Connecting to a Room Control from N3uron using BACnet Client
This is a detailed step-by-step guide to connecting to a Room Control from N3uron using the BACnet Client module.
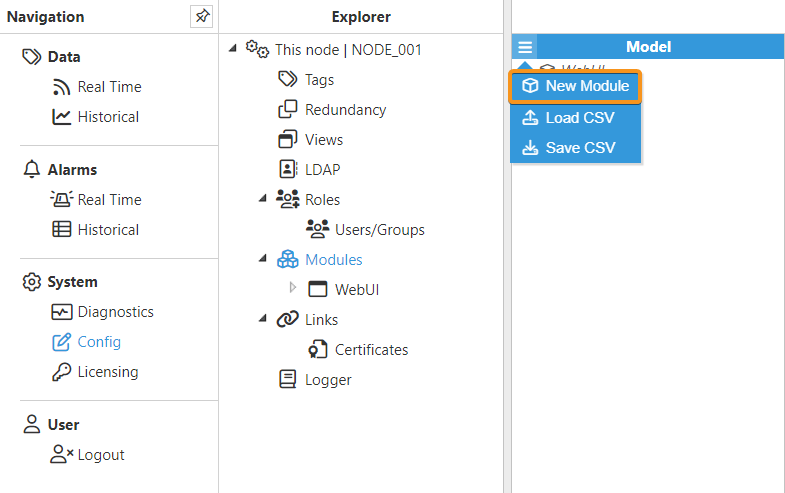
- Step 1: Create the module: (Config => Modules => Model => New Module).
- Step 2: Provide a name for the module (in this case BACnetClient), assign the module type (in this case BacnetClient), and save the new configuration.
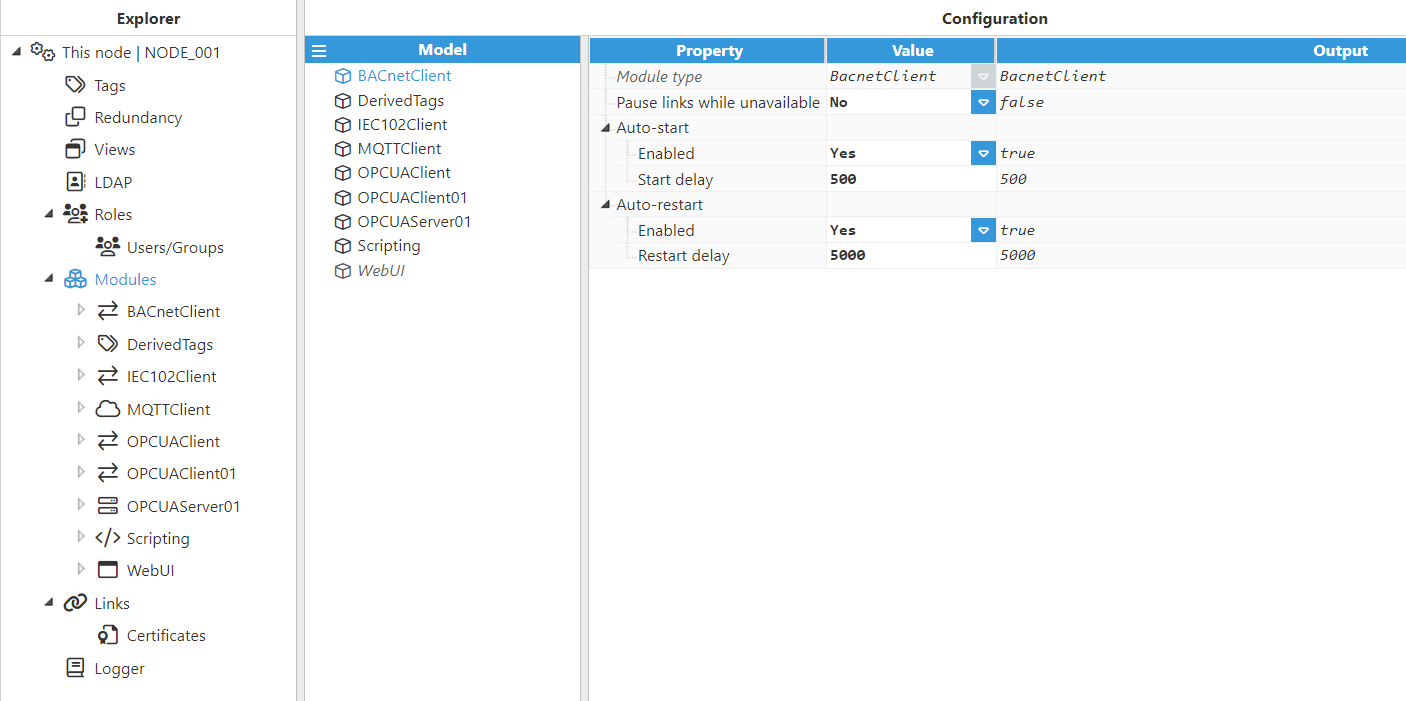
- Step 3: Configure the Logger and API sections (usually the default values are sufficient). Save the configuration.
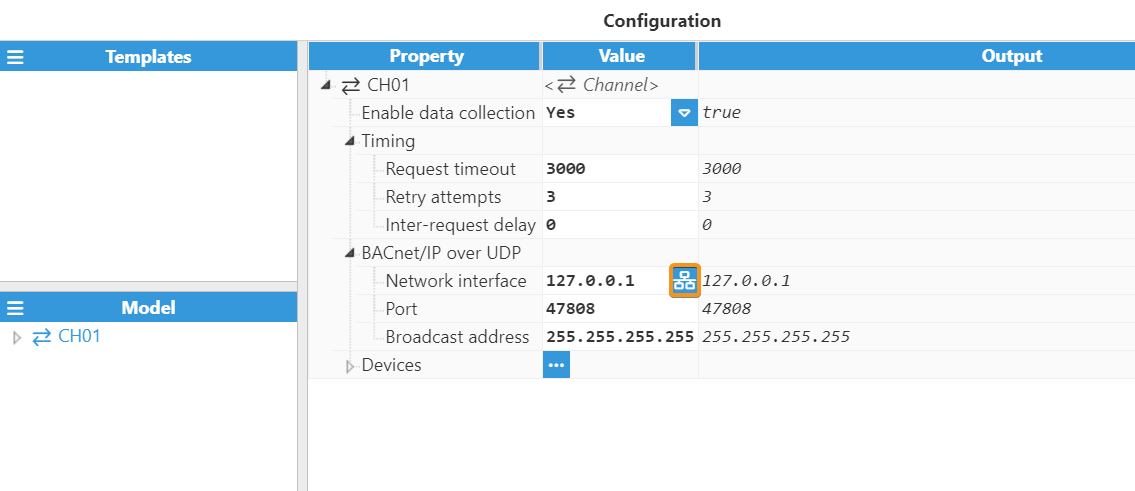
- Step 4: Click the button on the left-hand side of the Model header, select New Channel, and give it a name. In this case, CH01.

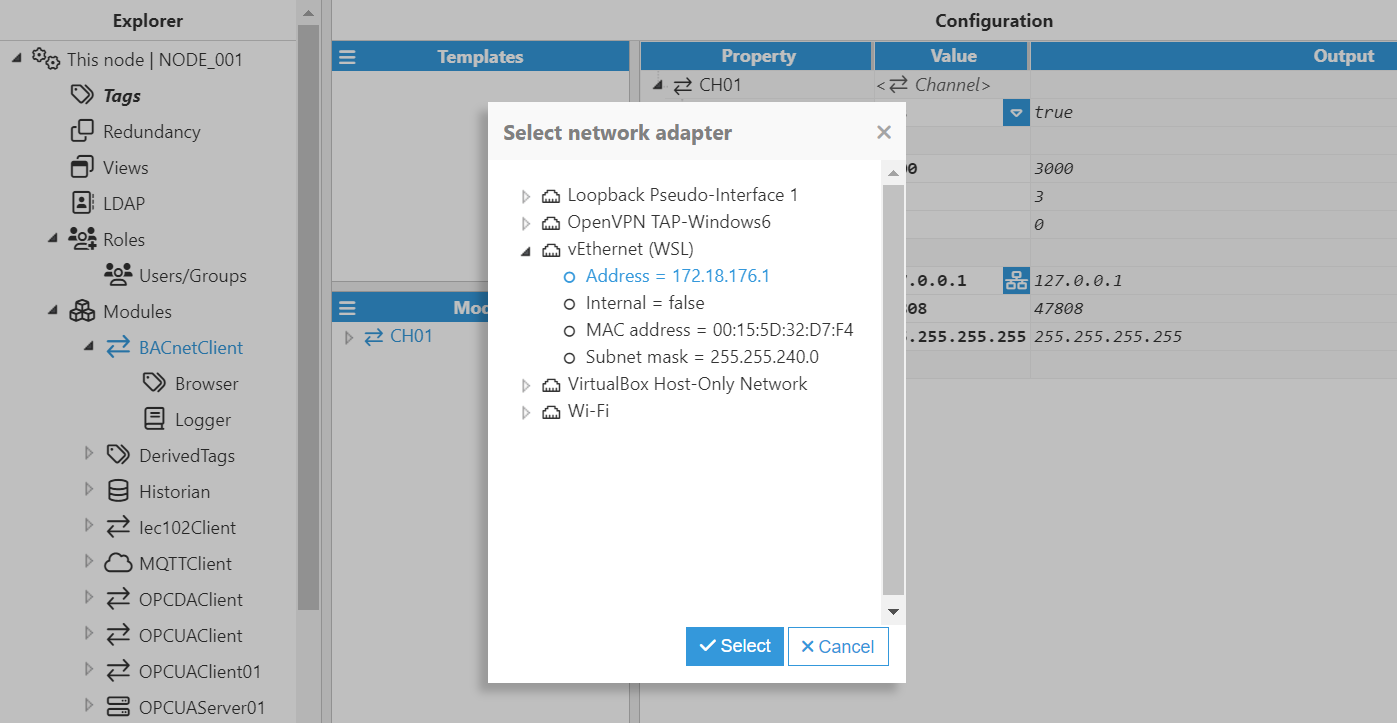
- Step 5: Configure the BACnet Client to connect to the Room Control. To do so, click on the Network interface discovery button to the right of the Network interface field and select the corresponding interface of the network we want to connect to. The default BACnet communication port is 47808 (BAC0 in HEX). In this example, leave the broadcast address as its default setting.
- Step 6: Once the module is configured, click on Save and restart the module.
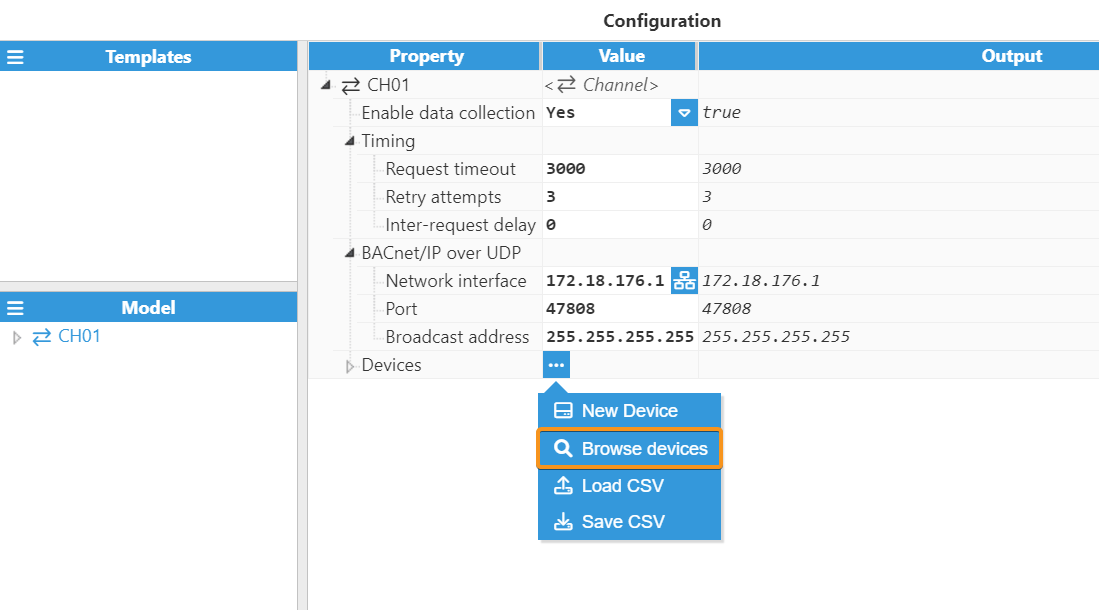
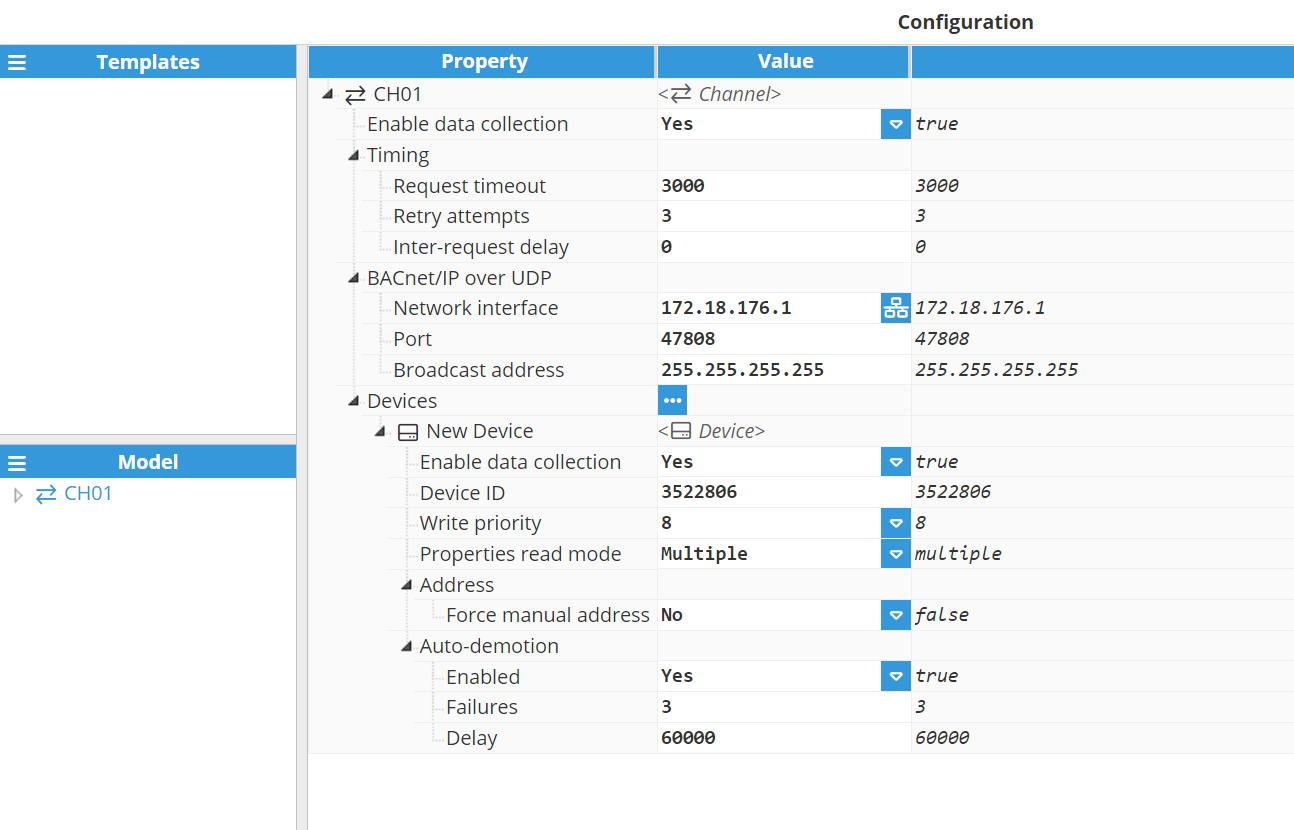
- Step 7: Once the connection has been set up, the device must be created and configured. In this example, a device has been created named RoomController.Simulator. Next, click on the Browse Devices button to the right of the Devices field and discover and select the corresponding device we want to connect to. The other parameters have been left as their default values.

- Step 8: Once the module and the device are configured, click on Save and restart the module.
At this point, the connection is ready and we can move on to create new tags.
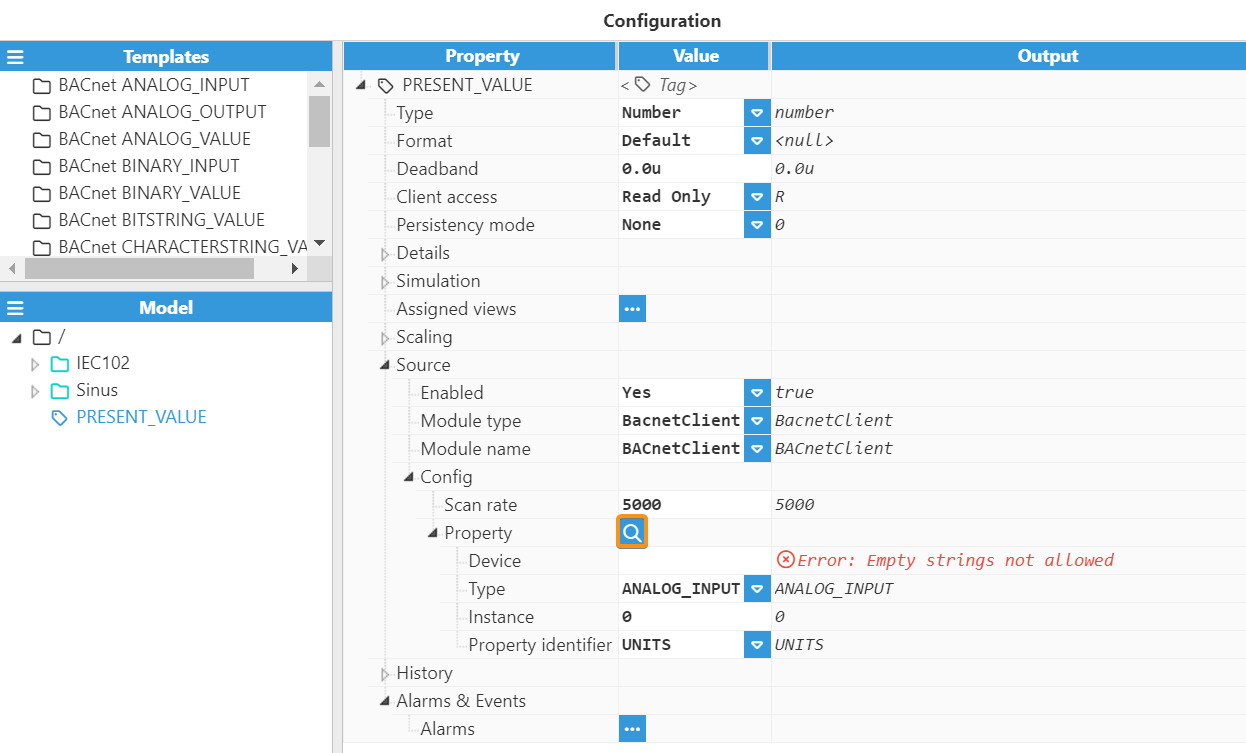
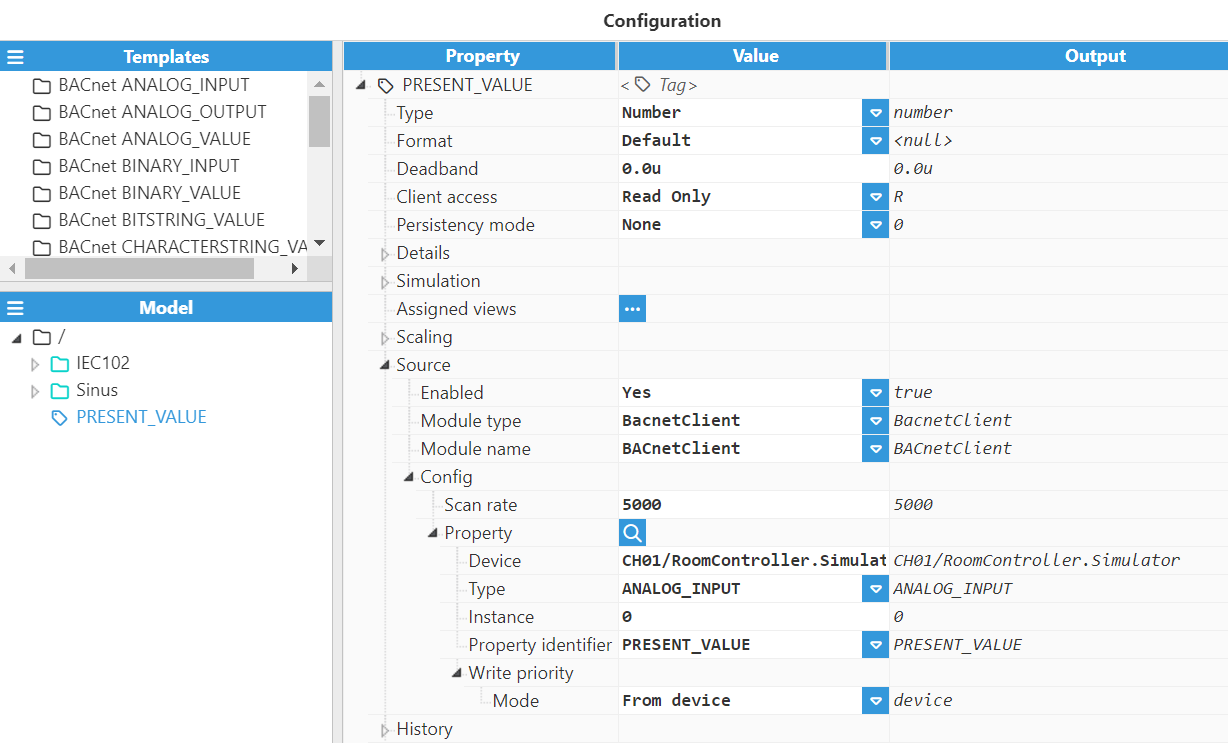
- Step 9: In the Explorer panel, select Tags. In the Model panel, create a new tag and name it PRESENT_VALUE.
- Step 10: Set the configuration parameters properly:
- Type: Number.
- Format: Integer.
- Client Access: R.
- Details:
- Description: Present value.
- Scaling:
- Enabled: Yes.
- Raw Range:
- Minimum: 0.
- Maximum: 1.
- Source:
- Enabled: Yes.
- Module type: BacnetClient.
- Module name: BACnetClient.
- Config:
- Scan rate: 5000.
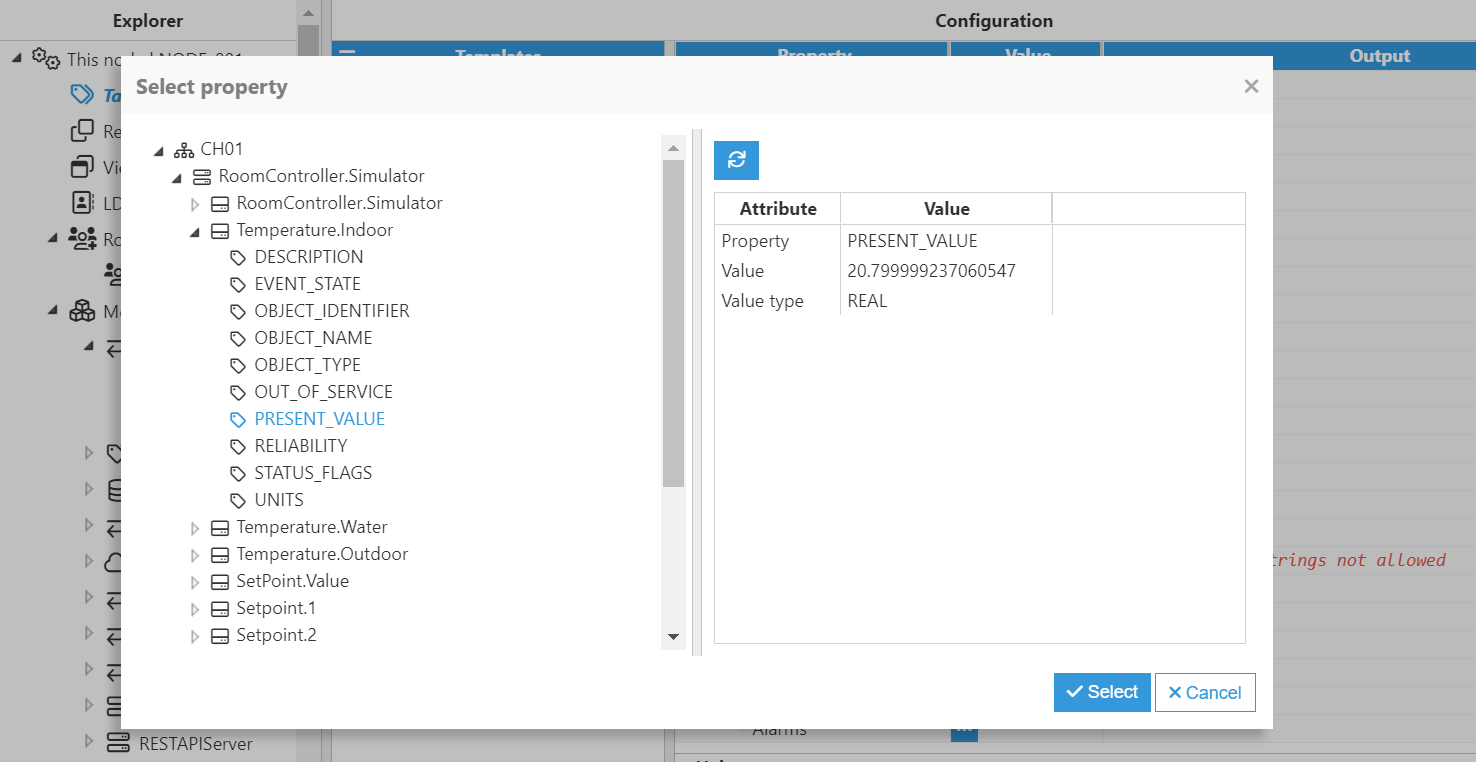
- Property: It's possible to browse and discover the property by clicking on the button to the right. When selected, all the fields are automatically filled in. In this case, select ANALOG_INPUT:0 and then, PRESENT_VALUE. We also select From device in the write priority mode.
- Step 11: Now, go to the Data/Real-Time section in the Navigation panel where you should be able to see all the data read from that device.
