Collecting Data from a Domino Printer
This example shows how to connect to and exchange information with a Domino industrial printer.
- Step 1: Create the module: (Config => Modules => New module)
.png)
- Step 2: Provide a name for the module (in this example, DominoClient has been used) and set the module type to DominoClient in Module Type.
.png)
- Step 3: Configure the Logger and API for this module. In this example, the default configuration has been left unchanged since, in most cases, this is a valid configuration.
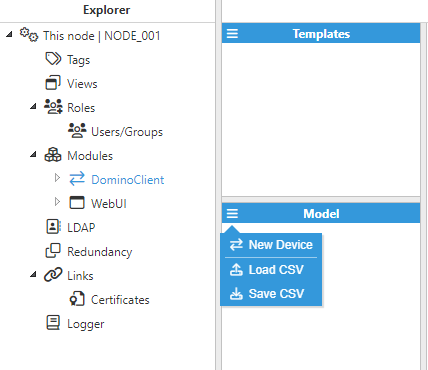
- Step 4: Create a new device (Config => Modules => DominoClient => Model => New Device)
- Step 5: Provide a name for the device (in this example, the name is Device01) and configure it as shown in the below image.
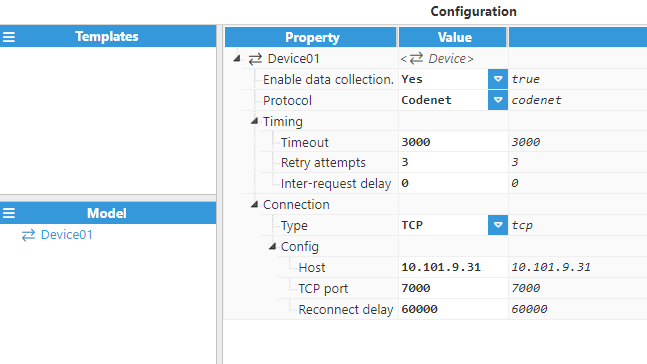
The main parameters to be configured are as follows:
- Enable data collection: True
- Connection
- Type: TCP
- Config:
- Host: 10.101.9.31
- TCP Port: 7000
- Reconnect Delay: 60000
The rest of the parameters will be left with the default values.
At this point, the connection is ready and we can now move on to creating new tags
- Step 6: Create a new tag (Config => Tags => Model => New tag),
.png)
- Step 7: Give it a name (in this case Current Status) and configure the tag parameters according to the below image.
.png)
.
- Source
- Enabled: Yes
- Module type: DominoClient
- Module name: DominoClient
- Config
- Device: Device01
- Group: Extensions
- Variable: Current Status
- Head Select: 1
- Index: 000
- Scan rate: 5,000.
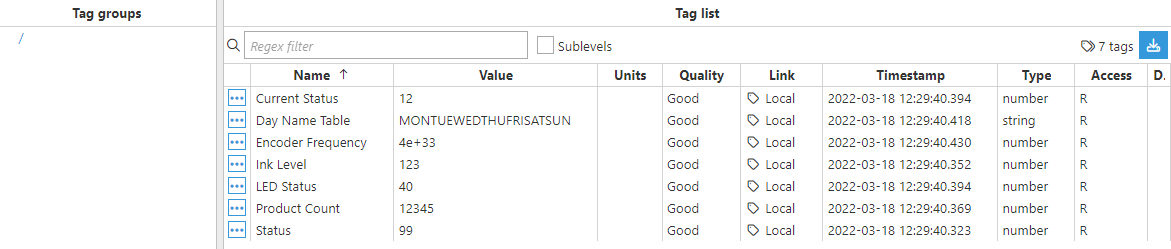
- Step 8: The tag should now be available and displayed with good quality in the Real-Time display