Connecting to MongoDB Atlas
The following steps will help you connect your Historian instance to an Atlas Cluster in a matter of minutes.
Prerequisites
An Atlas account.
An organization and project with an account's user who has permission to create clusters.
An active cluster created in this account.
An IP address added to your IP access list.
A Database user on your cluster.
Take a look at the MongoDB Documentation for more information.
Getting the Connection String from Atlas
You'll need to get your cluster's connection string from Atlas to connect your N3uron's Historian instance to the cluster using the Node.js driver.
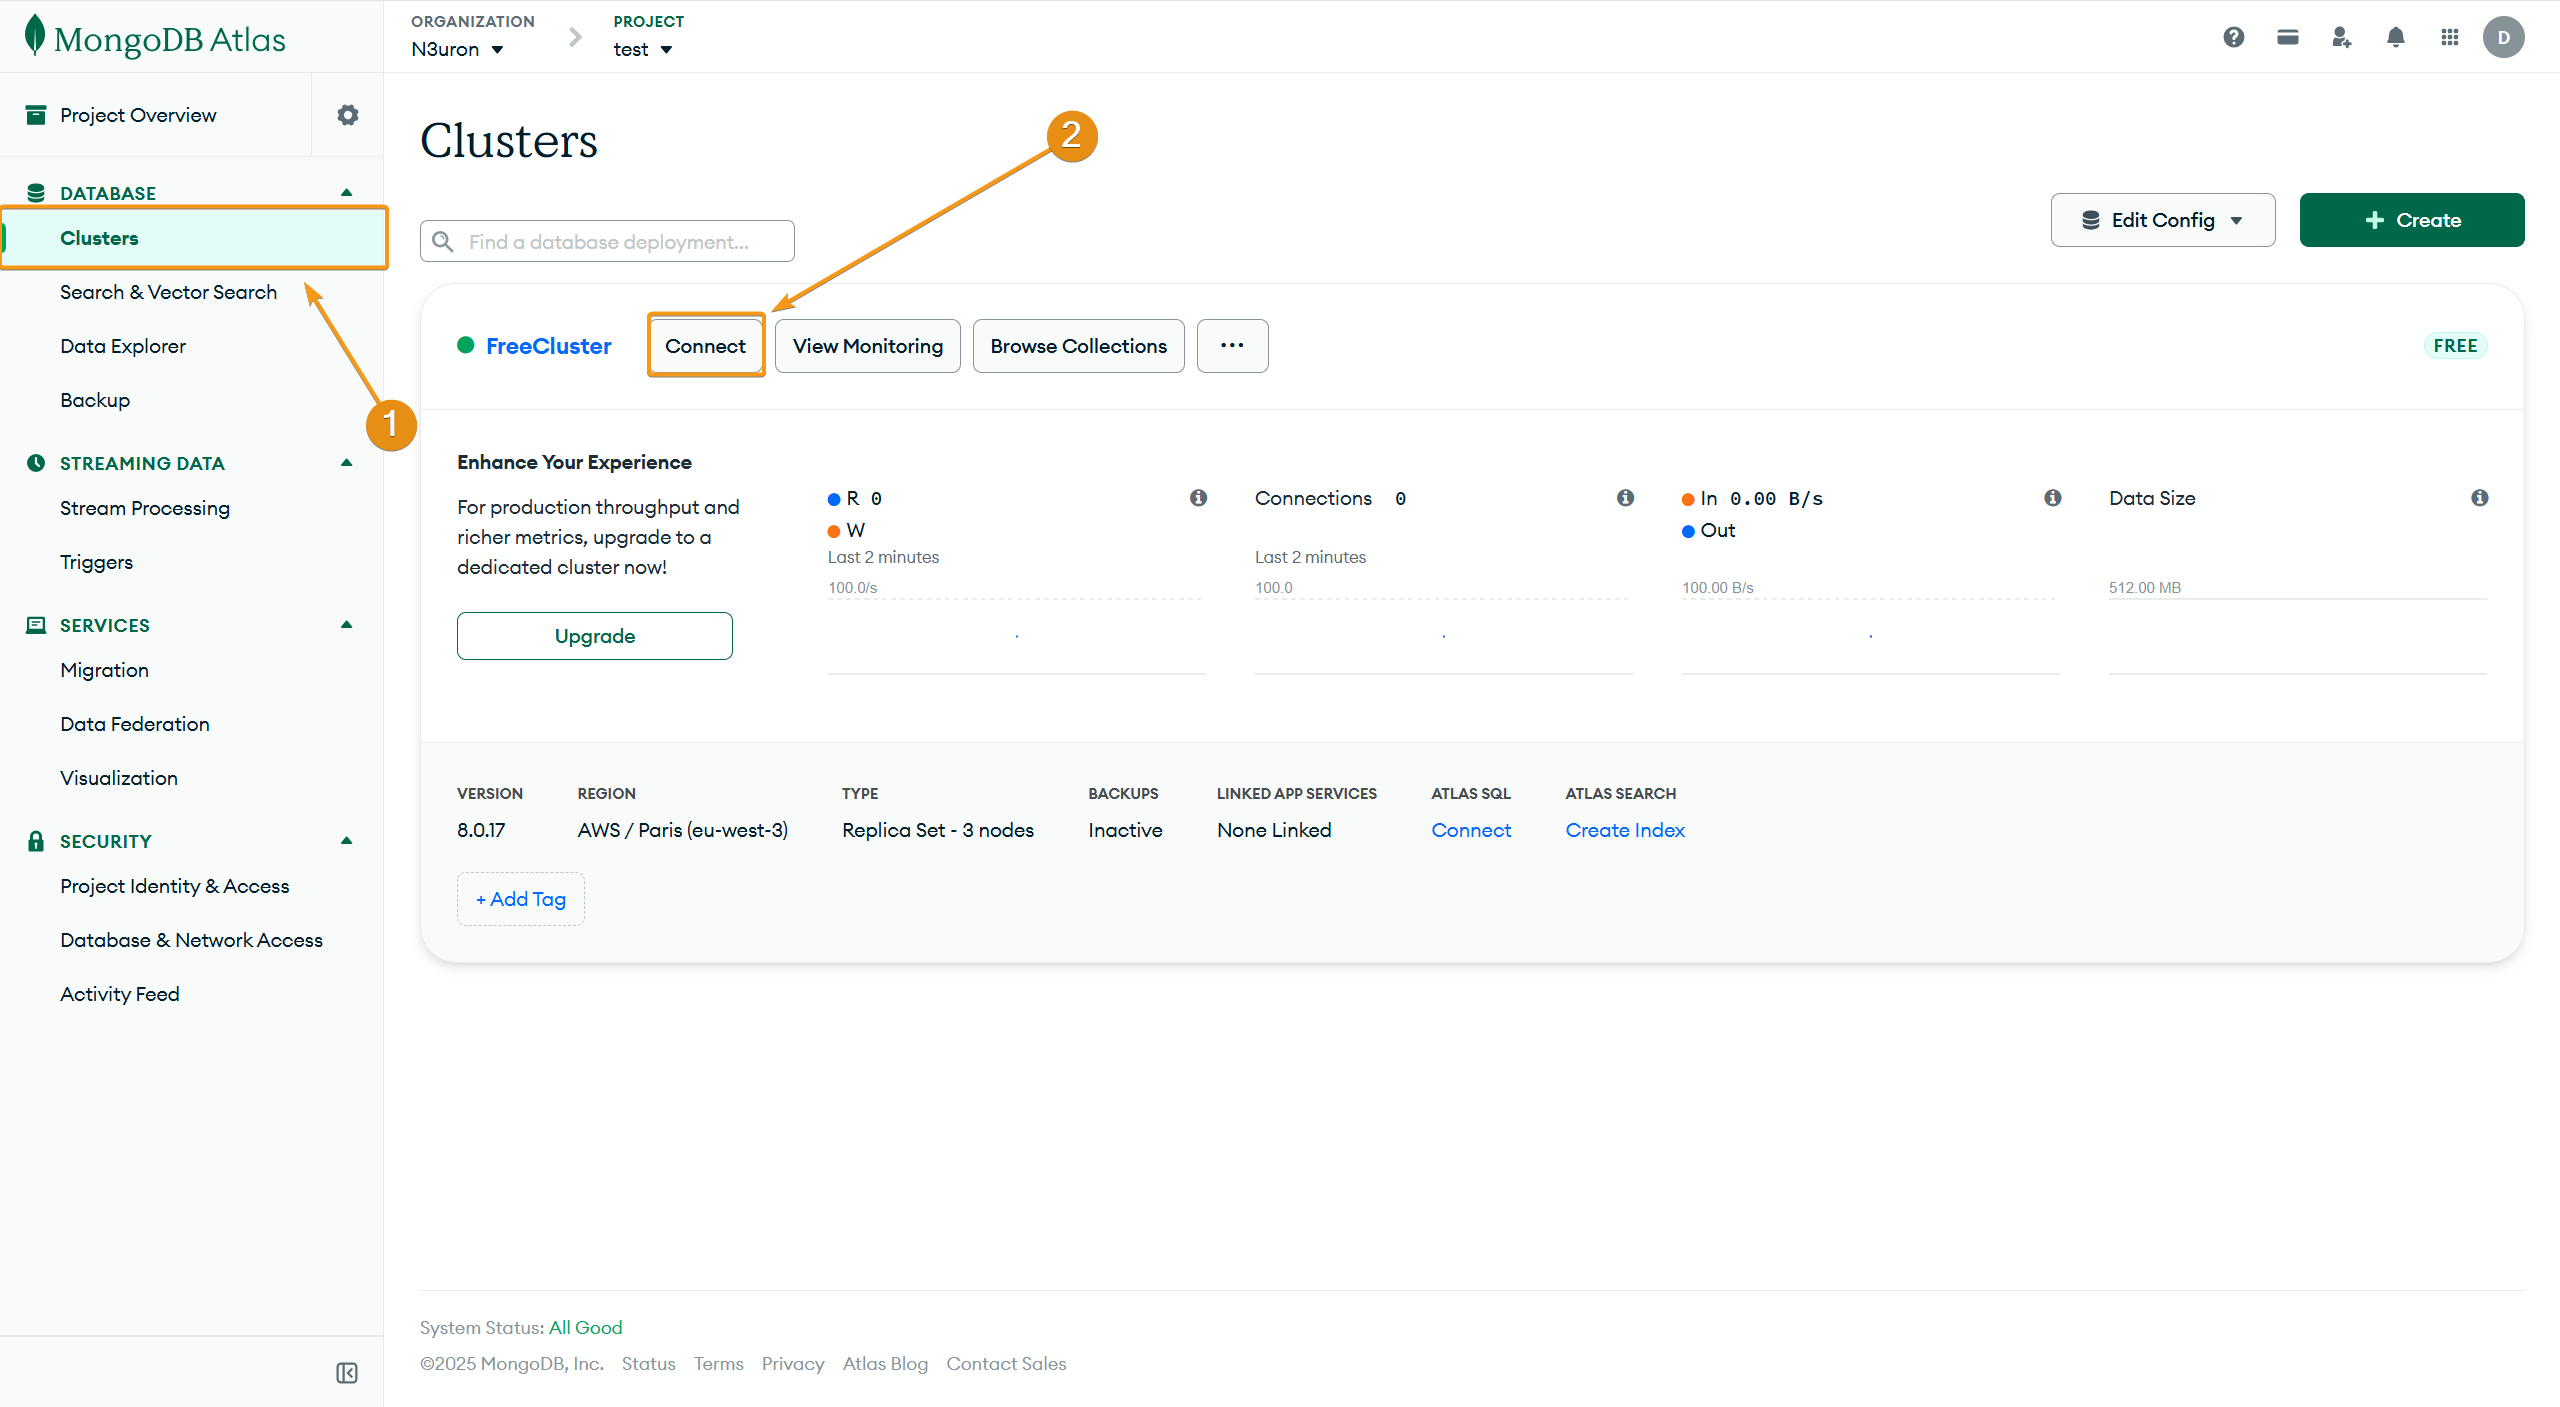
Step 1: Click on Connect:
Click on Clusters in the top-left corner of Atlas.
In the Clusters view, click on Connect for the database deployment to which you want to connect.
Step 2: Click on Connect your application→Drivers: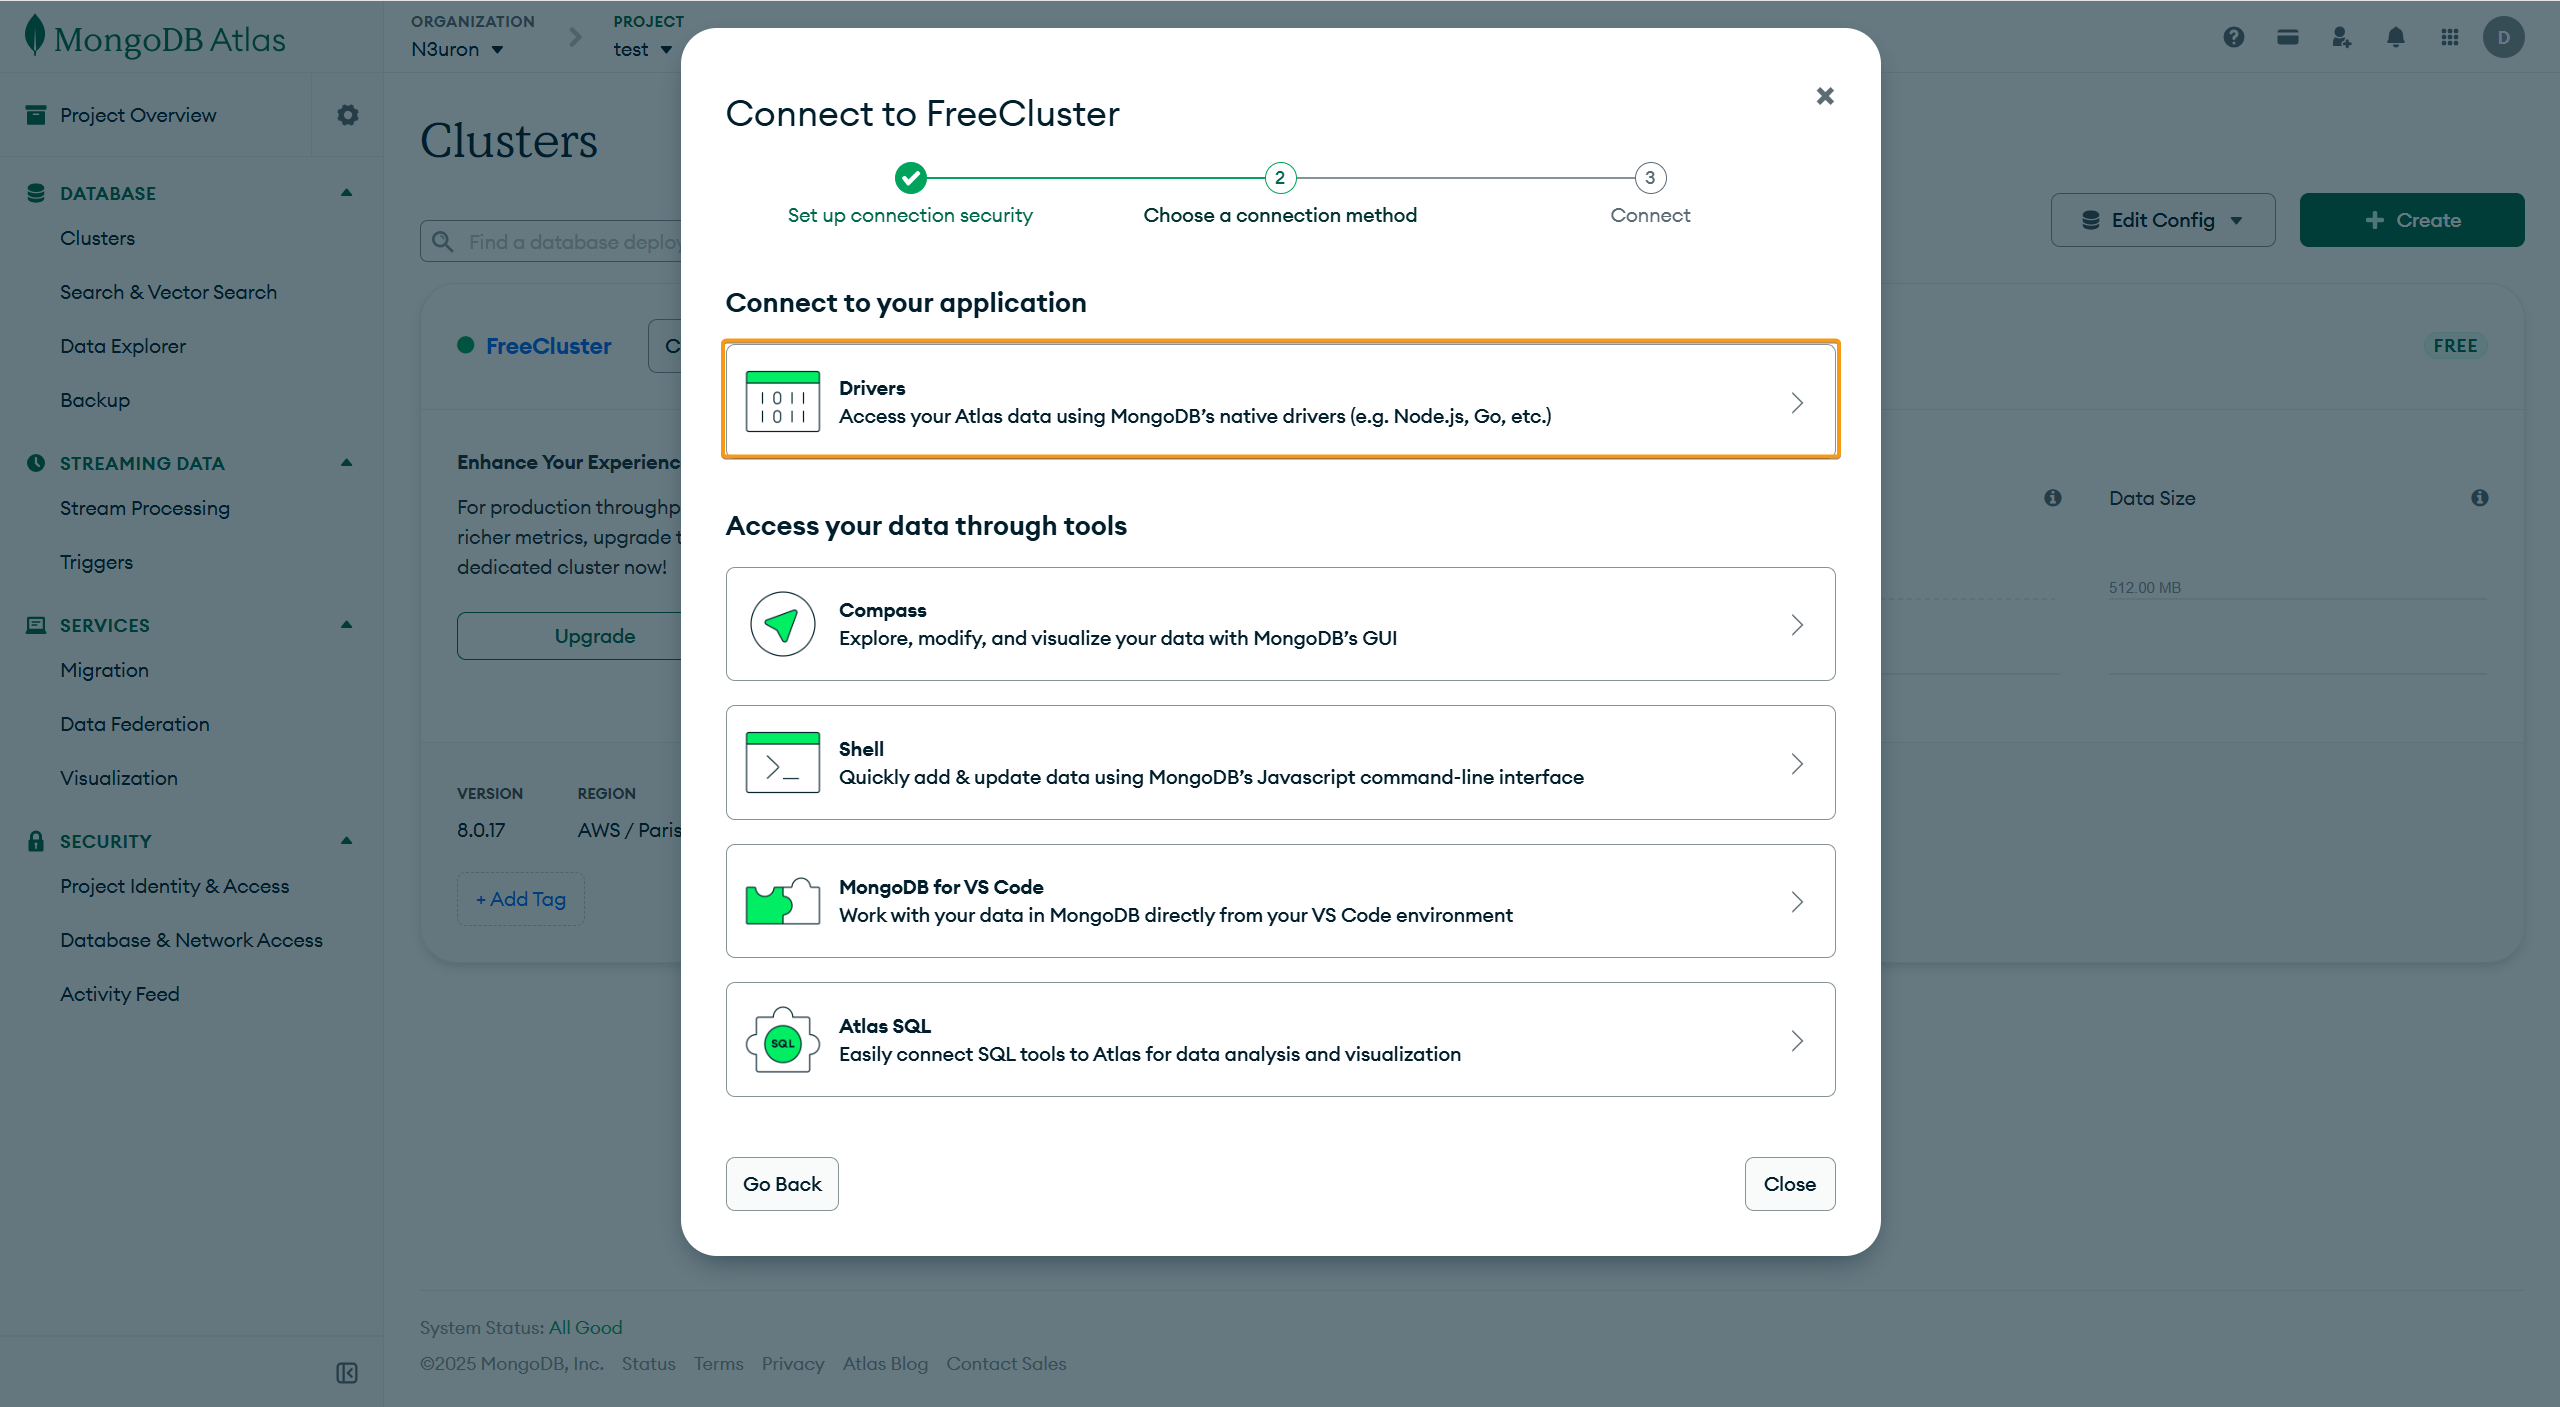 Step 3: Select Node.js as the Driver and copy the connection string:
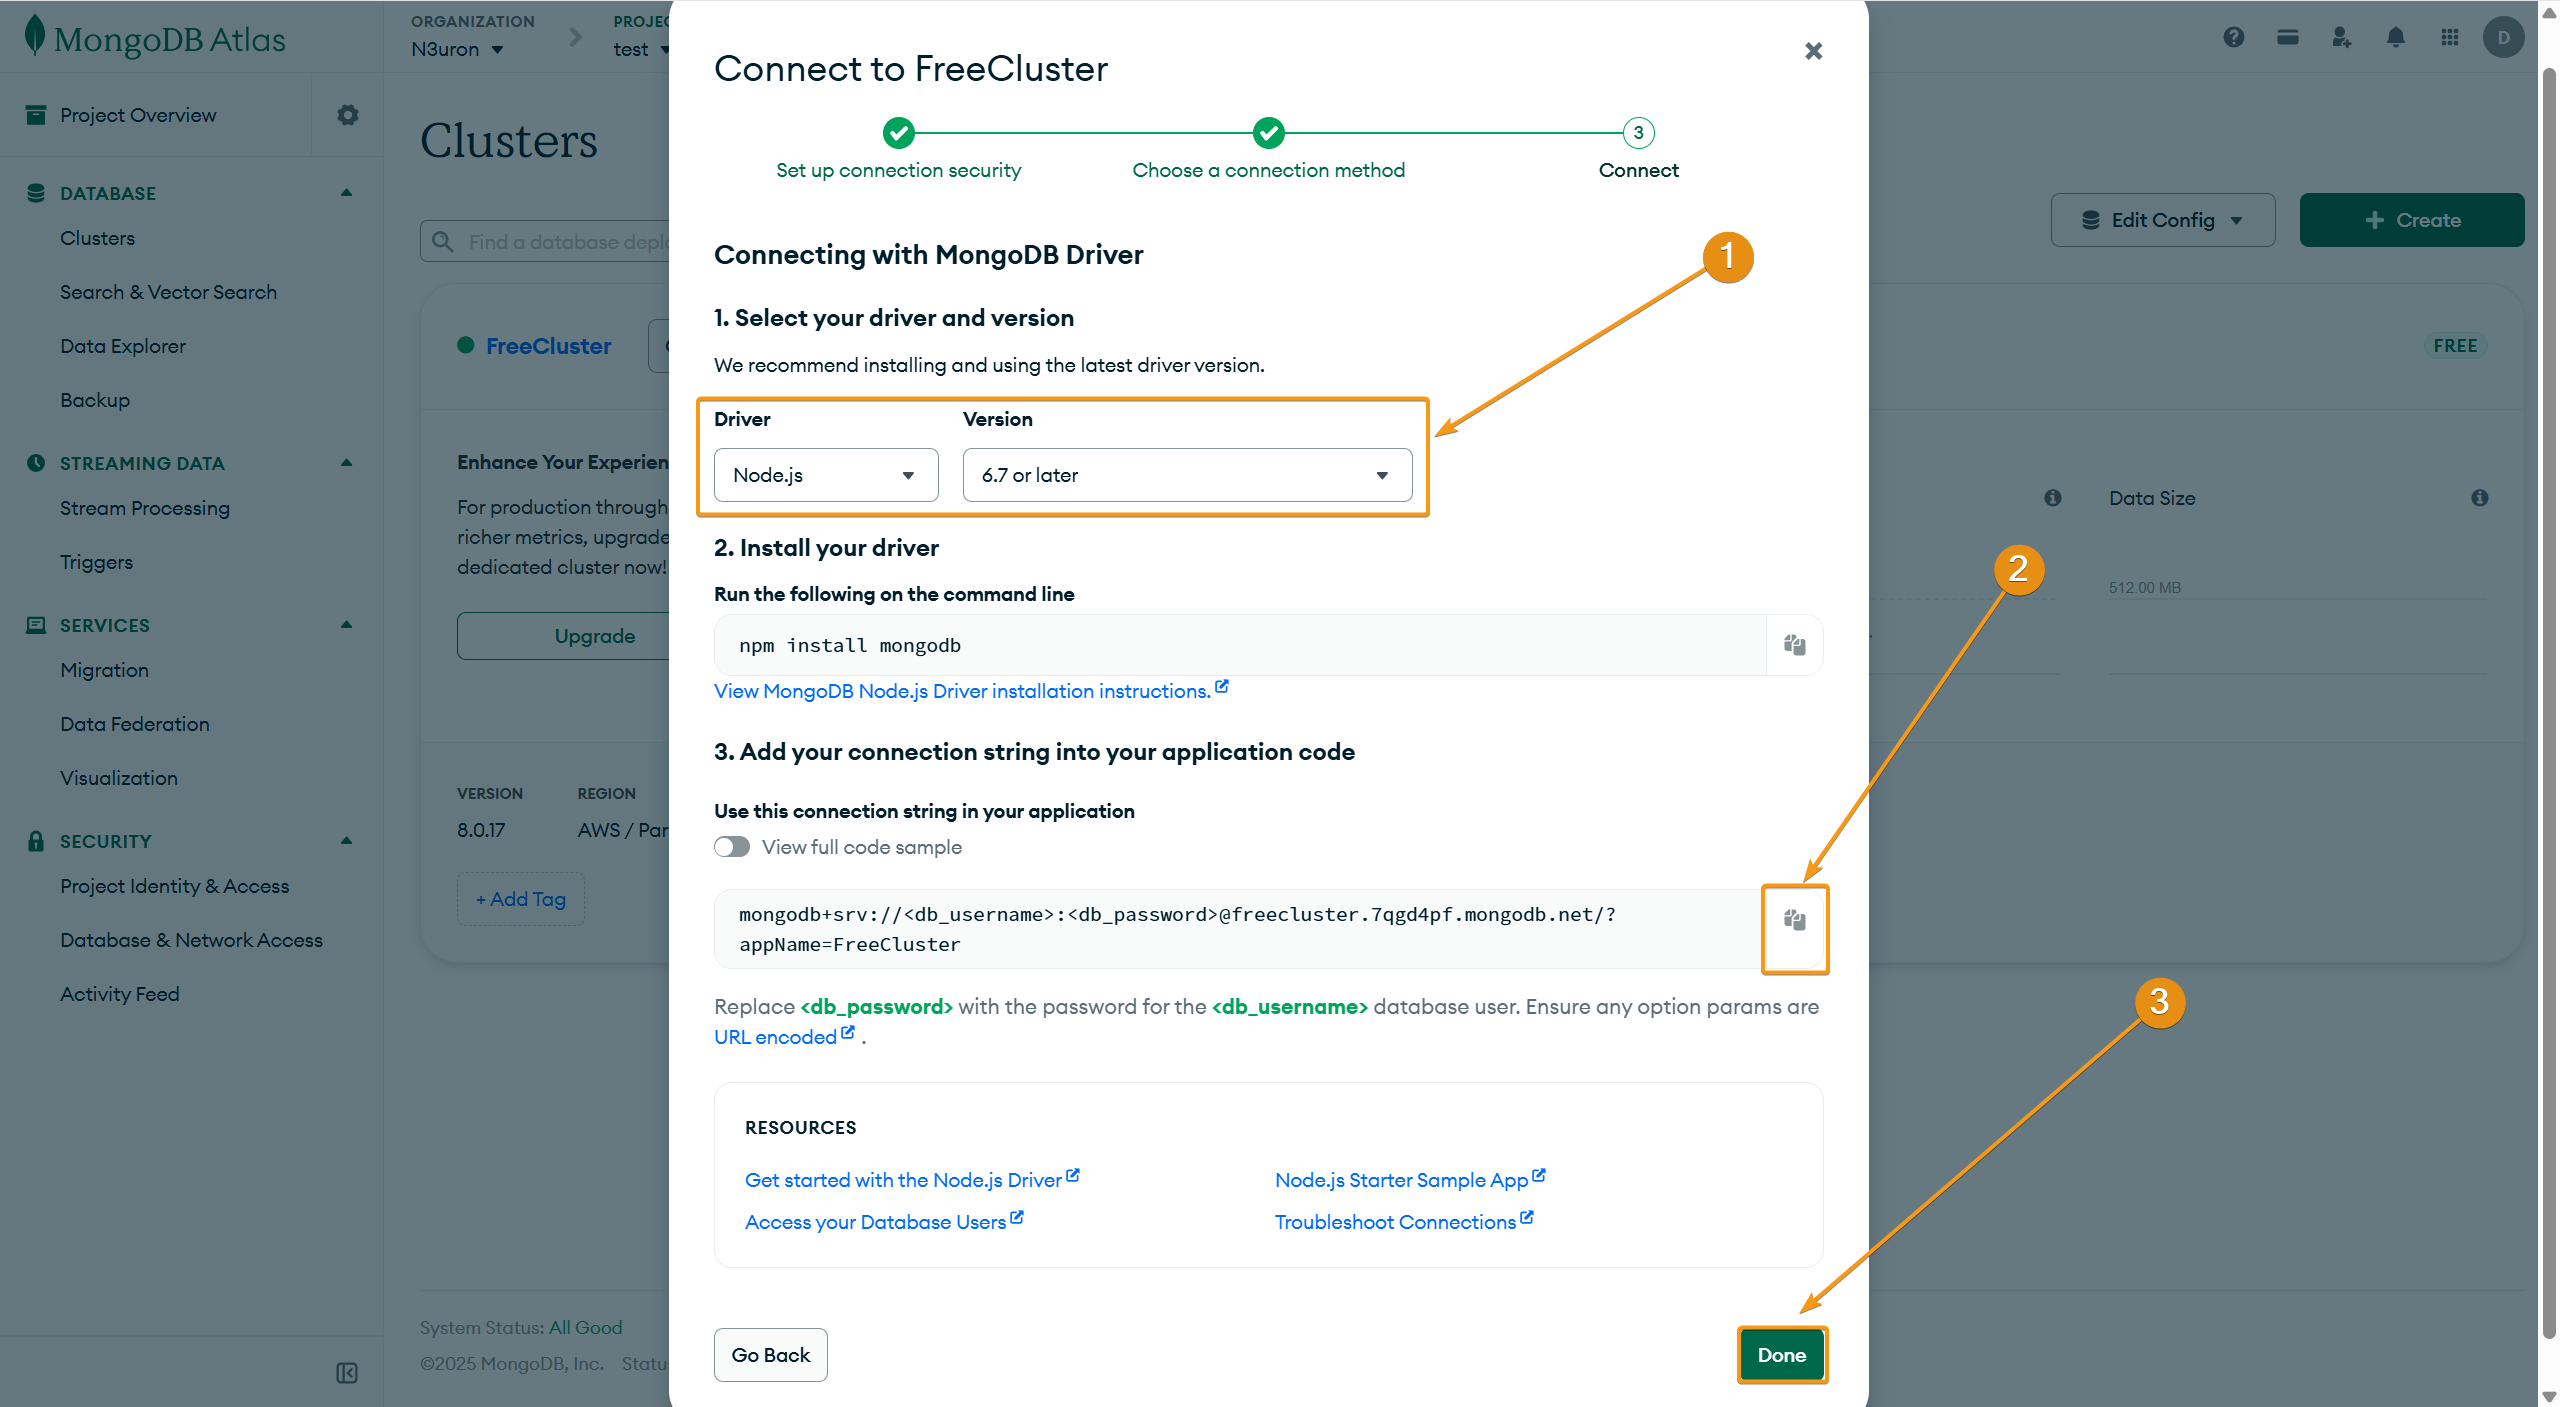
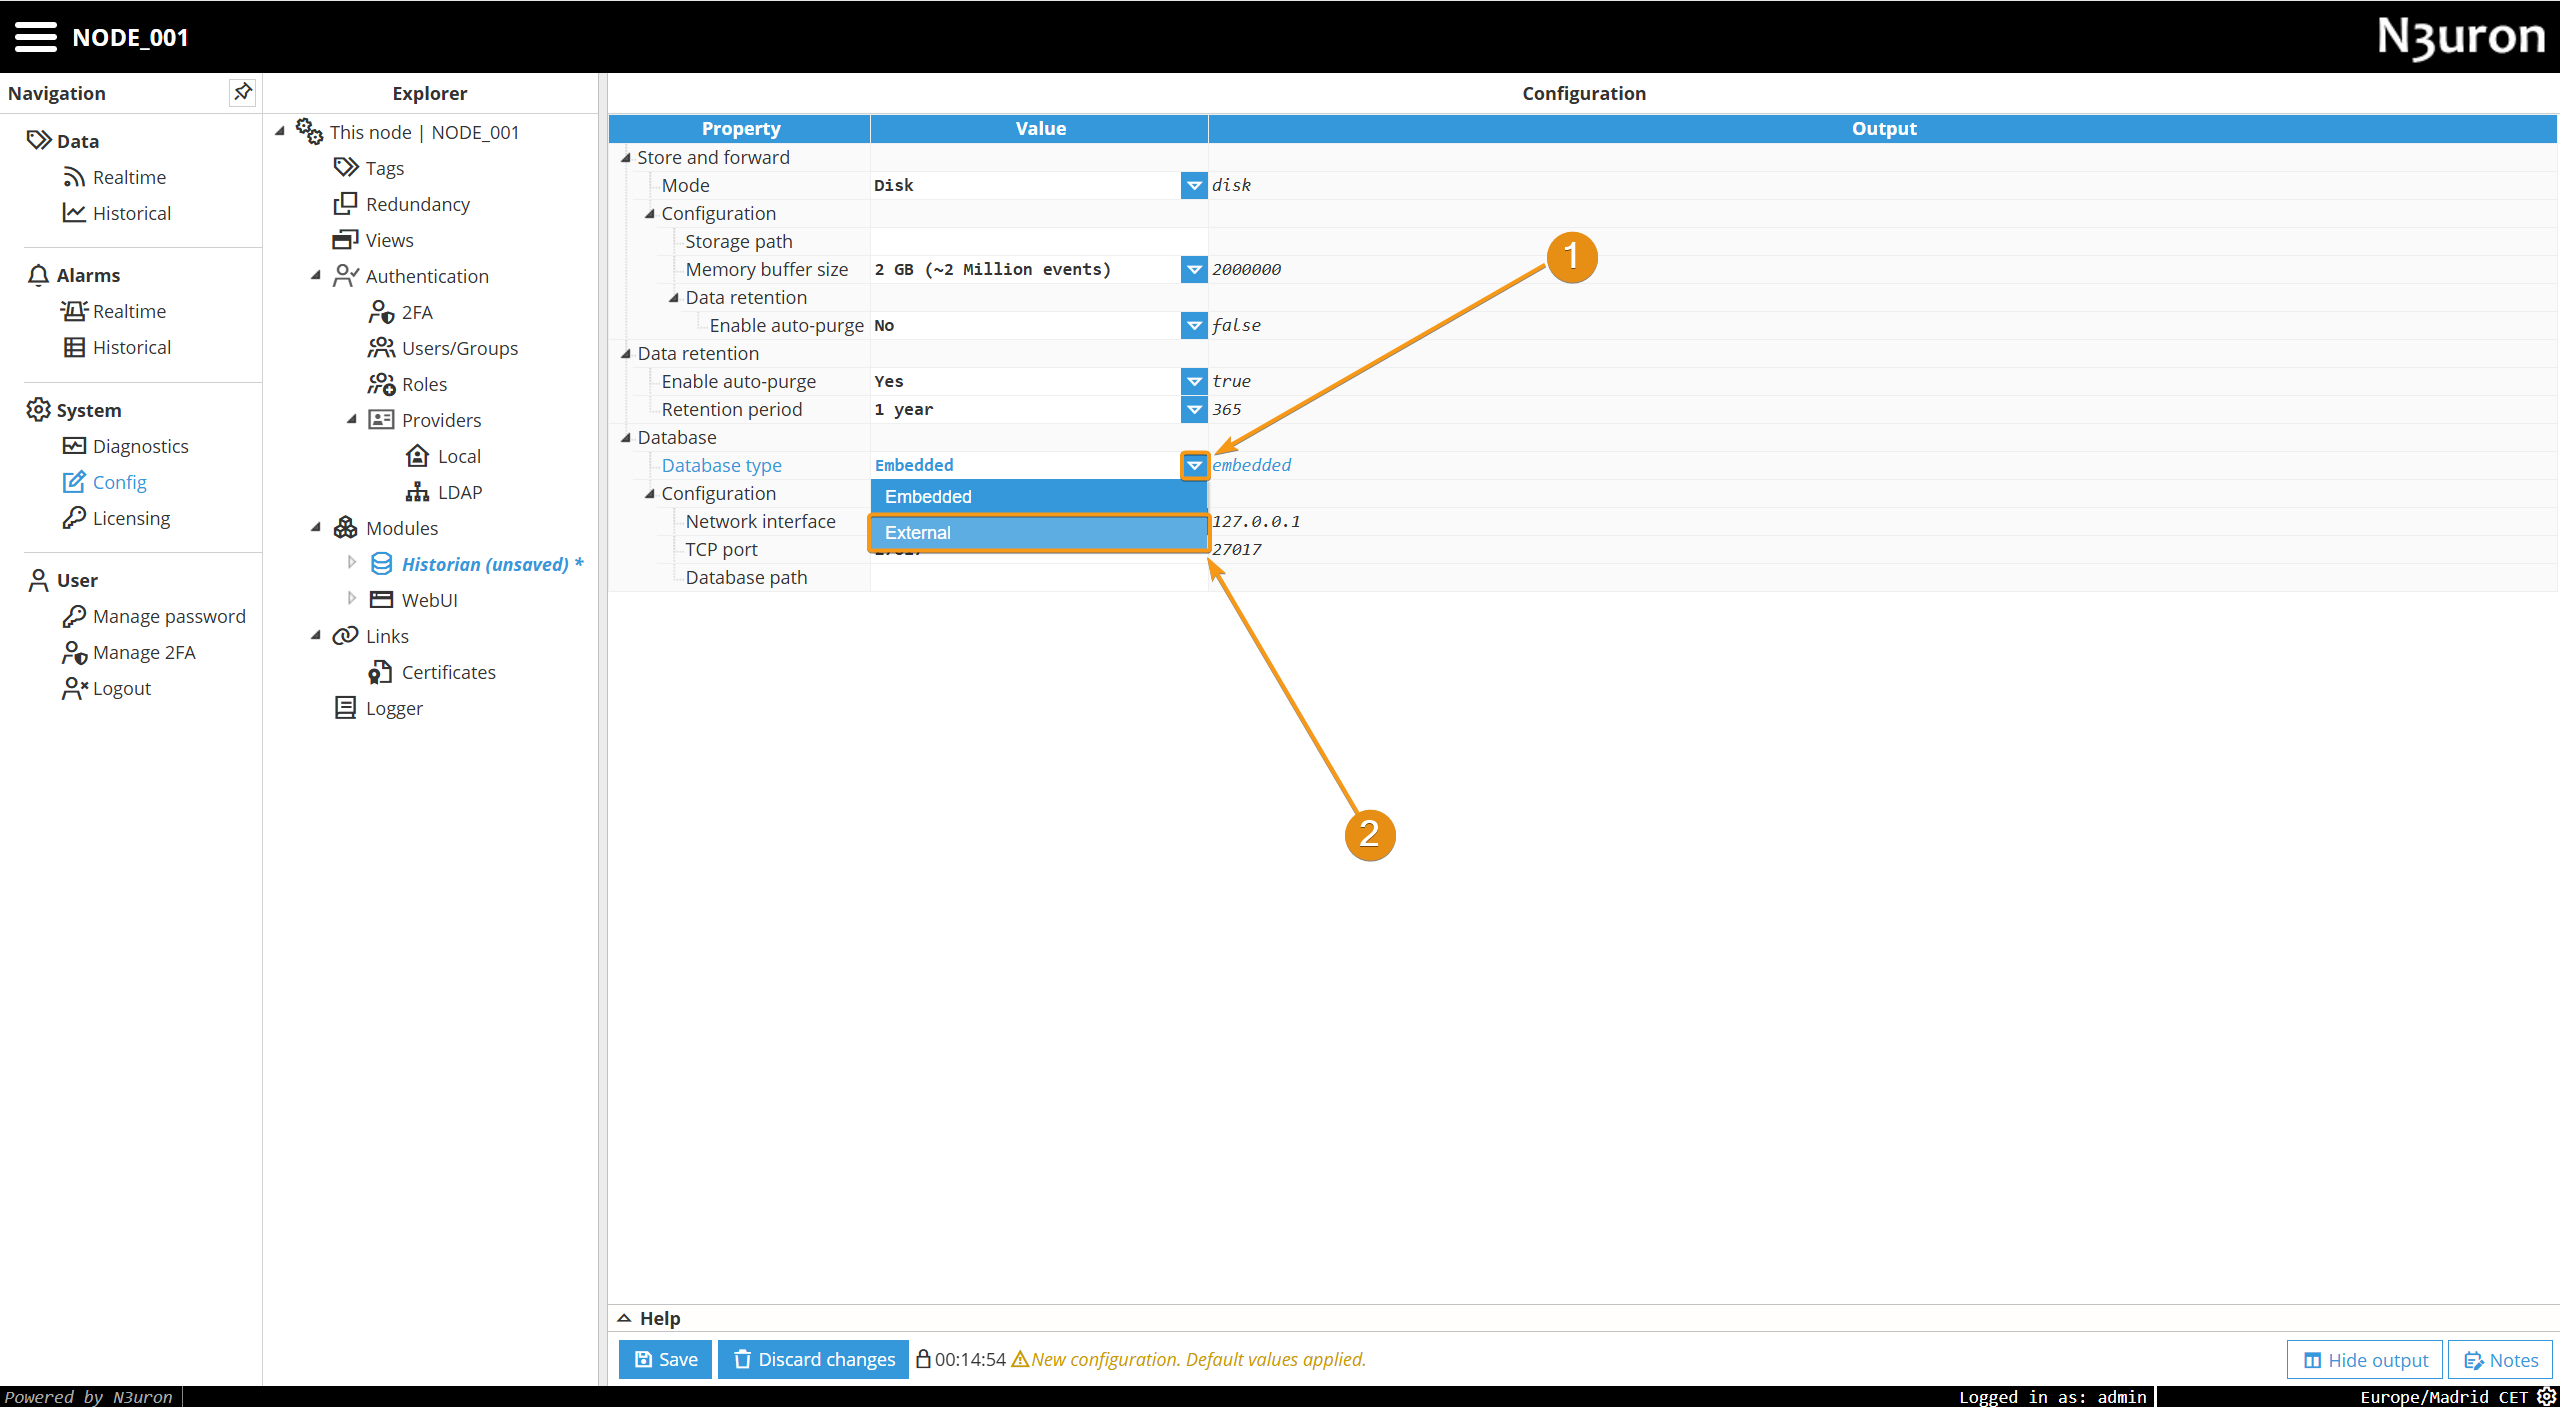
Configuring N3uron
Step 1: Select External as Database type and choose MongoDB.
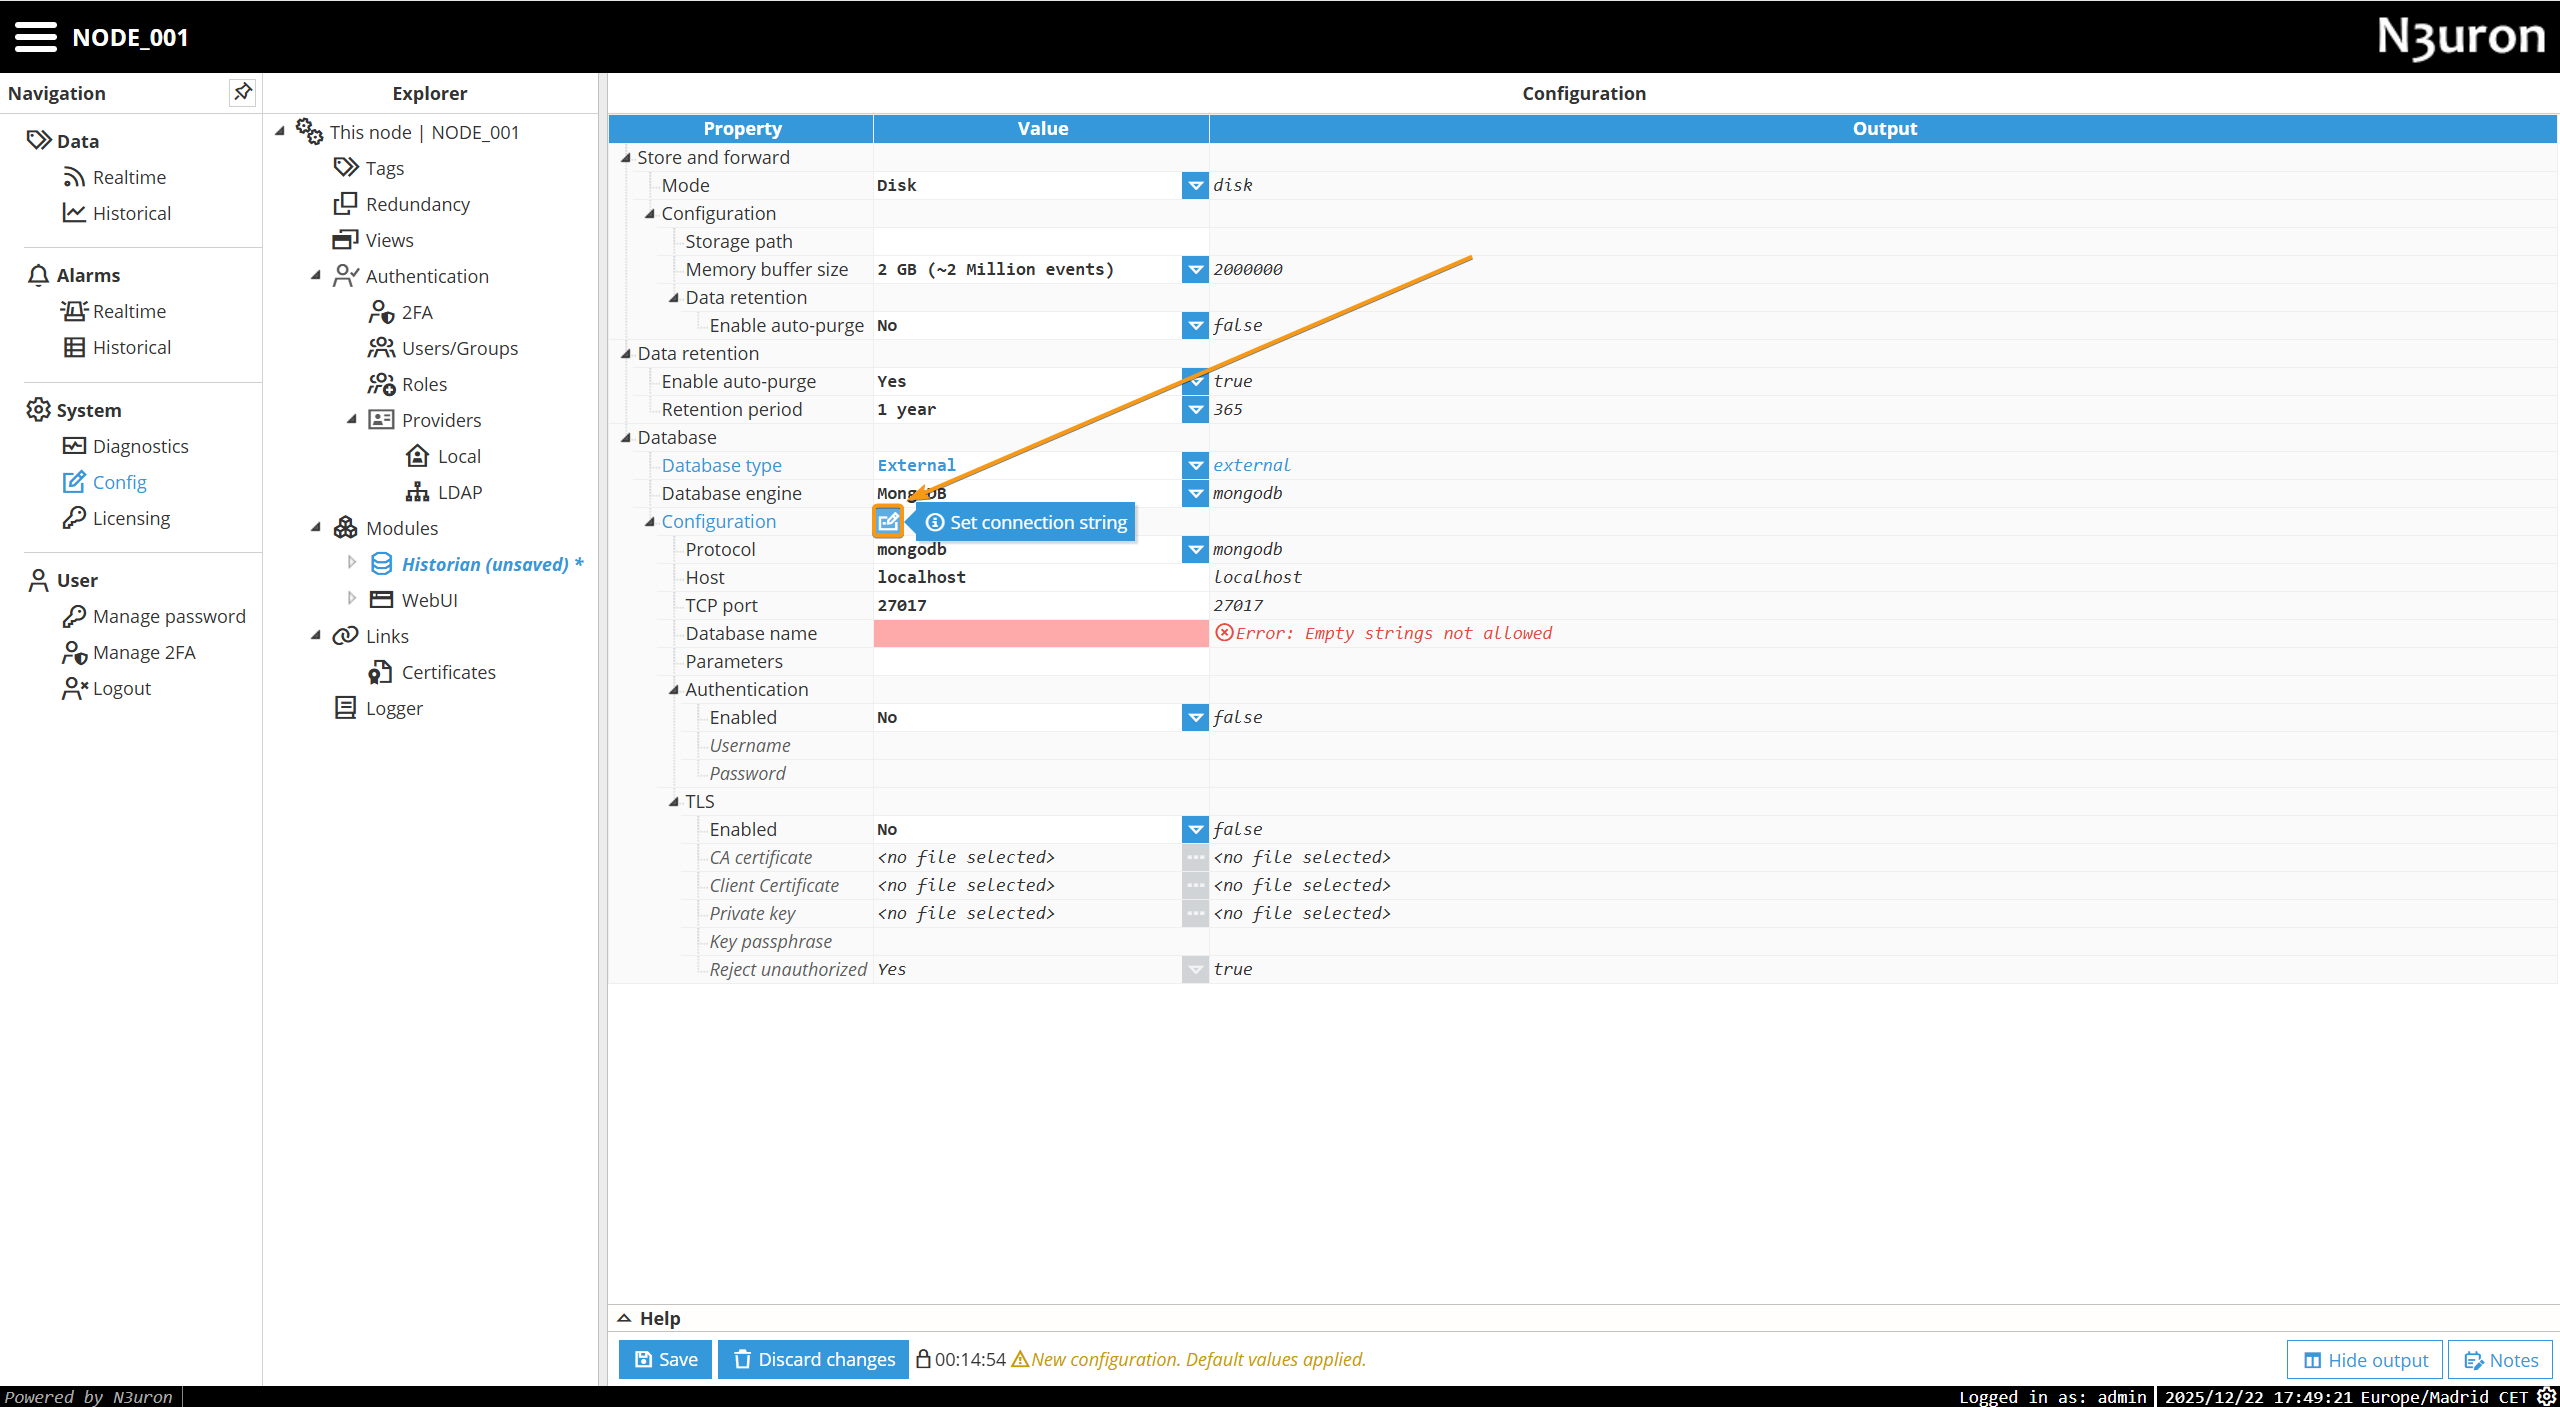
Step 2: Open the connection string helper.
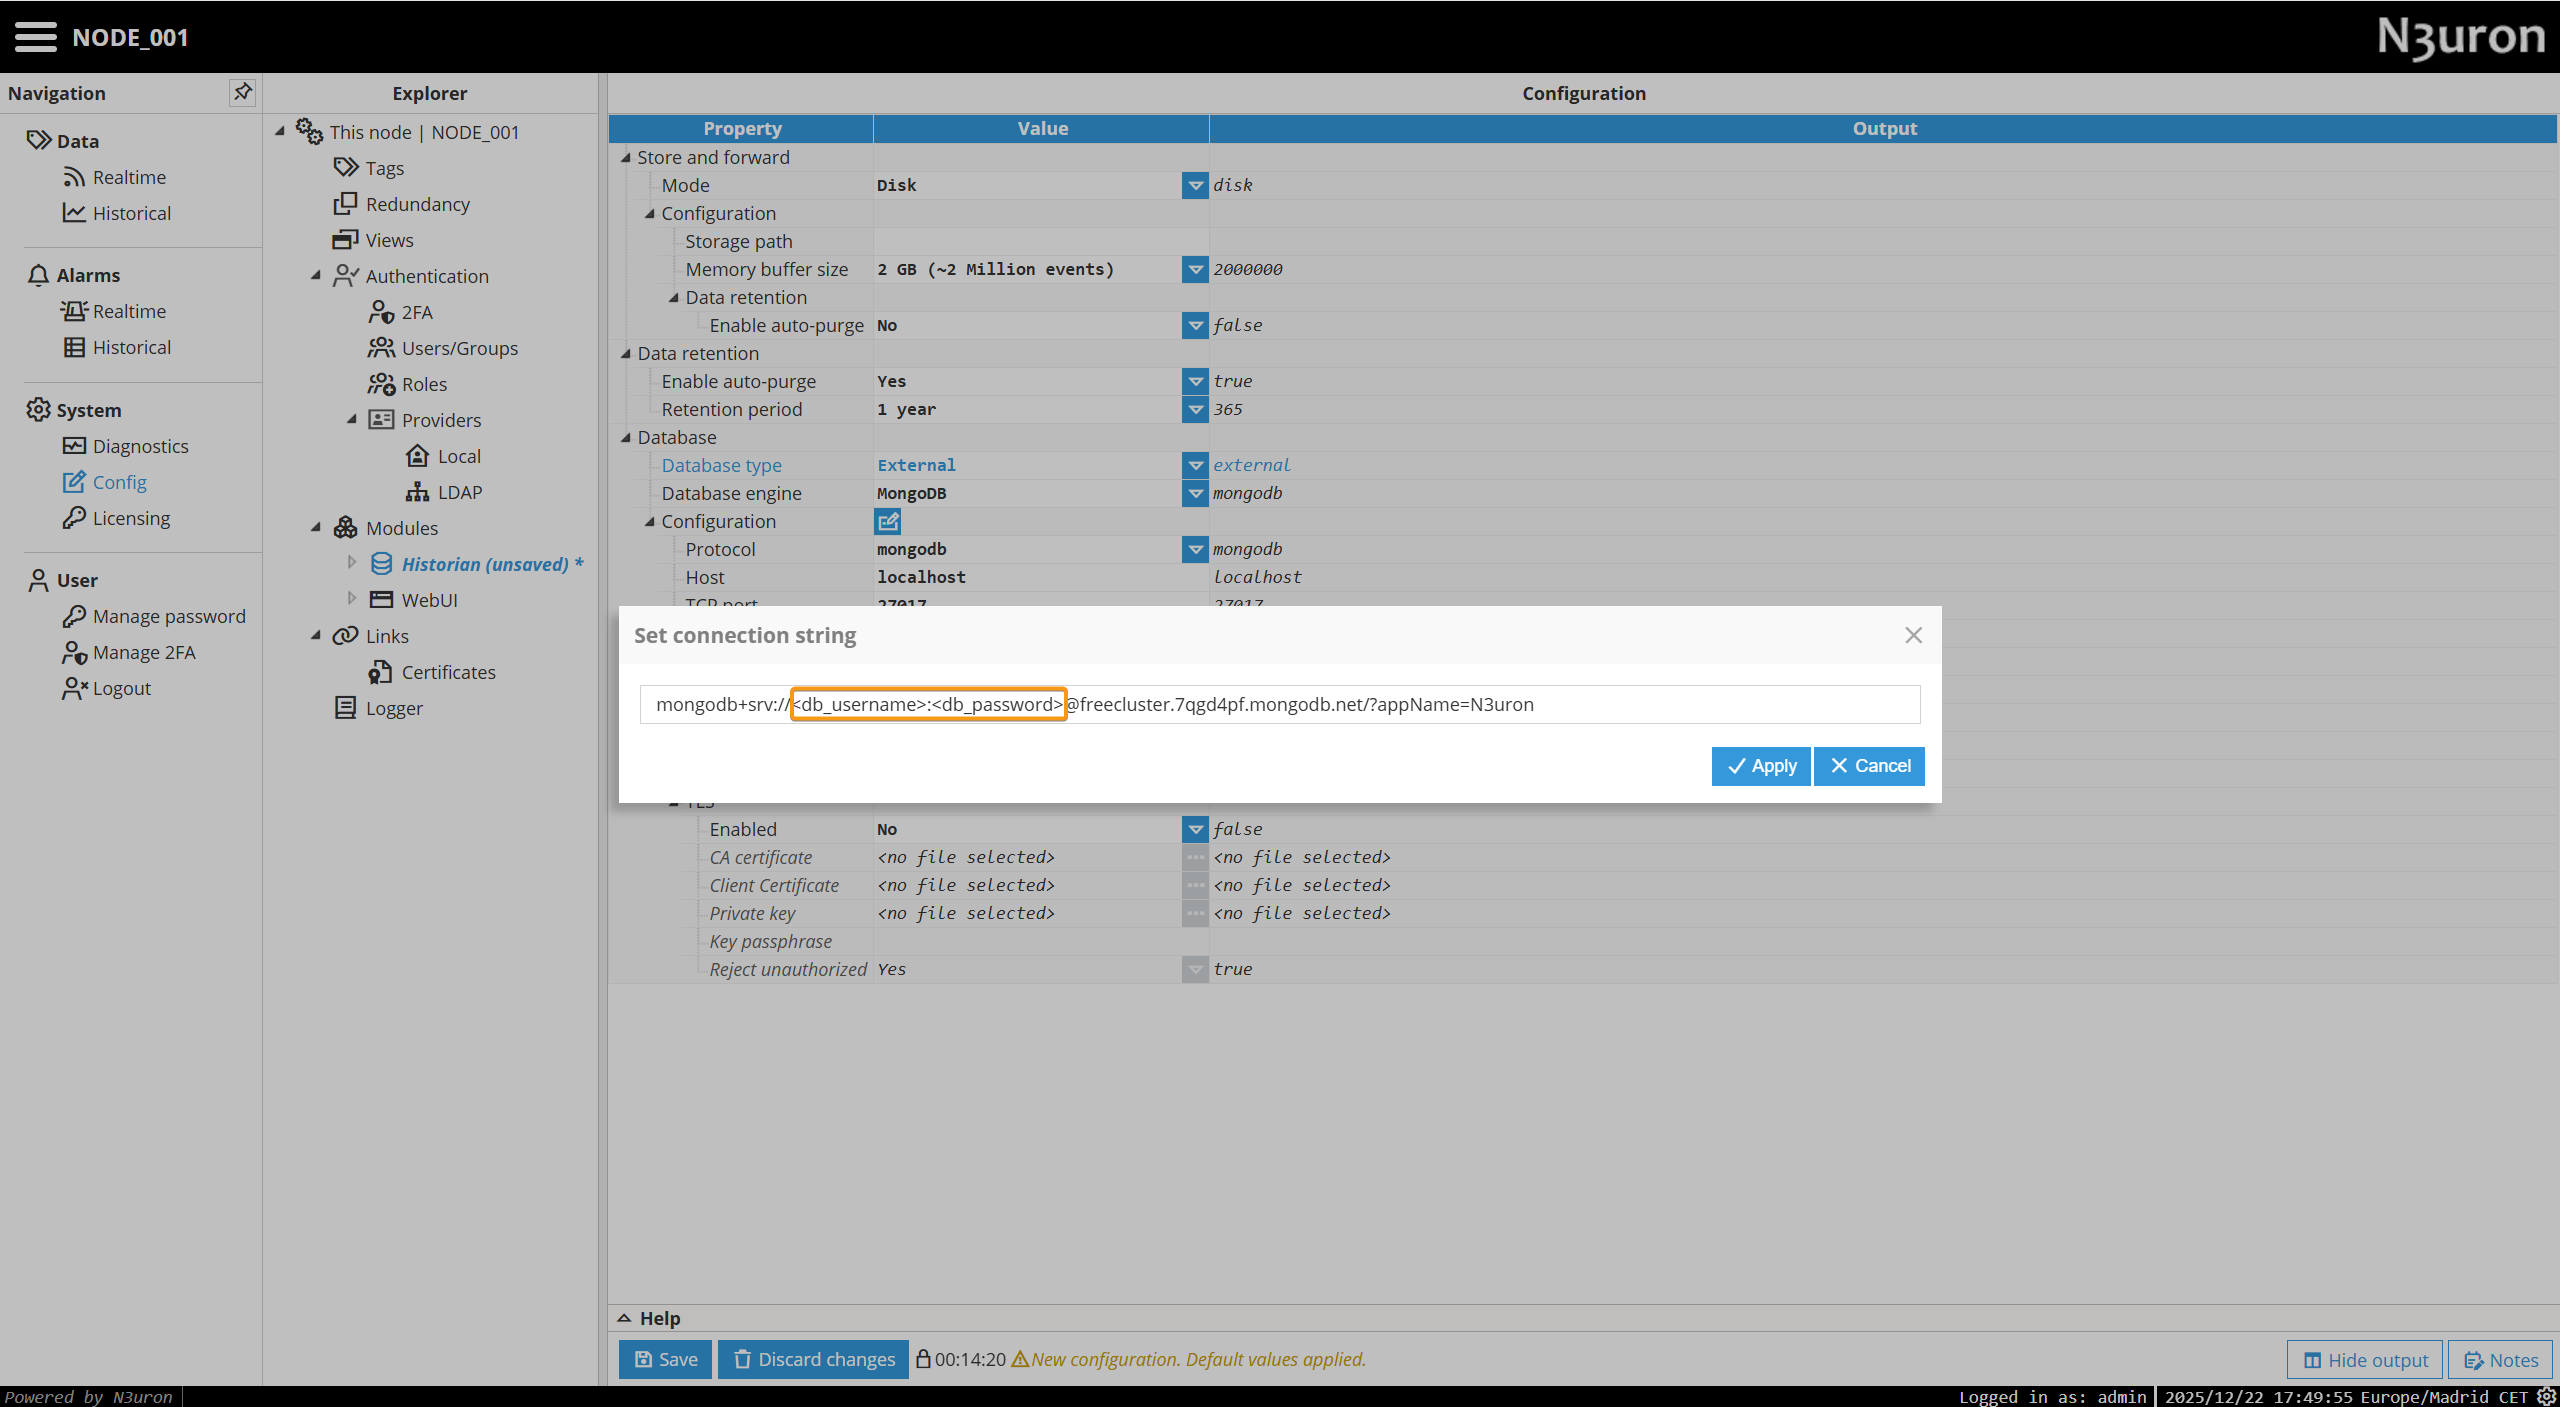
Step 3: Paste the connection string, replace the placeholders with the database user and password, then click Apply.
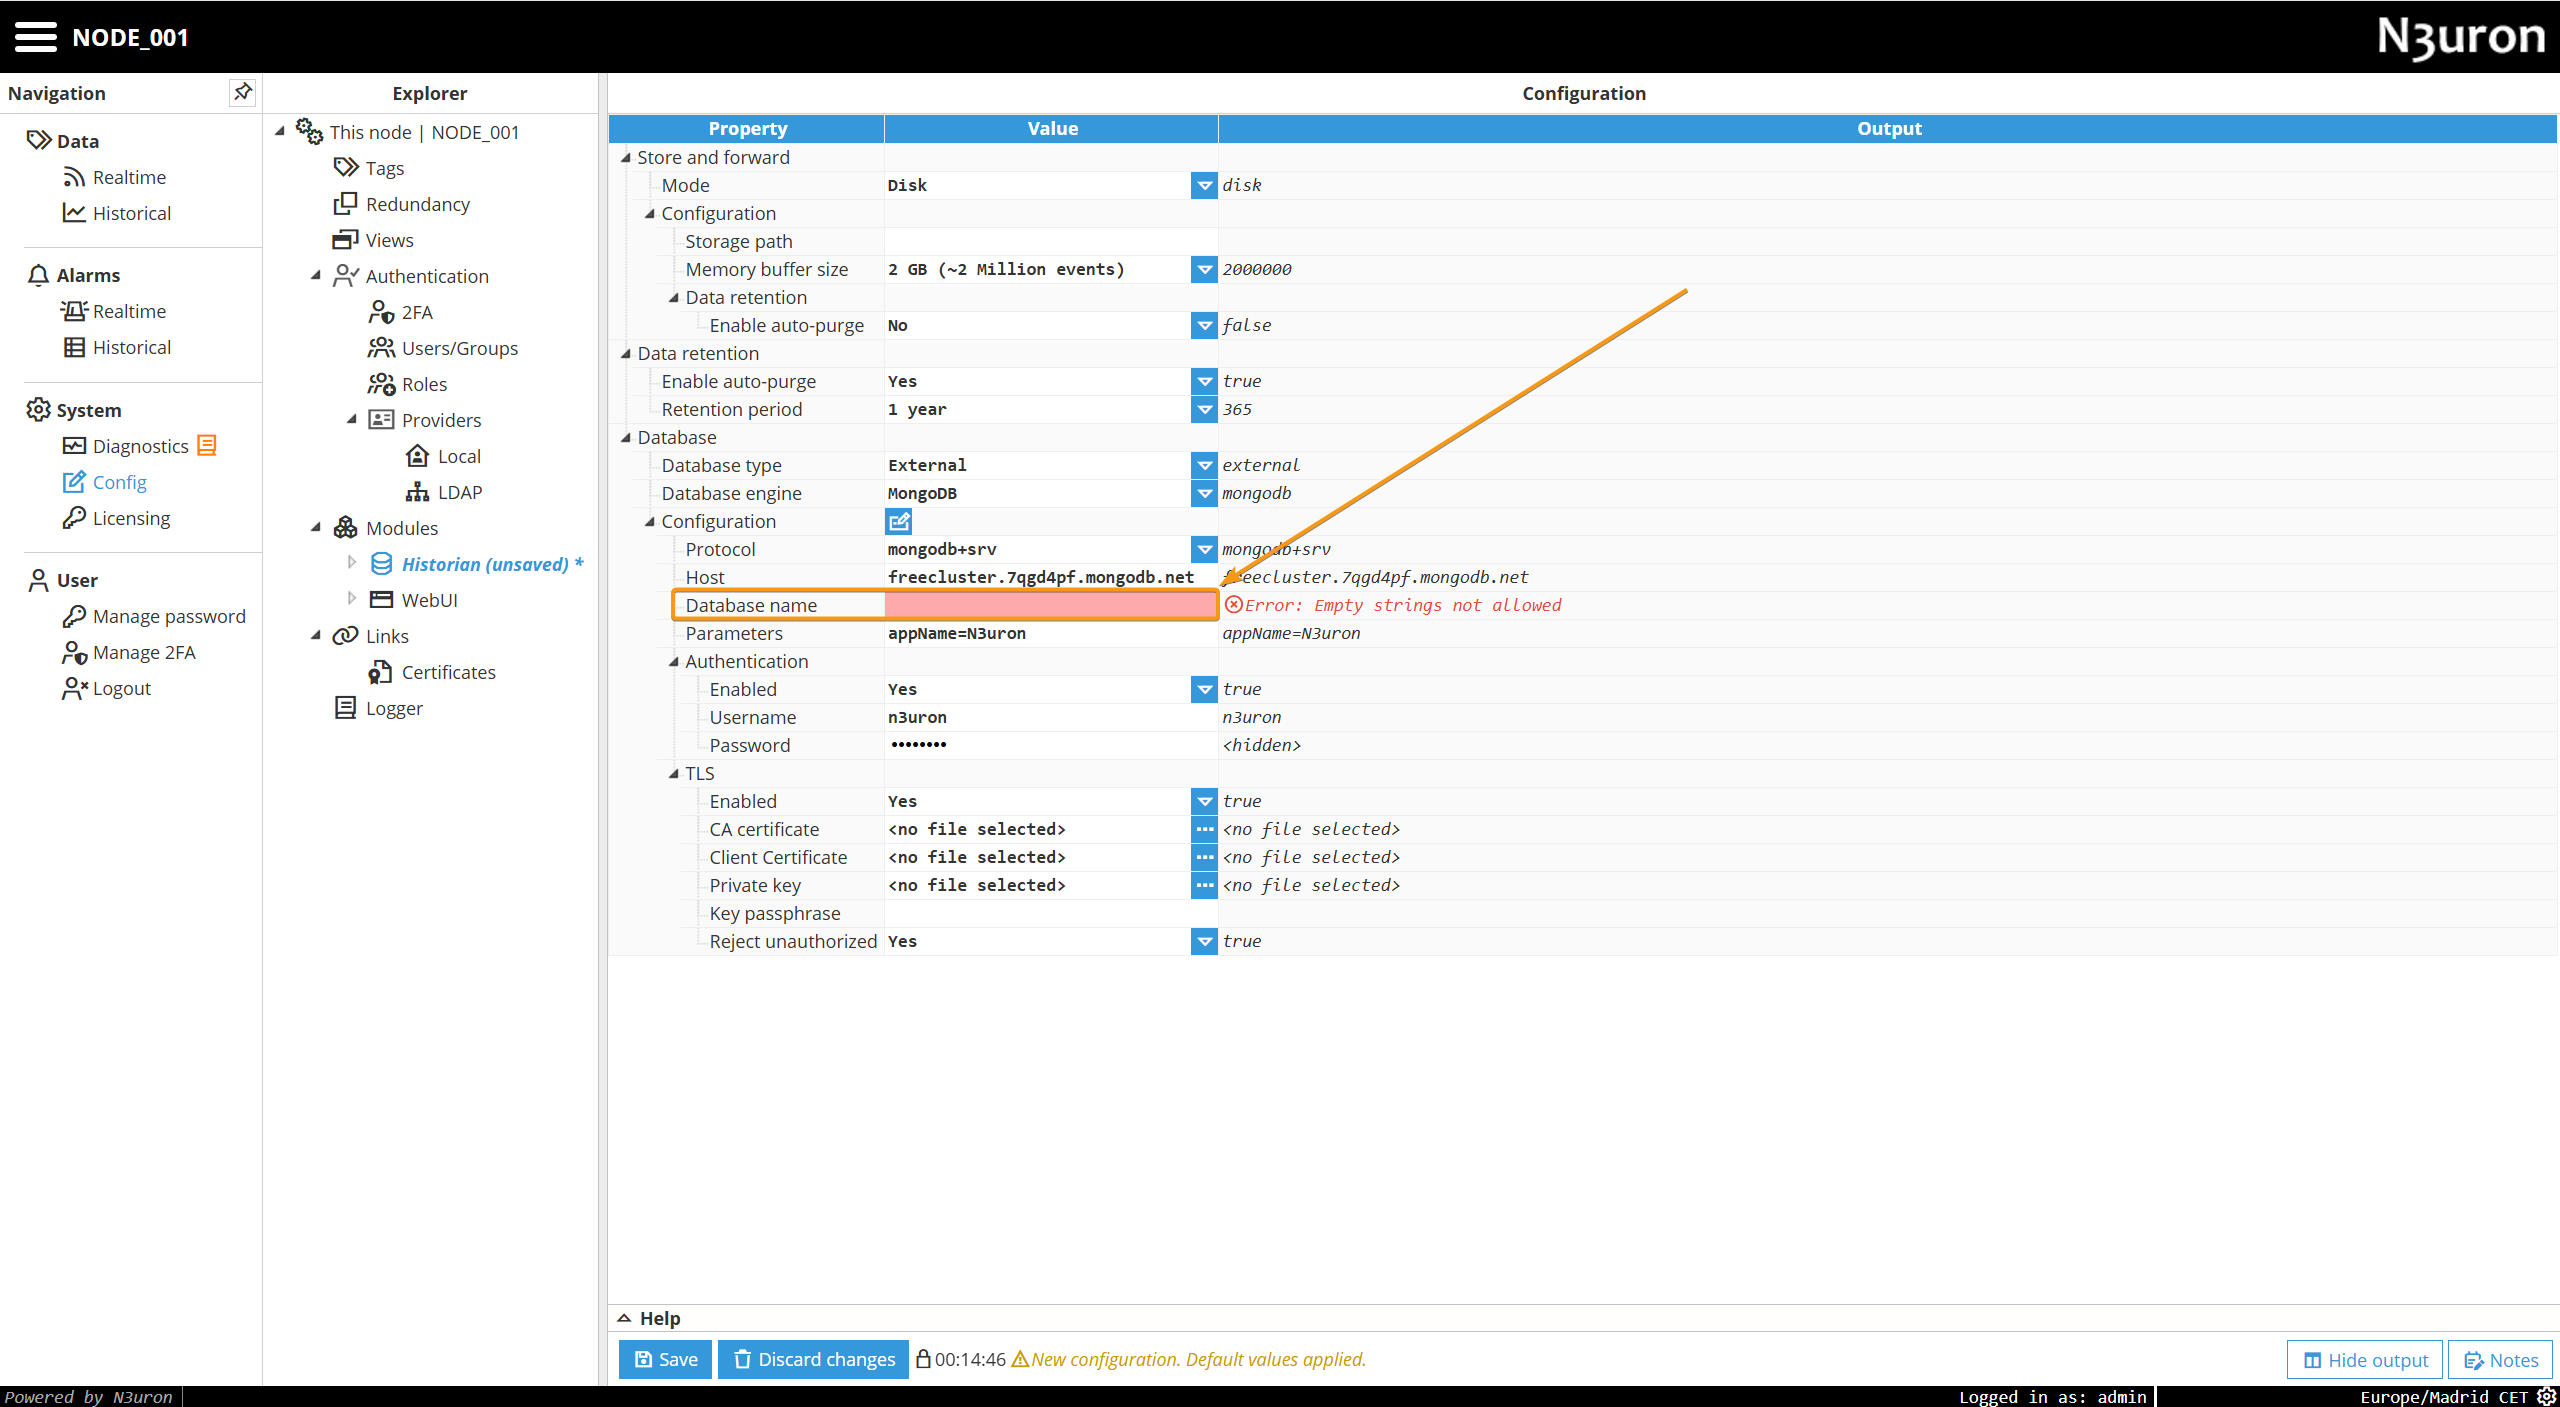
Step 4: Set the database name (e.g., n3-history) and then save the config.

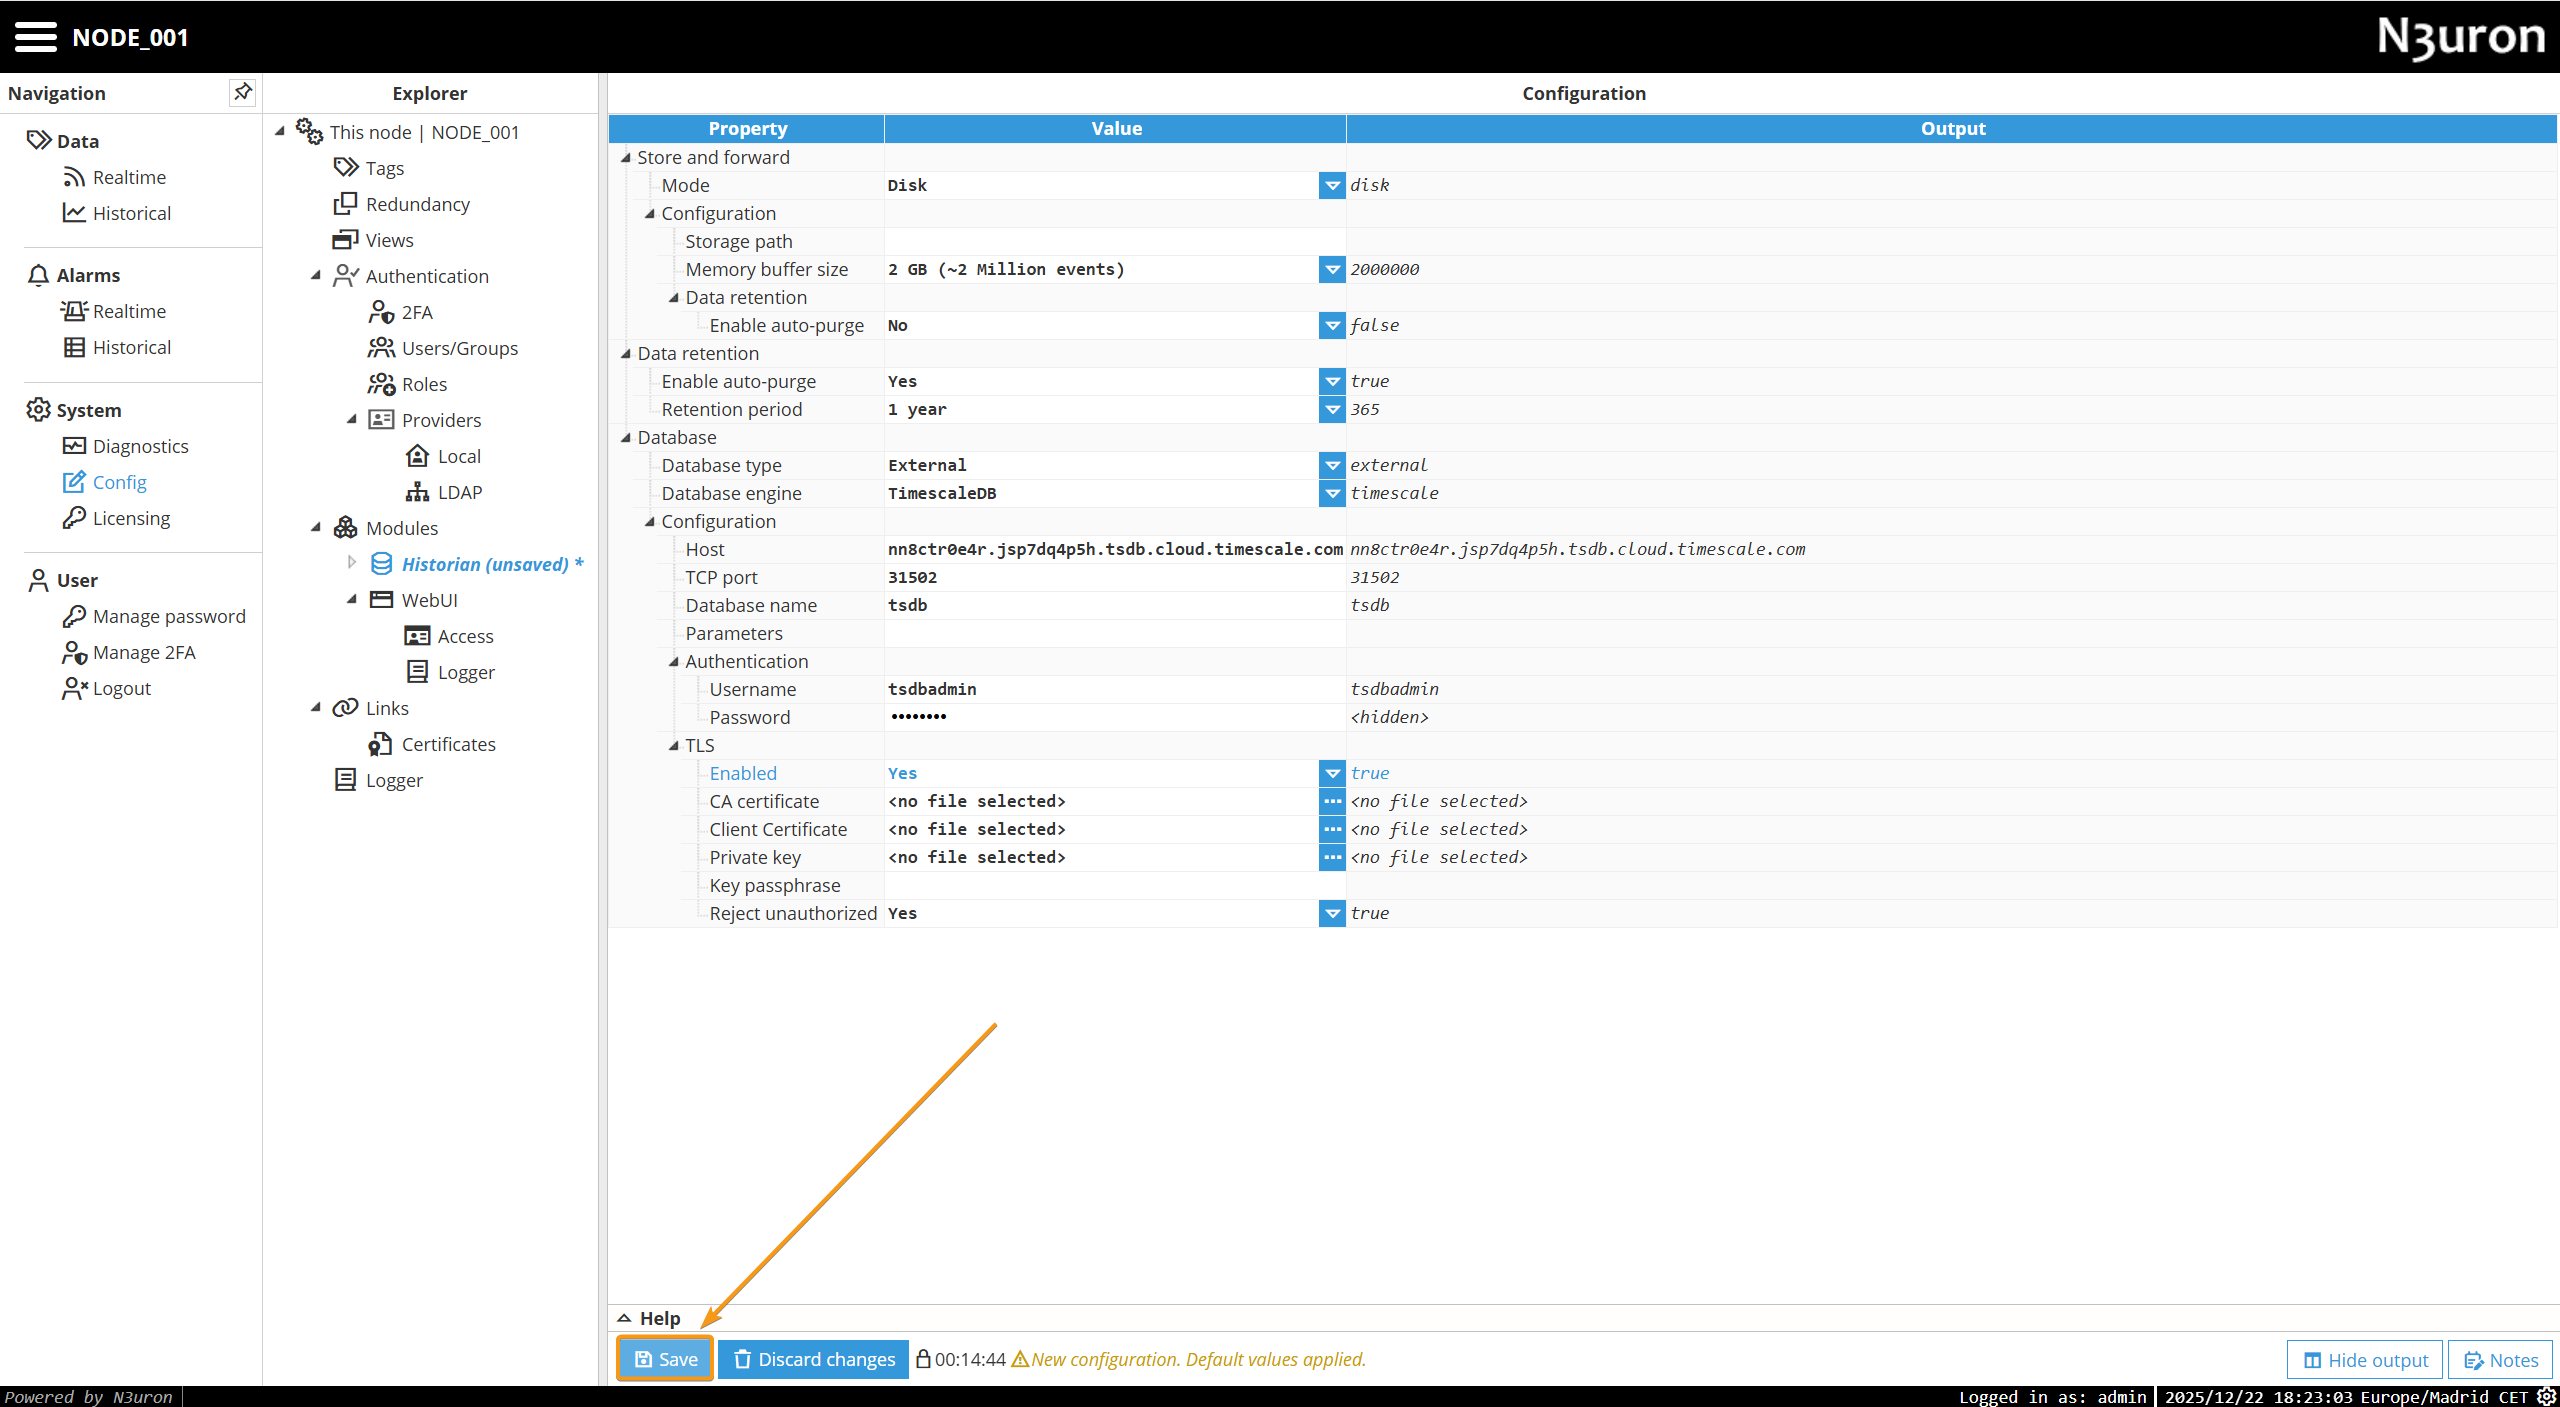
Connecting to TigerData
The following steps will help you connect your Historian instance to a TigerData instance.
Prerequisites
A TigerData account.
An active instance created in this account.
An IP address added to your IP access list.
Getting the connection details from TigerData
Step 1: In your Timescale project, navigate to Overview, then select More details in the Service Info section.
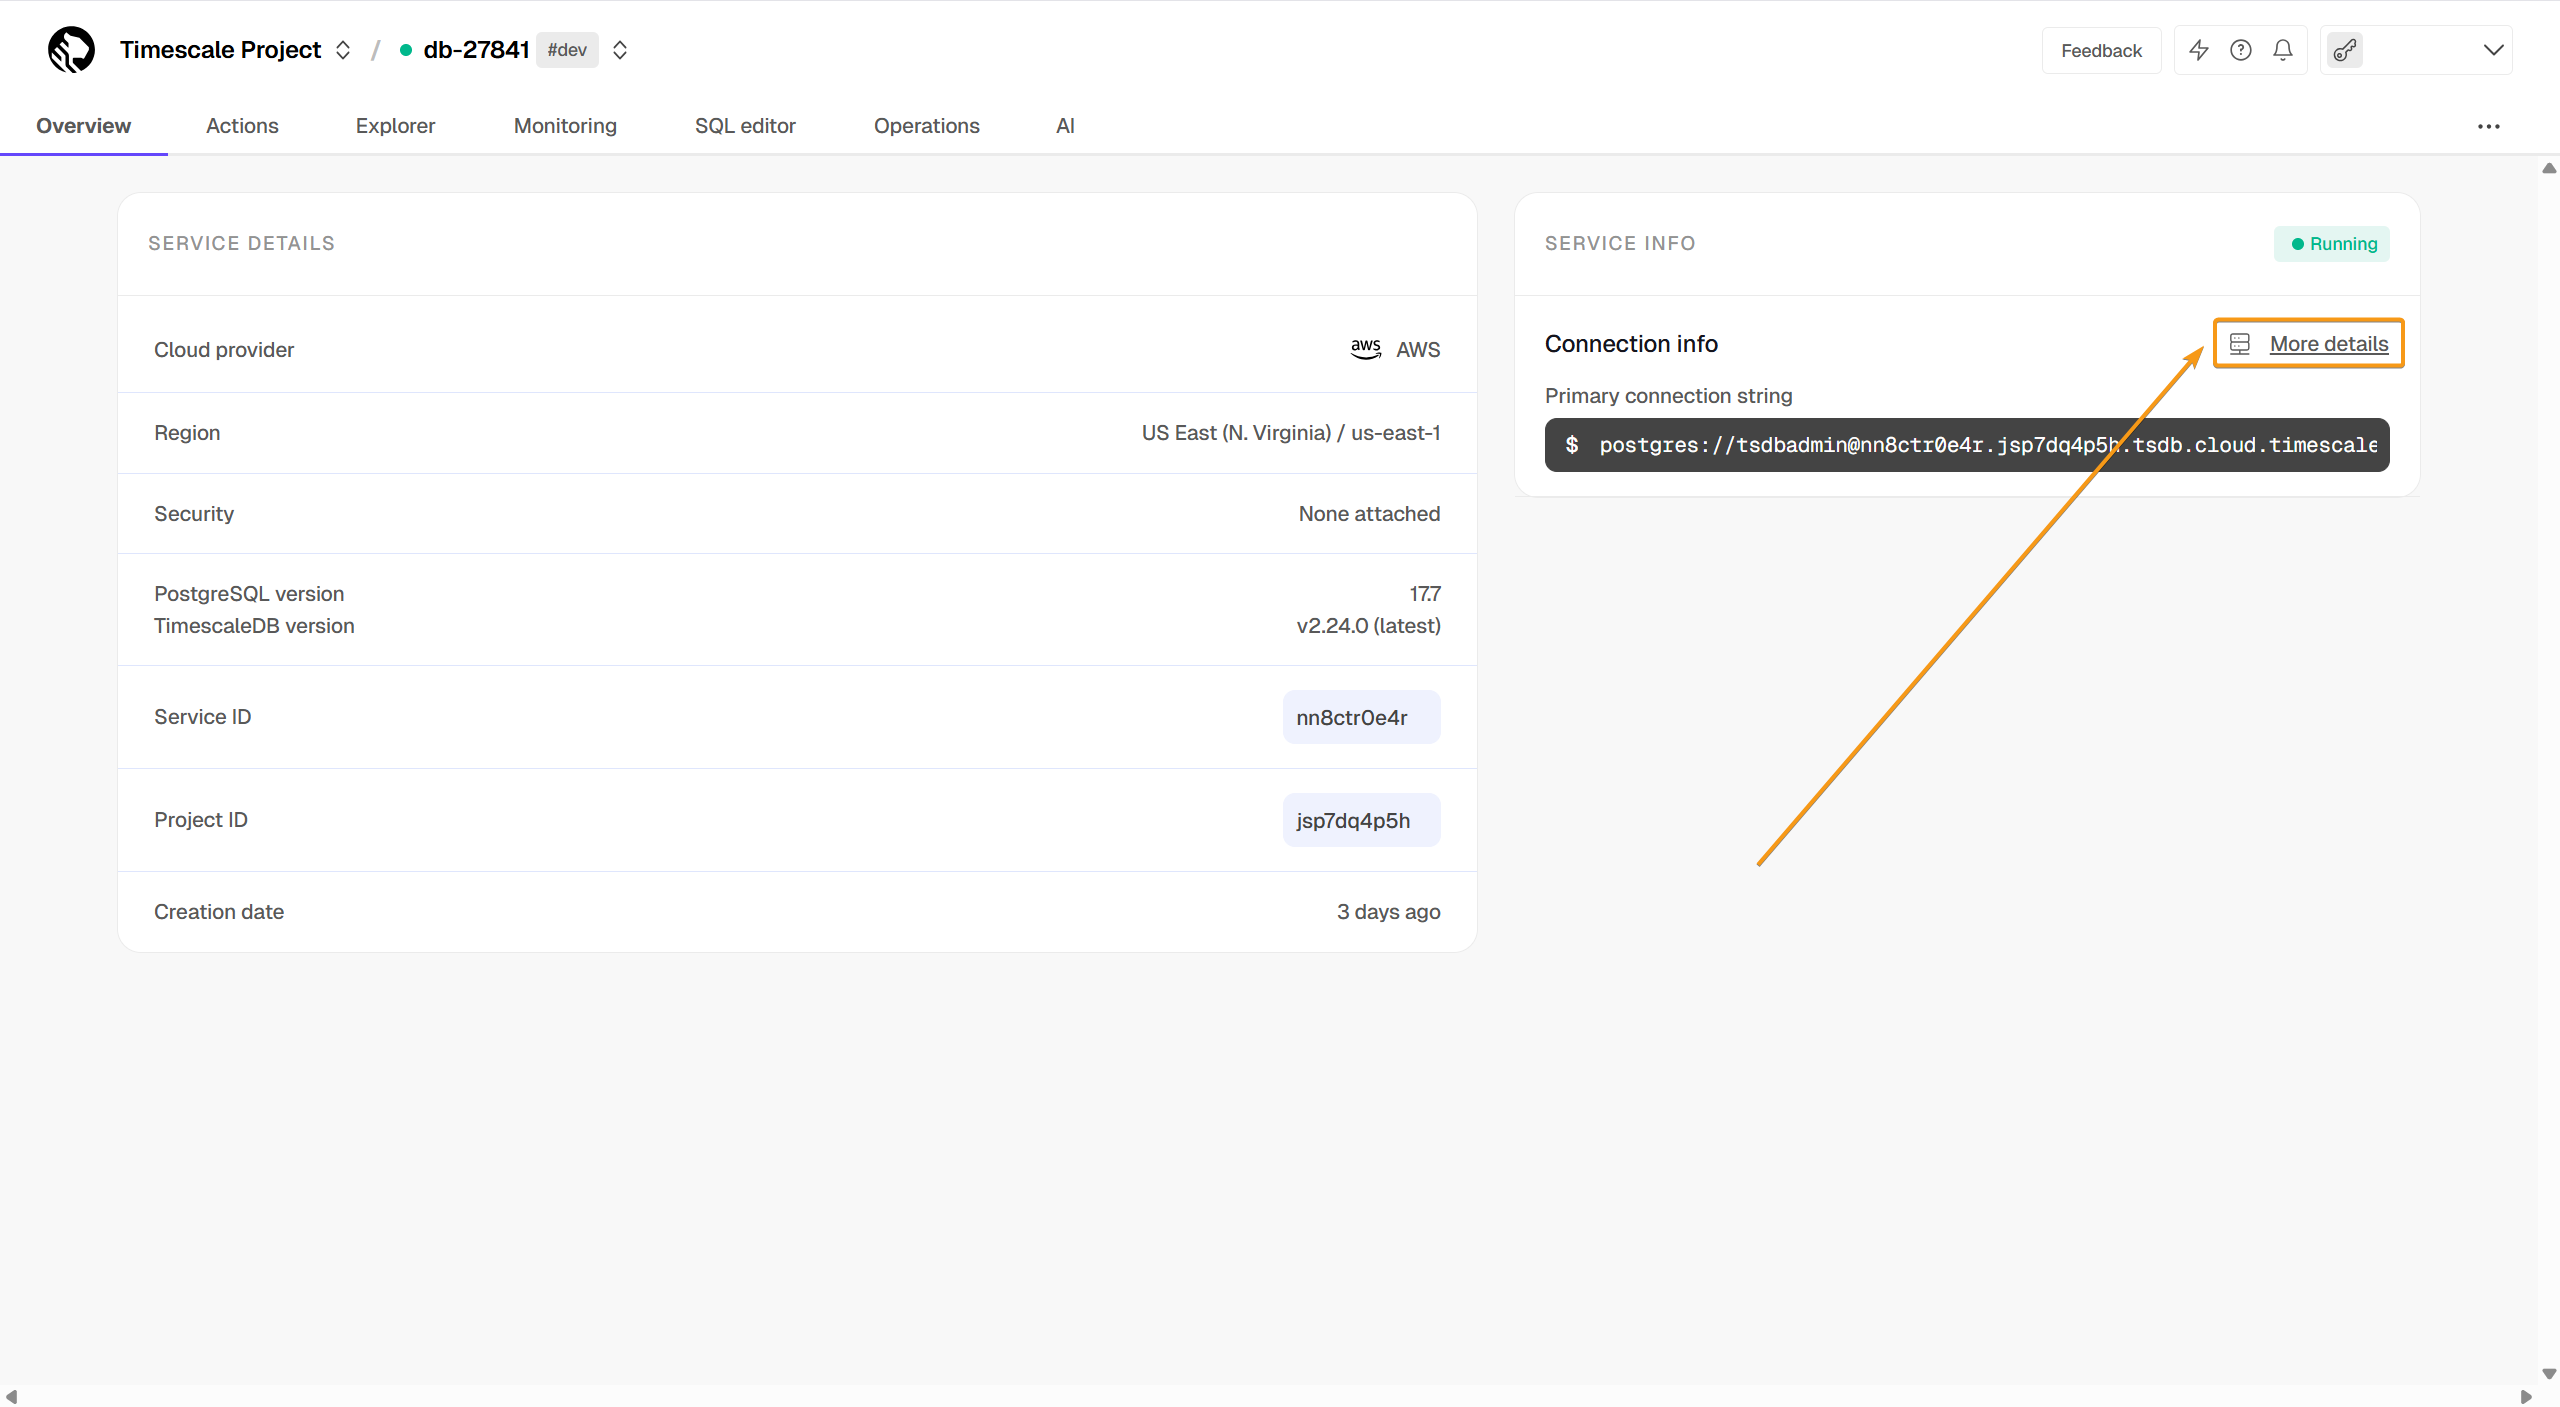
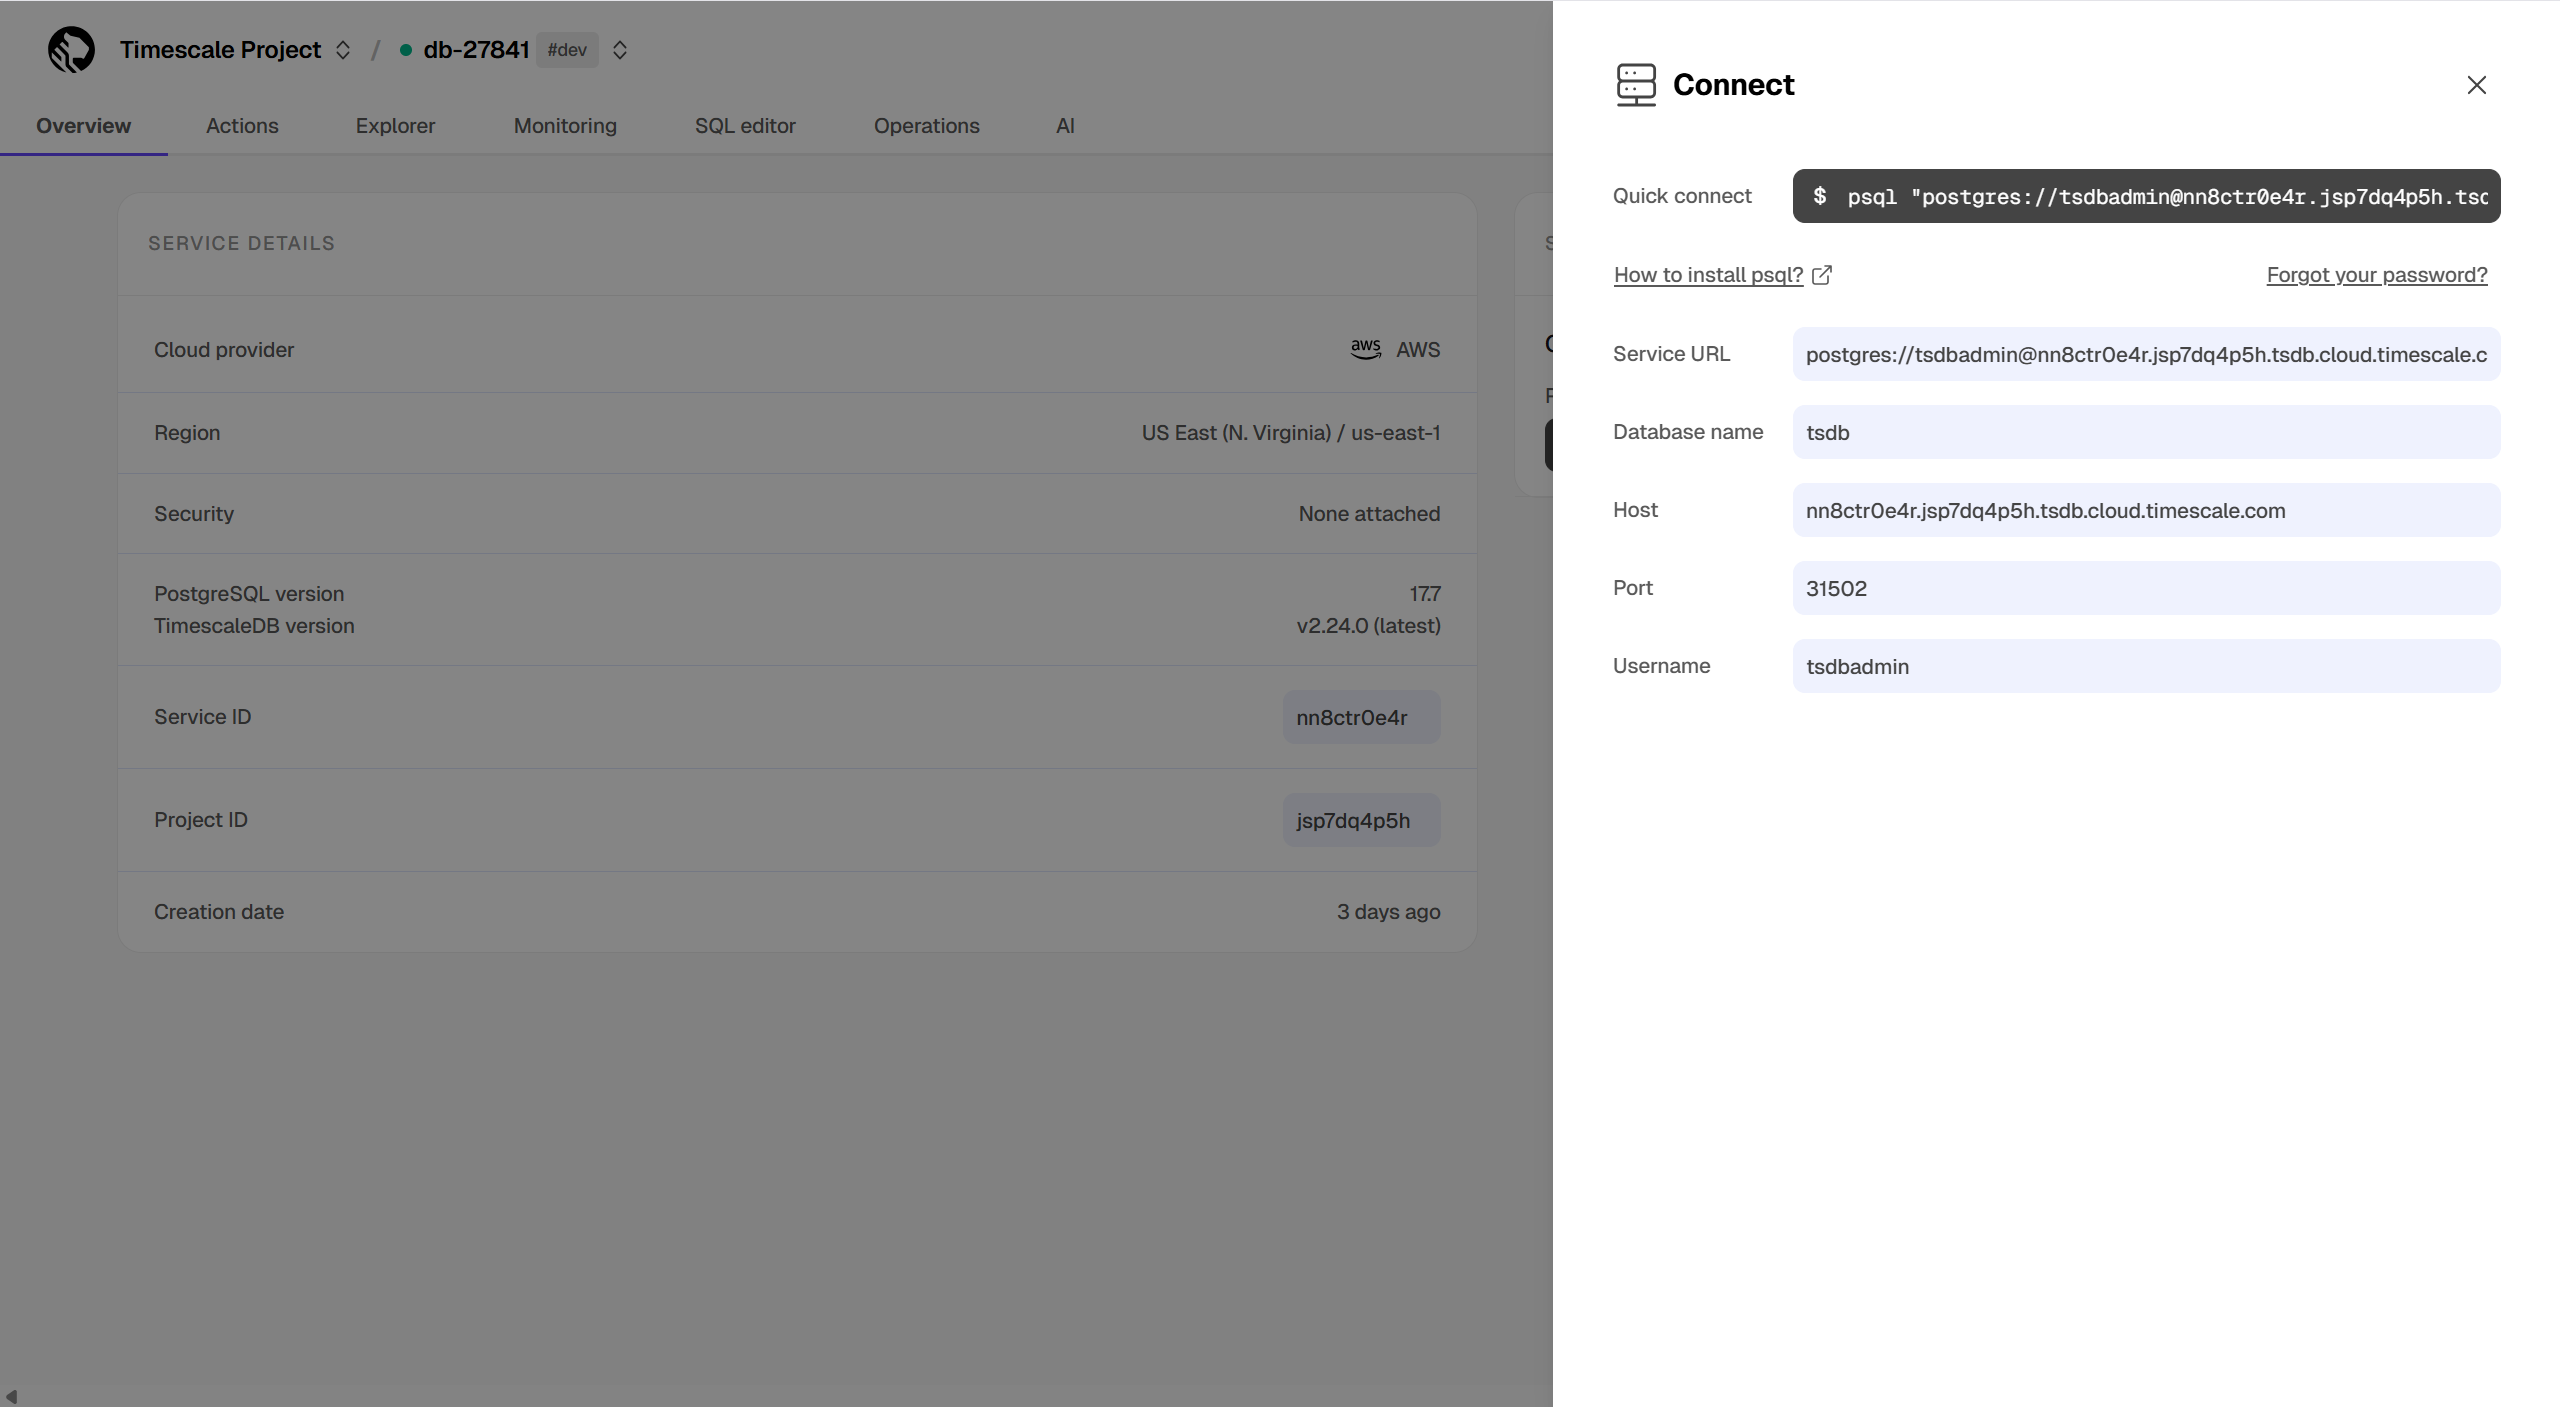
Step 2: Copy all the fields, as you will need them to configure the N3uron Historian.
Configuring N3uron
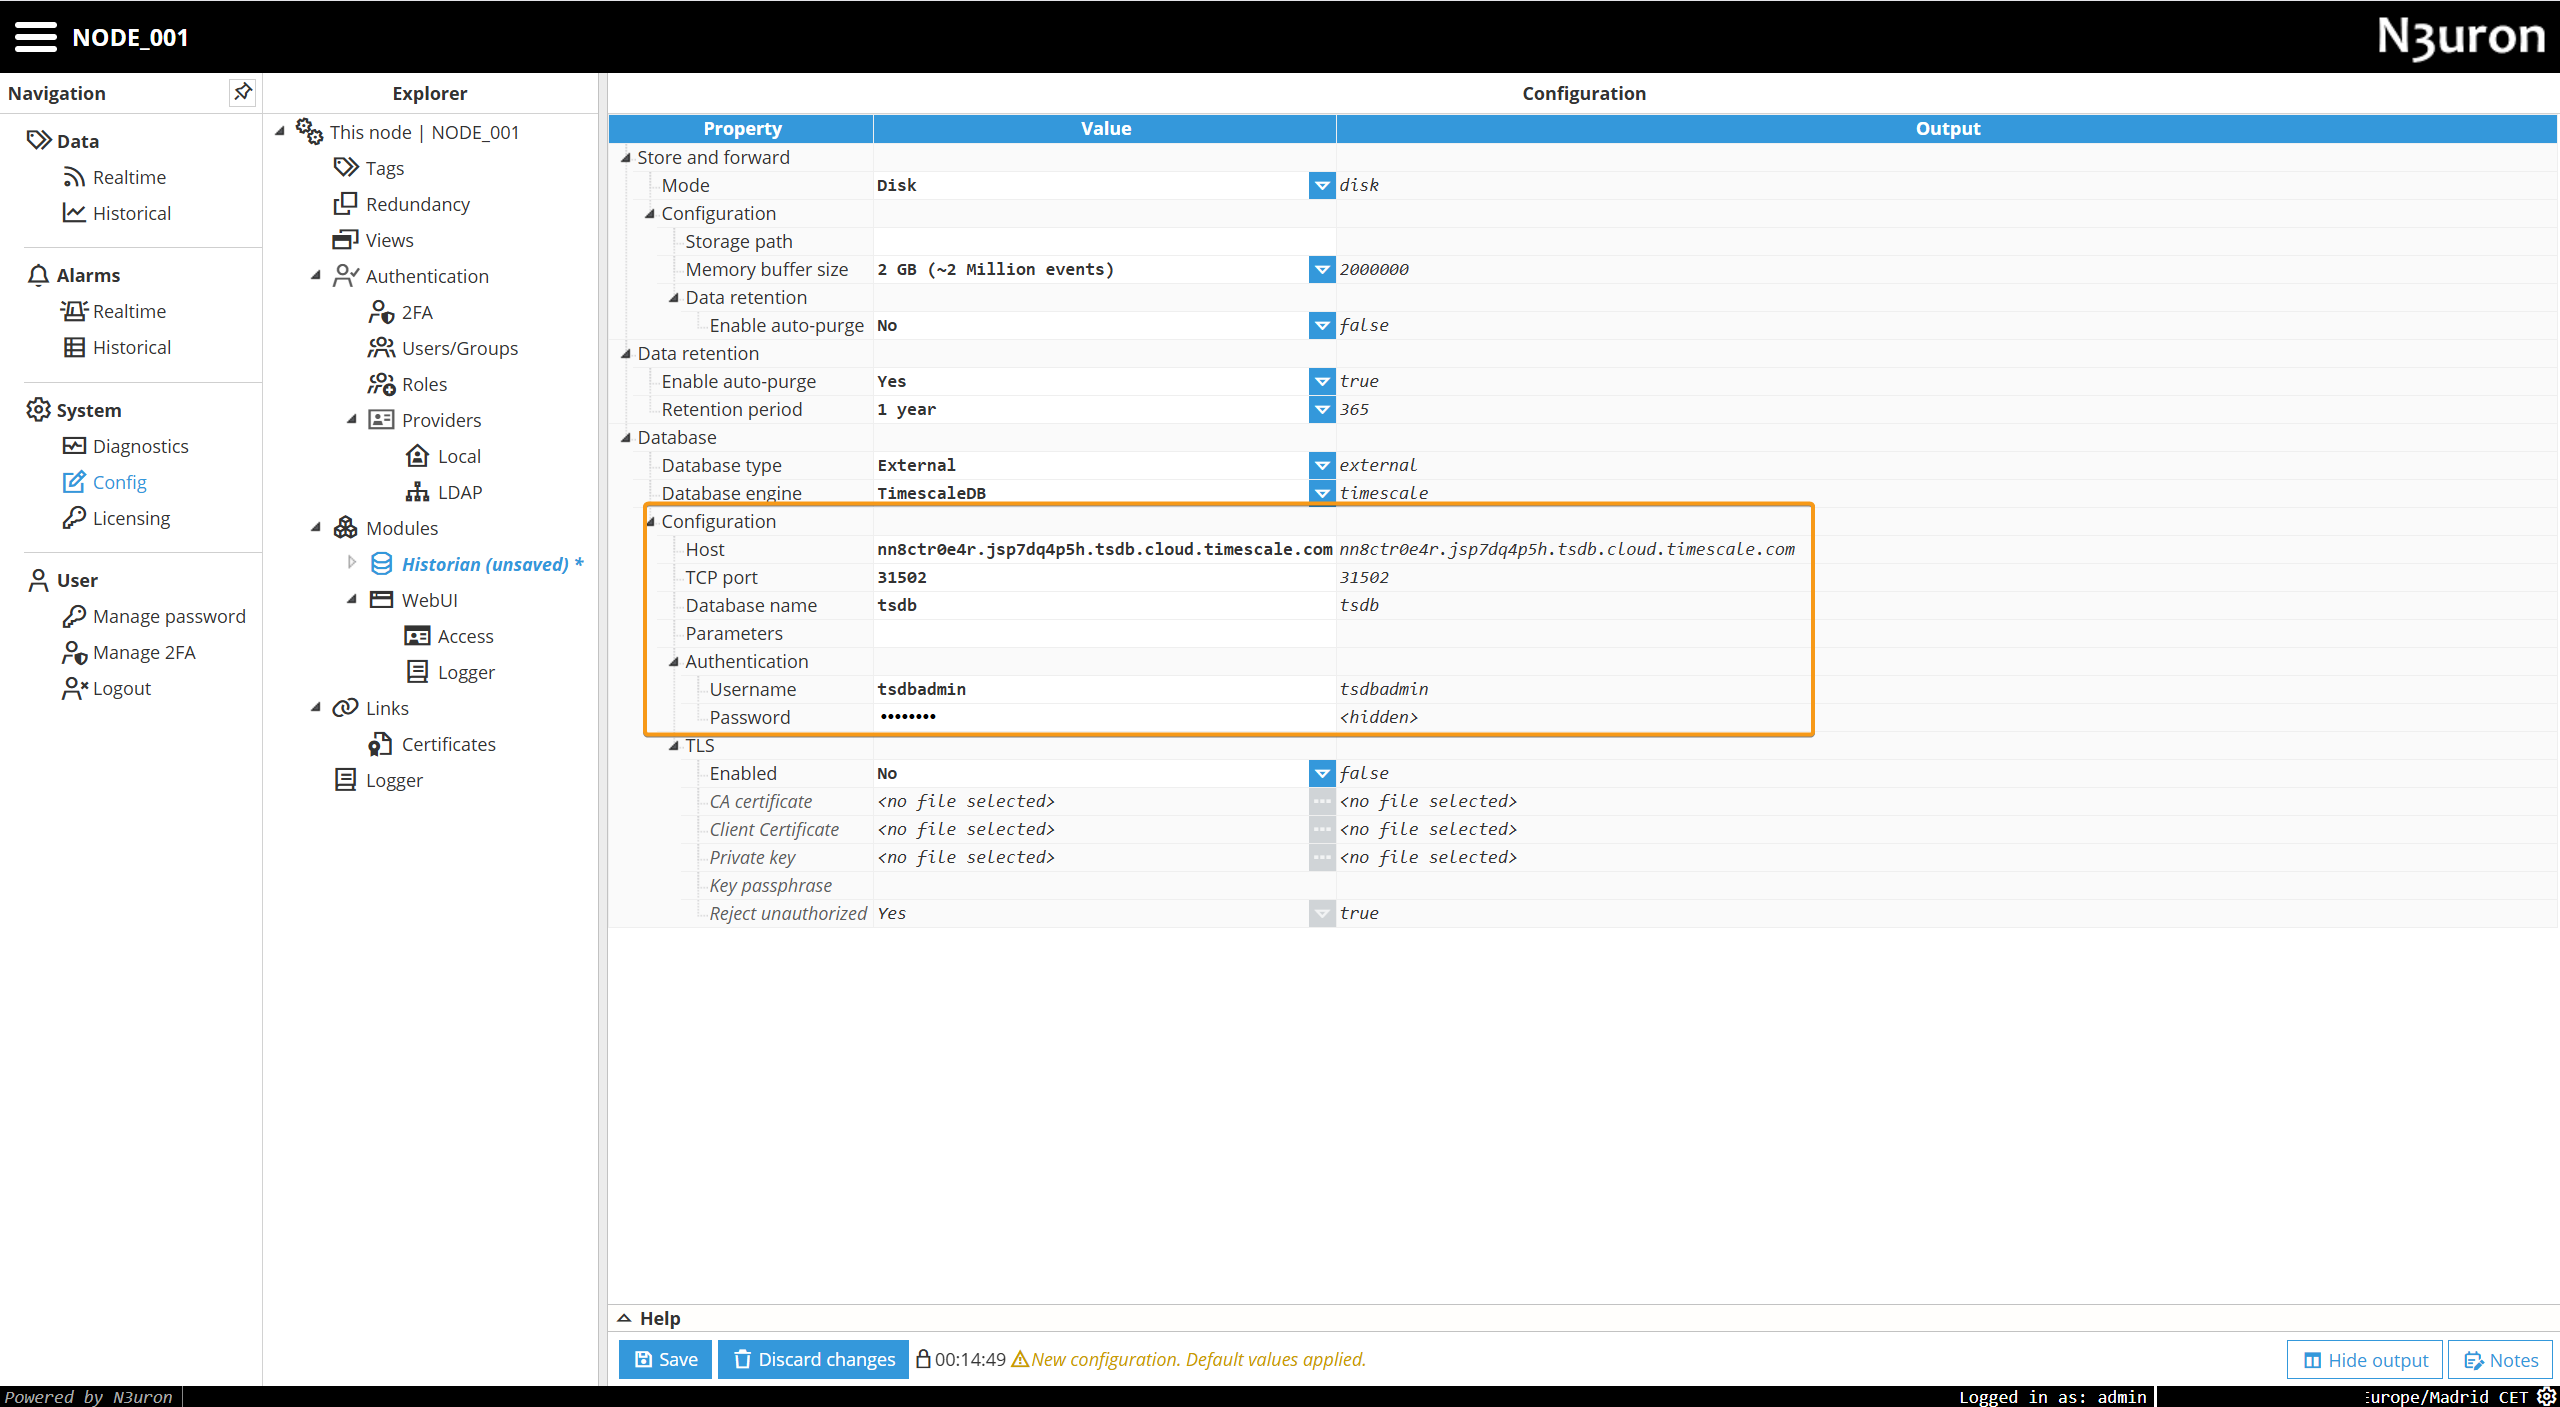
Step 1: Select External as the database type.
Step 2: Select TimescaleDB as the database engine.

Step 3: Fill in the Host, Port, Database Name, and Authentication credentials using the information obtained previously from Timescale.
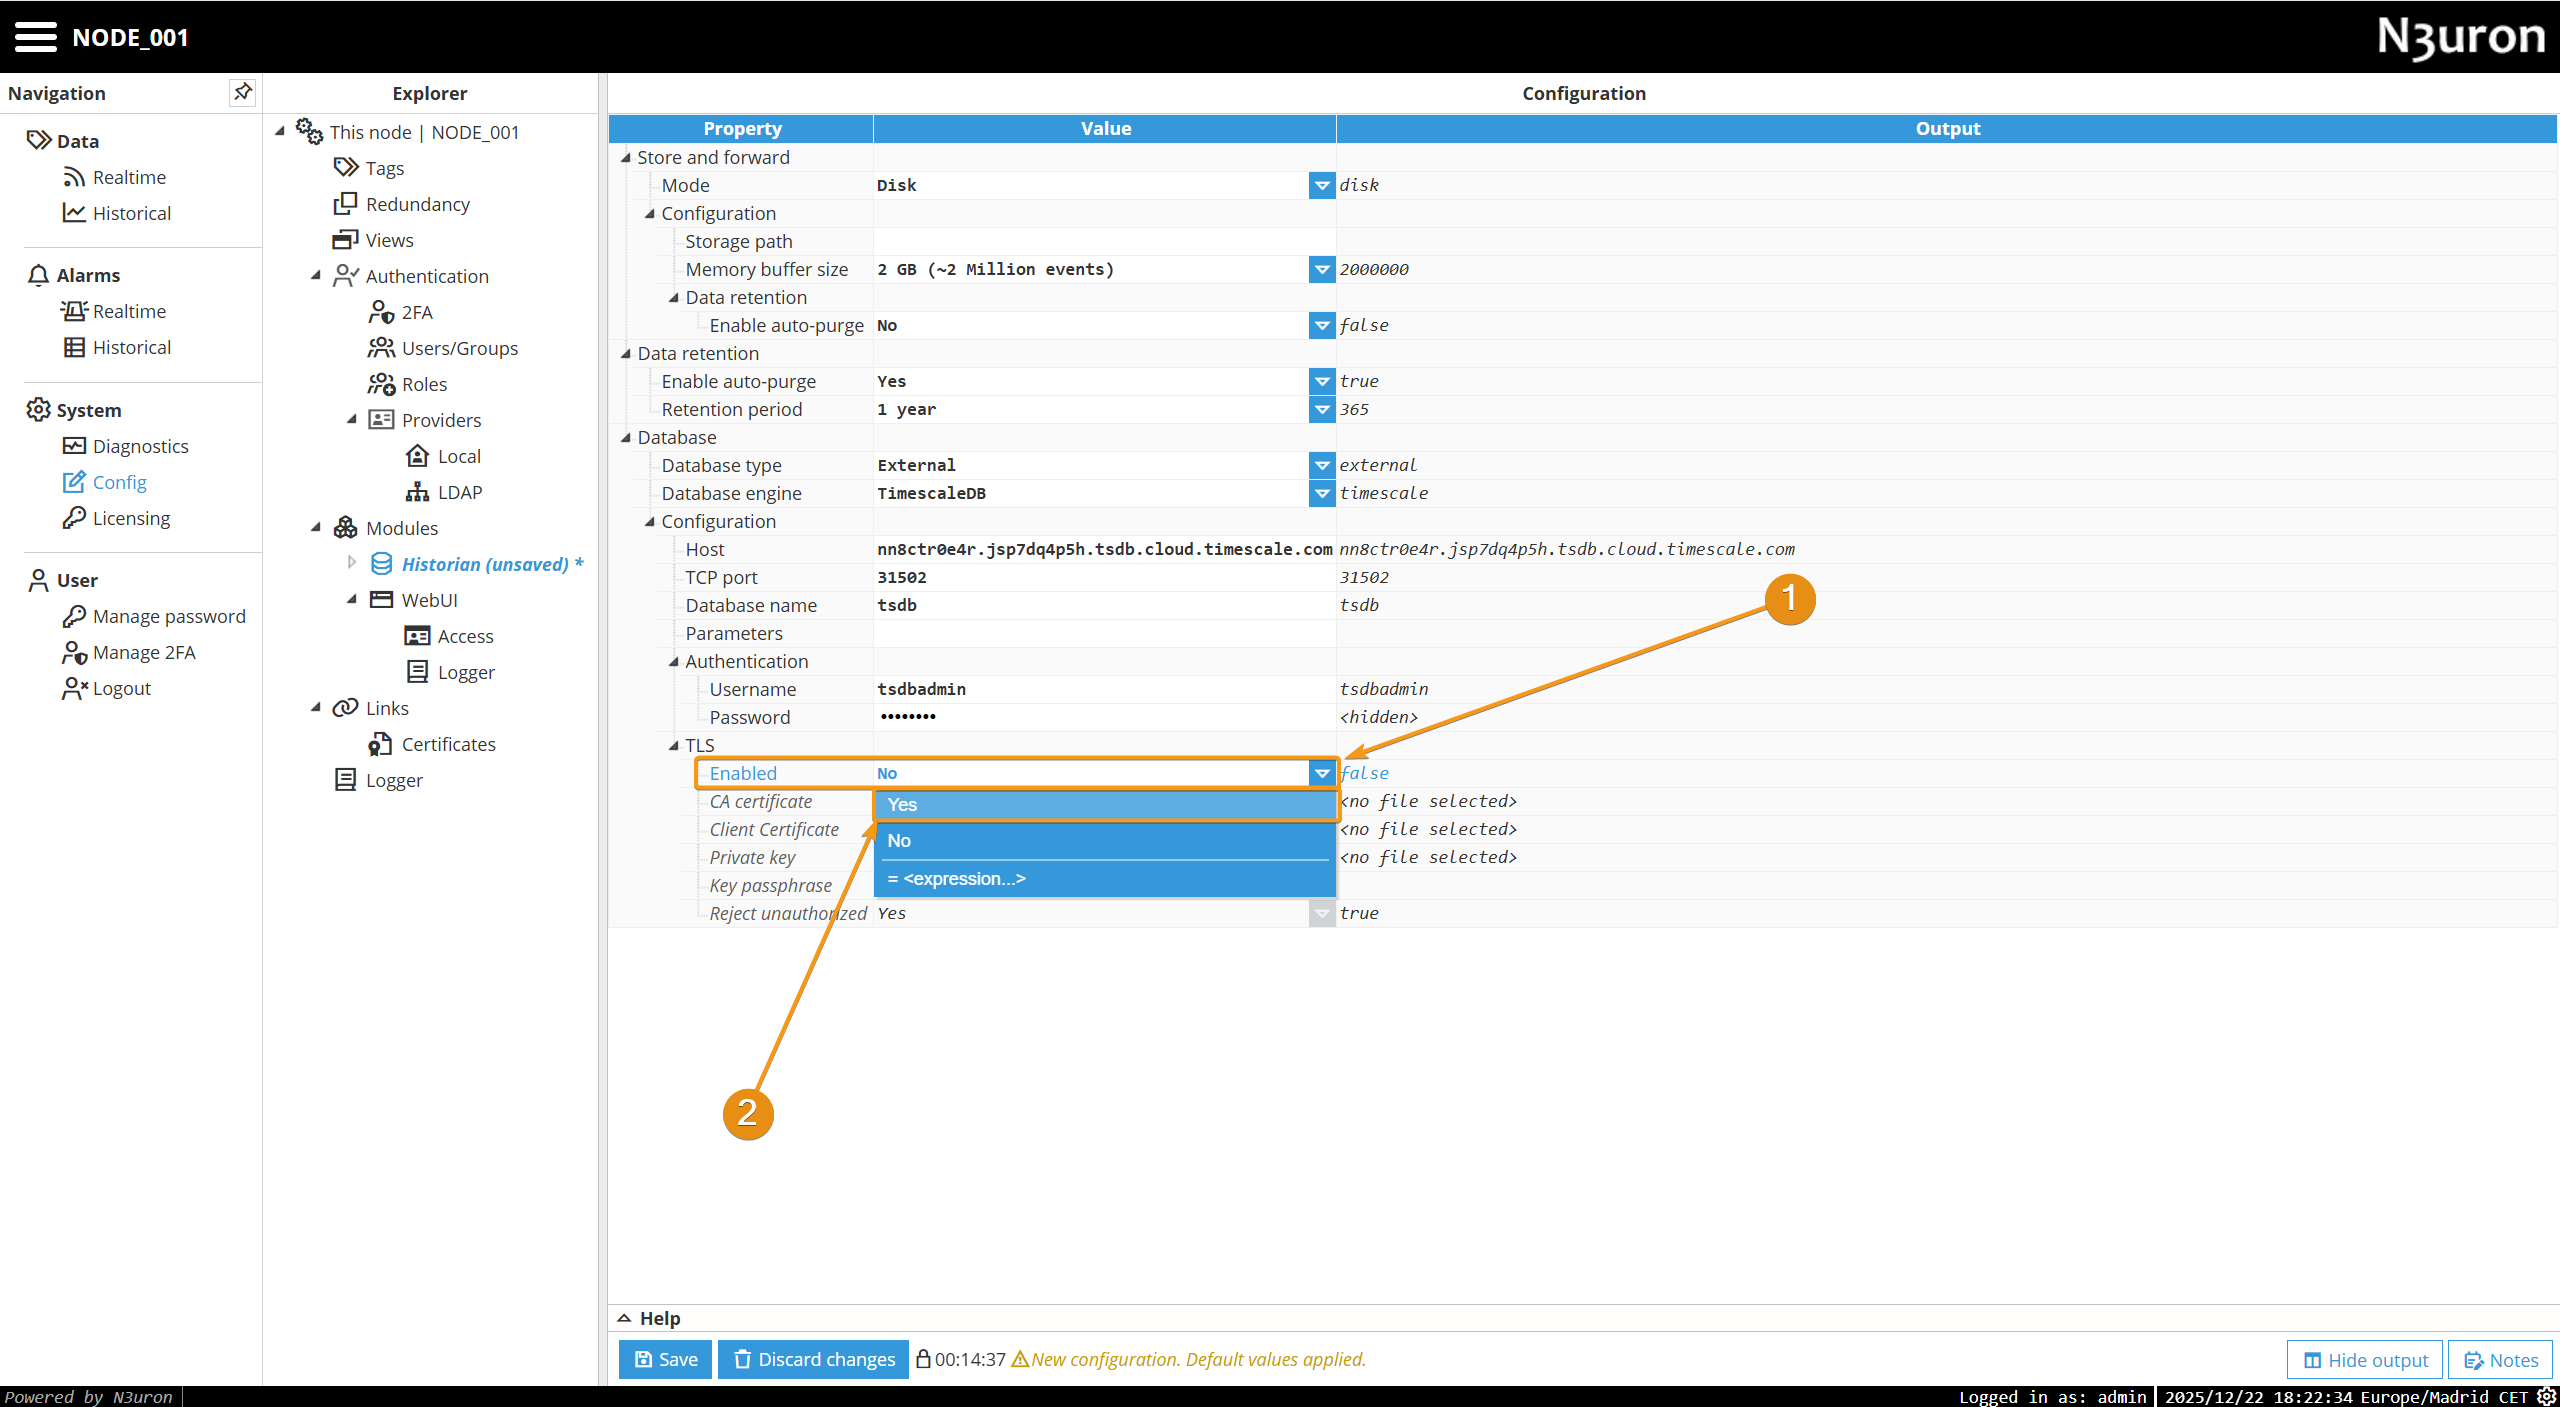
Step 4: Enable the TLS section to use encrypted communications.
Step 5: Save the changes and reload the module.
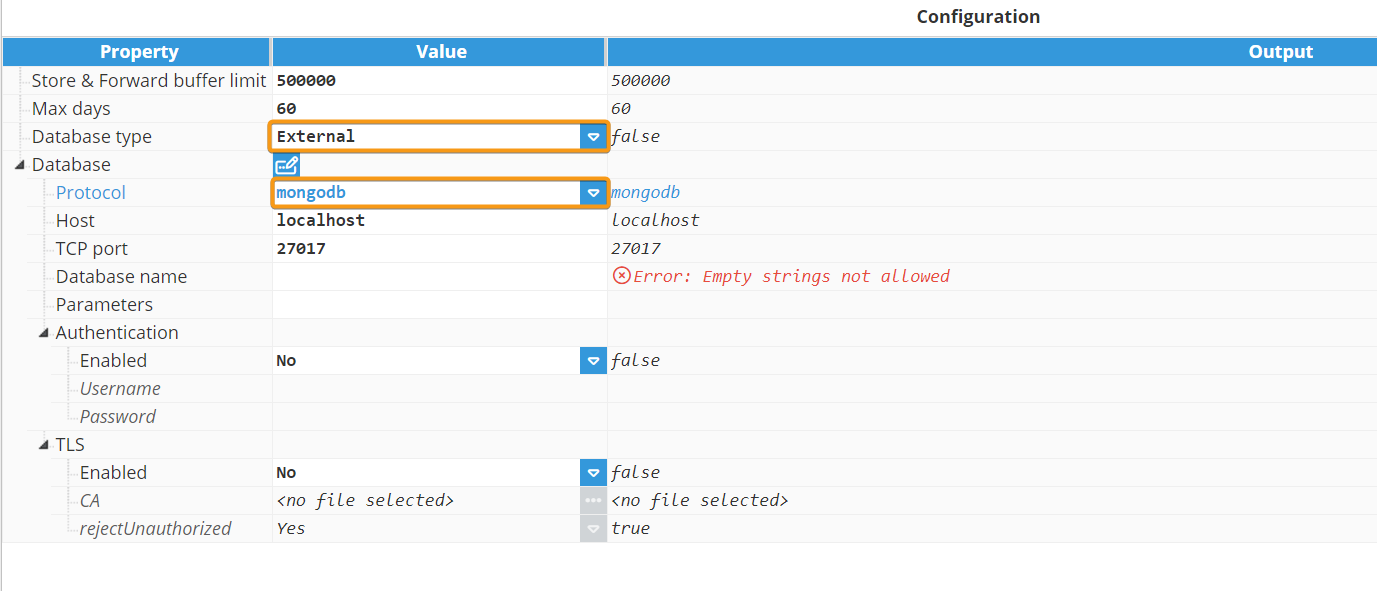
Connecting Historian to a self-managed MongoDB Replica Set
The following steps will help you connect the N3uron Historian to a self-managed MongoDB replica set deployment.
Example replica set with name rs0 (refer to this guide on deploying a replica set):
Build the MongoDB connection string
This is the standard connection URI format. Refer to the official documentation for more details.
mongodb://[username:password@]host1[:port1][,...hostN[:portN]][/[defaultauthdb][?options]]For the example above, the connection URL should be:
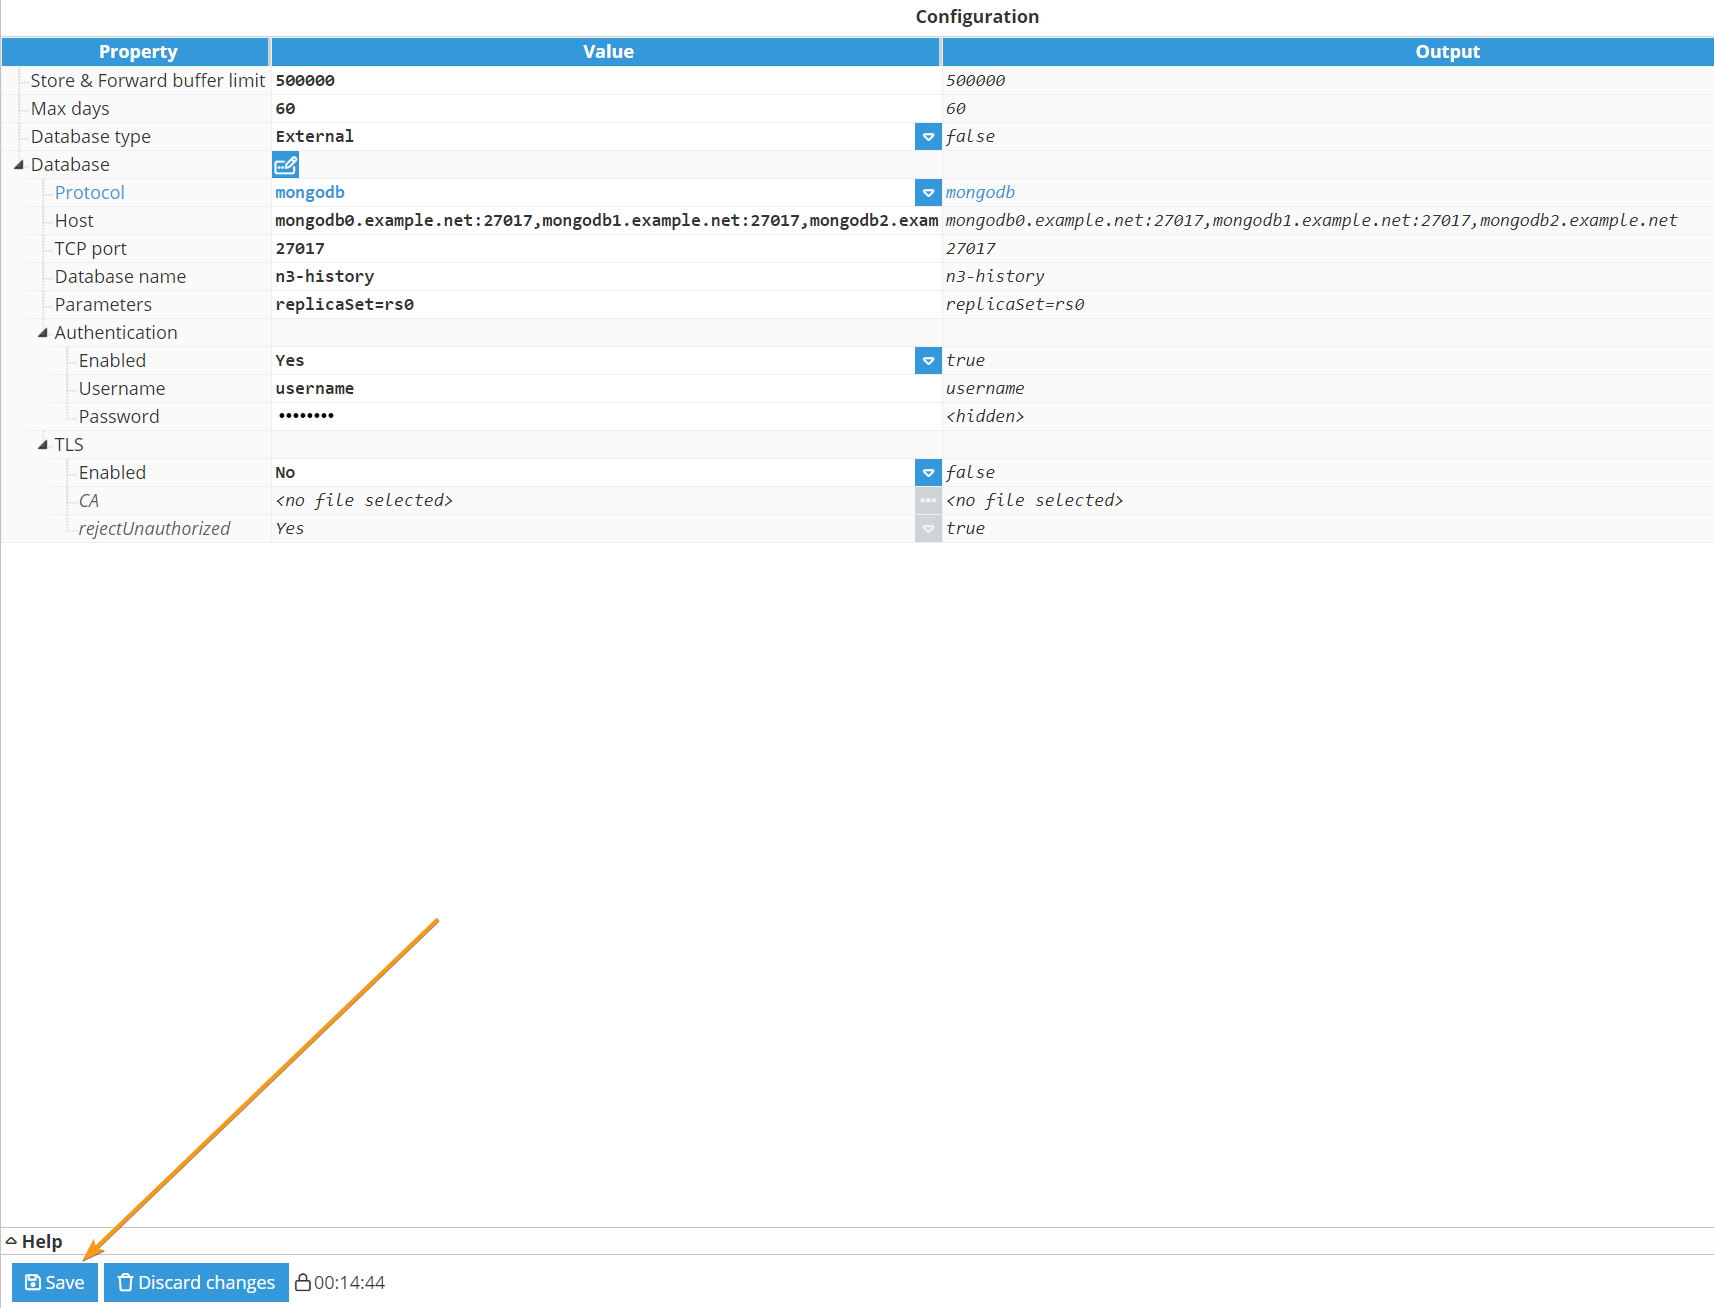
mongodb://username:password@mongodb0.example.net:27017,mongodb1.example.net:27017,mongodb2.example.net:27017/n3-history?replicaSet=rs0Configuring N3uron
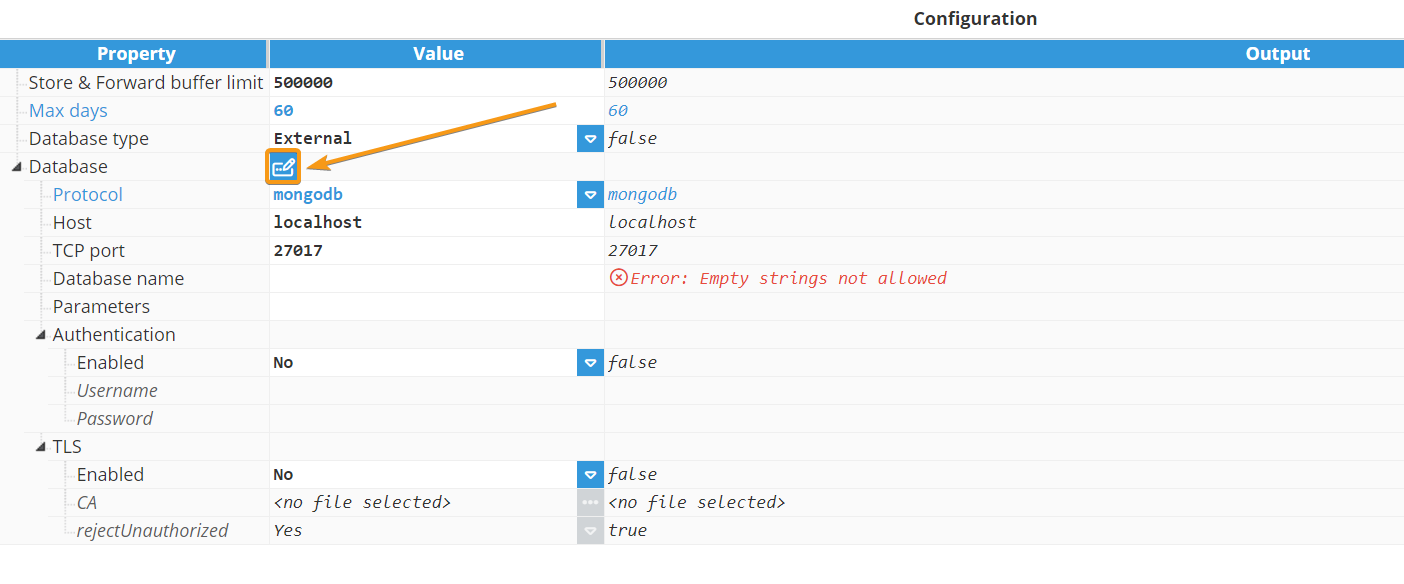
Step 1: Go to the Historian module configuration and select External as the database type and mongodb as the protocol.
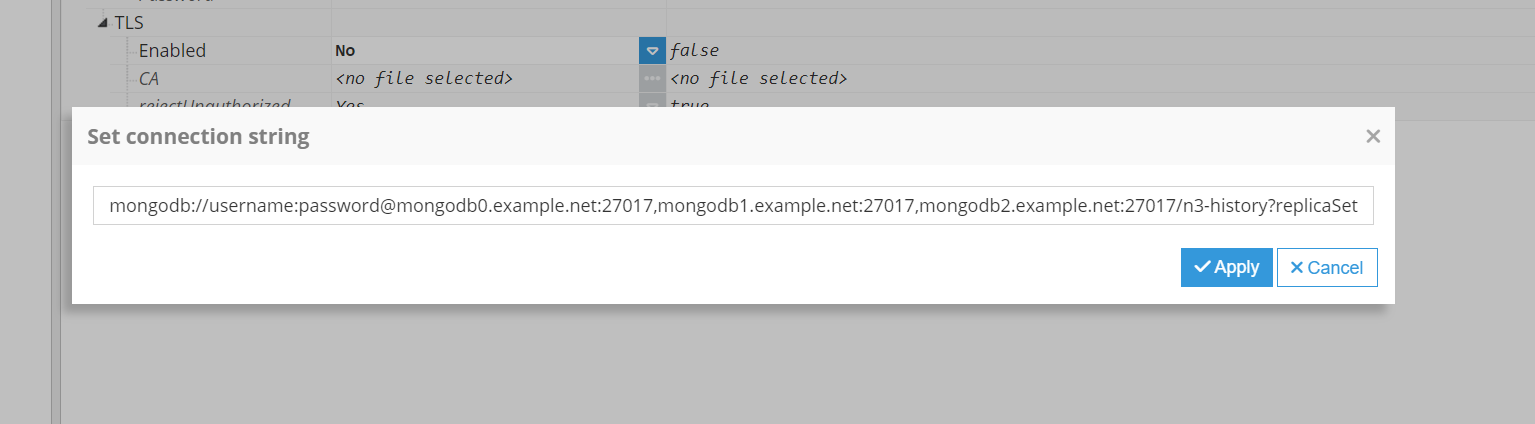
Step 2: Open the database connection helper, paste the connection URI created in the previous section, and click Apply.
Step 3: Review the module settings and click Save to load the changes.