Common Examples
In this section, we’ll walk through detailed examples of the most common procedures in the License Manager. These include:
Migrating a Node (hostname and/or UID change) in versions 1.20 and 1.21.
Recovering a license in case of damage.
Changing one module for another.
Adding additional modules to an existing node.
Removing modules from an existing node.
Transferring license ownership to a different user.
Migrating a Node
Migrating a license from one N3uron node to another is a straightforward process that allows you to transfer your existing licenses without the need to purchase new ones. This is commonly required when replacing hardware or whenever there is a change in the Hostname or UID of the host machine.
To ensure a smooth migration, it’s important to follow the proper steps, which involve unlicensing the license from the current node and then reassigning it to the new node.
Please note that only licenses with active Support & Maintenance (S&M) can be migrated. Therefore, to change the Hostname and/or UID of a node, all licenses assigned to that node must have active S&M.
Note:
Detailed instructions for obtaining the Unlicensed file can be found in our Knowledge Base or in the N3uron Academy. Please make sure all licenses in the node have active S&M before unlicensing the node.
To migrate a node using the LM, you have to follow the following steps:
Gather Required Files: Ensure you have the Unlicensed file from the current node and the destination node’s information (Hostname and UID).
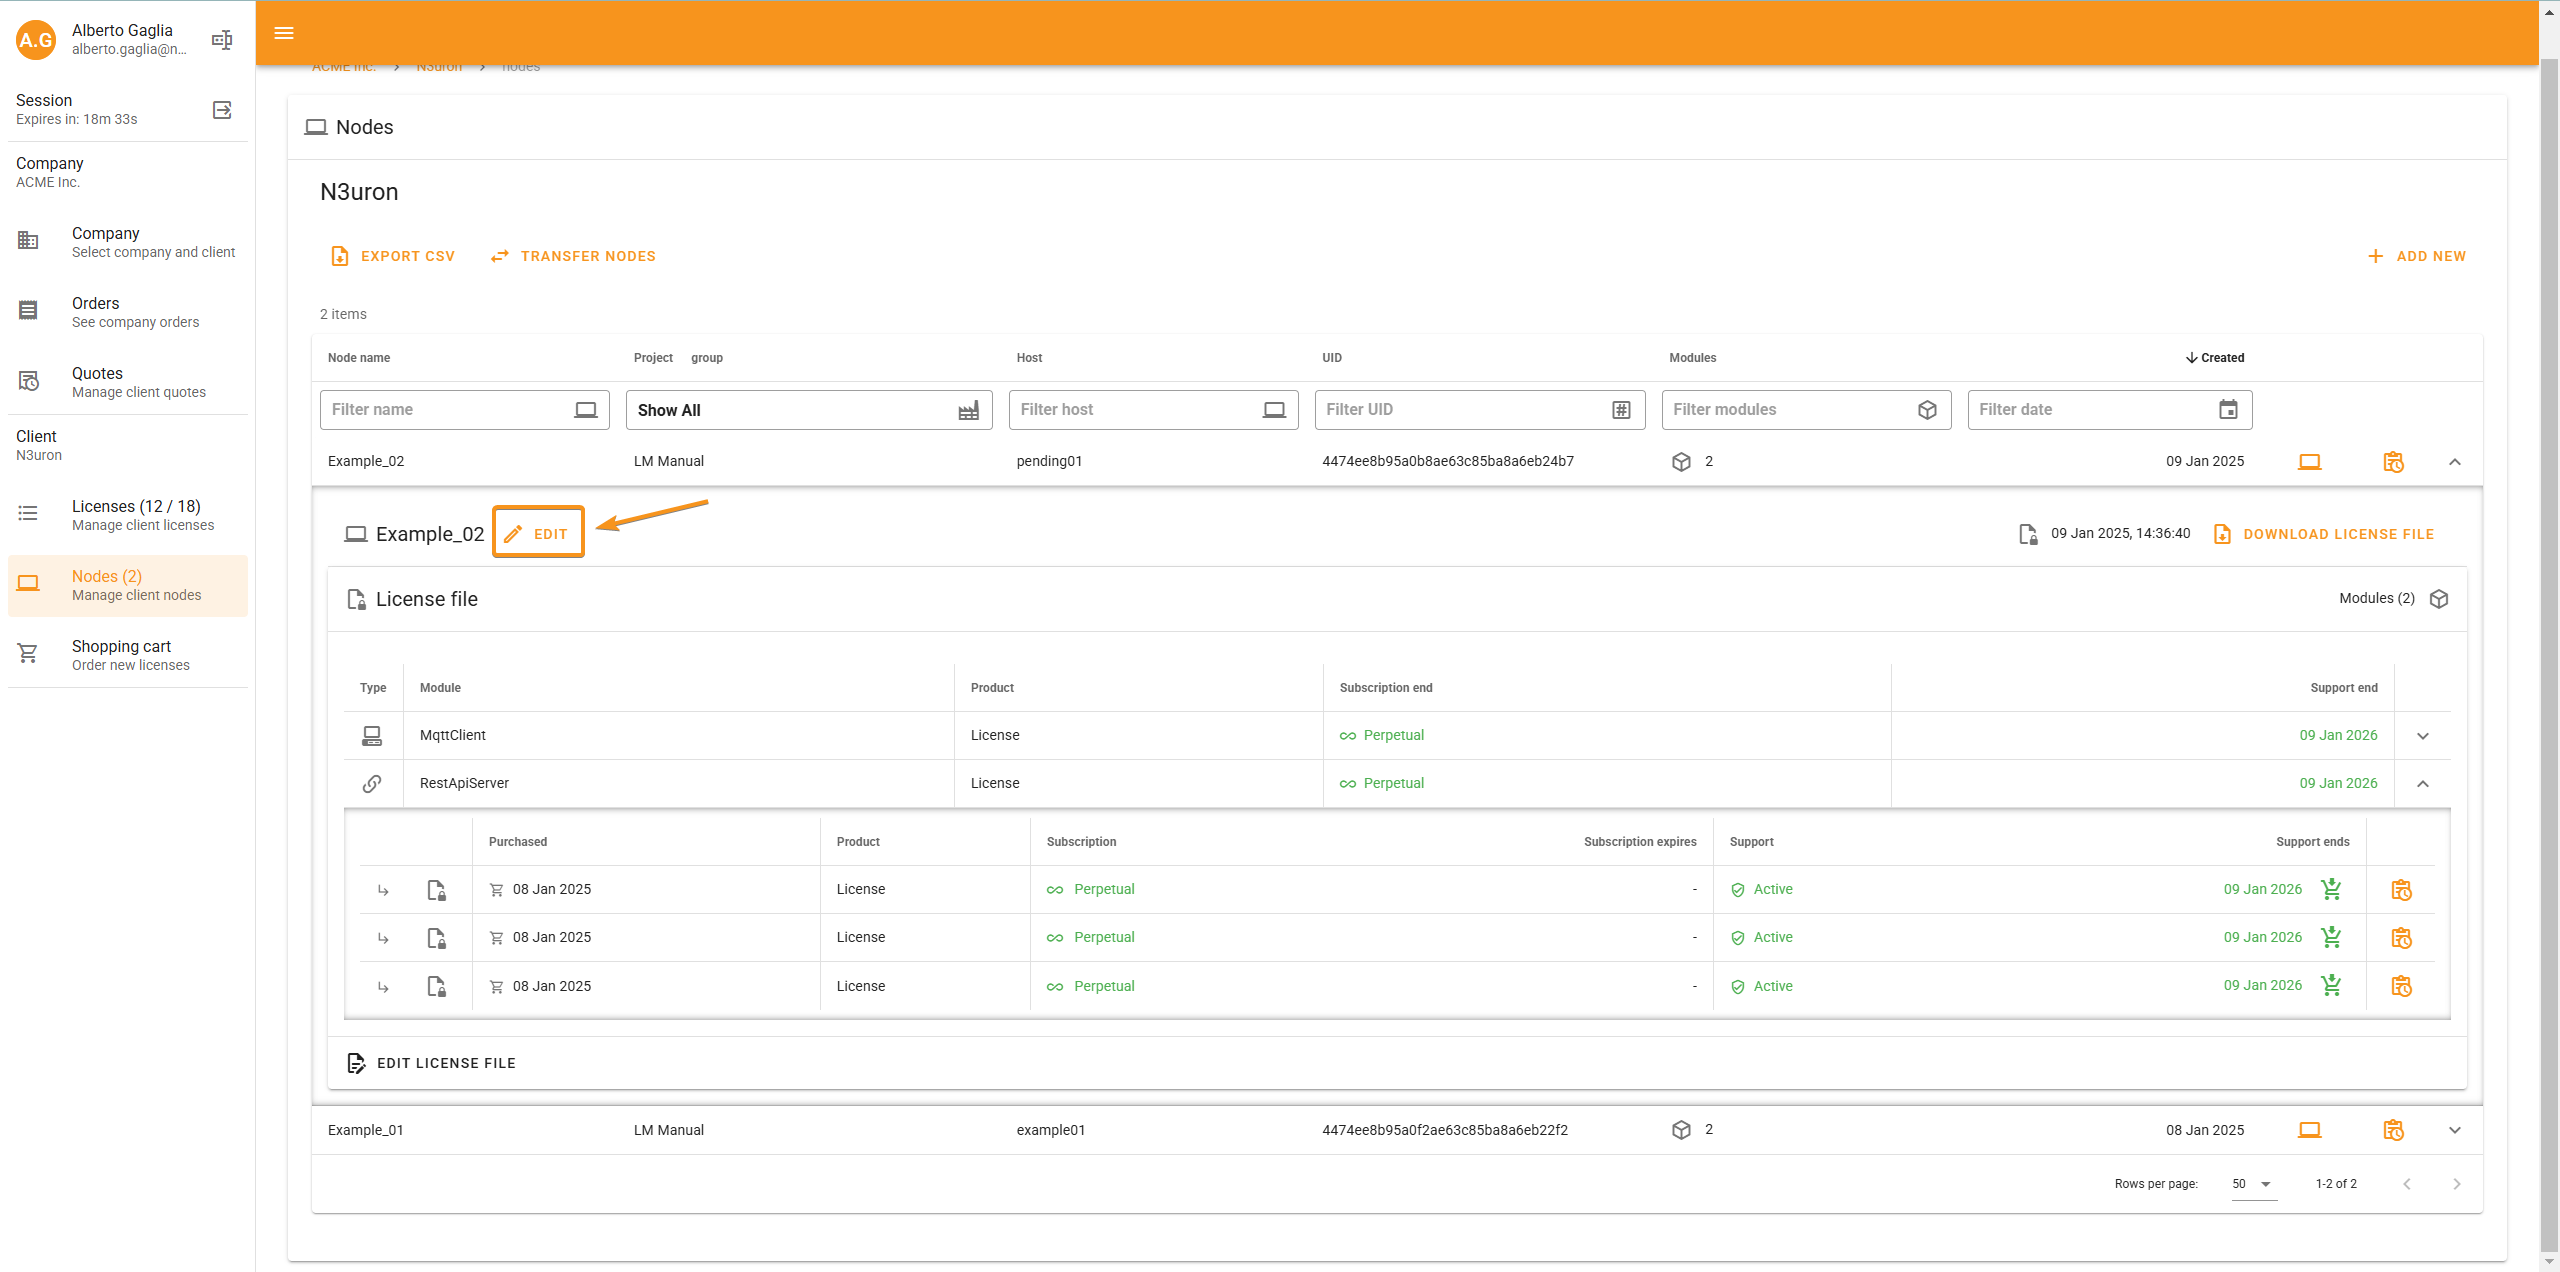
Navigate to the Nodes Section: Open the License Manager and go to the Nodes section.
Edit the Node: Expand the node you want to migrate and click on the Edit button to unlock the node's editable details.
Unlock Hostname and UID: Click Edit again to unlock the Hostname and UID fields.
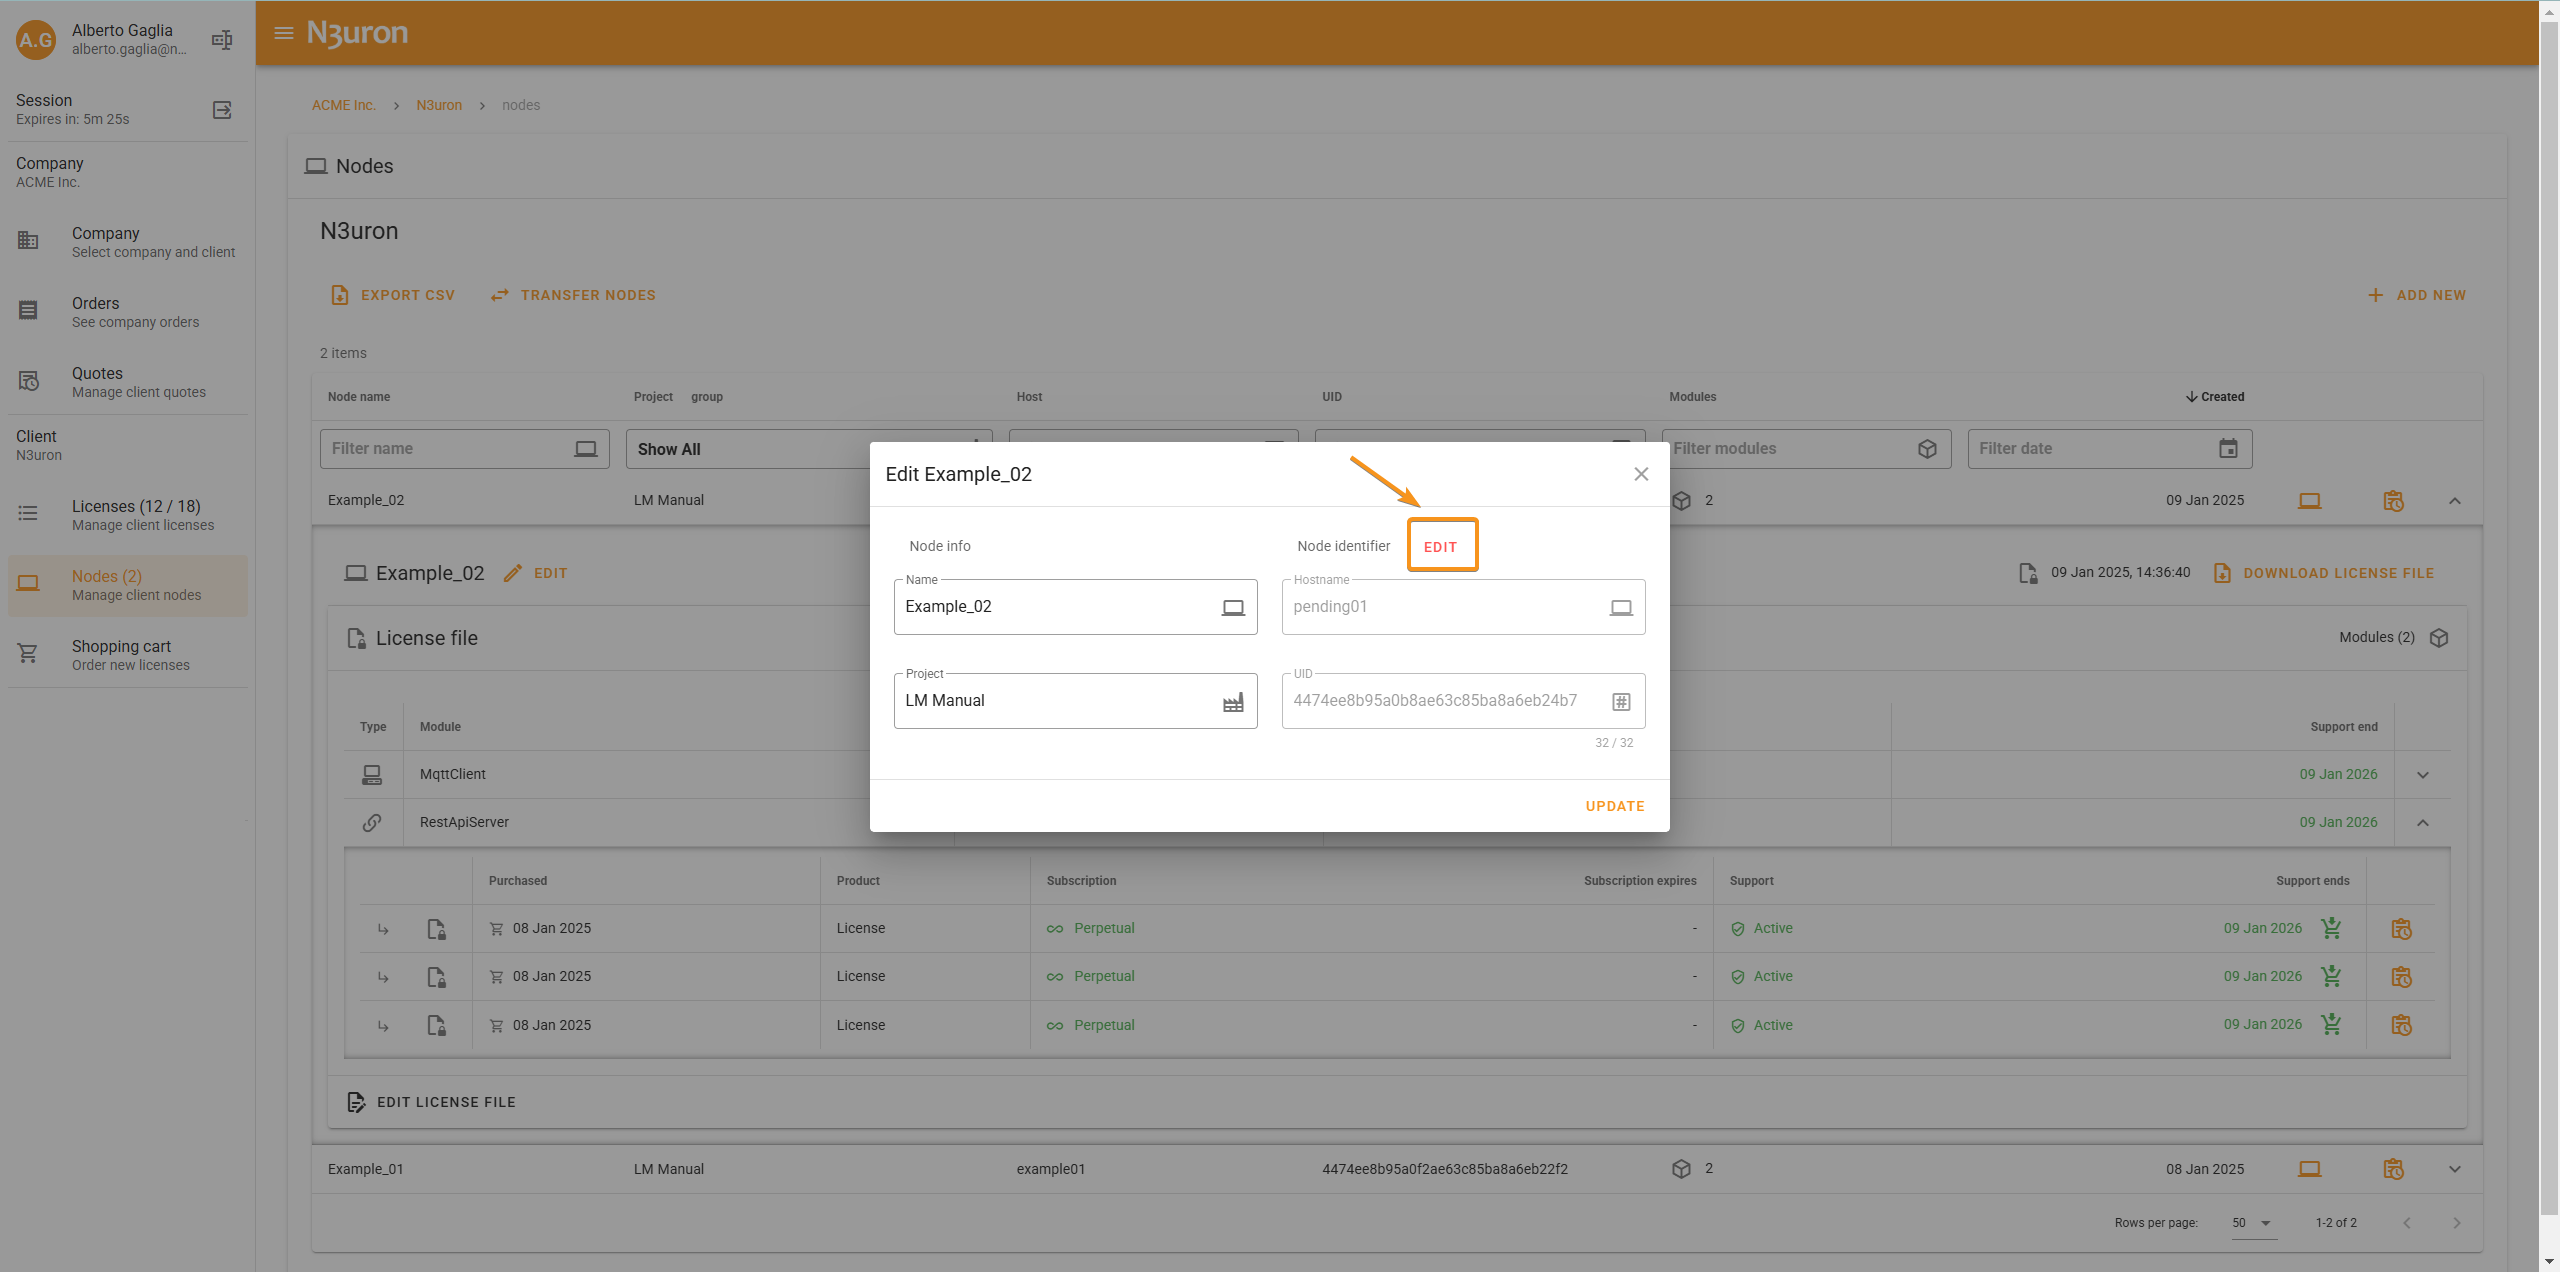
Update Node Details: Enter the new Hostname and/or UID.
Upload the Unlicensed File: Once you’ve made the necessary modifications, click on Update and the system will request the Unlicensed file.
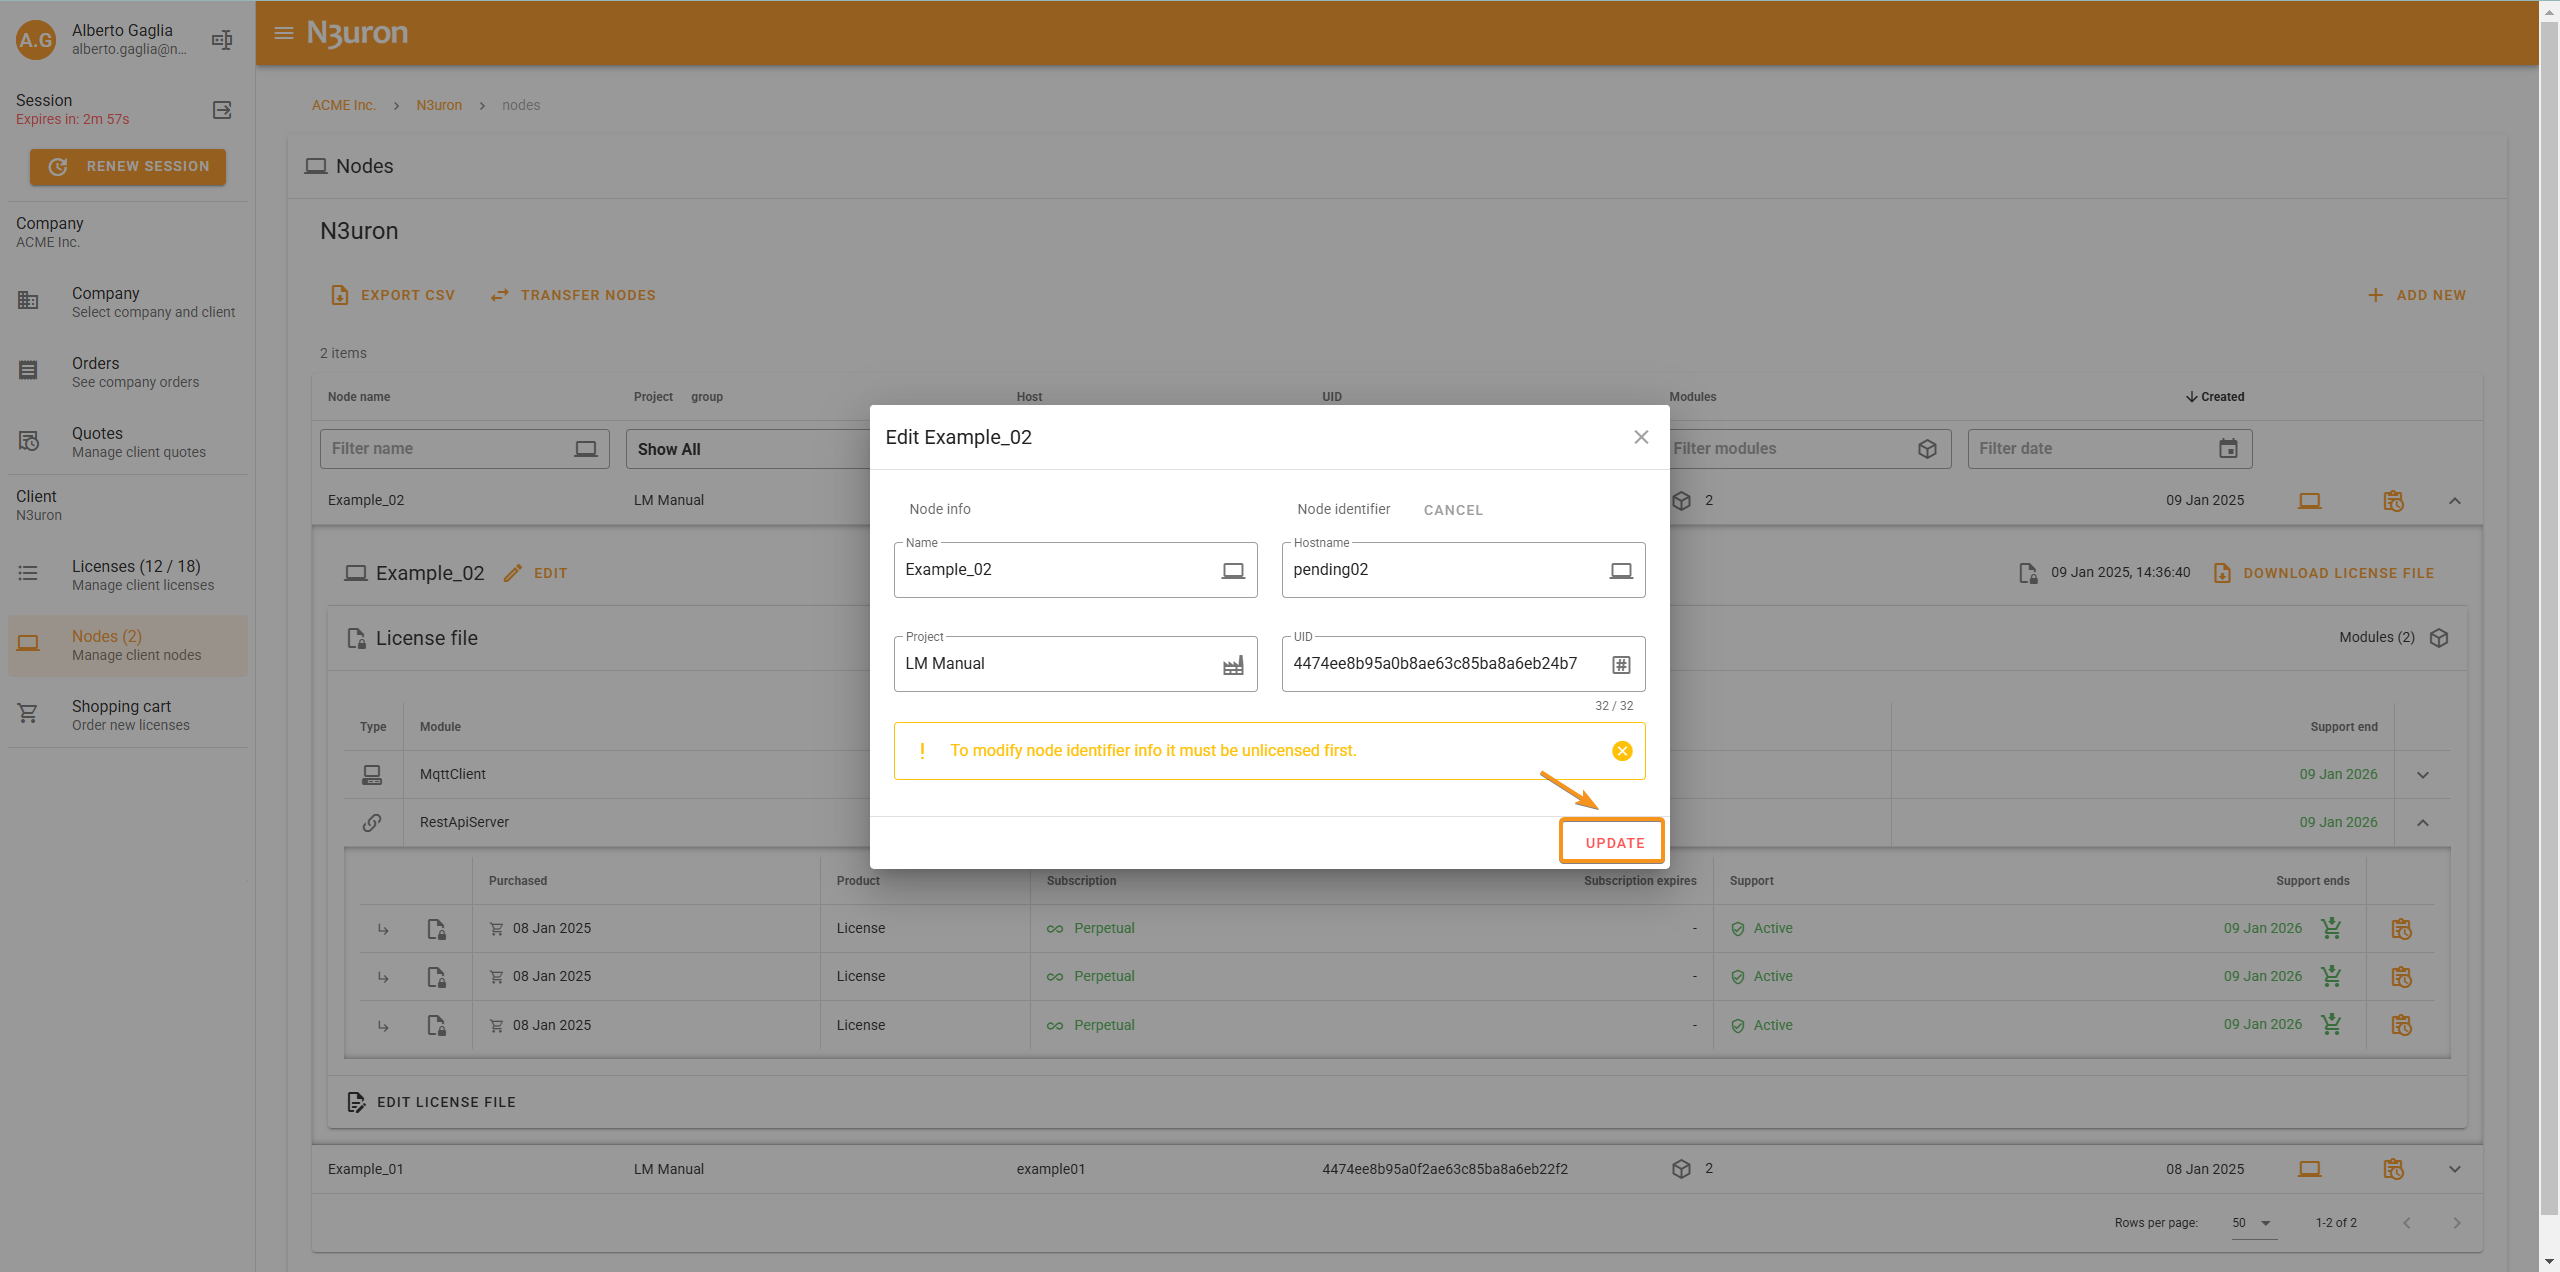
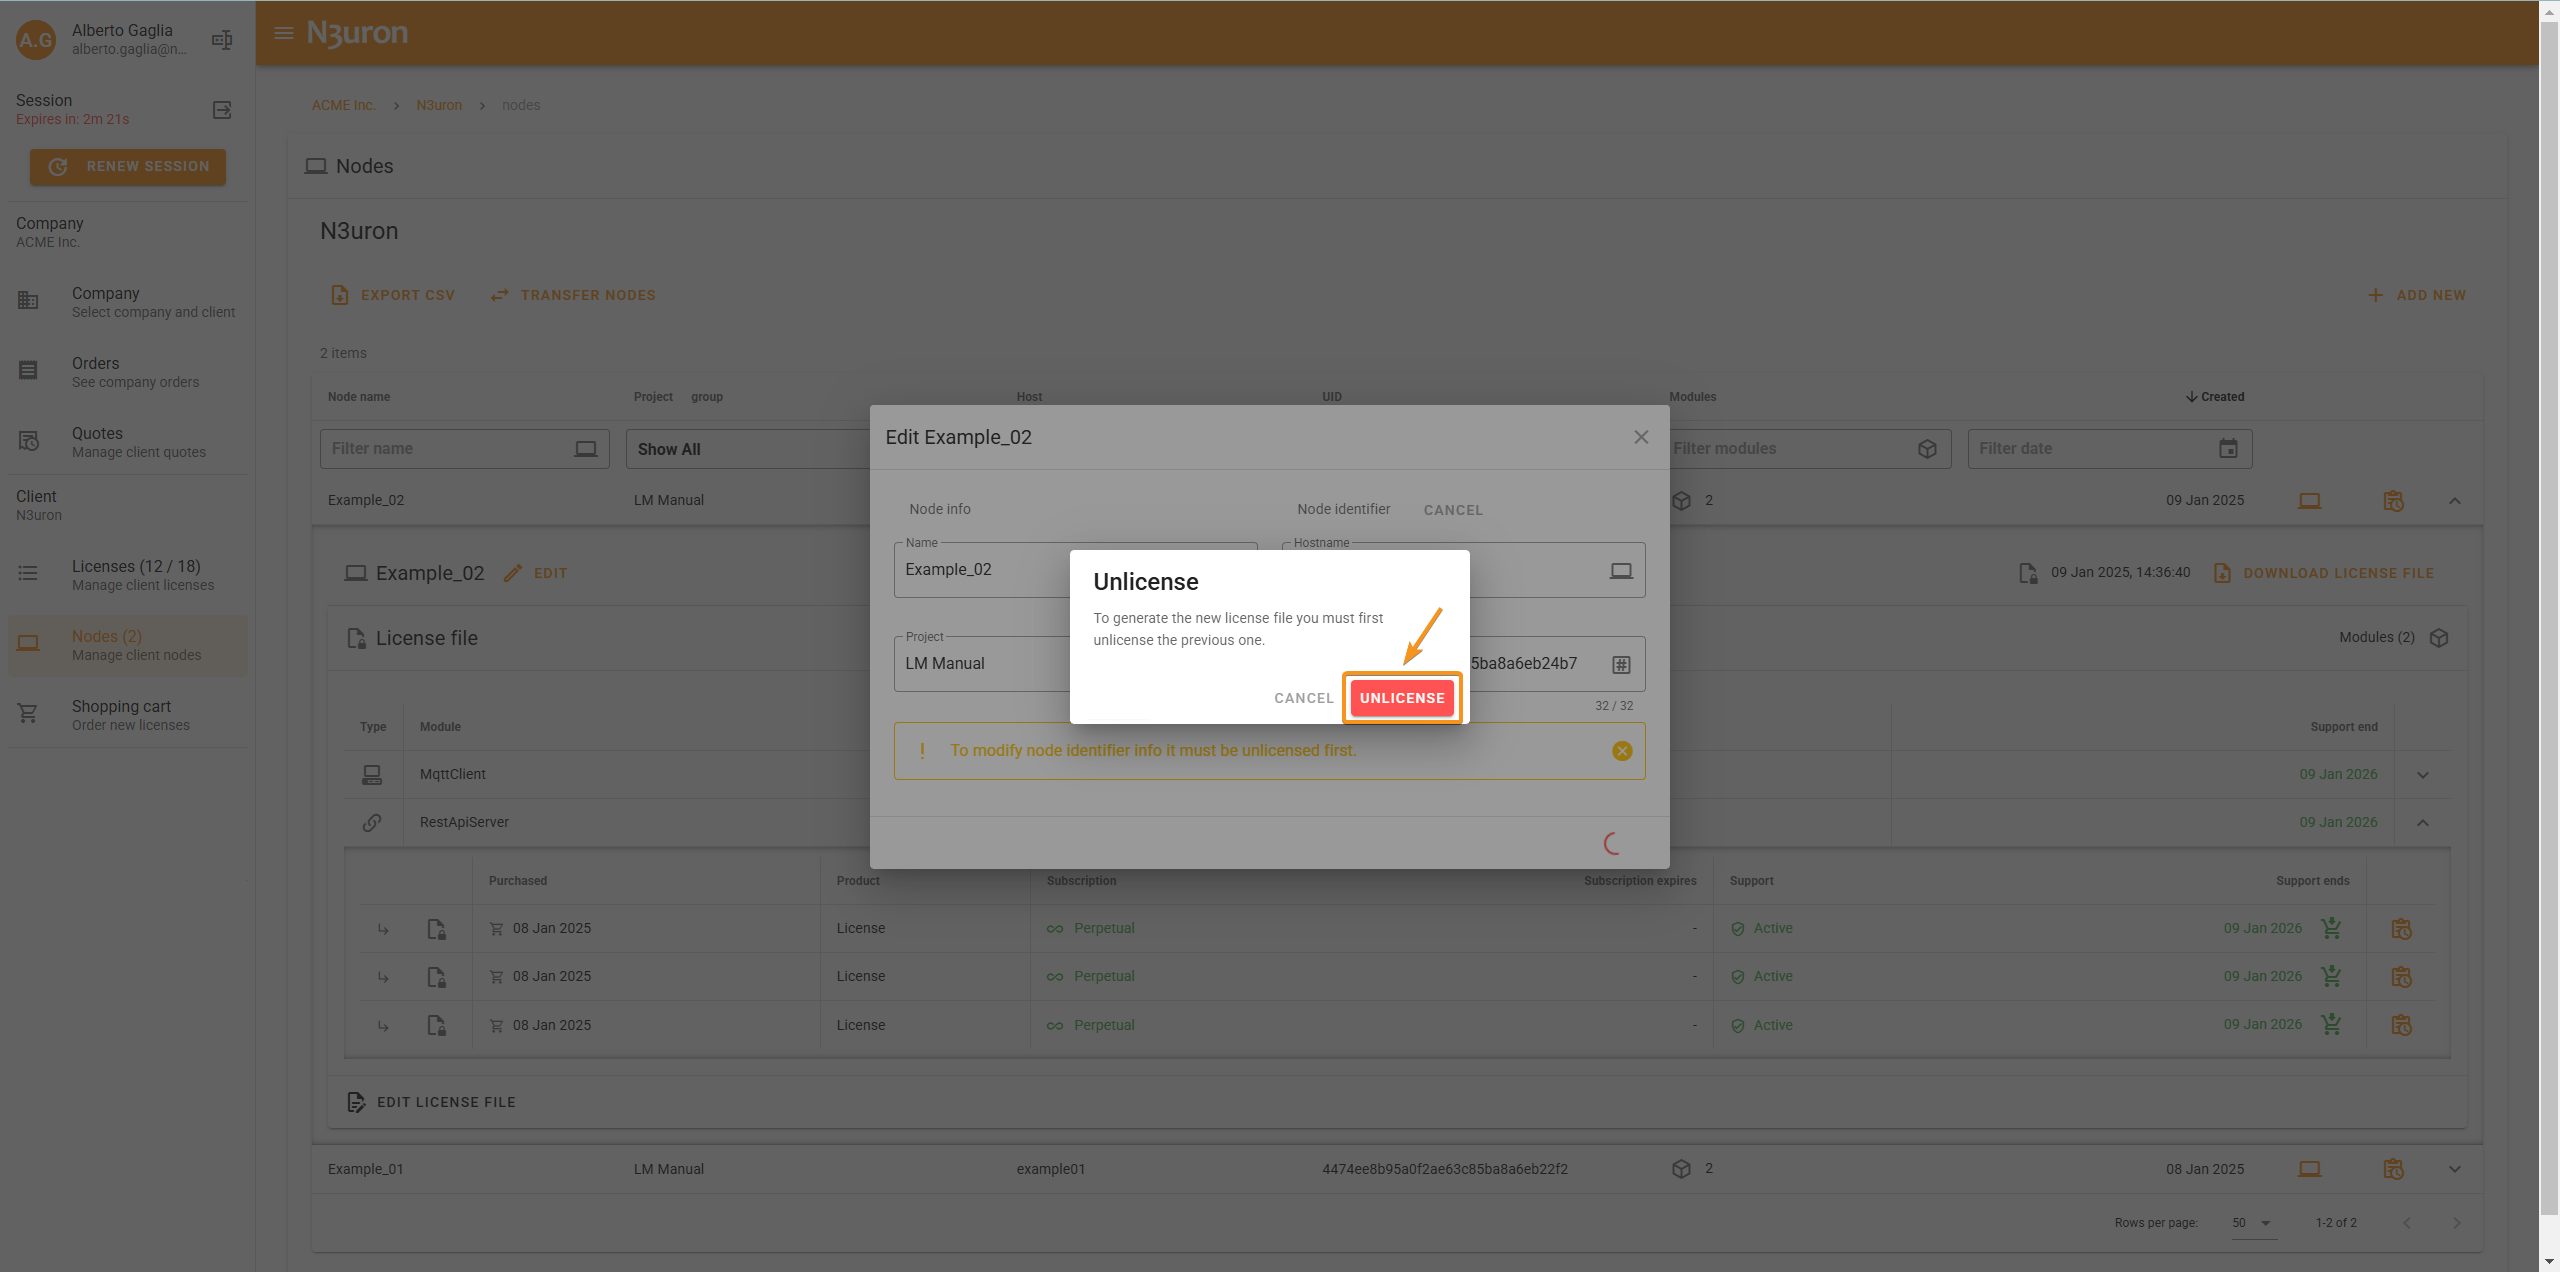
Complete the Migration: Upload the file, and the migration process will complete successfully.
Changing the UID in Version 1.20 and Earlier Due to Hardware Changes
In N3uron versions prior to 1.21, the UID was tied to the hardware. This means that a hardware change could result in a new UID. Unlike version 1.21, it is not possible to obtain an Unlicensed file in earlier versions. Therefore, the process to update the UID in the license file requires a License Migration Document, which must be digitally signed.
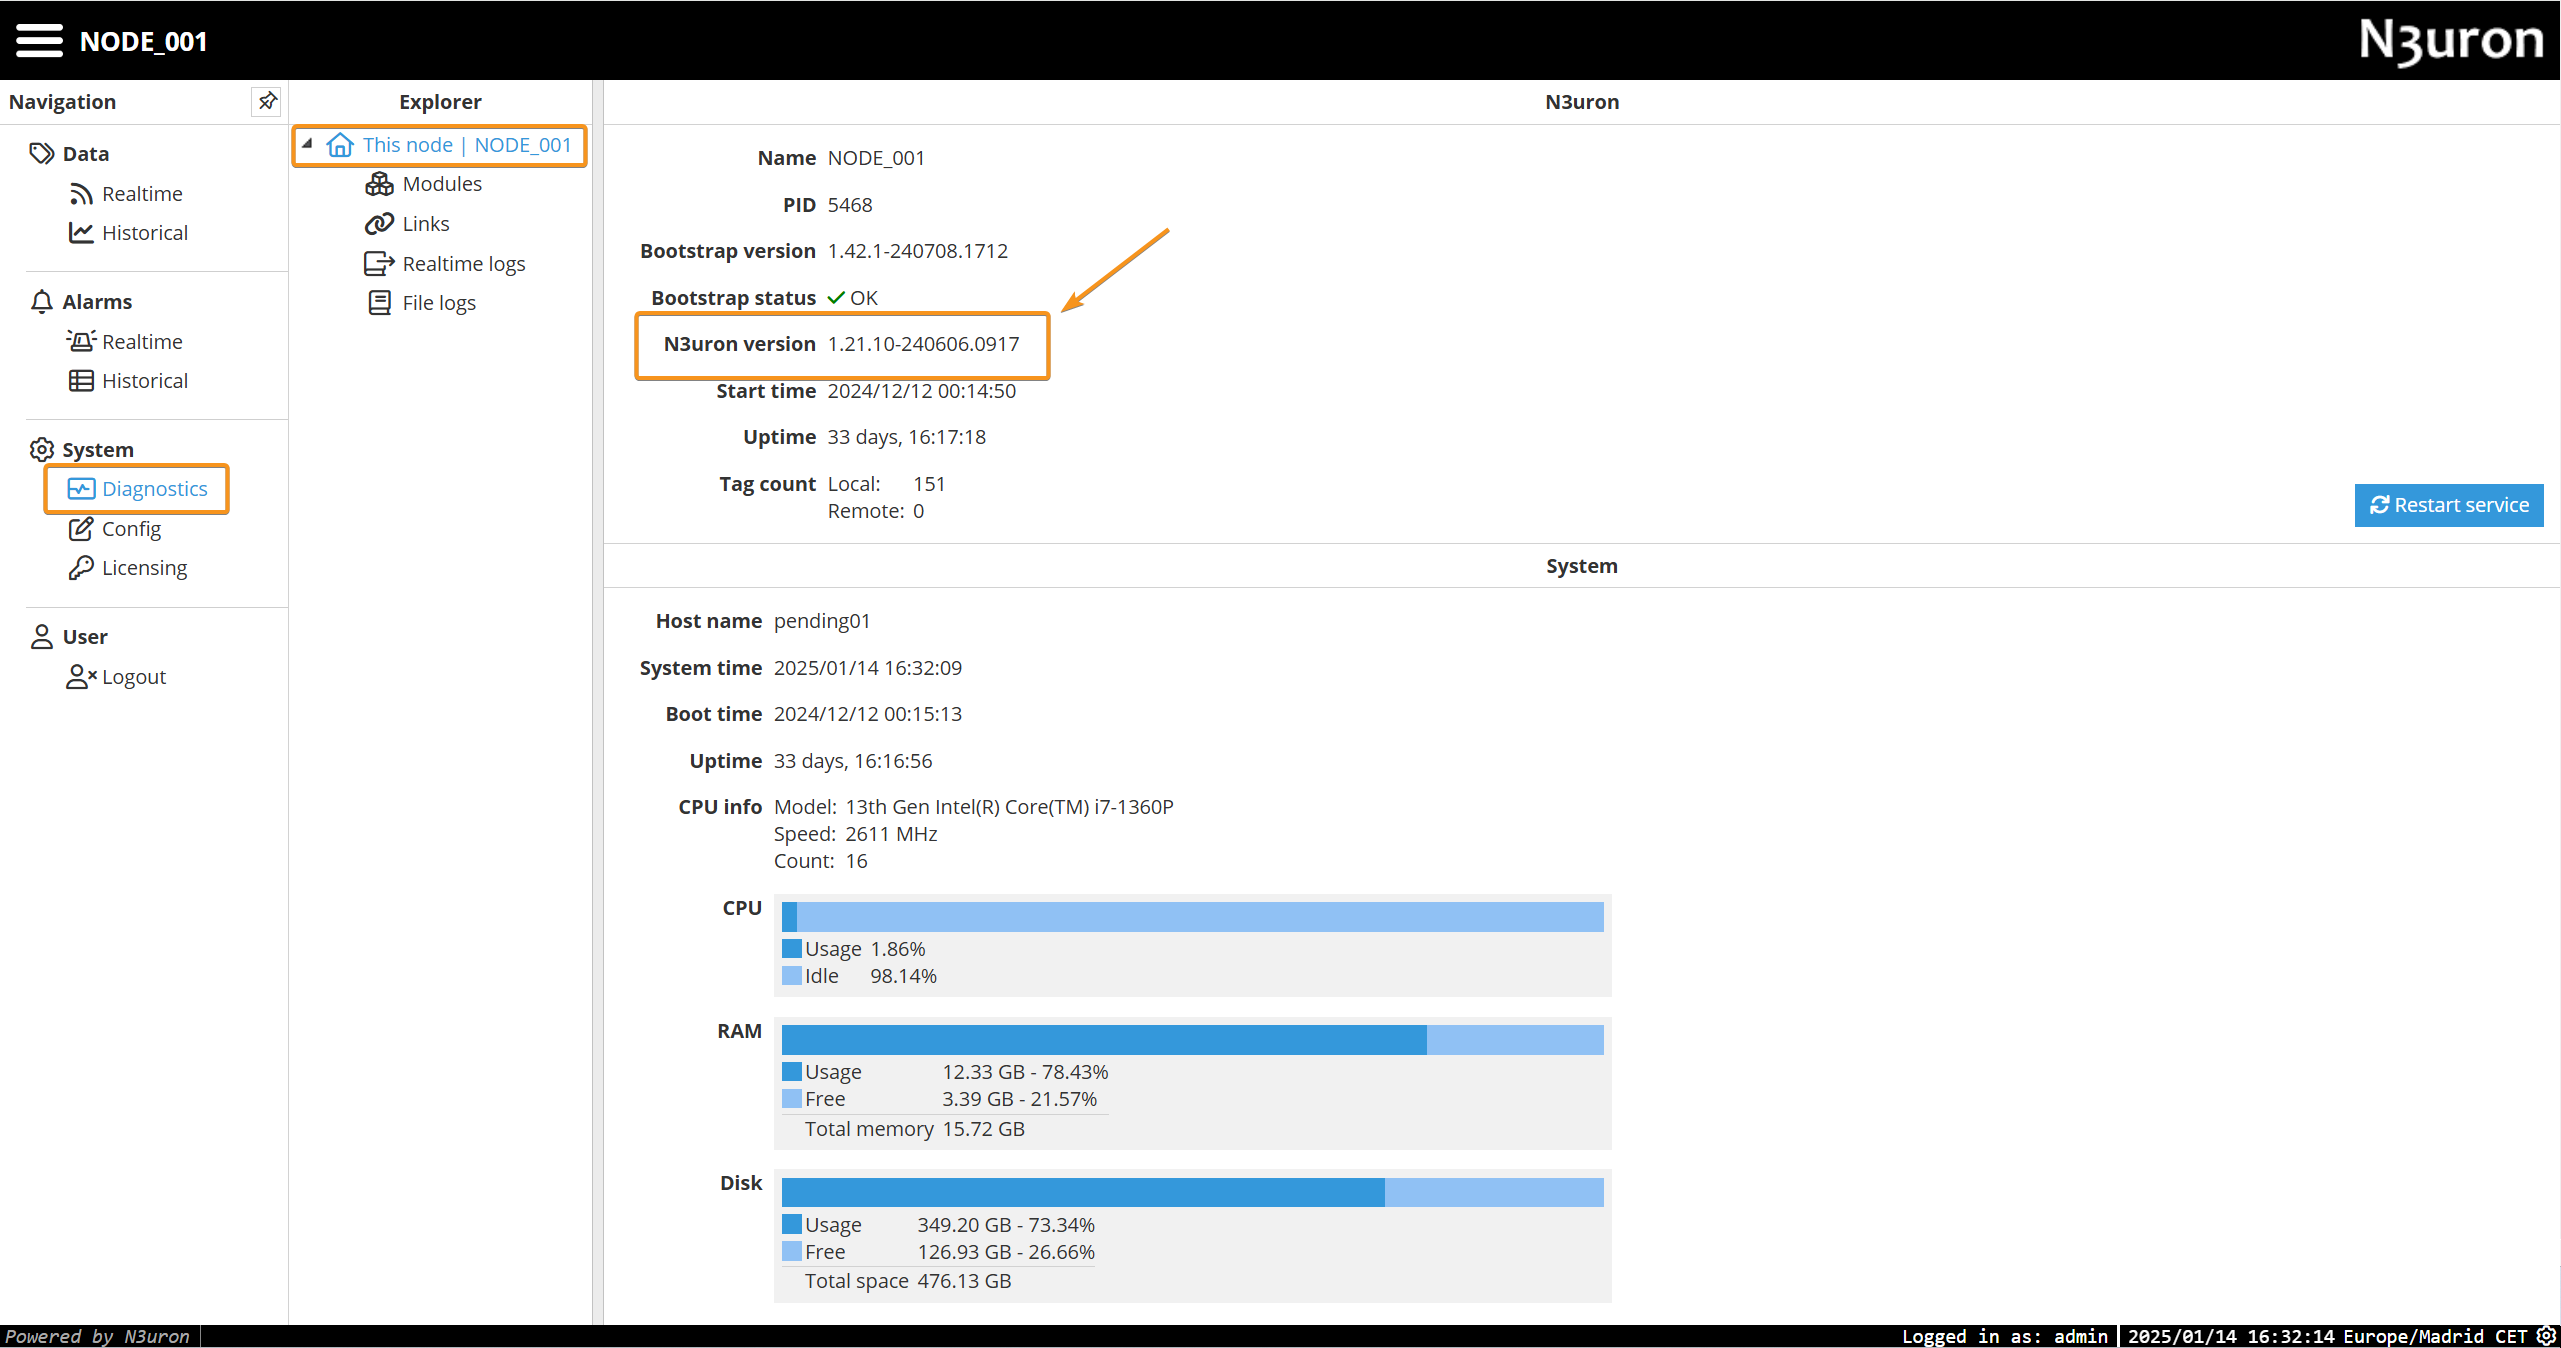
Additionally, it is necessary to provide a screenshot of the Diagnostics/This Node section, ensuring that the software version running on the node is clearly visible, as well as a screenshot of the Licensing section, where both the new UID and the error in the license can be identified.
The License Migration Document can be downloaded directly here:
Recovering a License in Case of Machine Damage
In situations where the machine hosting the licenses is damaged and it is not possible to perform an Unlicense, the procedure to migrate the license to a new machine involves using the License Migration Document. This document must be digitally signed.
The License Migration Document can be downloaded directly here:
Converting Module Type
From version 1.21 onwards, it is possible to exchange one module type for another. For instance, you can convert an OPC DA Client to an OPC UA Client. Similarly, a module with Remote Tags access can be converted into three modules with Local Tags access, and vice versa.
To perform this conversion, all modules involved must have active Support and Maintenance (S&M).
Let’s go through an example of converting an OPC DA Client module into an OPC UA Client module:
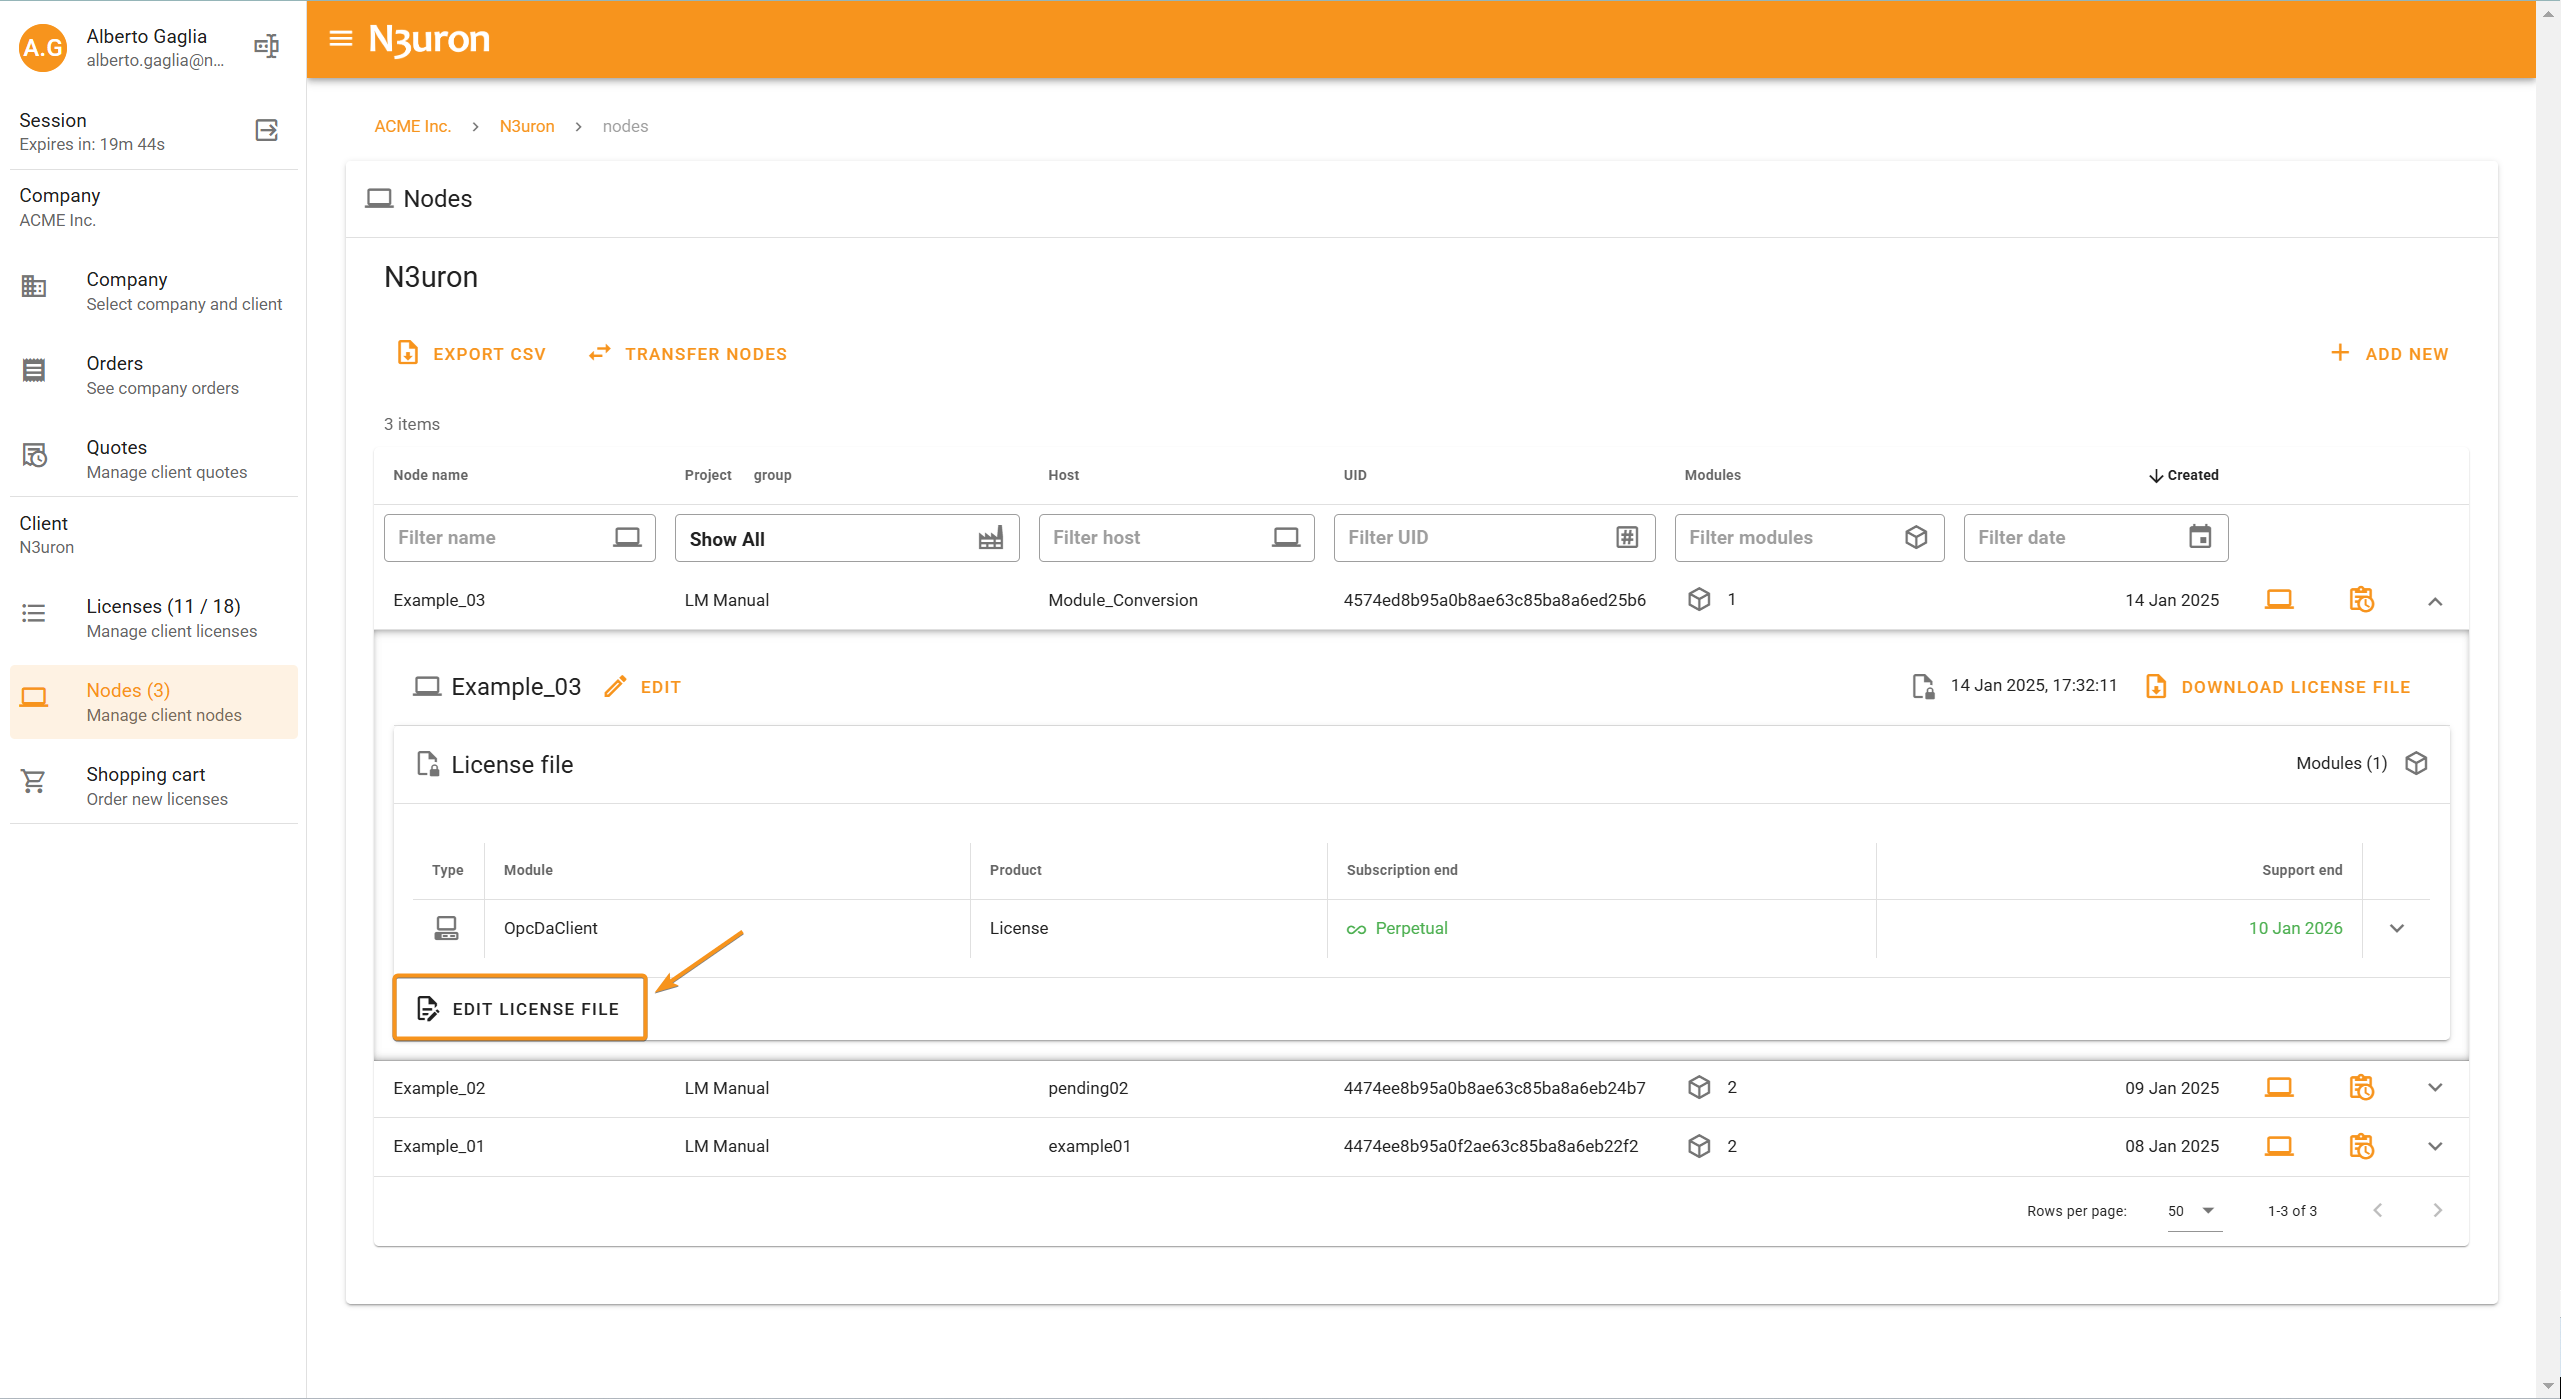
Go to the License Manager and navigate to the Nodes section. Locate the node you want to edit and click on Edit License File.
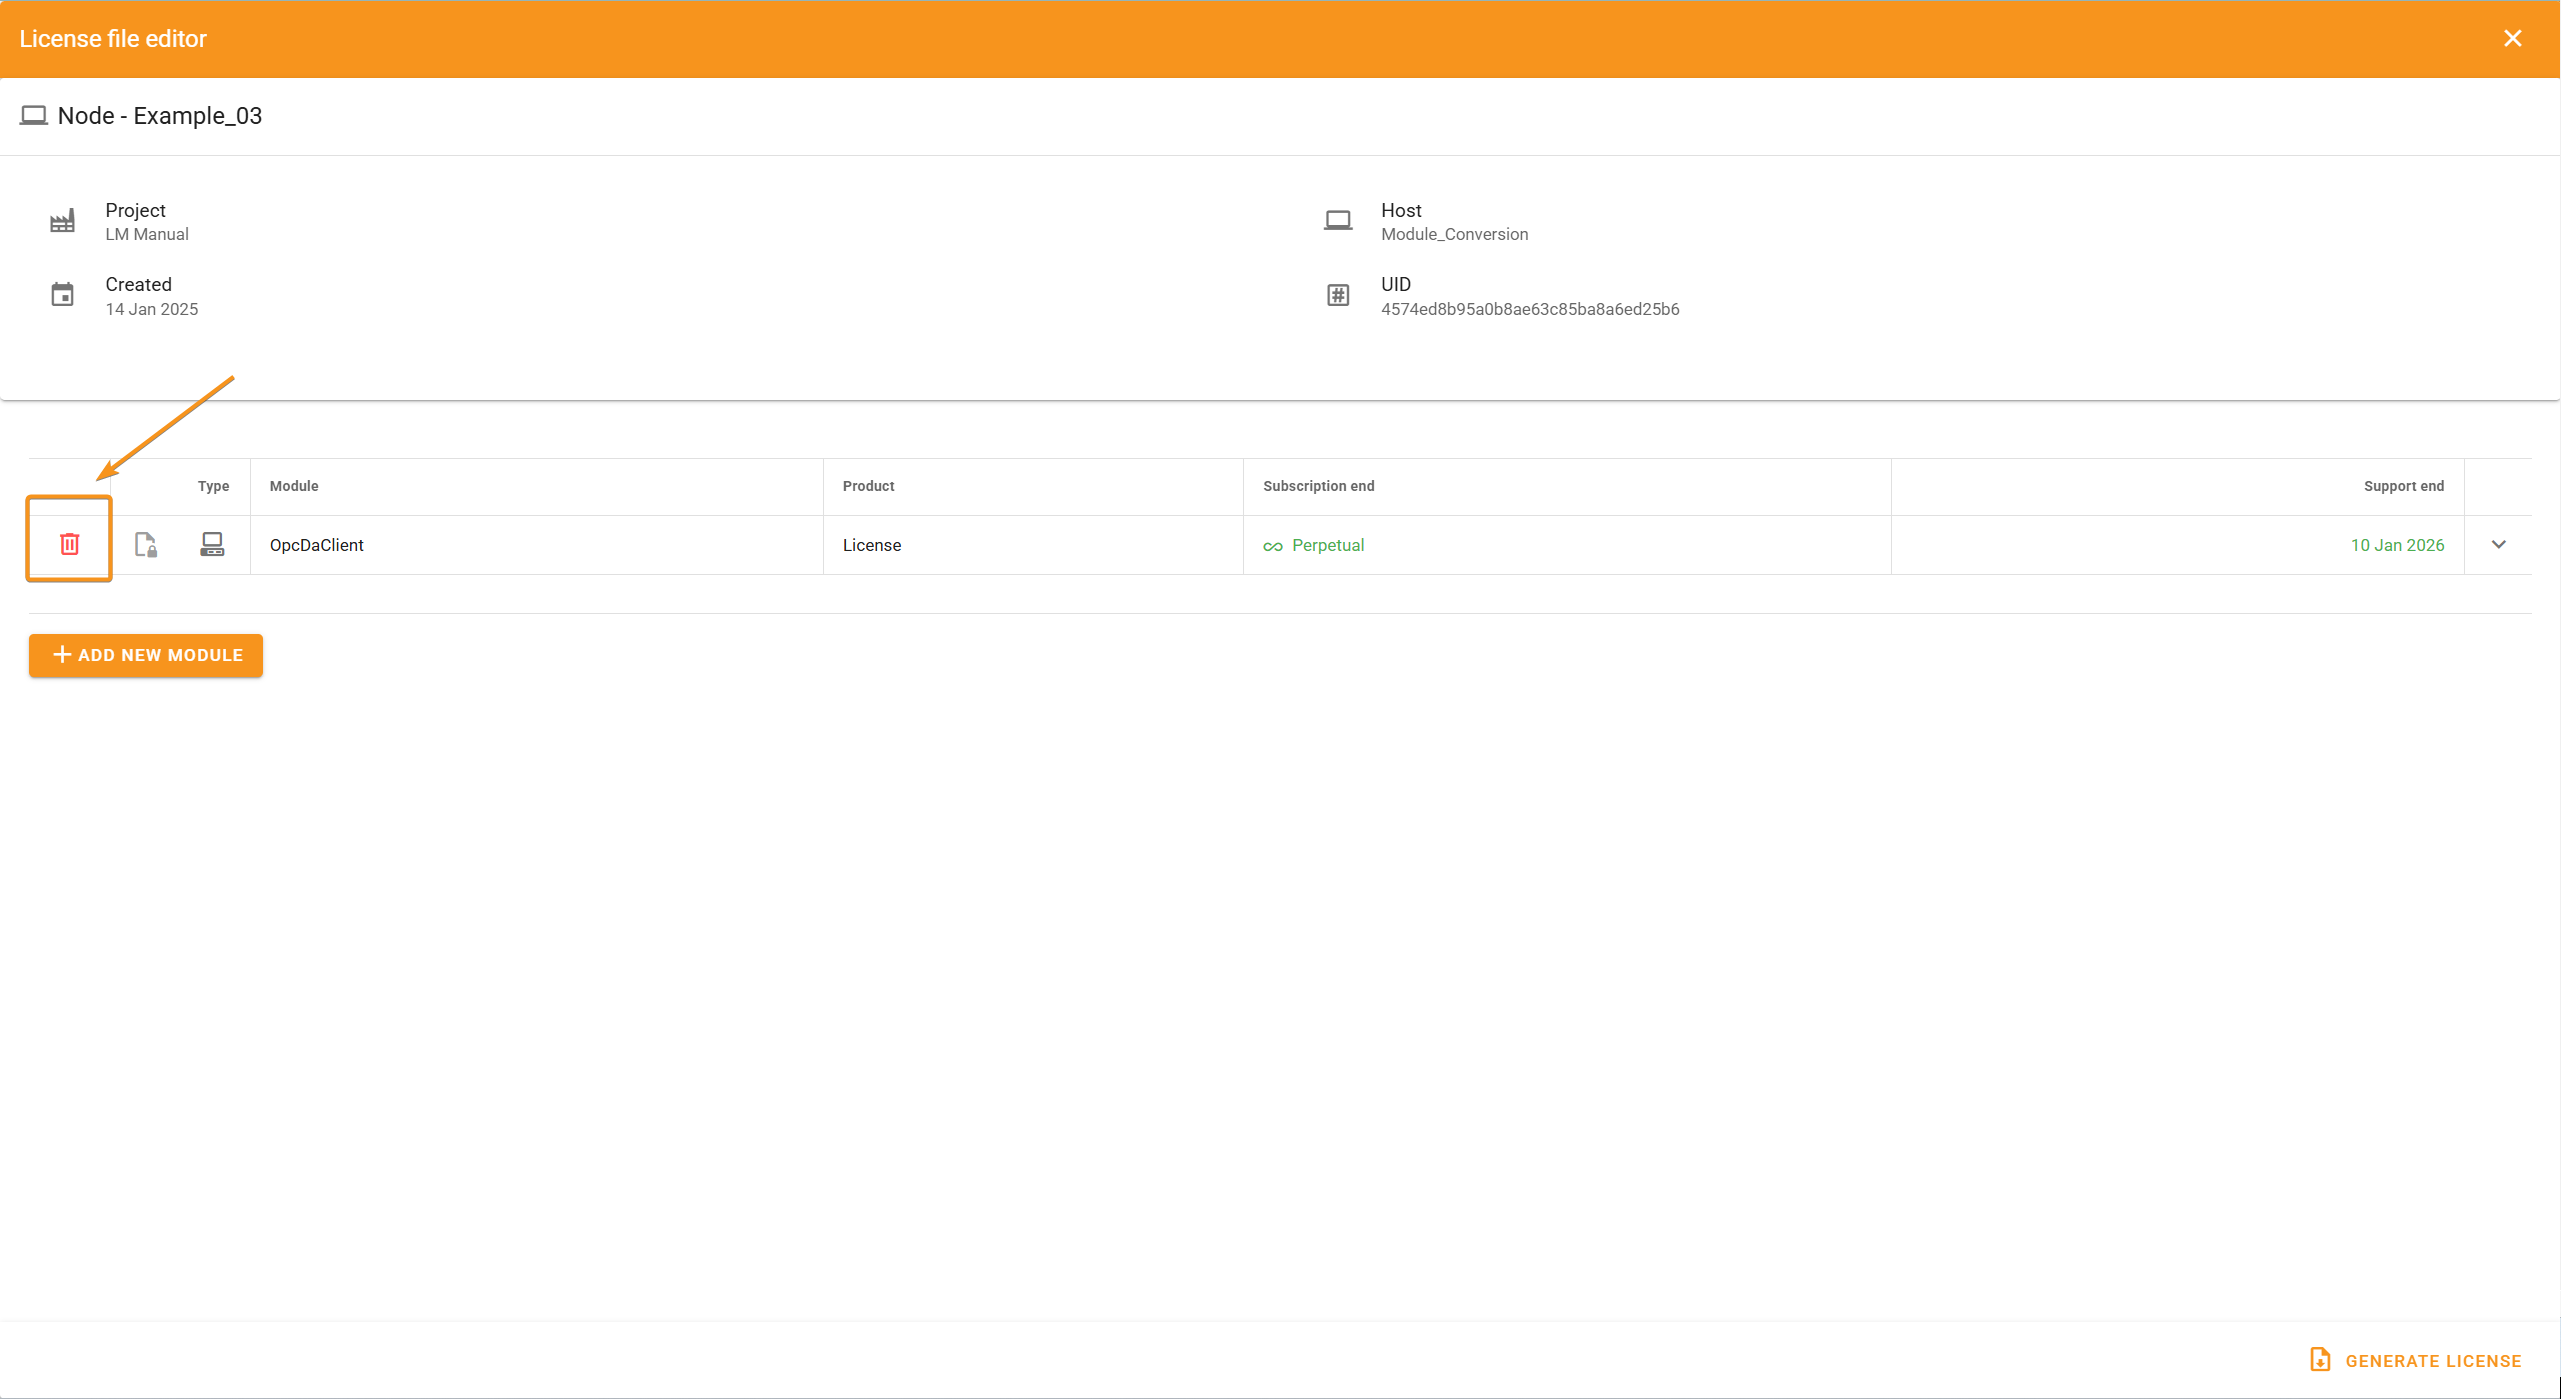
Inside the License File Editor, locate the OPC DA Client module.
Click on the trash bin icon to the left of the module.
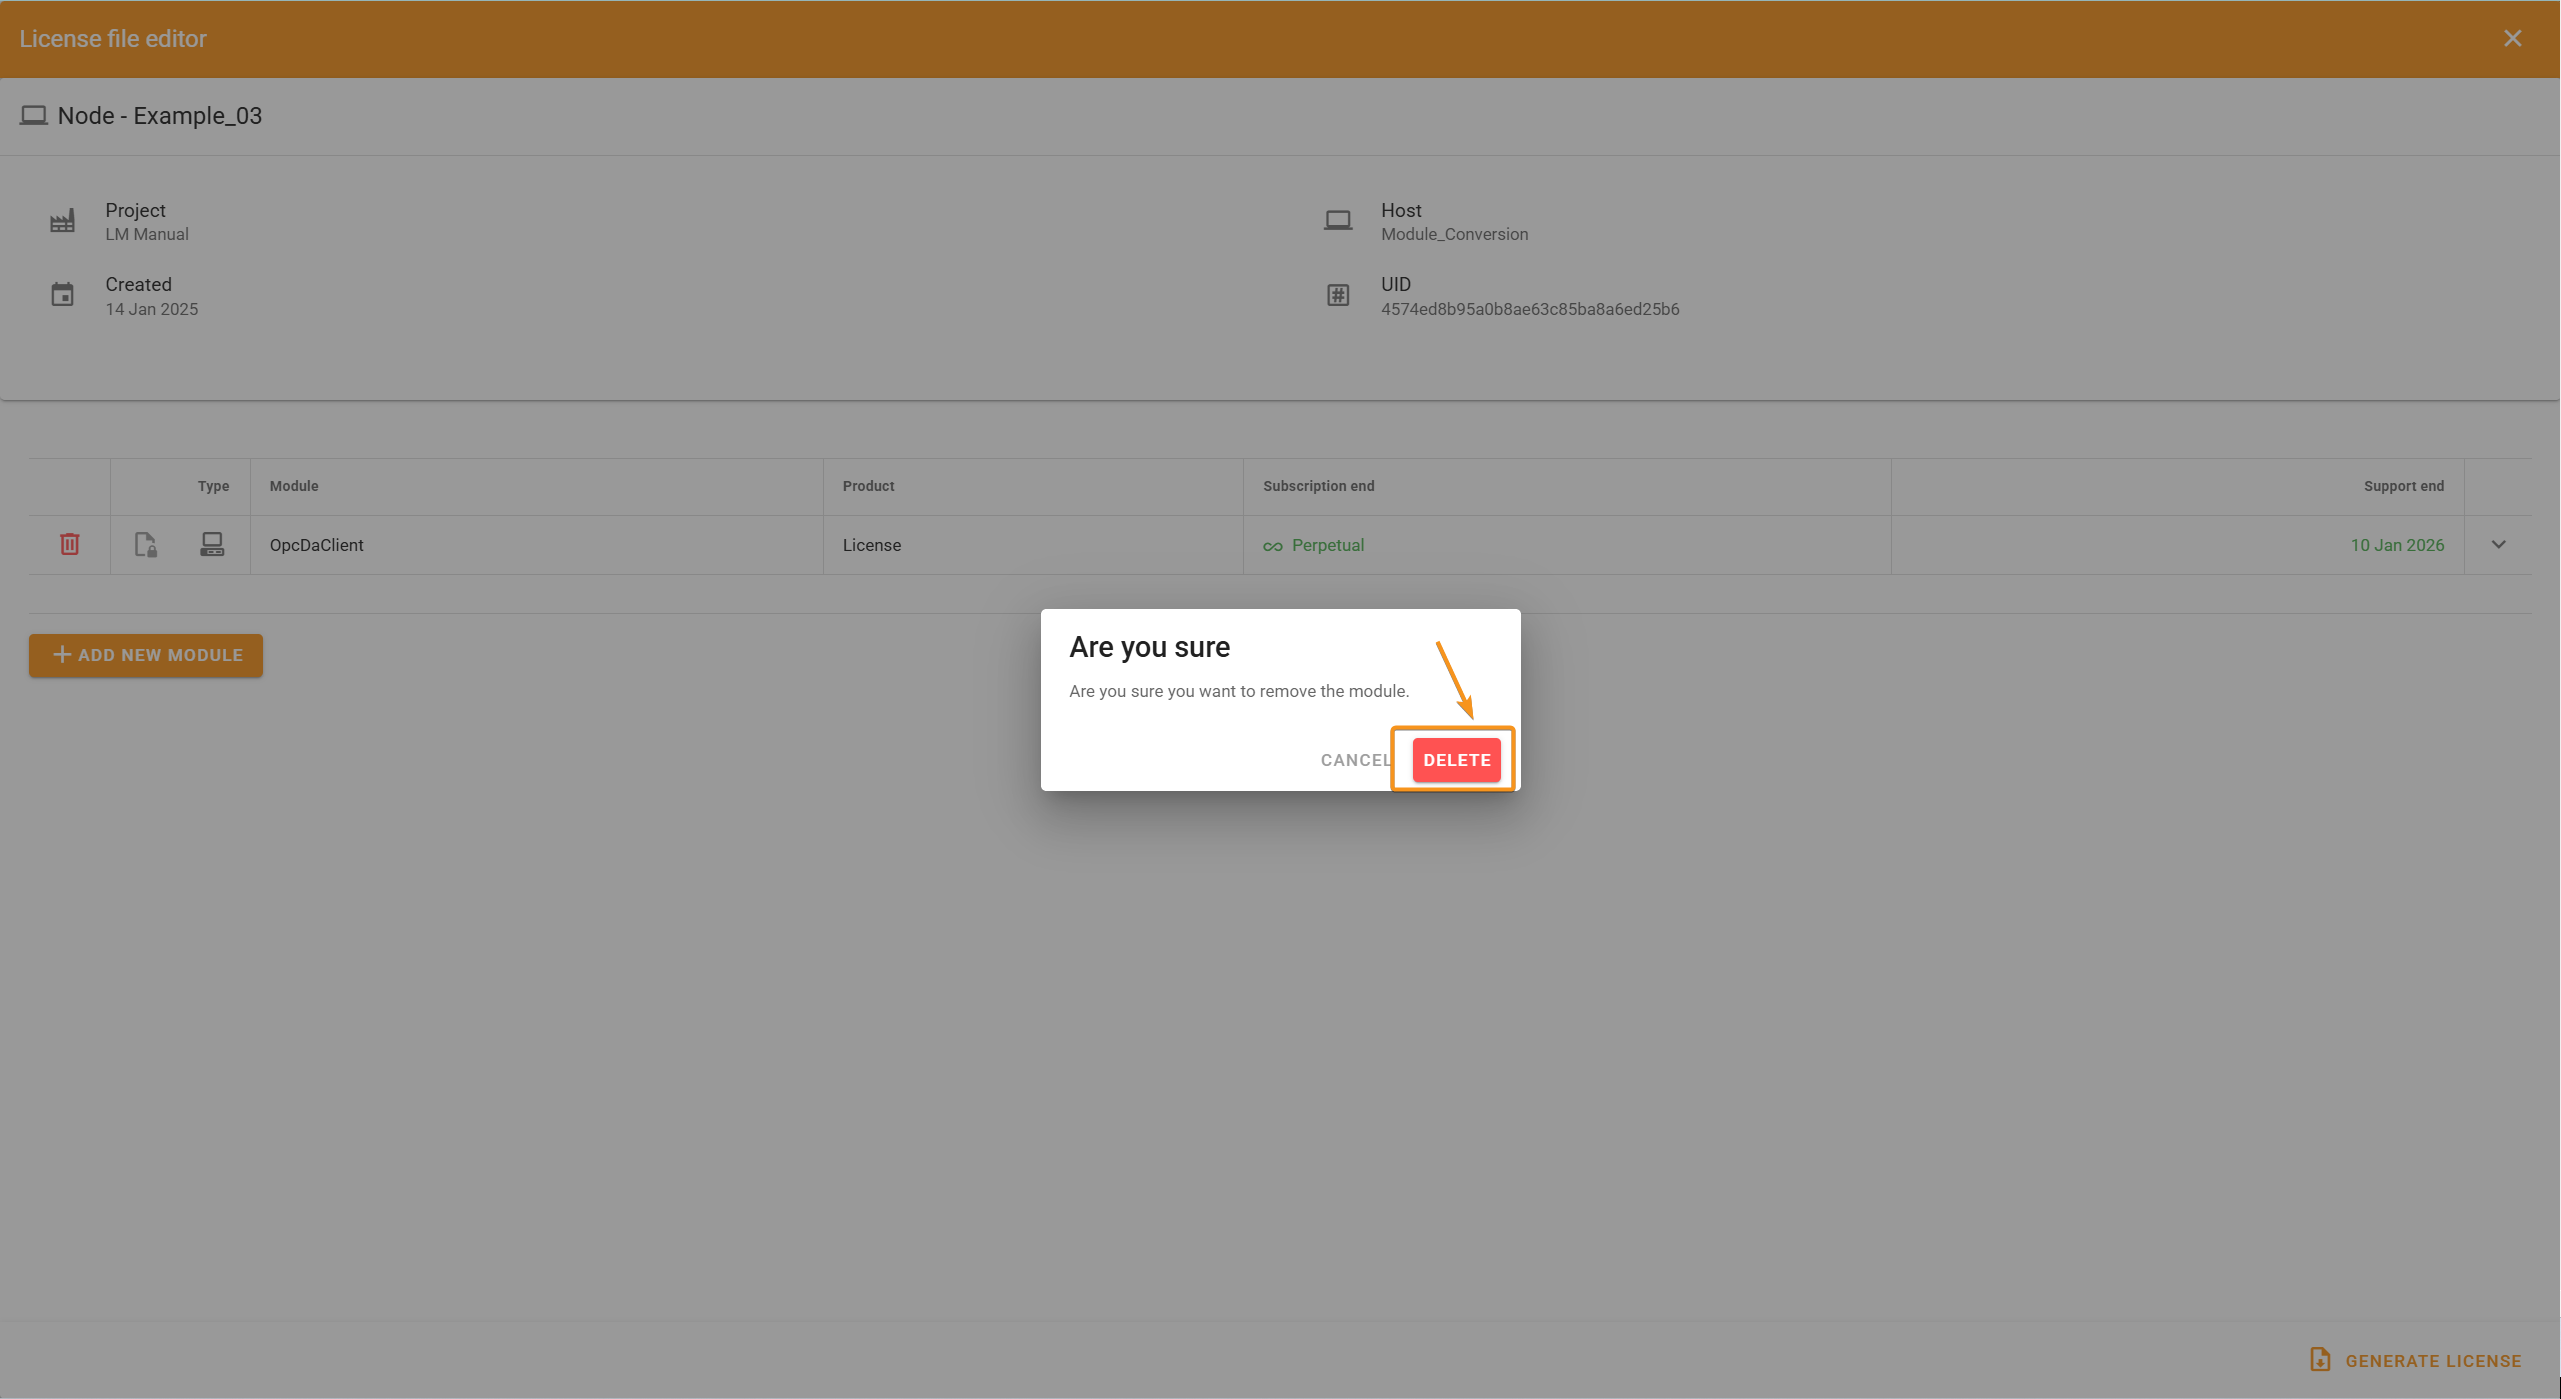
A pop-up will appear asking for confirmation. Click Delete to proceed.
Click on + Add New Module and select OPC UA Client from the list.
Click on the selected module and then click Add.
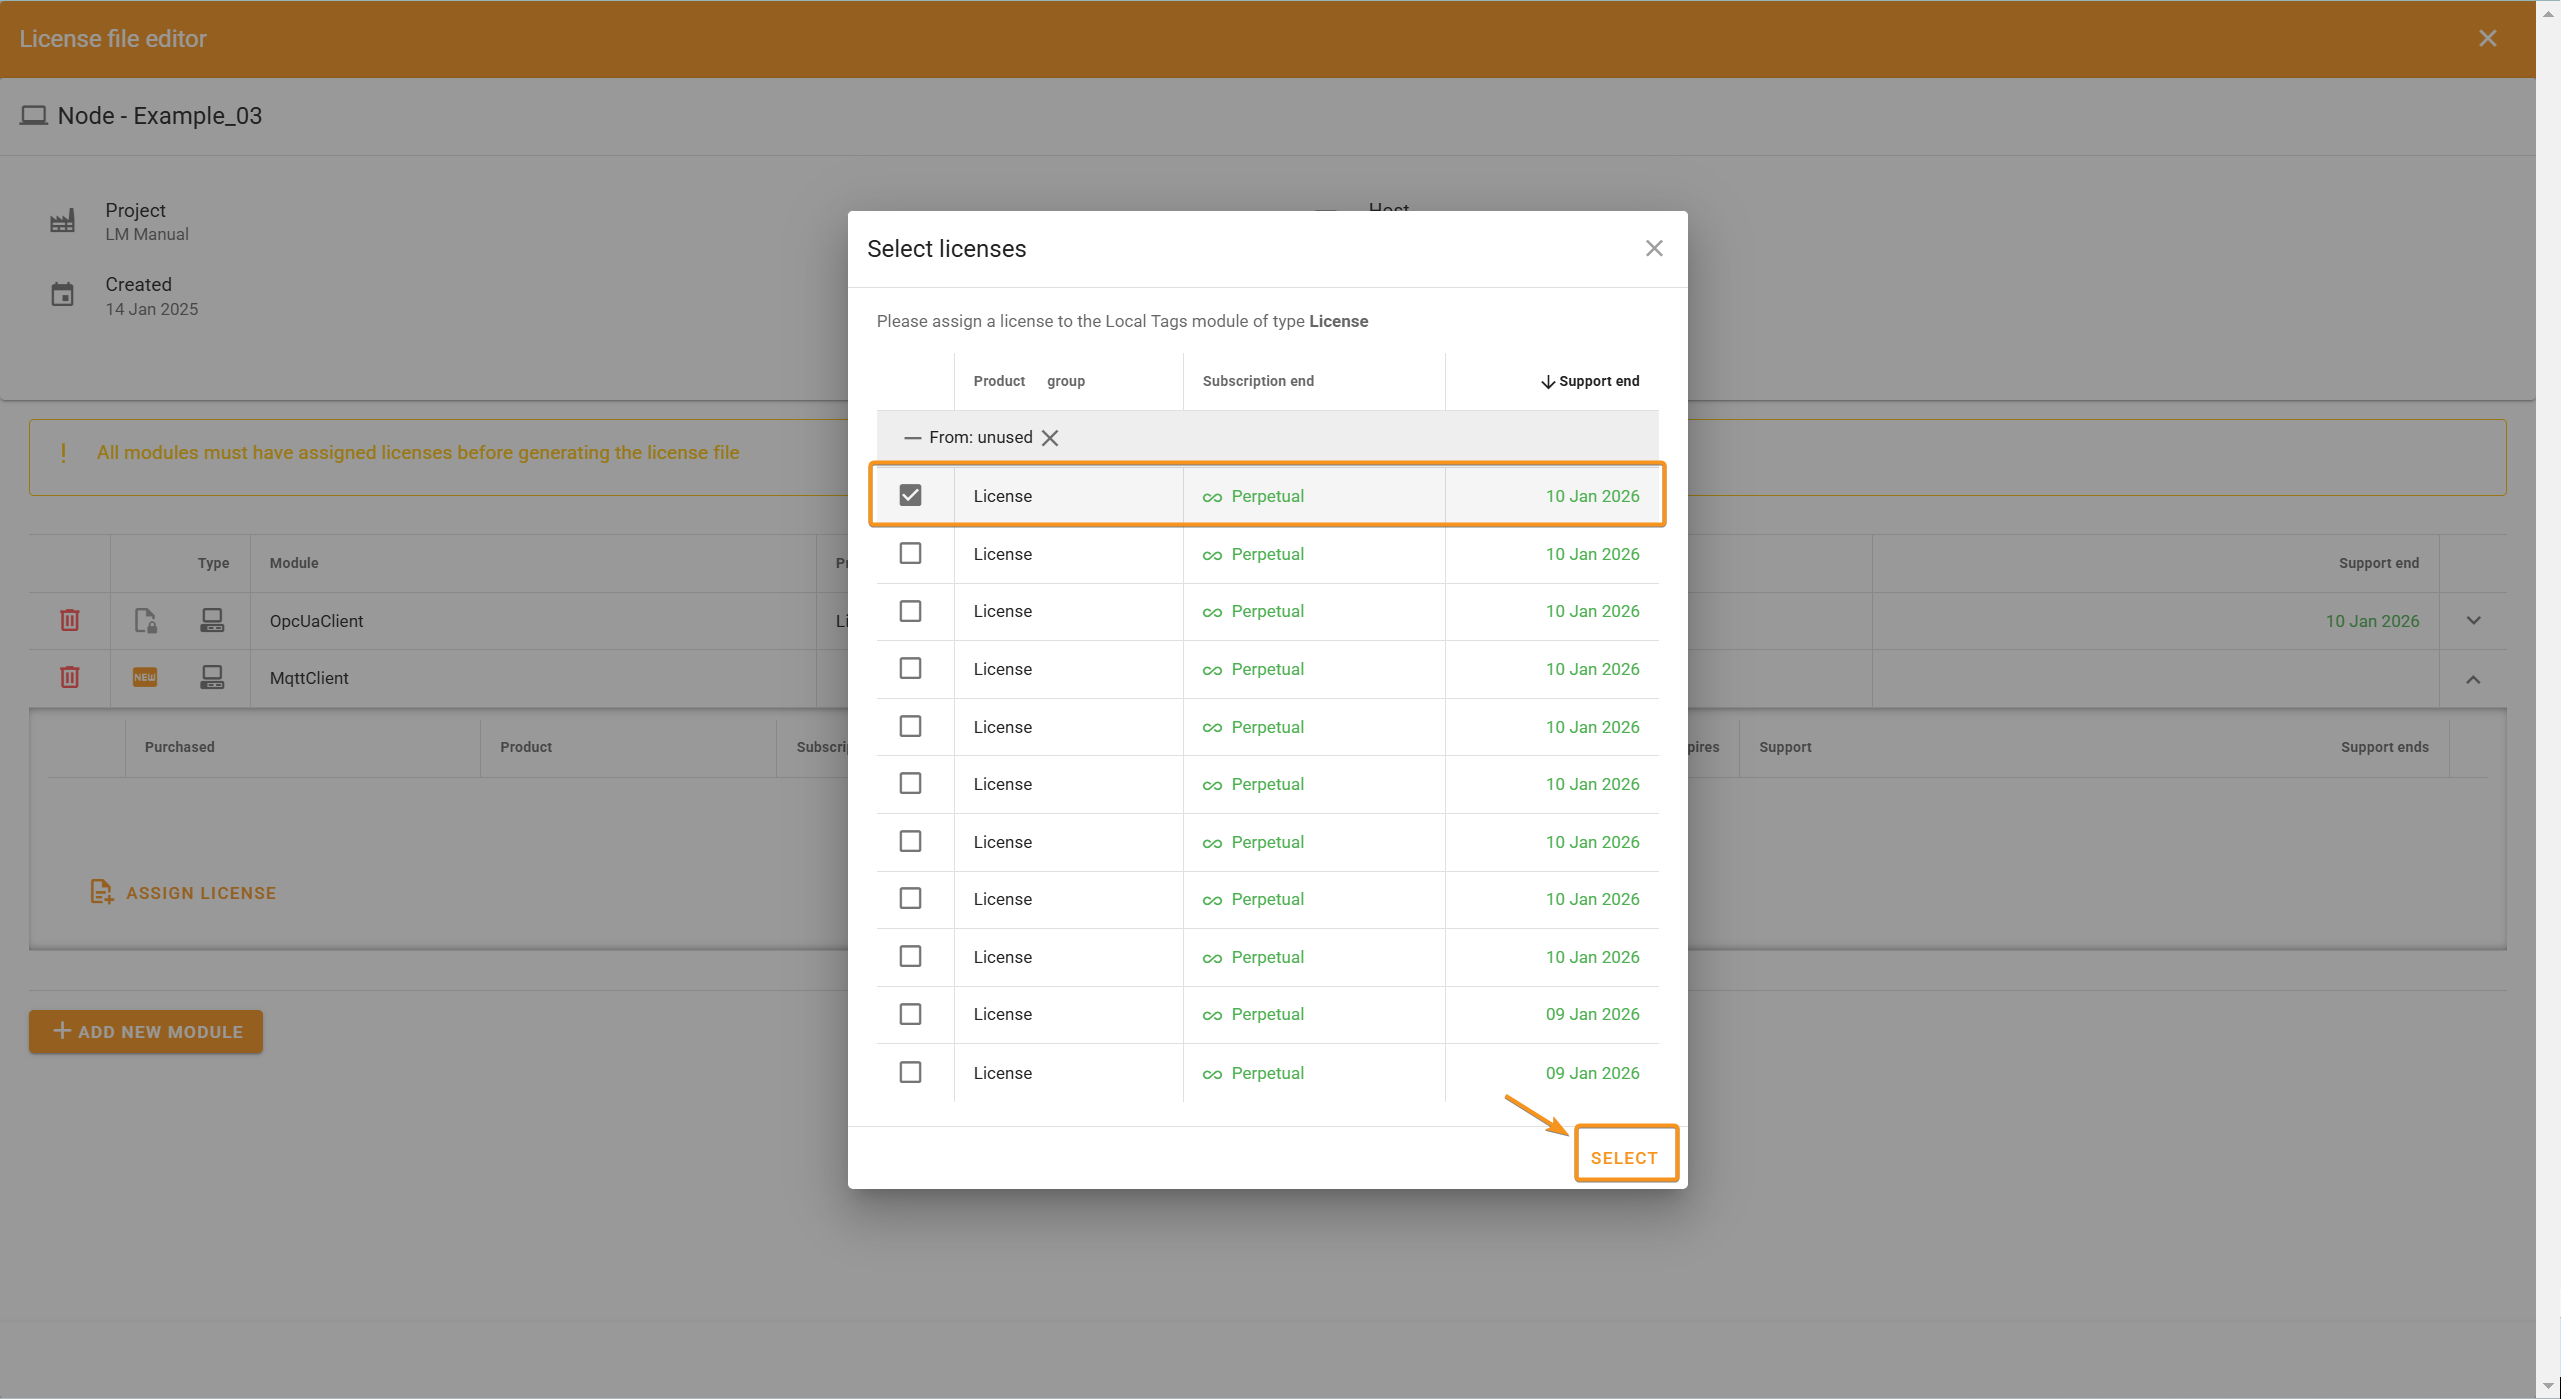
The system will prompt you to select a license. Look for the license you just removed, which now appears as Unassigned above the Unused licenses.
Select this license and click Select.
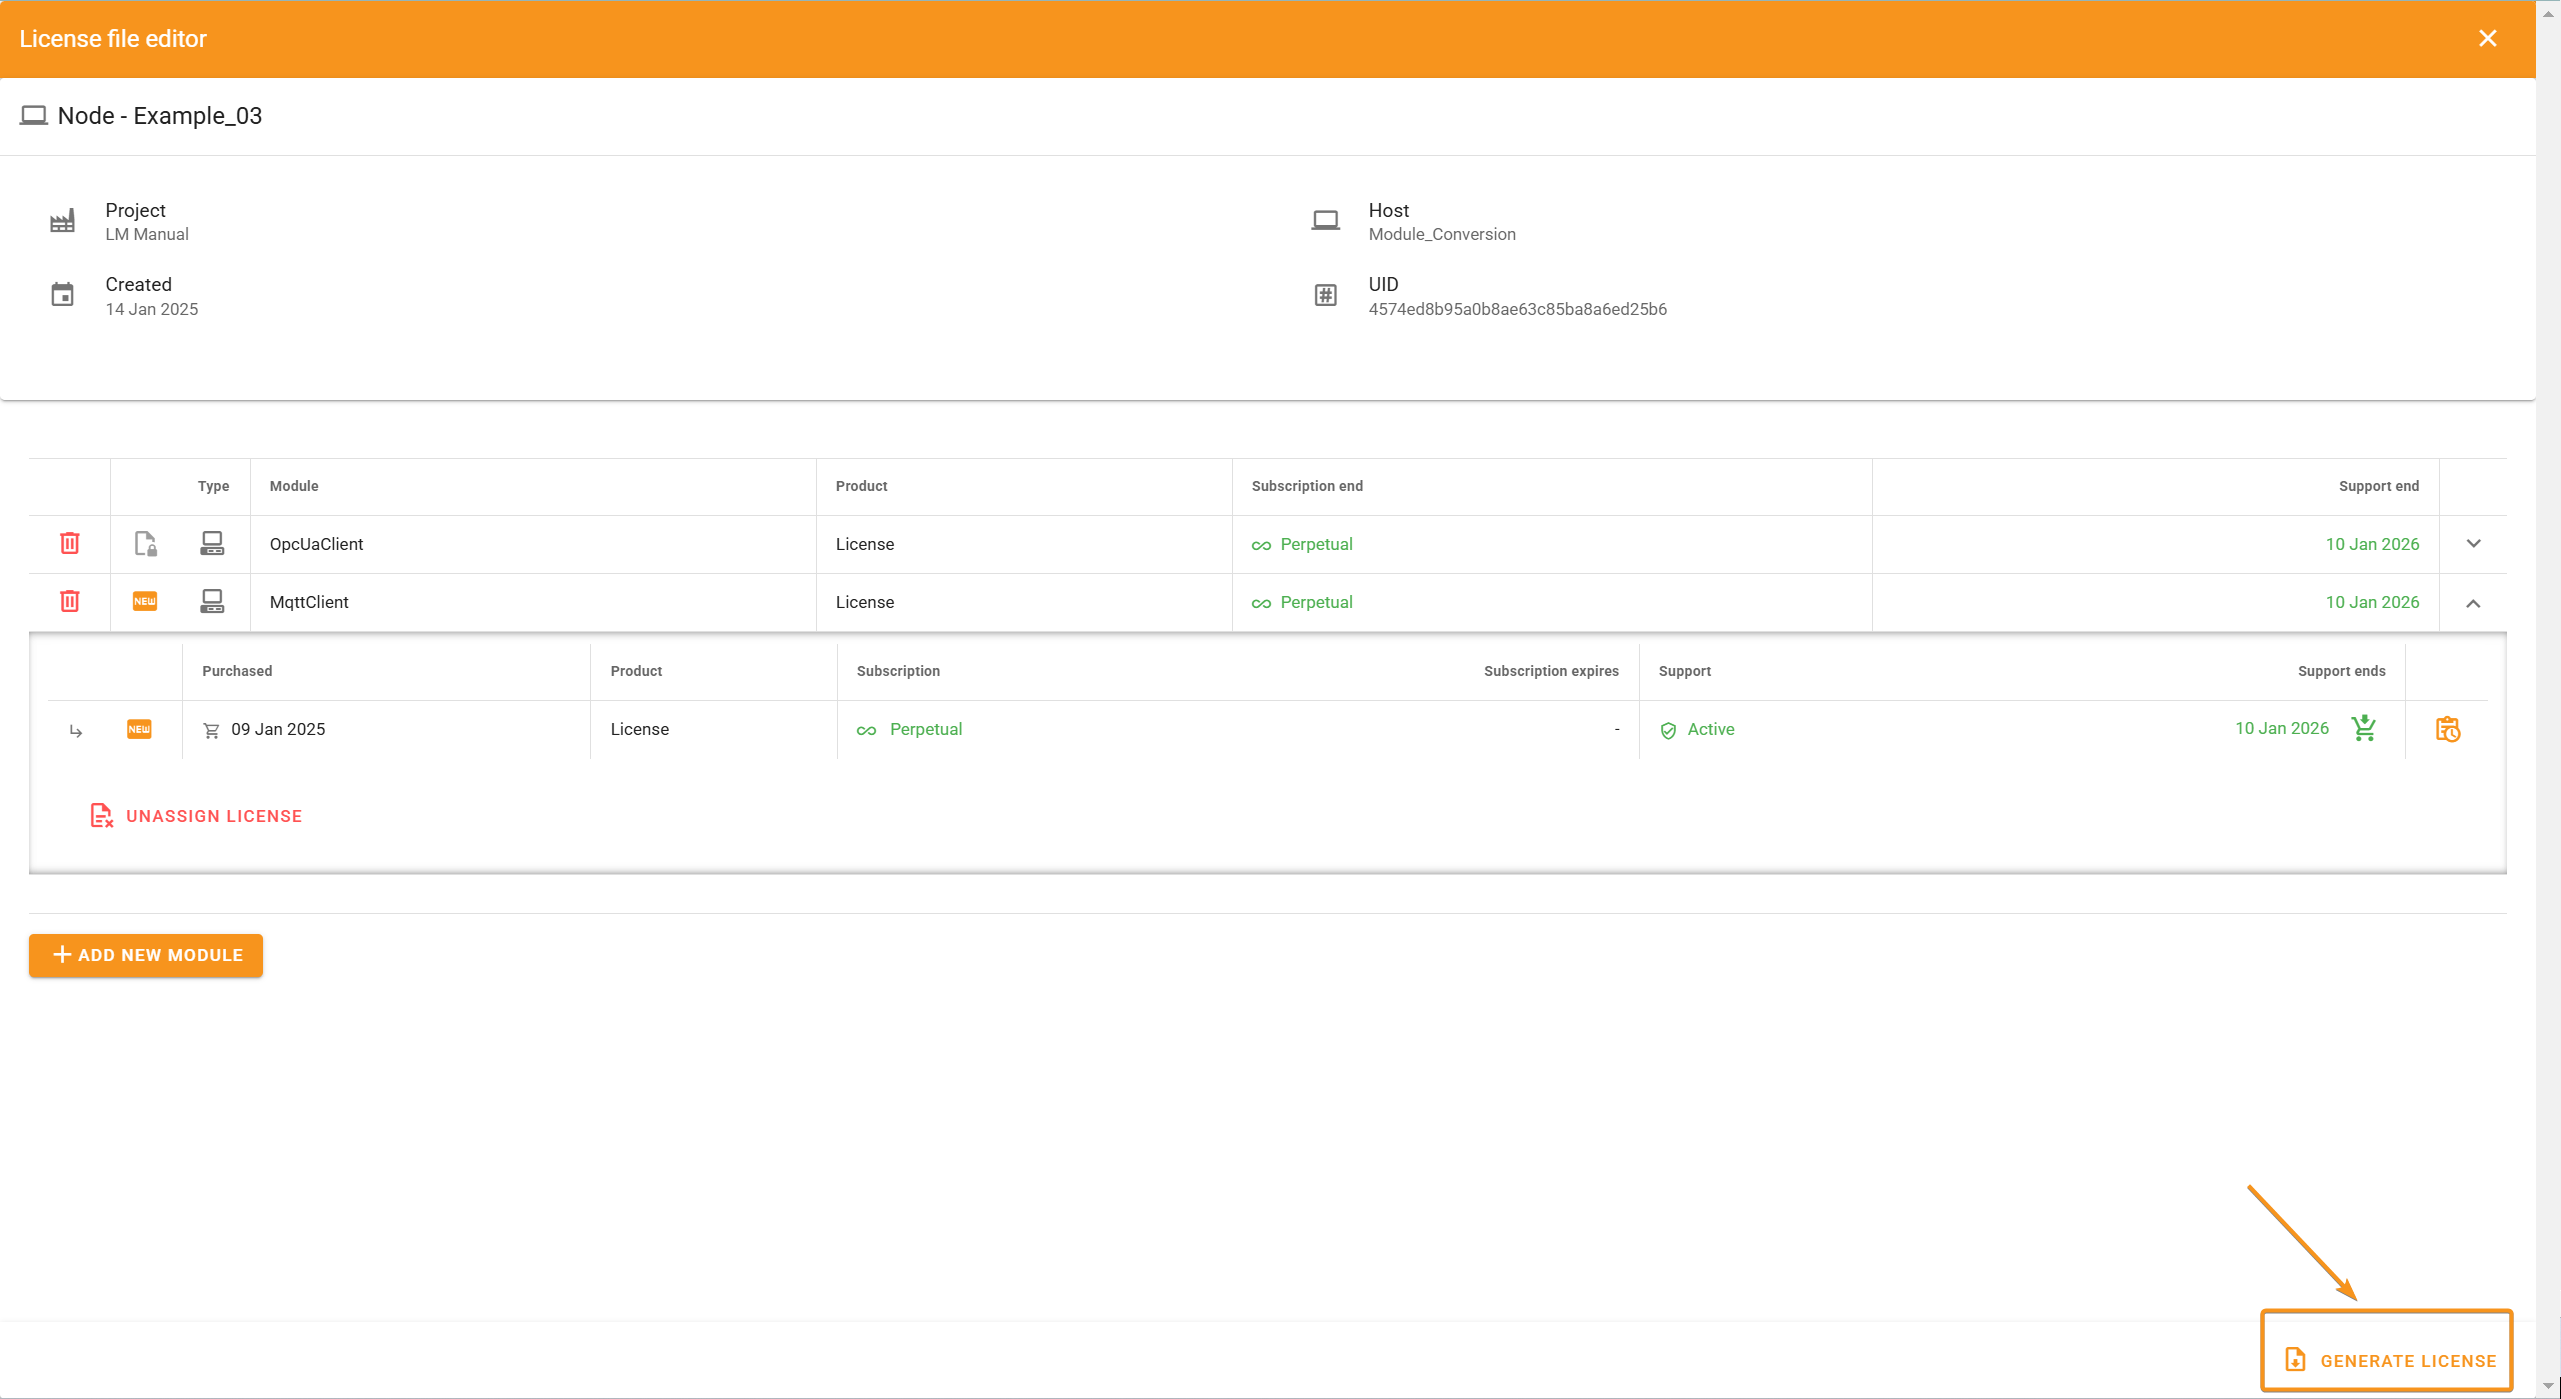
After selecting the license, click Generate License to finalize the process. Then it must be uploaded to the node and that license will replace the previous one. Therefore, once the new one is installed, you can delete the old one.
By following these steps, you will successfully convert the OPC DA Client module into an OPC UA Client module.
Adding Additional Modules to an Existing Node
In this example, we will see how to add one or more new modules to an existing node.
Navigate to the Nodes section in the LM.
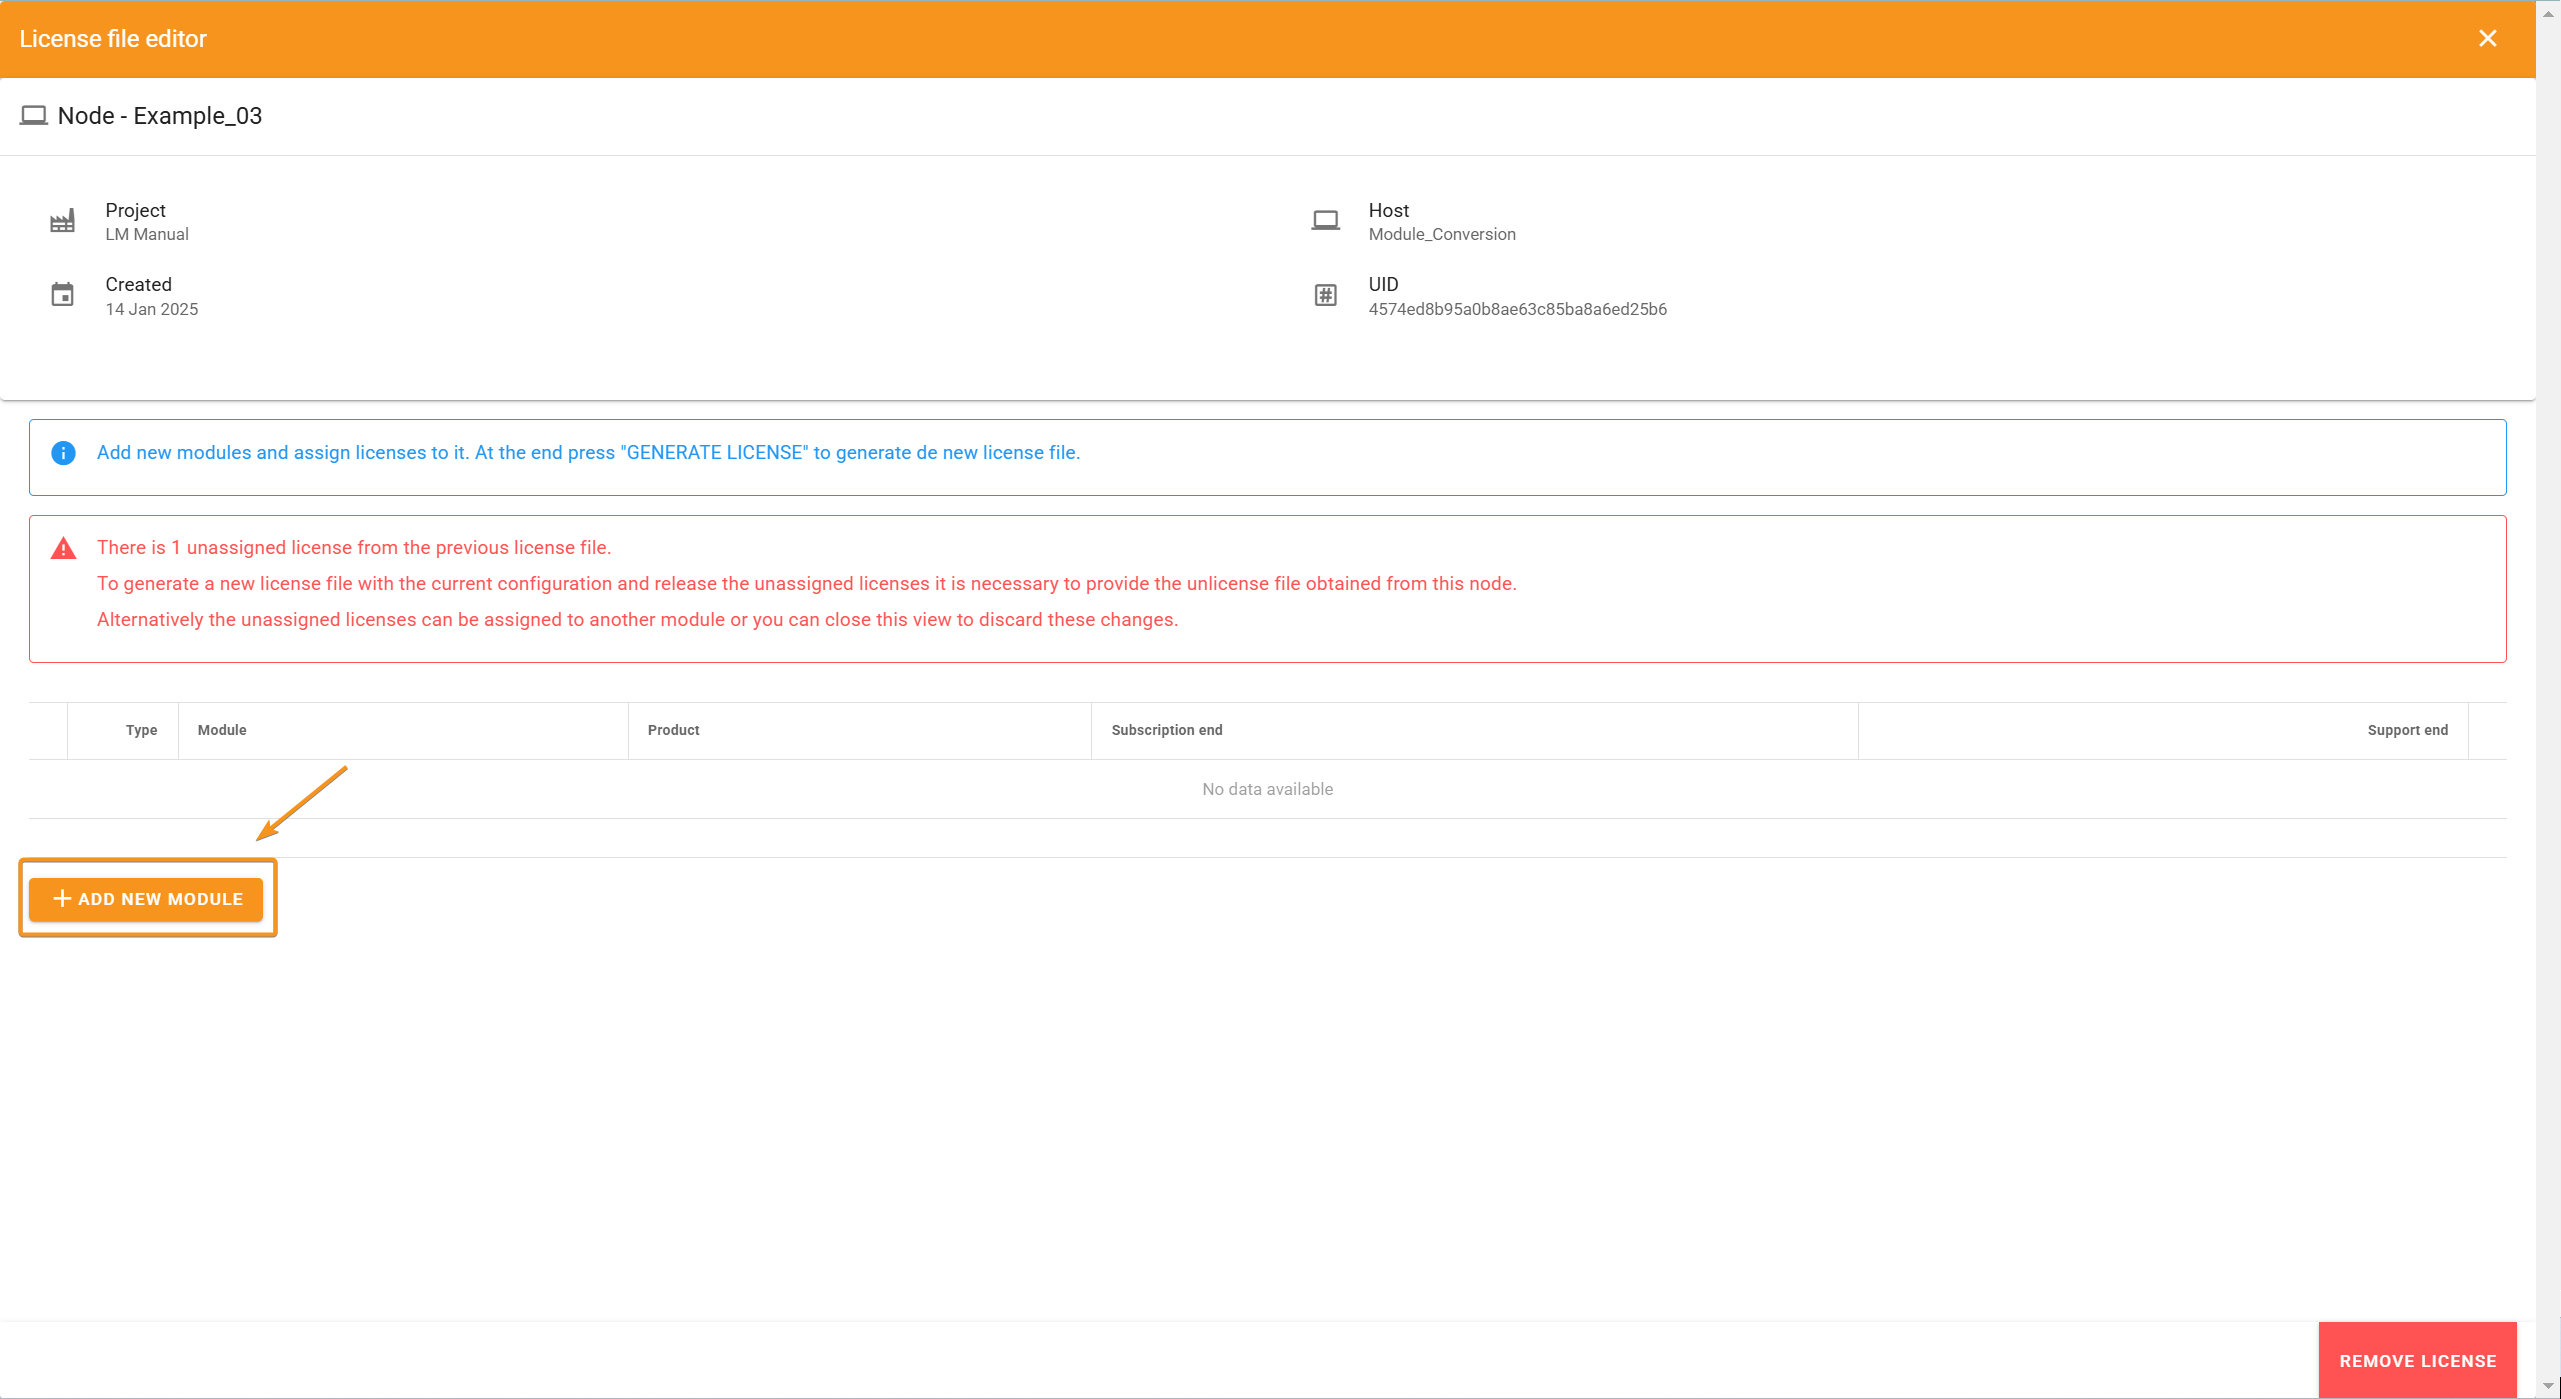
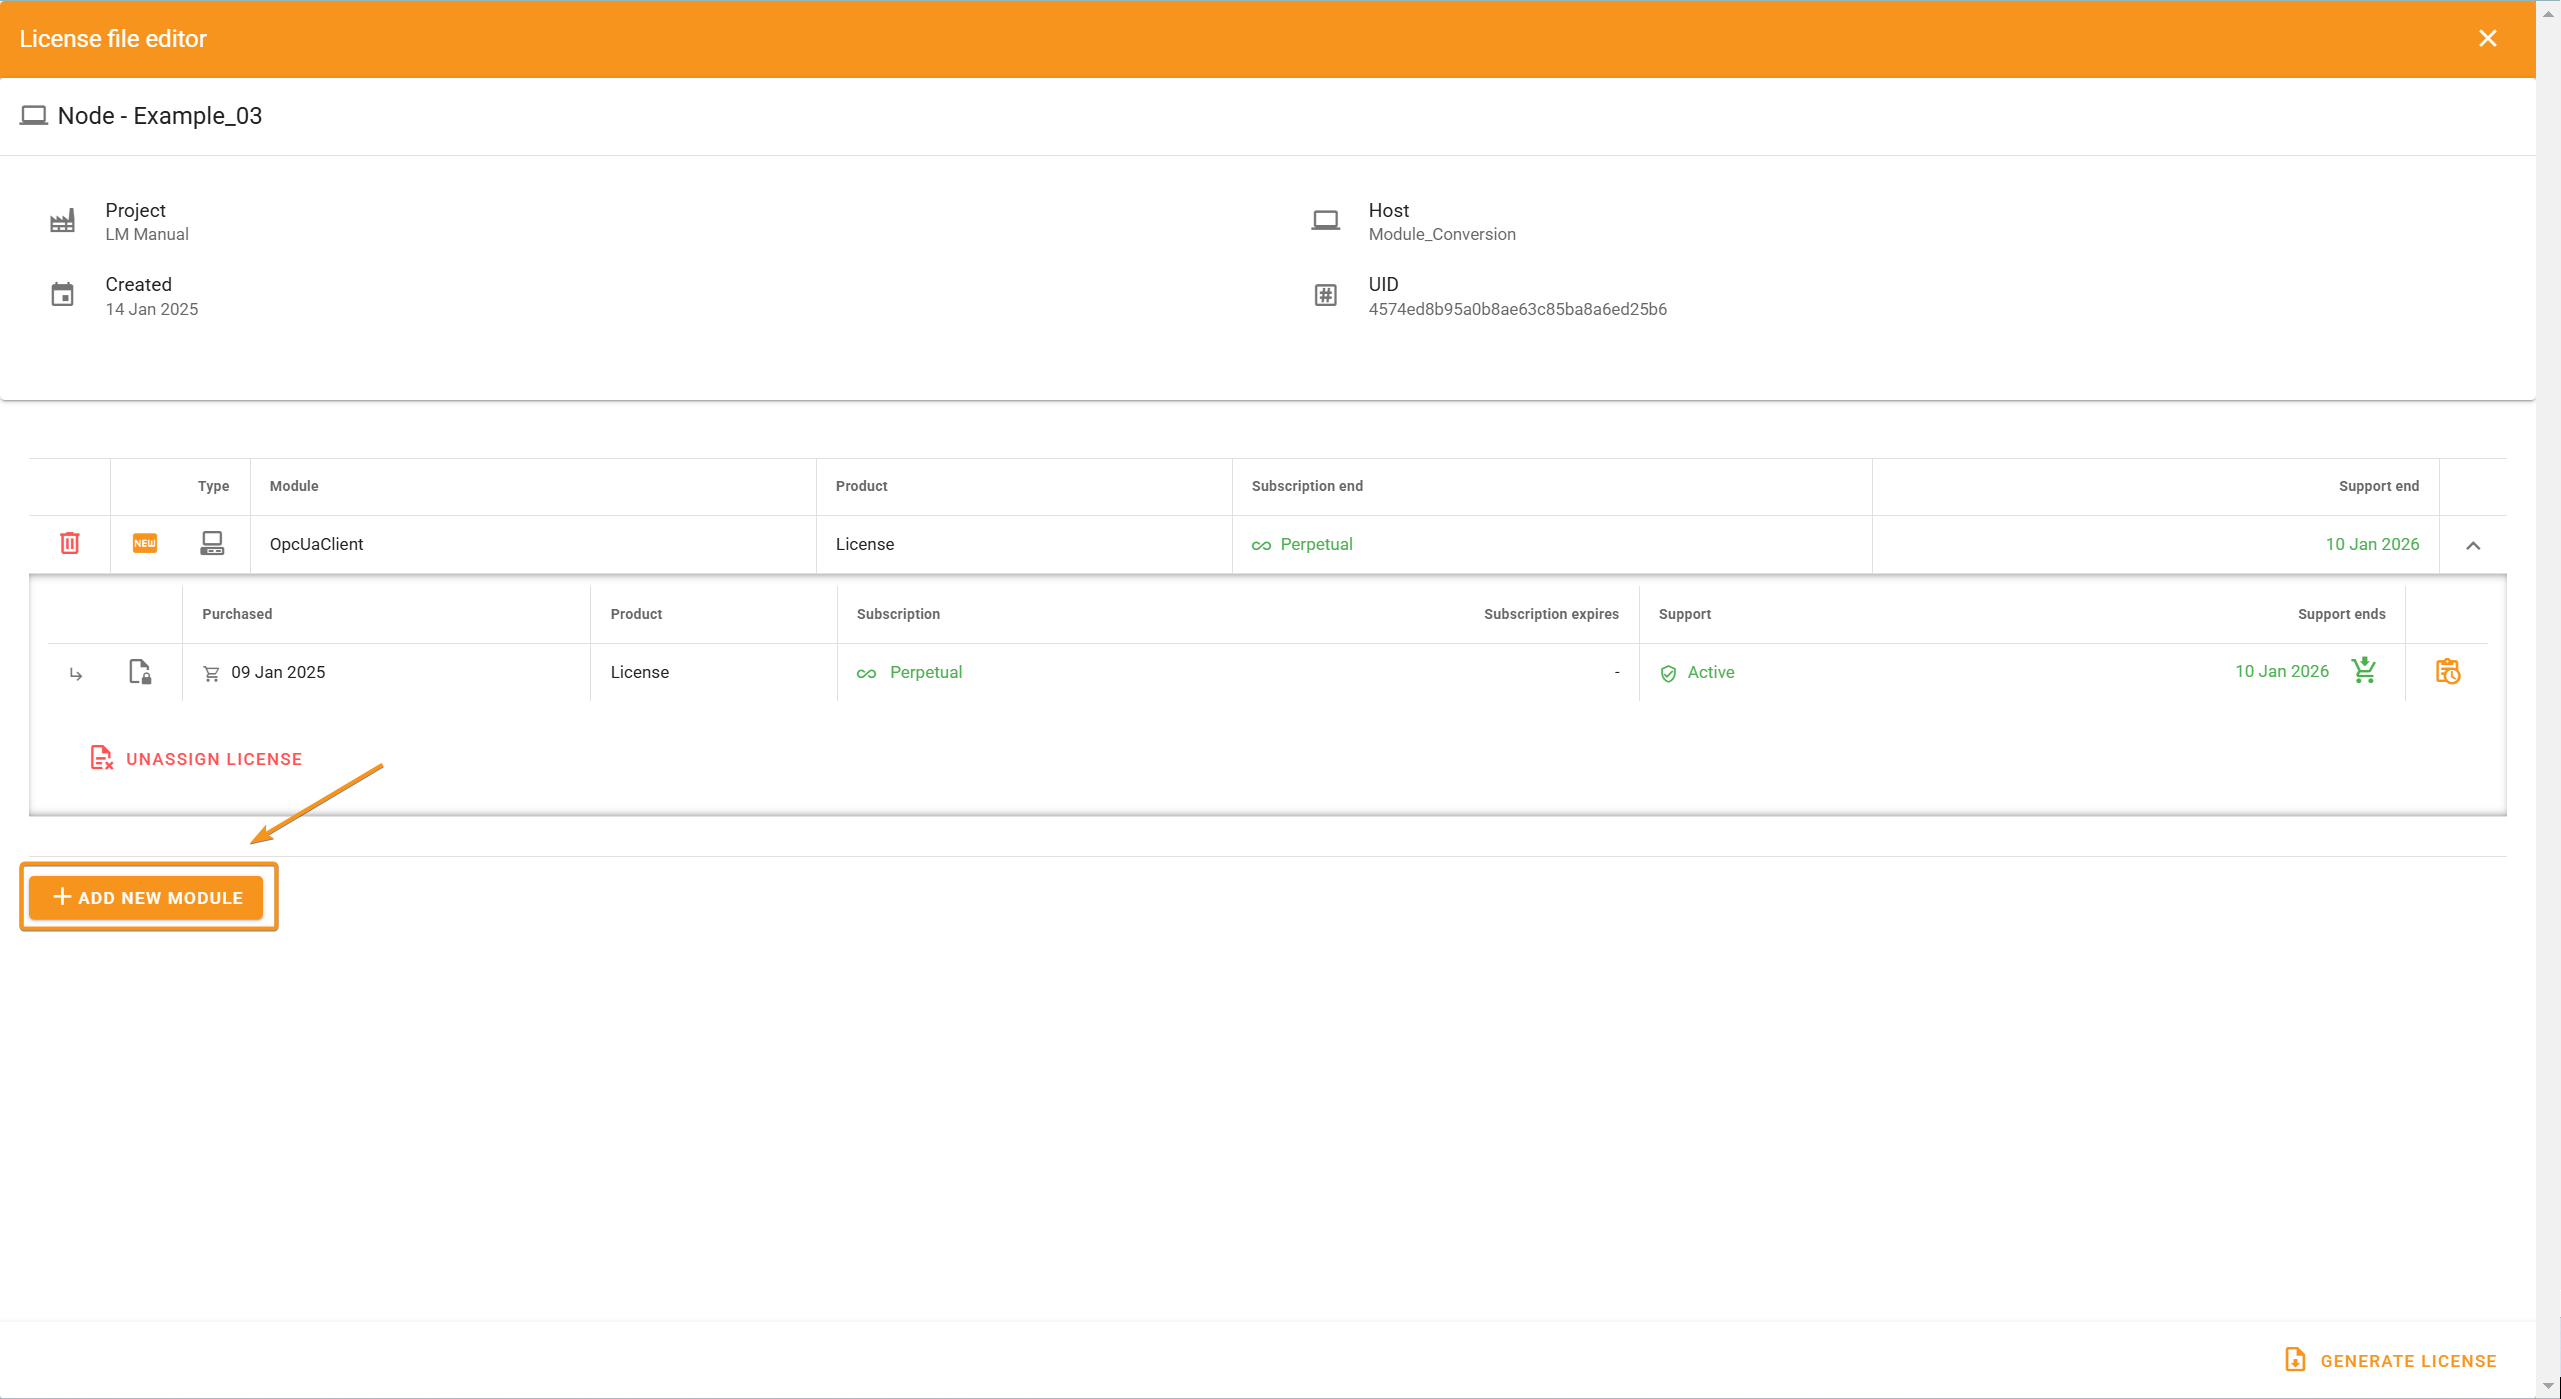
Expand a node and click on Edit License File. Before proceeding, ensure you have available licenses.
.png)
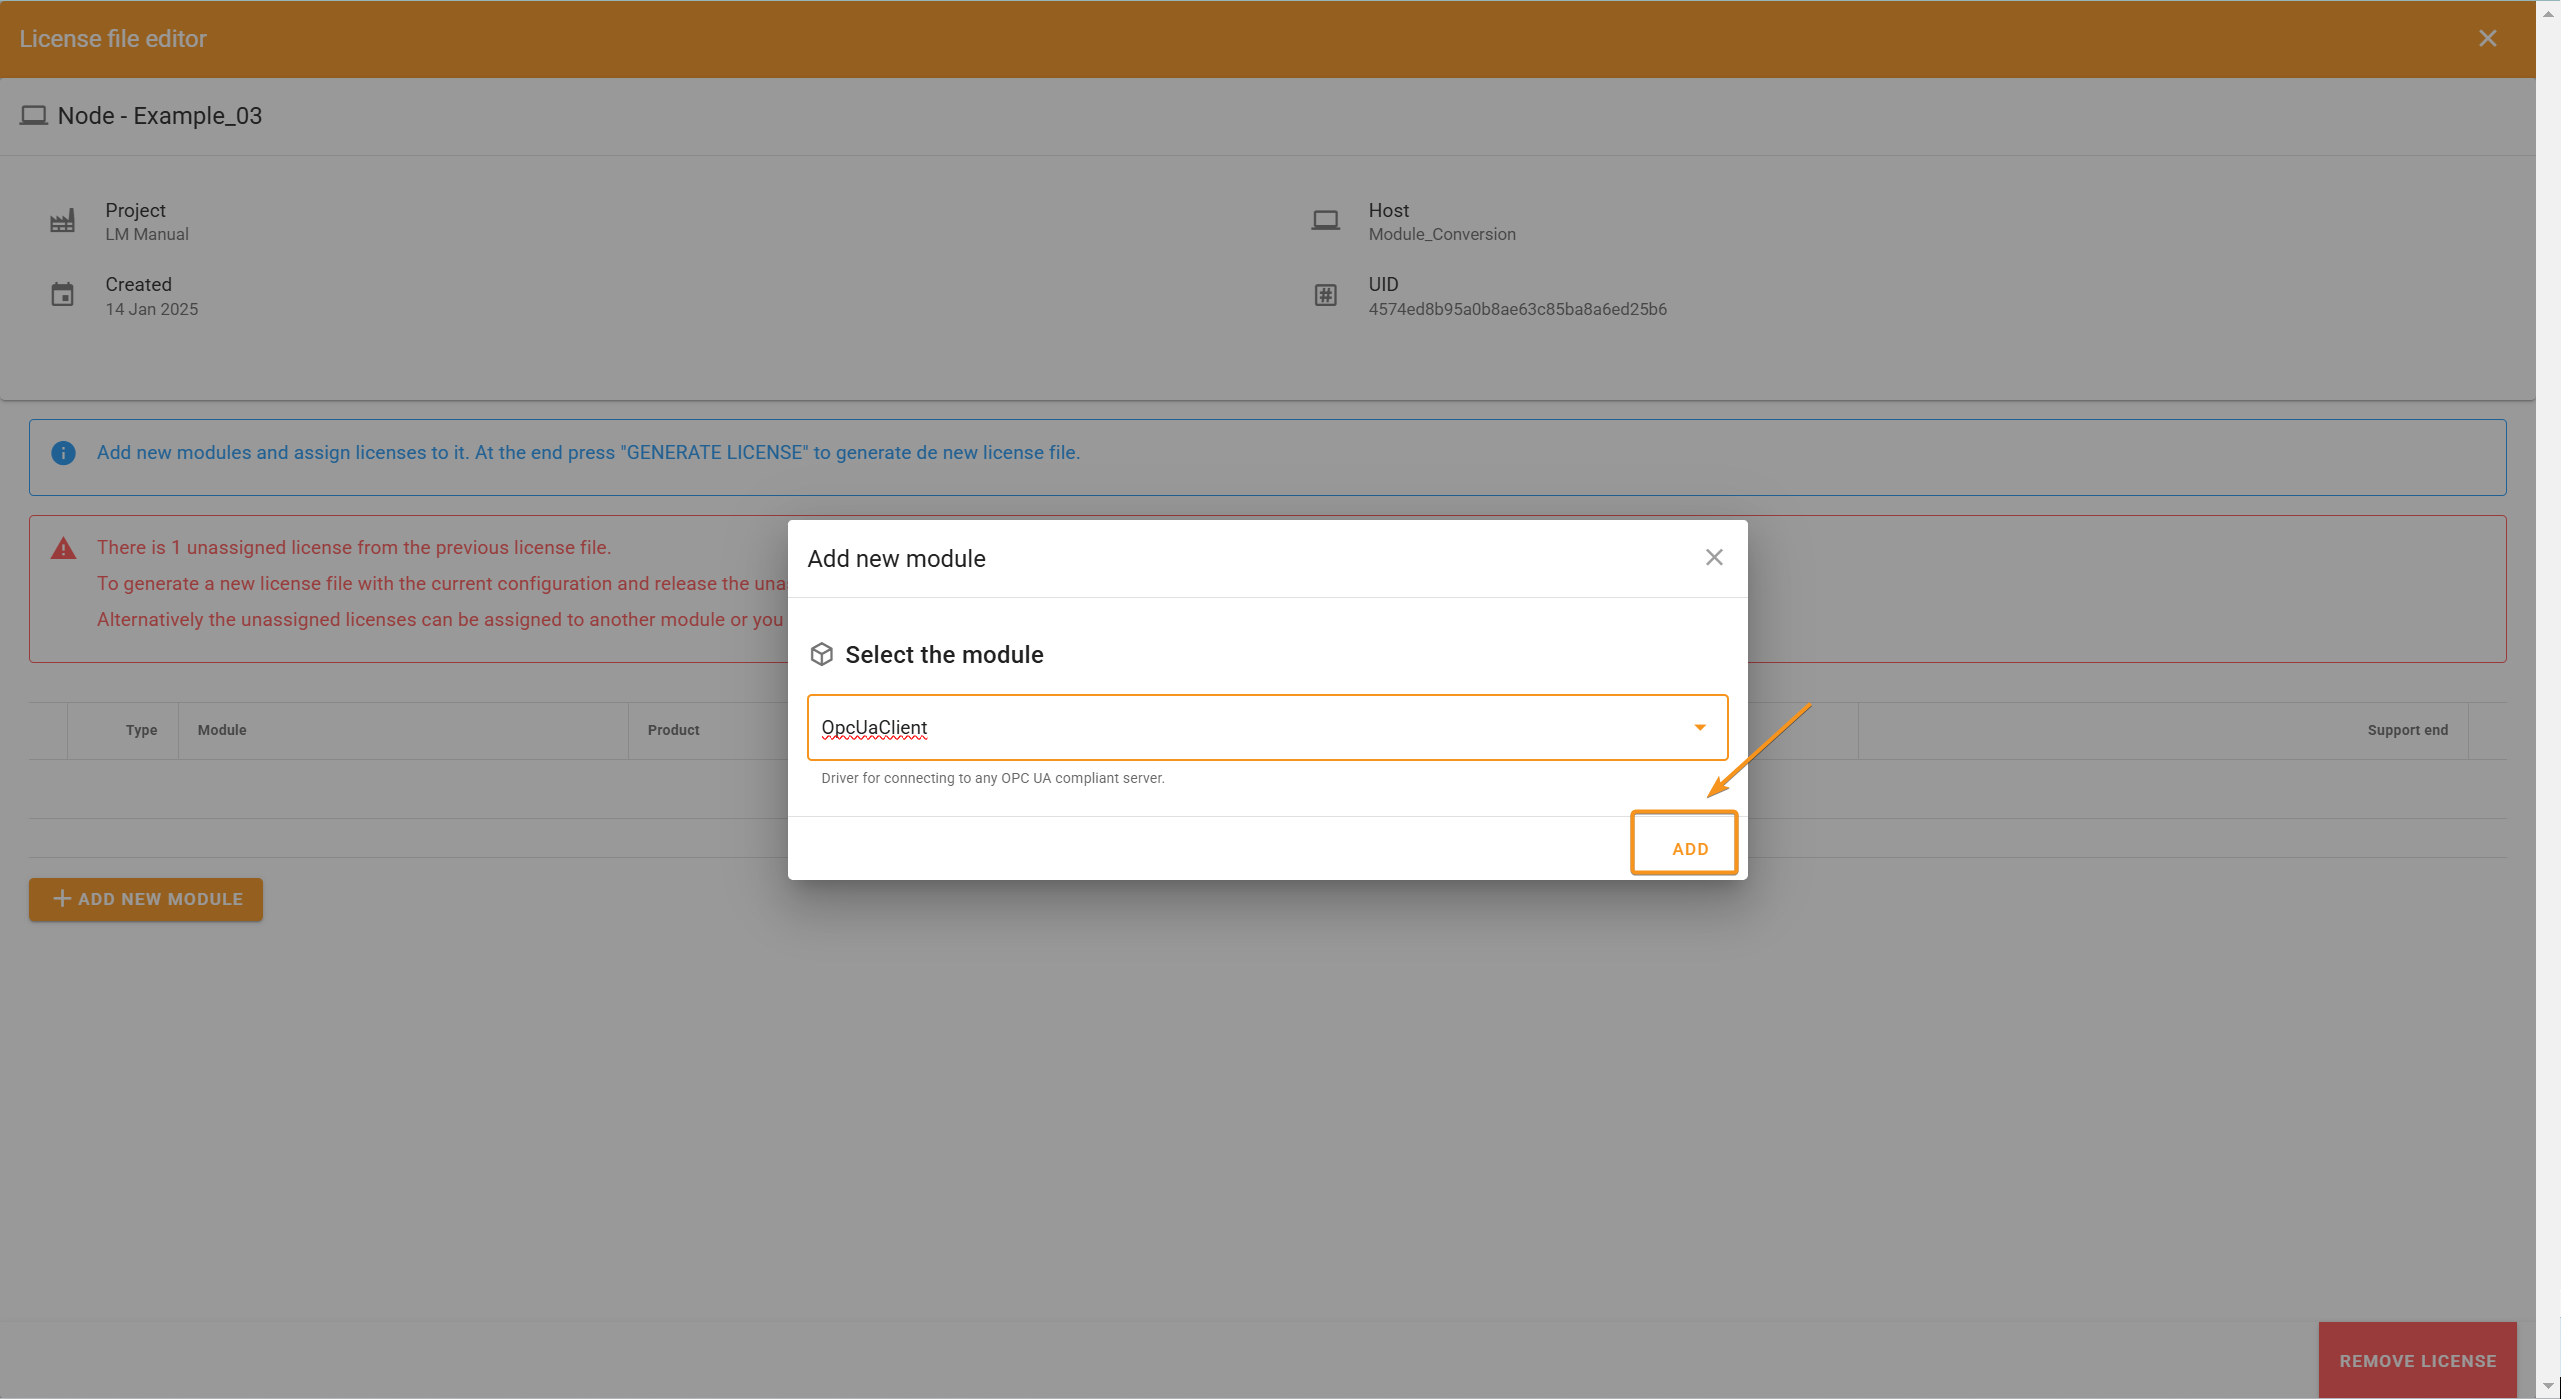
Once inside the License File Editor, click on + Add New Module and select the desired module from the list of available modules.
Select the module, in this case, MQTT Client, and click on Add.
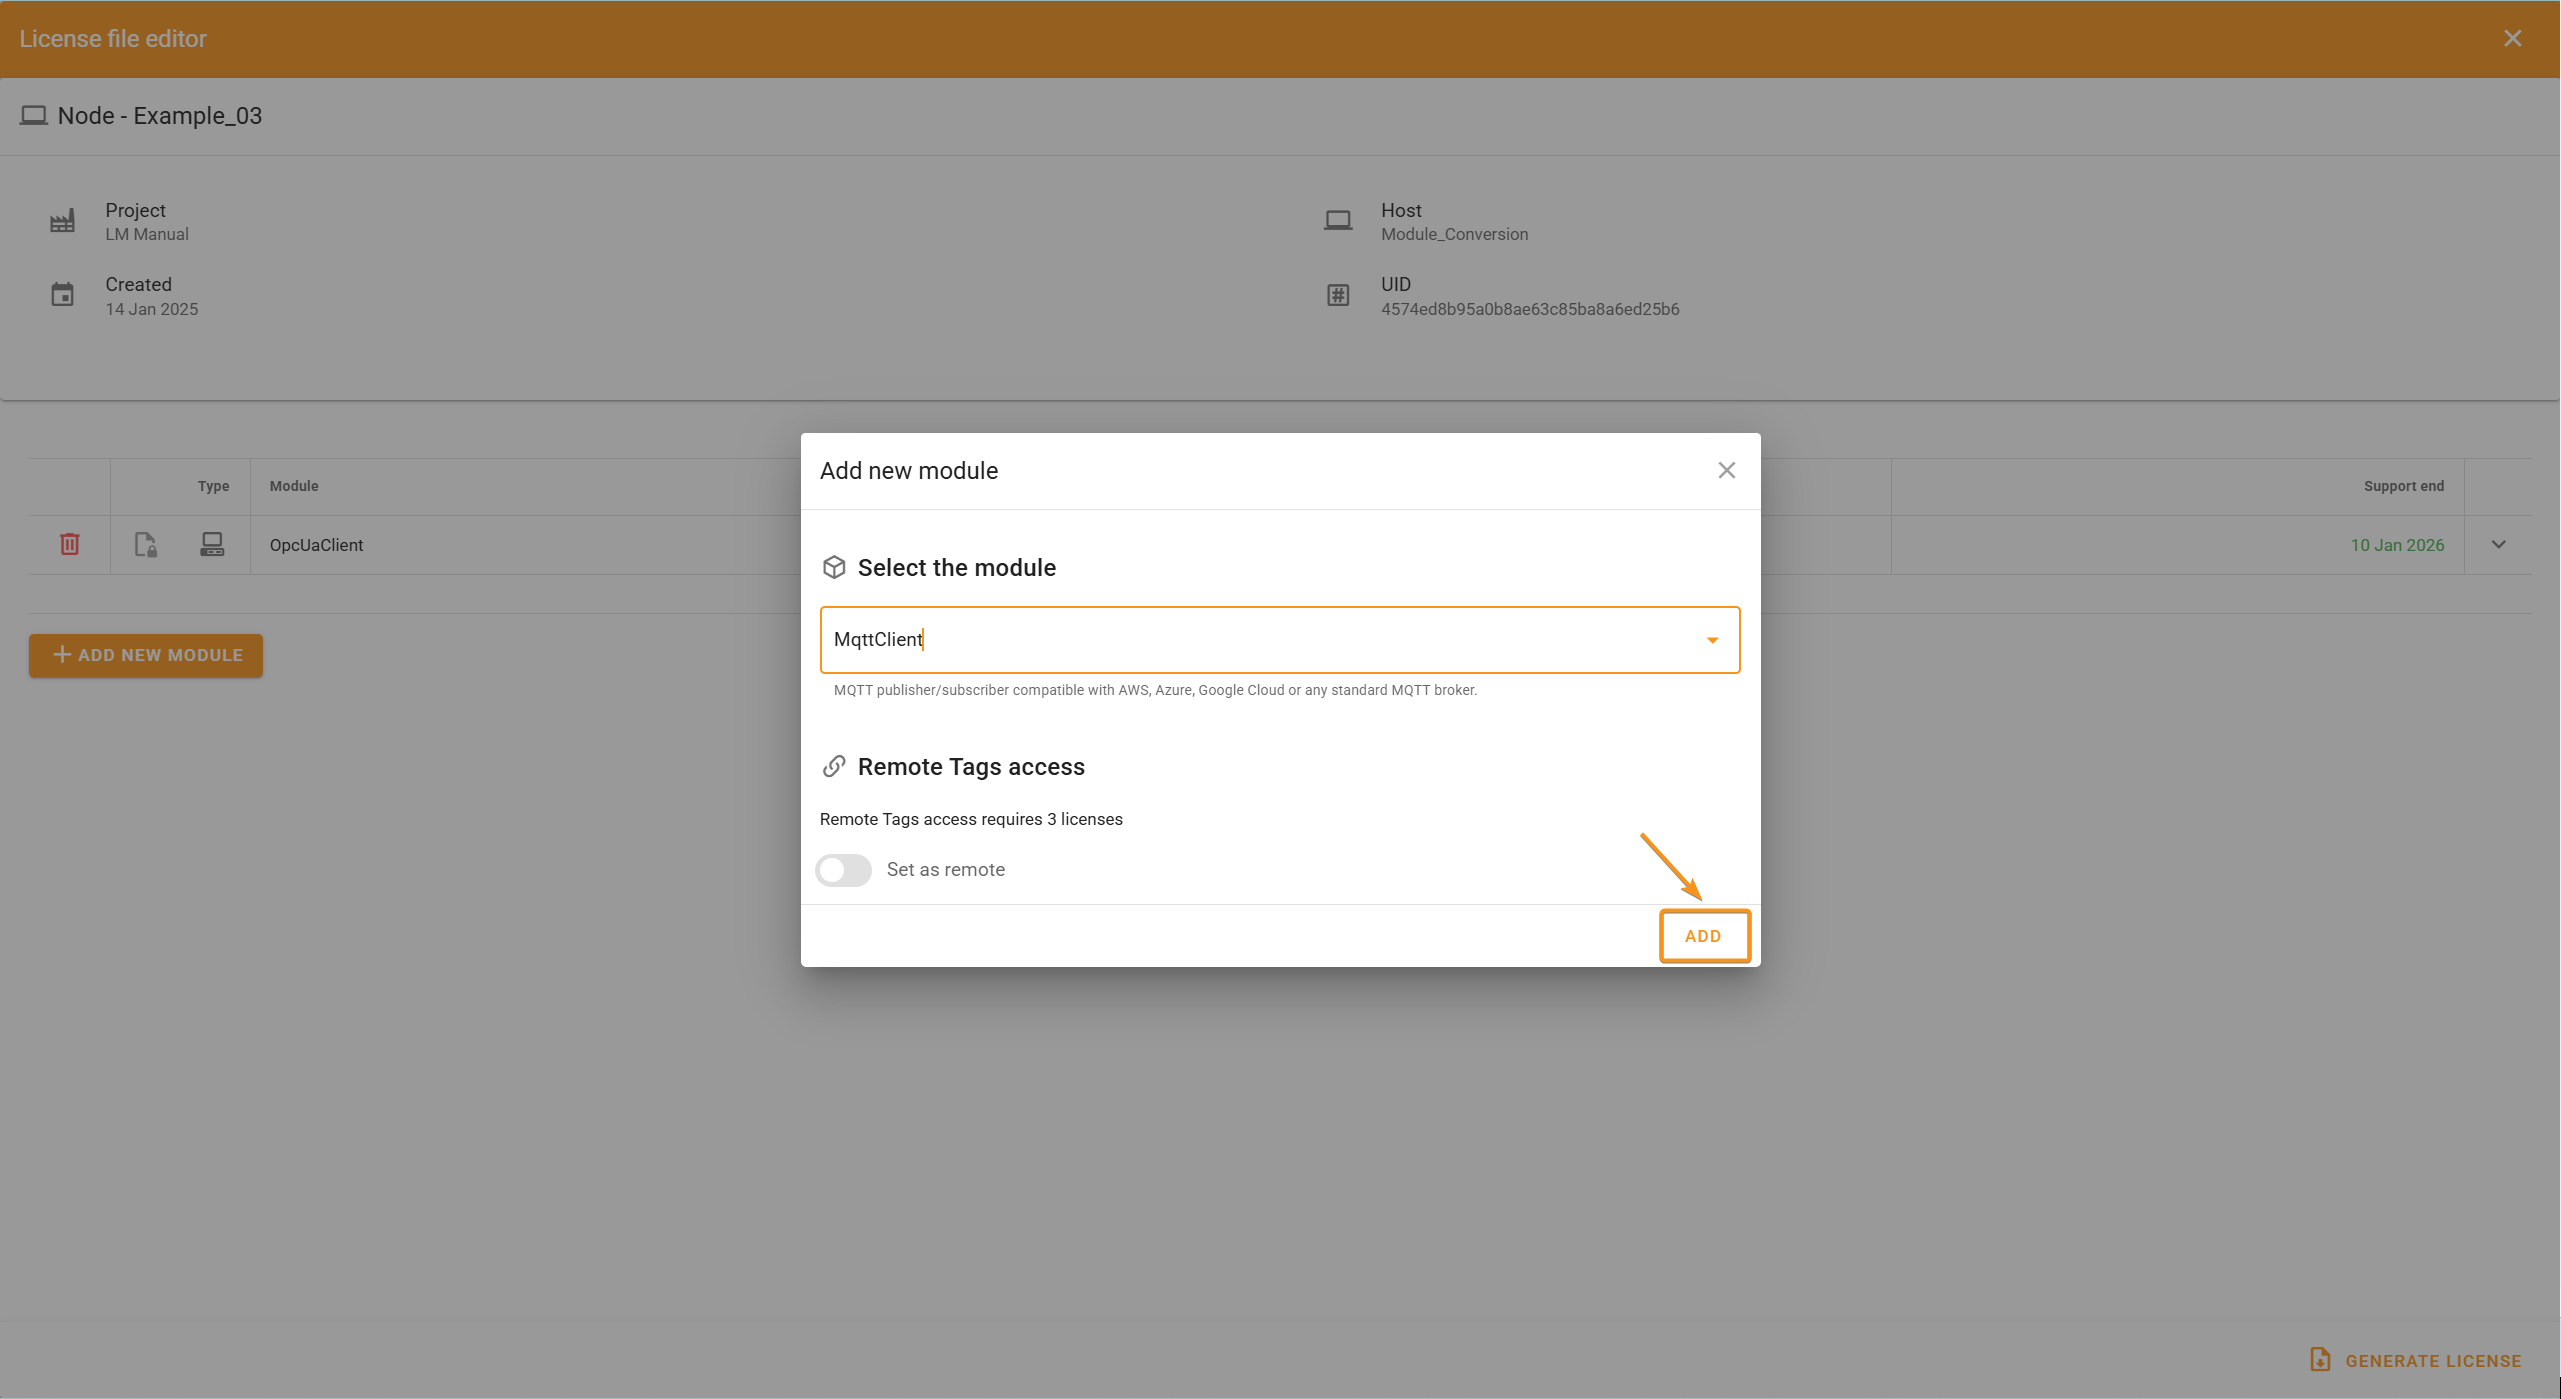
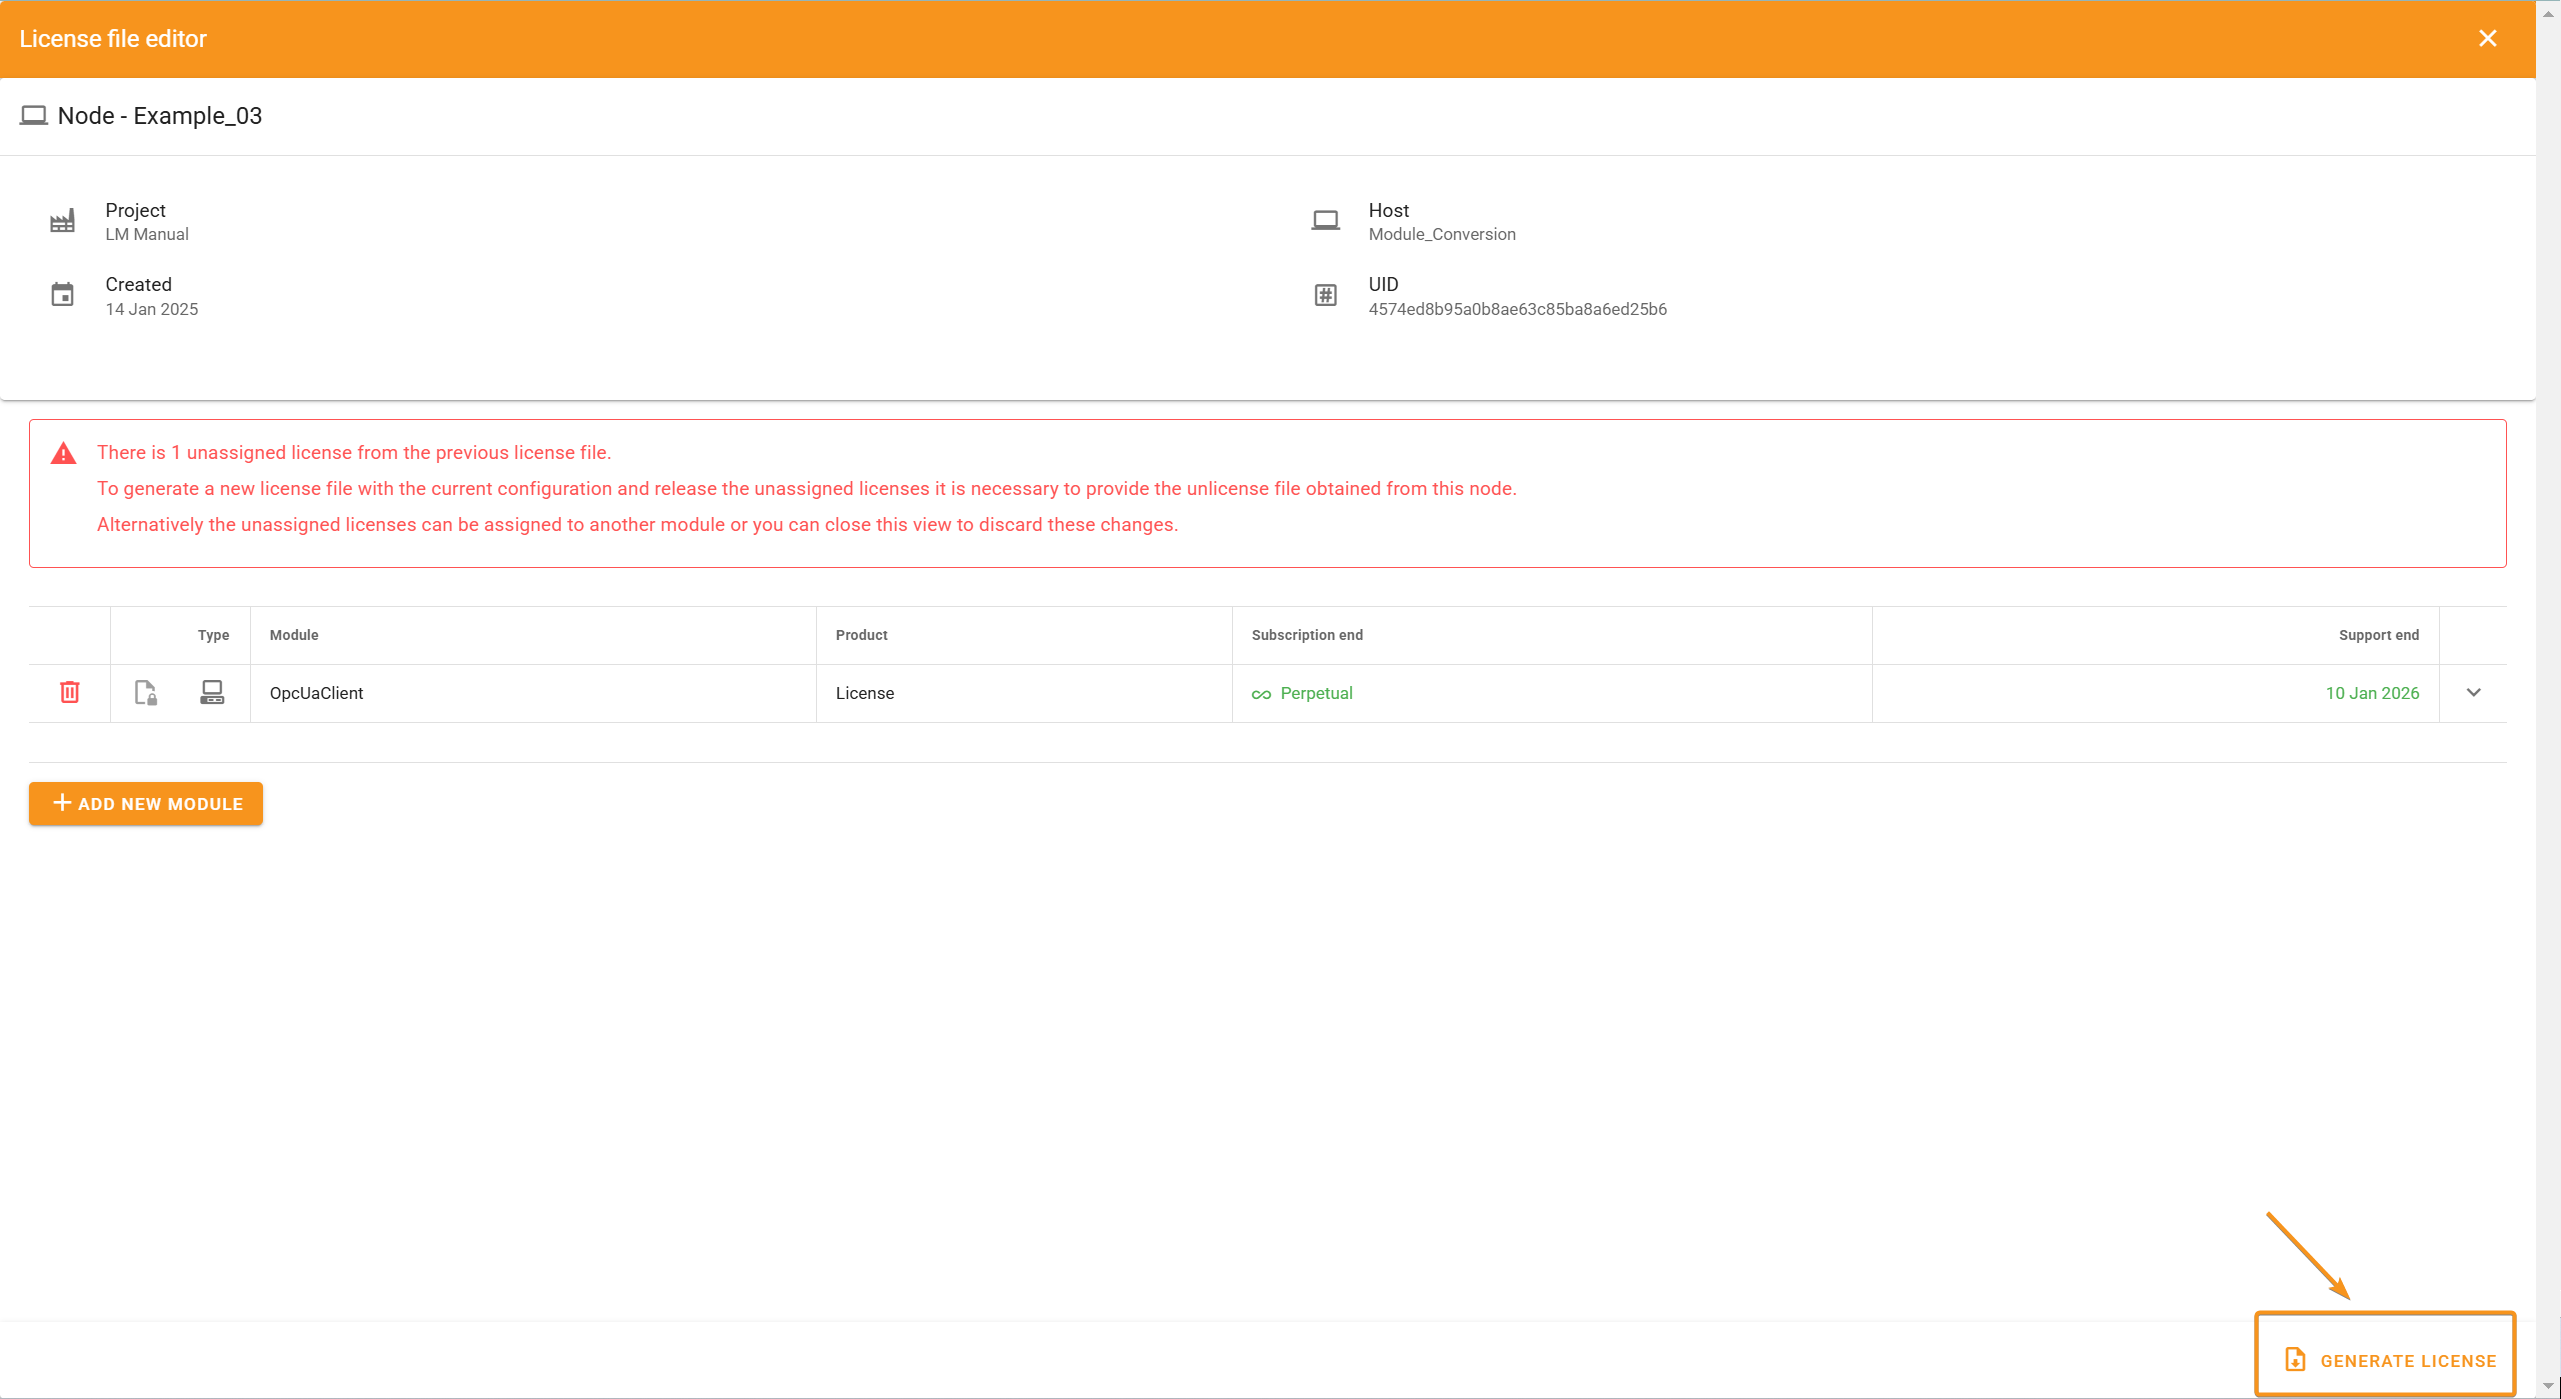
Select a license, click on Select, and then generate the new license by clicking on Generate License.
Once you have the new license, add it to your node in N3uron, successfully adding an extra module to the node.
Removing Modules from an Existing Node
In this example, we will see how to remove a module from our node.
Navigate to the Nodes section in the LM.
Expand the node where you want to remove the module.
Click on Edit License File.
Inside the License File Editor, click on the trash icon next to the module you want to remove.

A pop-up will appear asking for confirmation; click on Delete.

You will be prompted to provide the Unlicensed file.
Click on Generate License, then on Unlicense, and upload the Unlicensed file.
Note:
Detailed instructions for obtaining the Unlicensed file can be found in our Knowledge Base or in the N3uron Academy. Please make sure all licenses in the node have active S&M before unlicensing the node.
The module will be successfully removed from the node, and the license previously used for that module will become available in your license pool.
Ownership Transfer of Licenses
To change the ownership of licenses, the Ownership Transfer document must be filled and signed by both the current owner of the licenses and the new owner.
This document must be digitally signed.
The Ownership Transfer Document can be downloaded directly here: