Overview
This example will explain in detail how to seamlessly push the data model created within a N3uron node into InfluxDB Cloud using its MQTT Native Collector that effectively turns InfluxDB into an MQTT client. As depicted in the image below, we will also need to deploy an MQTT broker, in this case, we will use a HiveMQ Cloud cluster.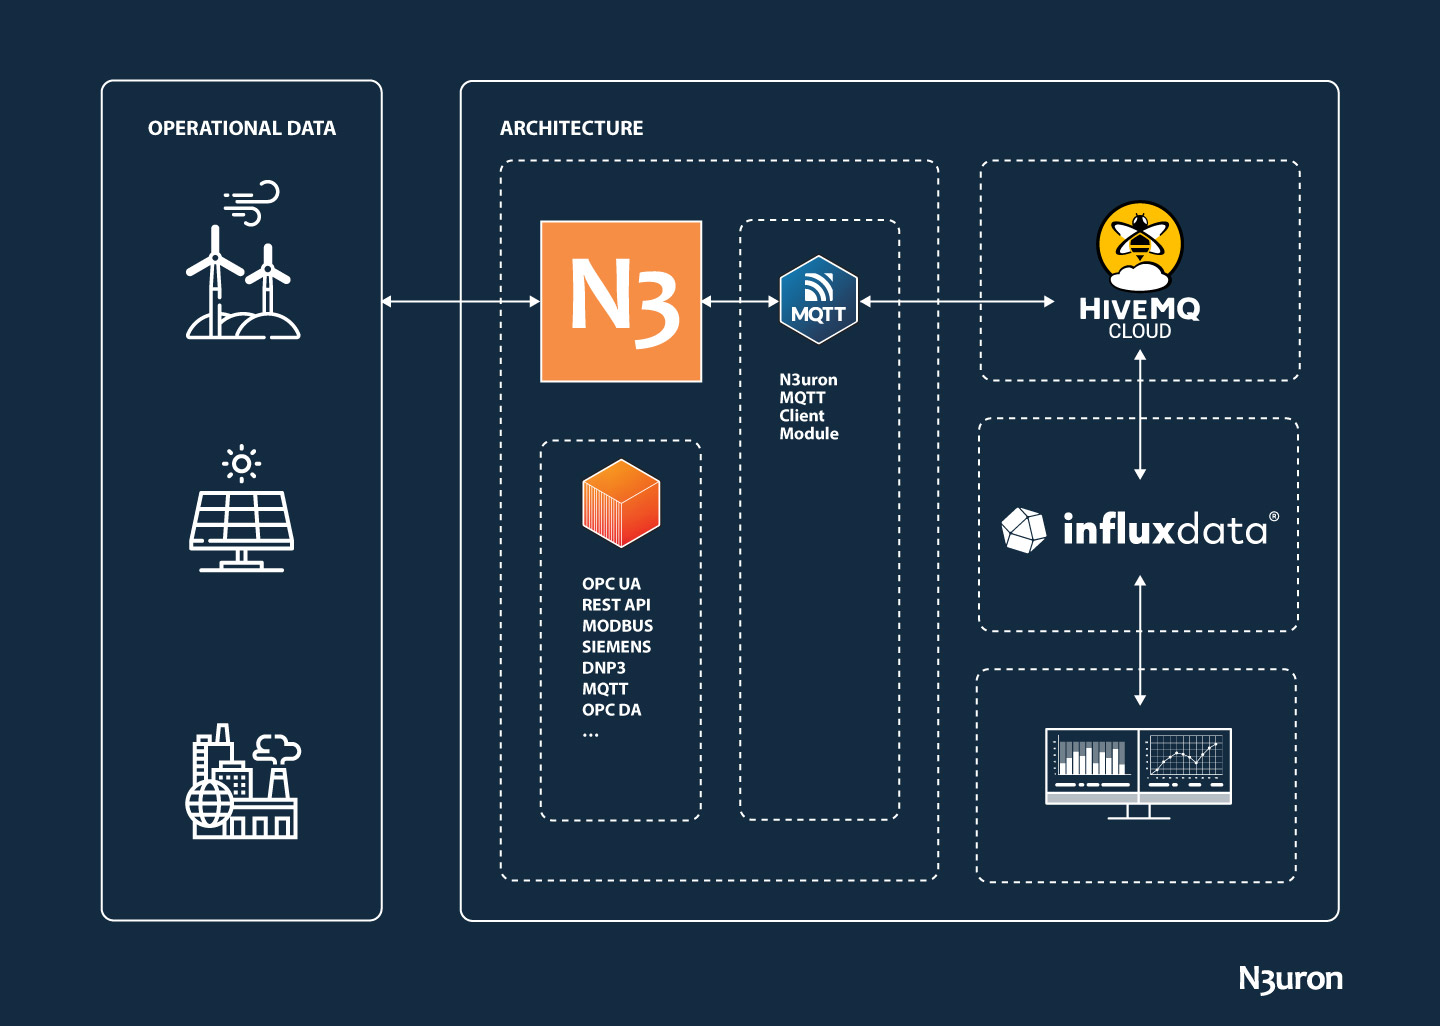
N3uron and InfluxDB Requirements
It is assumed that you already have an InfluxDB Cloud account. If not, you can create one at https://cloud2.influxdata.com/signup. If you haven’t downloaded N3uron yet, you can do so at https://n3uron.com/downloads/.
HiveMQ Cloud MQTT Broker configuration
It is assumed that you already have signed up for the HiveMQ Cloud. Once done, access your HiveMQ Cloud cluster to start configuration and proceed as follows:
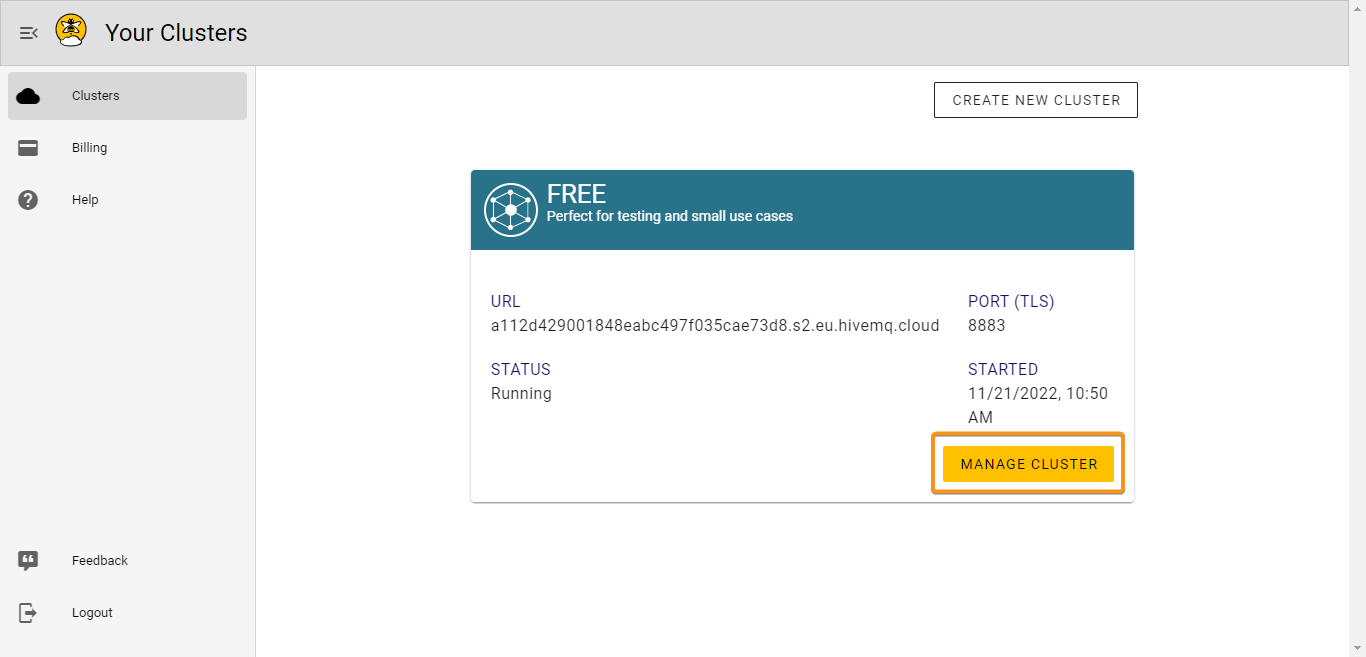
- Step 1: Select Manage Cluster.
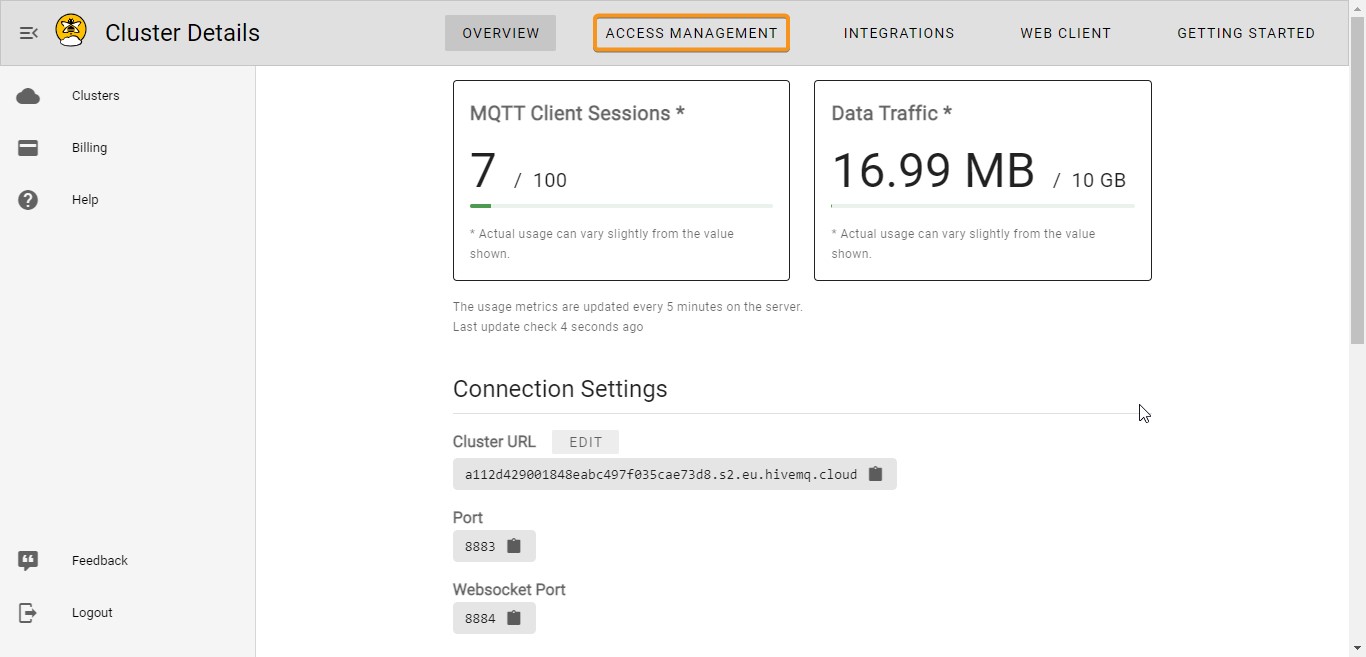
- Step 2: Some important information will appear on the overview page, such as the Cluster URL and the Port for the connection. Before beginning to establish a connection, click on the “Access Management” tab in the header.
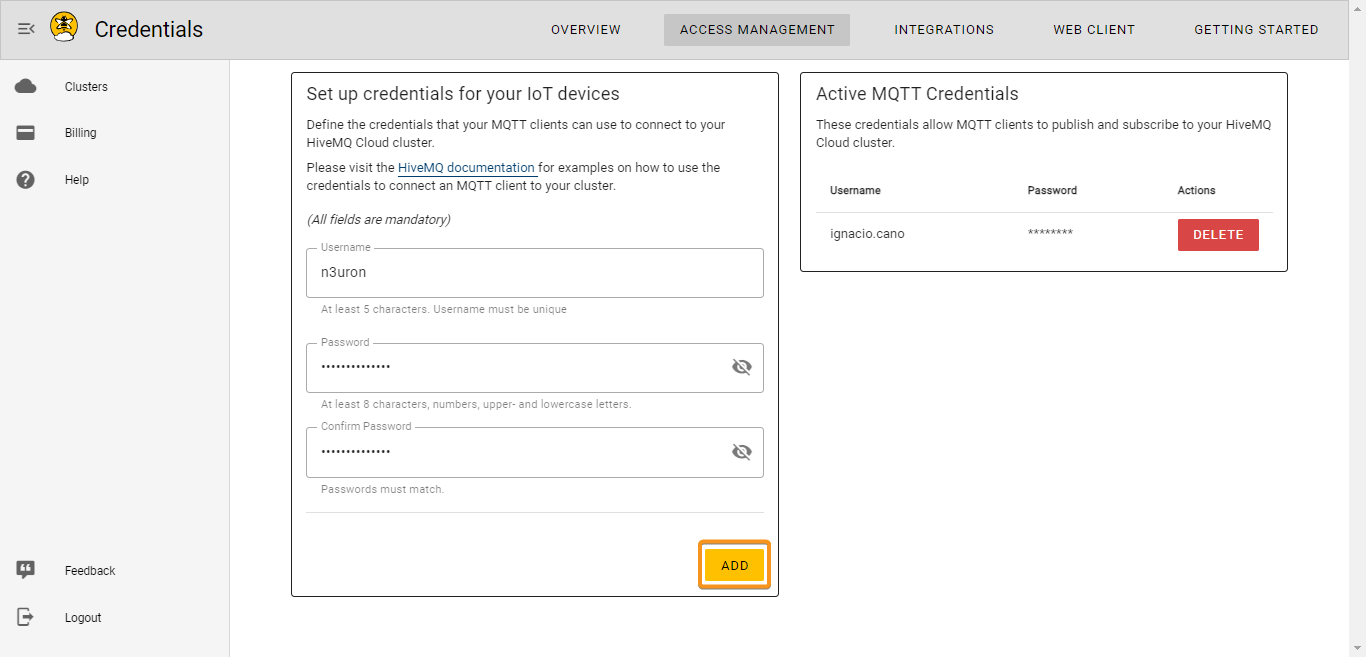
- Step 3: A username and password must be defined in order to allow clients to access the cluster. Go to “Set up credentials for your IoT devices” and complete these fields. When set, you will see the new user in “Active MQTT credentials”.
Configuring the MQTT Client Module in N3uron
- Step 1:Create the module: (Config => Modules =>Model=> New module)
.png)
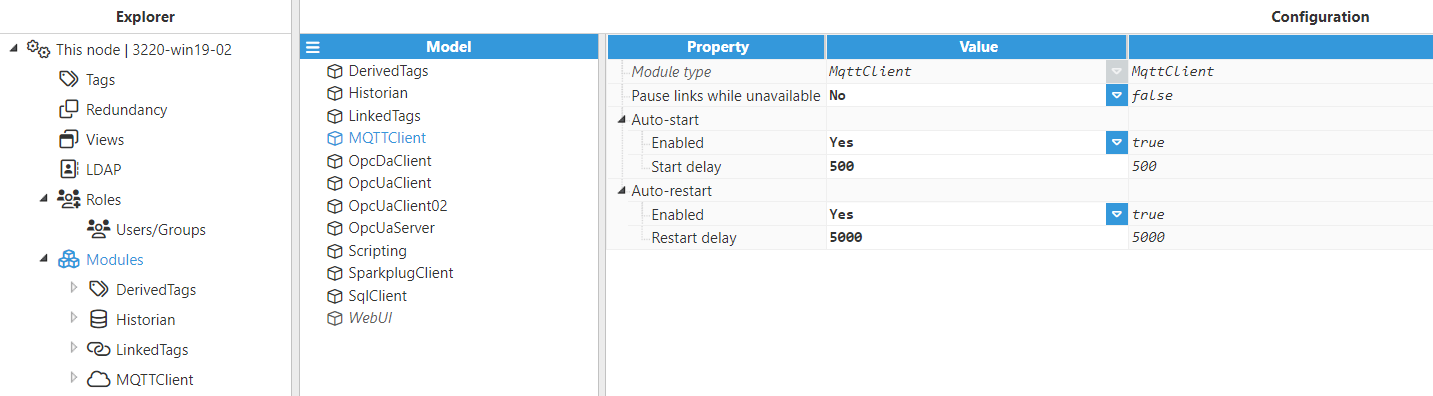
- Step 2: Provide a name for the module (in this case MQTTClient), assign the module type to MqttClient and save the new configuration.
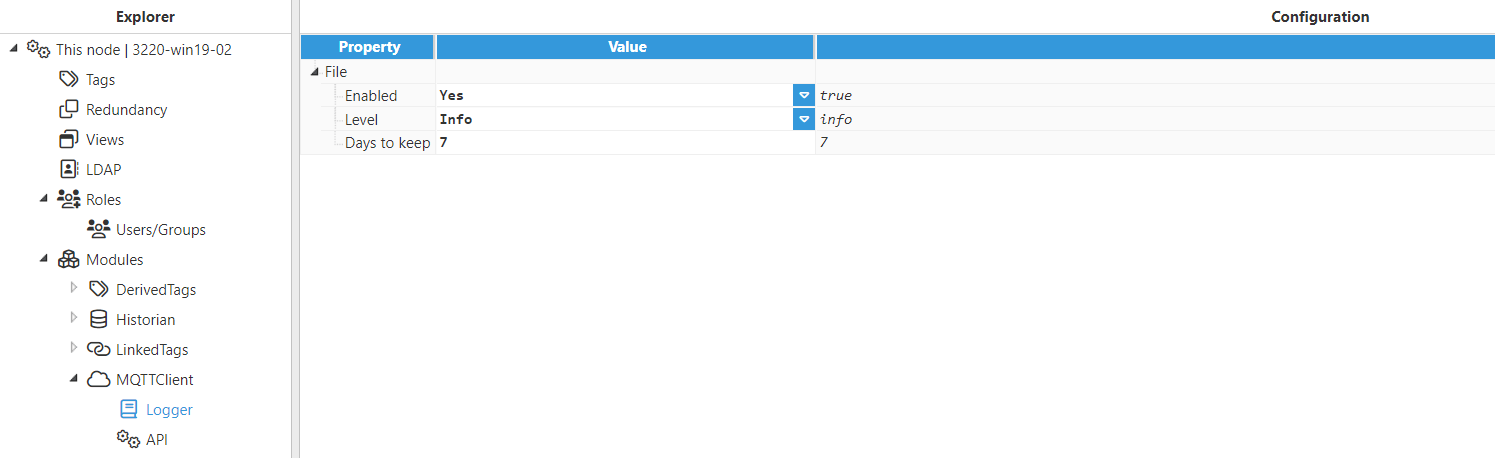
- Step 3: Configure the Logger and API sections (usually the default values are sufficient). Save the configuration.
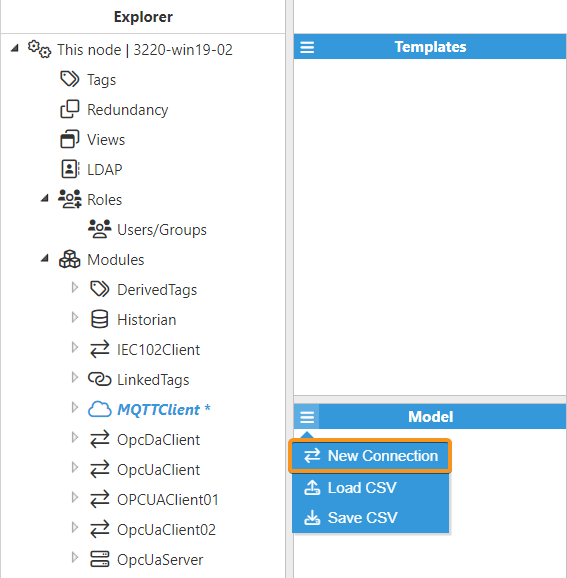
- Step 4: Create the connection to the MQTT Server. To do this, click the button on the left-hand side of the Model header, select New connection, and give it a name. In this case, we have called it HiveMQ. Each connection is an independent MQTT client.
- Step 5: Configure the MQTT Client as follows:
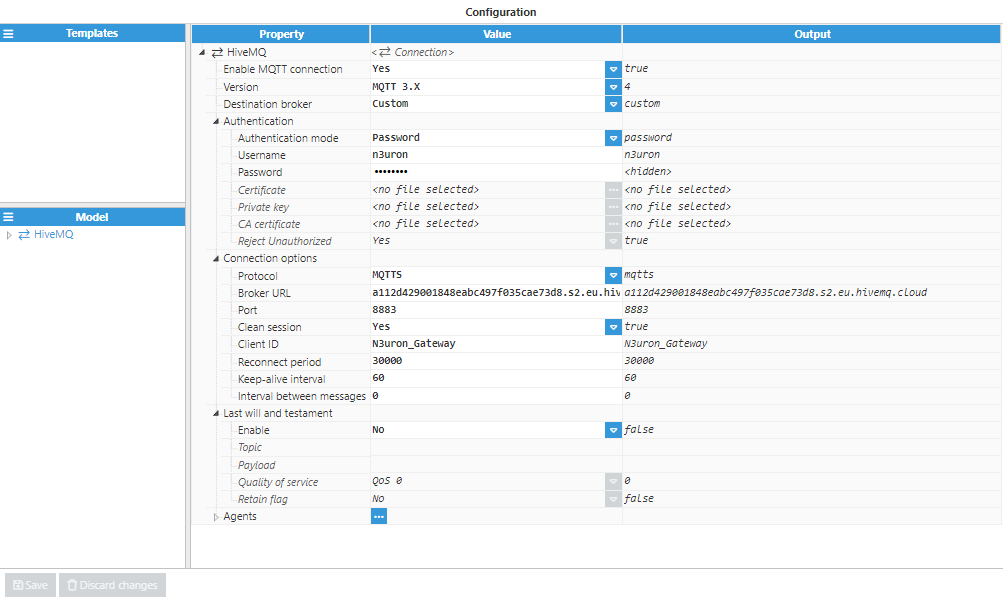
- Enable MQTT connection: Yes.
- Version: MQTT 3.X.
- Destination broker: Custom.
- Authentication:
- Authentication mode: Password.
- Username: n3uron.
- Password: Enter the password you used for the n3uron user when you configured it in the HiveMQ Cloud MQTT Broker.
- Connection options:
- Protocol: MQTTS.
- Broker URL: Enter your HiveMQ Cluster URL.
- Port: 8883.
- Clean session: Yes.
- Client ID: Select an id for your MQTT Client. For example, N3uron_Gateway.
- Reconnect period: 30000.
- Keep-alive interval: 60.
- Interval between messages: 0.
- Last will and testament:
- Enable: No.
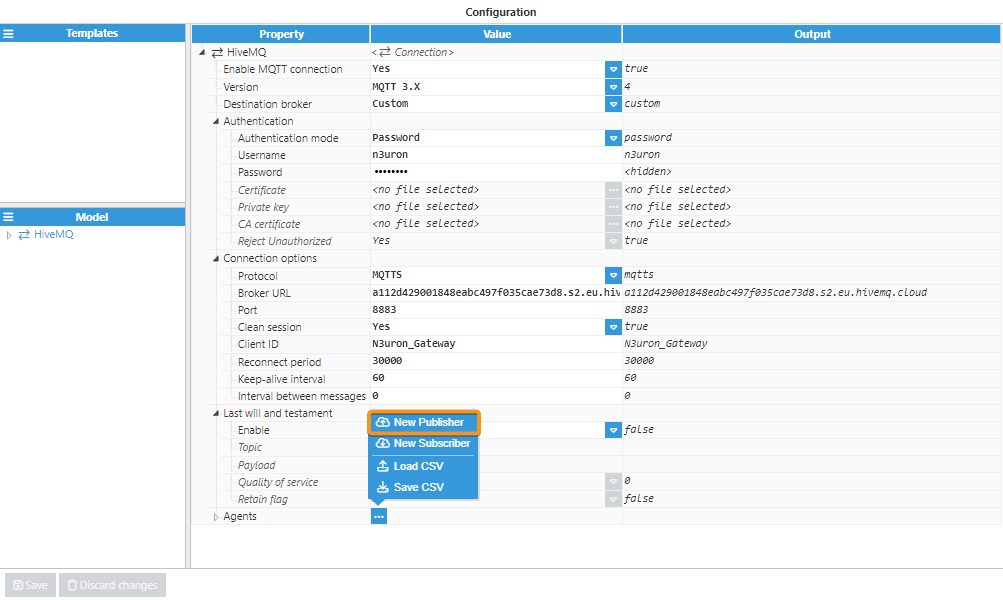
- Step 6: Once configured, let's create a new Publisher. To do this, click on the ellipsis button to the right of Agents and select New Publisher.
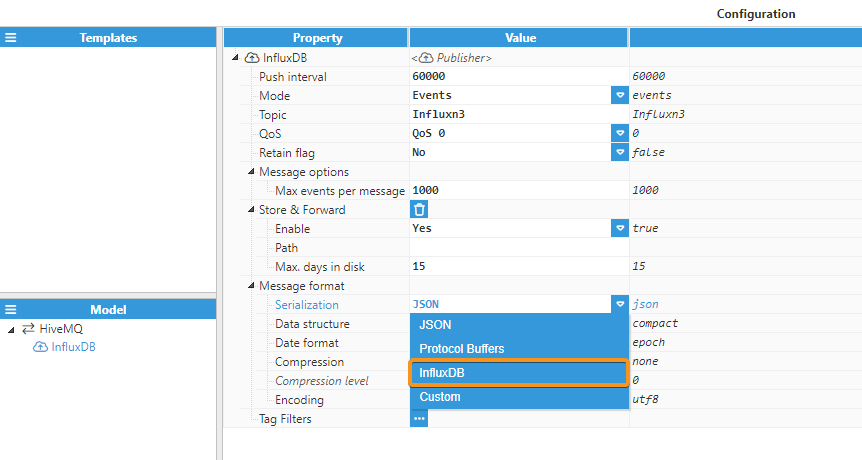
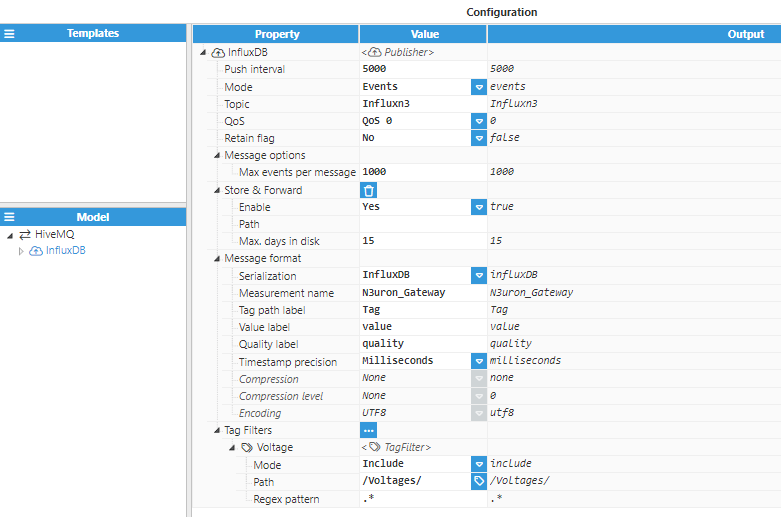
- Step 7: Now, give a name to the publisher (for example, InfluxDB) and configure the rest of its parameters:
- Push interval: 5000.
- Mode: events.
- Topic: Define the topic for the subscribers to identify it. We called it Influxn3.
- QoS: 0.
- Retain flag: false.
- Message options:
- Max events per message: 1000.
- Store & Forward:
- Enable: true.
- Path: If left blank, the path will be <program_root>/data/MqttClientInstance/ConnectionName/AgentName/.
- Max. days in disk: 15.
- Message format: Specify the Topic of the message. In this case, Influxn3. Then, select InfluxDB in Serialization to use InfluxDB Payload.
- Step 8: As we can see, when InfluxDB is selected, the following fields are shown. Configure them properly and click on Save.
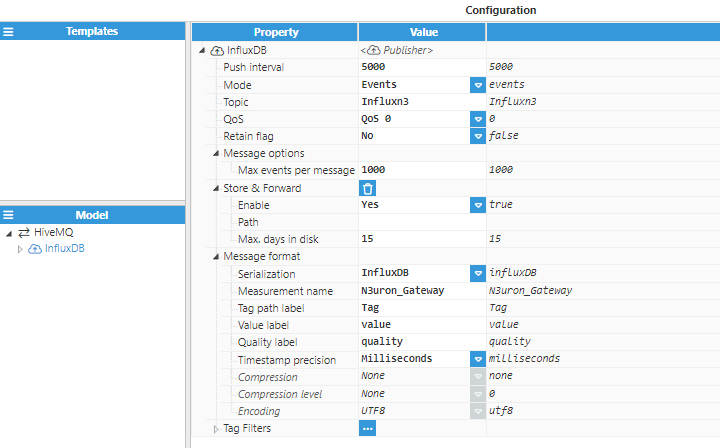
- Serialization: InfluxDB.
- Measurement name: The measurement name to send to InfluxDB. In this case, N3uron_Gateway.
- Tag path label: The key of the InfluxDB tag set where the tag path is sent (by default, Tag).
- Value label: The key of the InfluxDB field set where the tag value is sent (by default, value).
- Quality label: The key of the InfluxDB field set where the tag quality is sent. If empty, the quality will not be sent (by default, quality).
- Timestamp precision: The units of the timestamp. The default value of InfluxDB is nanoseconds, but N3uron works with milliseconds. Change it to milliseconds.
- Step 9: Create a Tag Filter and give it a name (for example: Voltage). You can leave the rest of the parameter default values or select only the path of the tags you want to send. In this case, we have only included the Voltage tags. Do not forget to save changes when you finish.

InfluxDB Cloud Configuration for Receiving MQTT Data
The last step to completing your connection starts with gaining access to InfluxDB Cloud. If you do not have an account yet you can create one at https://cloud2.influxdata.com/signup.
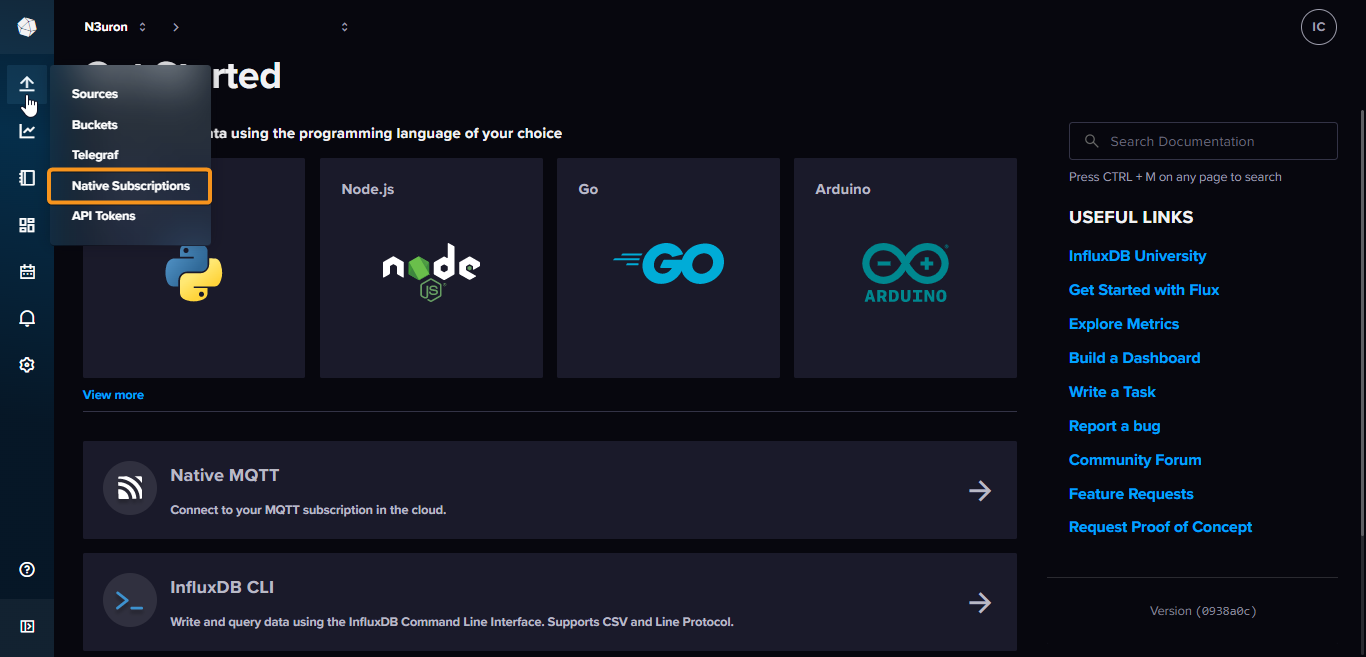
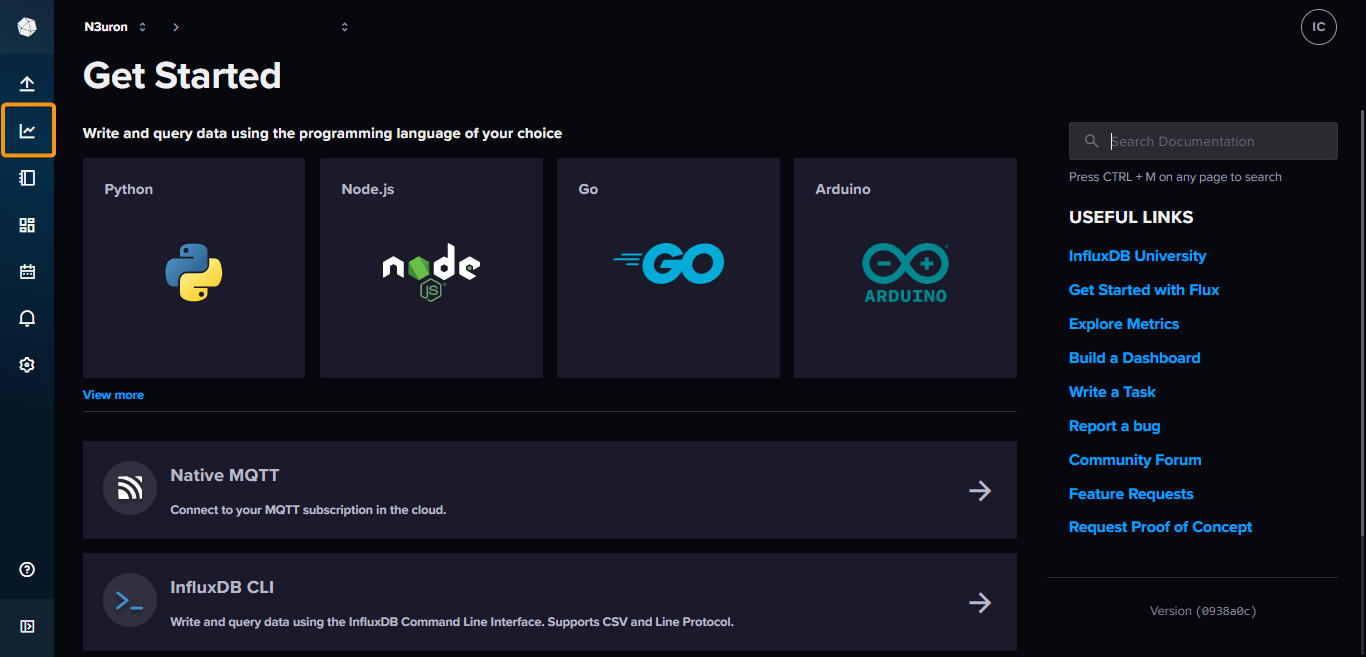
- Step 1: Once you are signed in, navigate to “Native subscriptions” by clicking on the upward-facing arrow on the left of the screen.
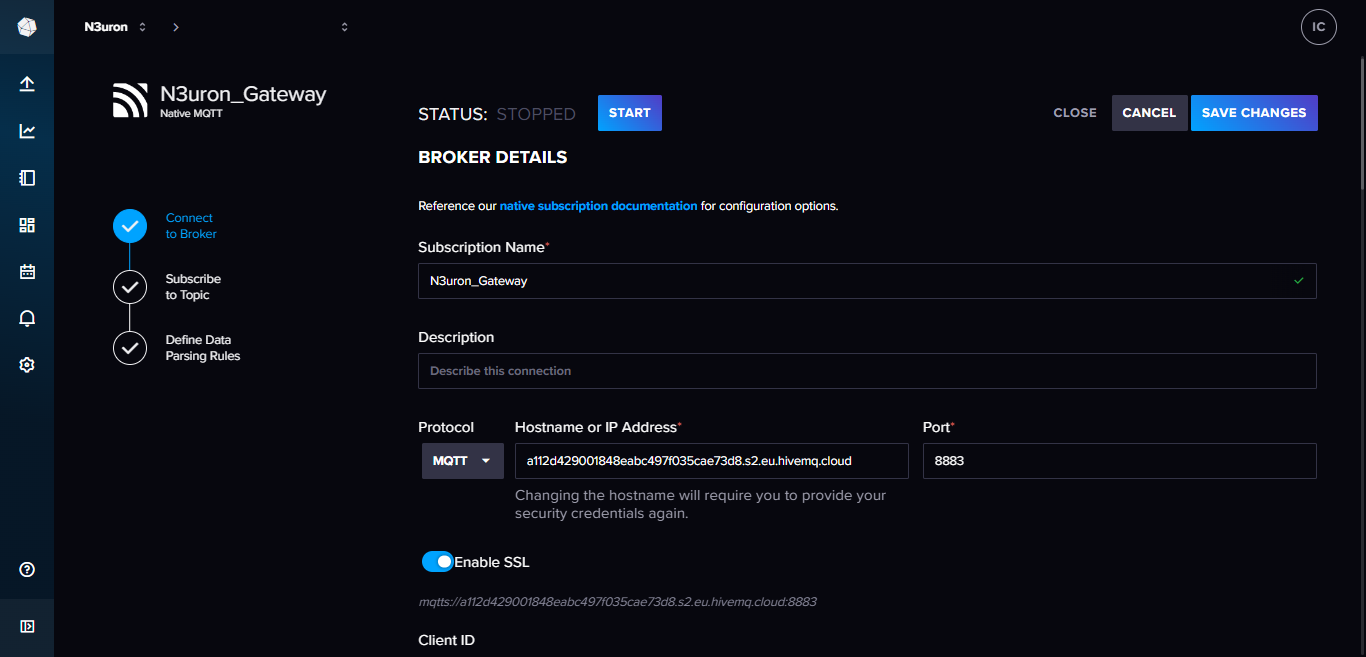
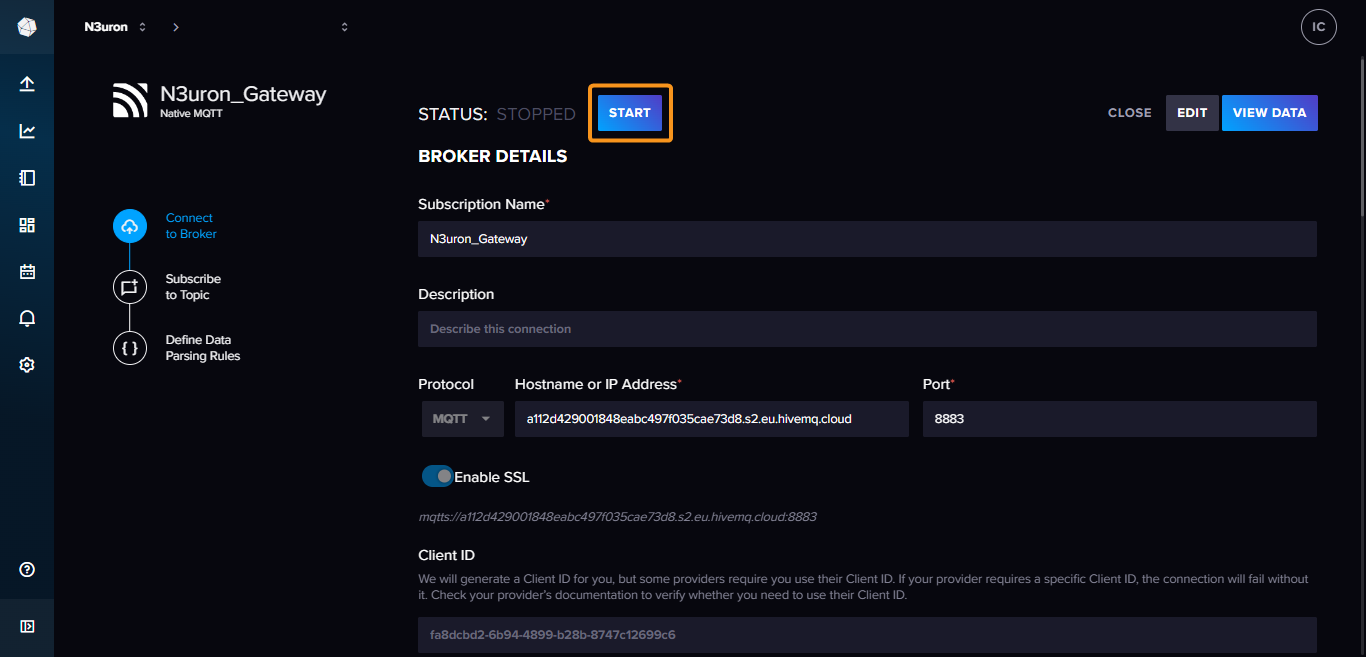
- Step 2: When the new page loads, enter the following information to complete your subscription to the HiveMQ broker:
- Broker details:
- Subscription name: Choose a name for the subscription. We recommend choosing the same as the N3uron measurement name. In this case, it’s N3uron_Gateway).
- Description: This field gives you the possibility to add extra information about the connection and subscription topic.
- Hostname or IP Address: Enter your HiveMQ Cluster URL.
- Port: 8883.
- Enable SSL: Enabled.
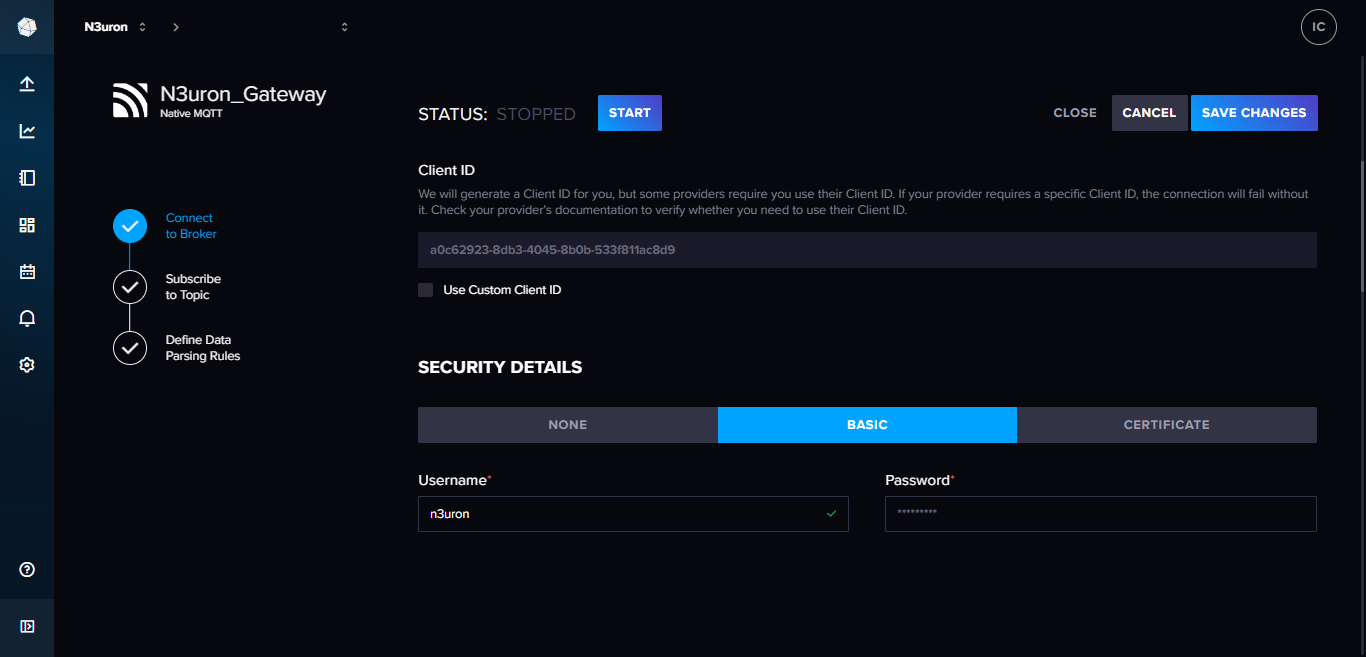
- Client ID: A new Client ID will be automatically generated.
- Broker details:
- Security details:
- Plan: Basic.
- User and password: Enter your HiveMQ broker Active MQTT credentials.
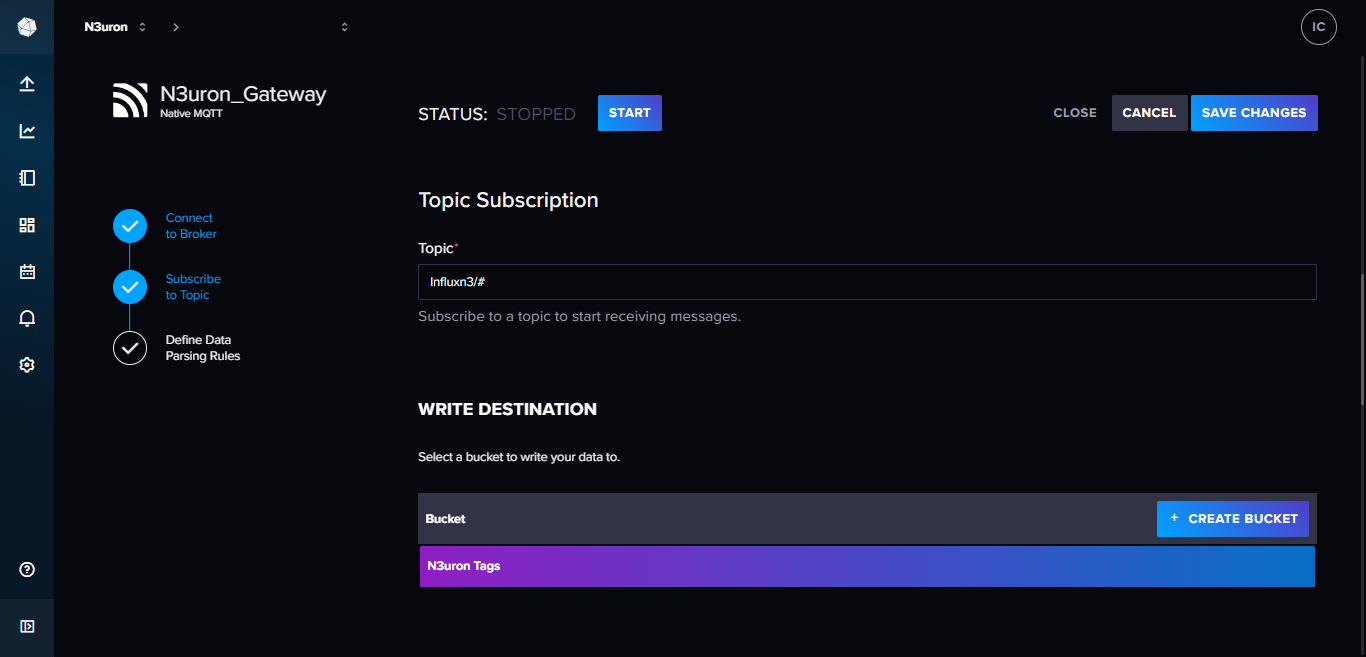
- Step 3: In the next section, you need to complete the following fields related to the topic subscription:
- Topic subscription:
- Topic: Enter the name of the topic you want to receive MQTT messages from, followed by “/#”. ( In this case: Influxn3/# )
- Write destination:
- Bucket: Select the bucket to where you want to write your messages to (a bucket is a named location where time series data is stored). If there are not buckets yet, create a new one and give it a name (for example: N3uron Tags).
- Topic subscription:
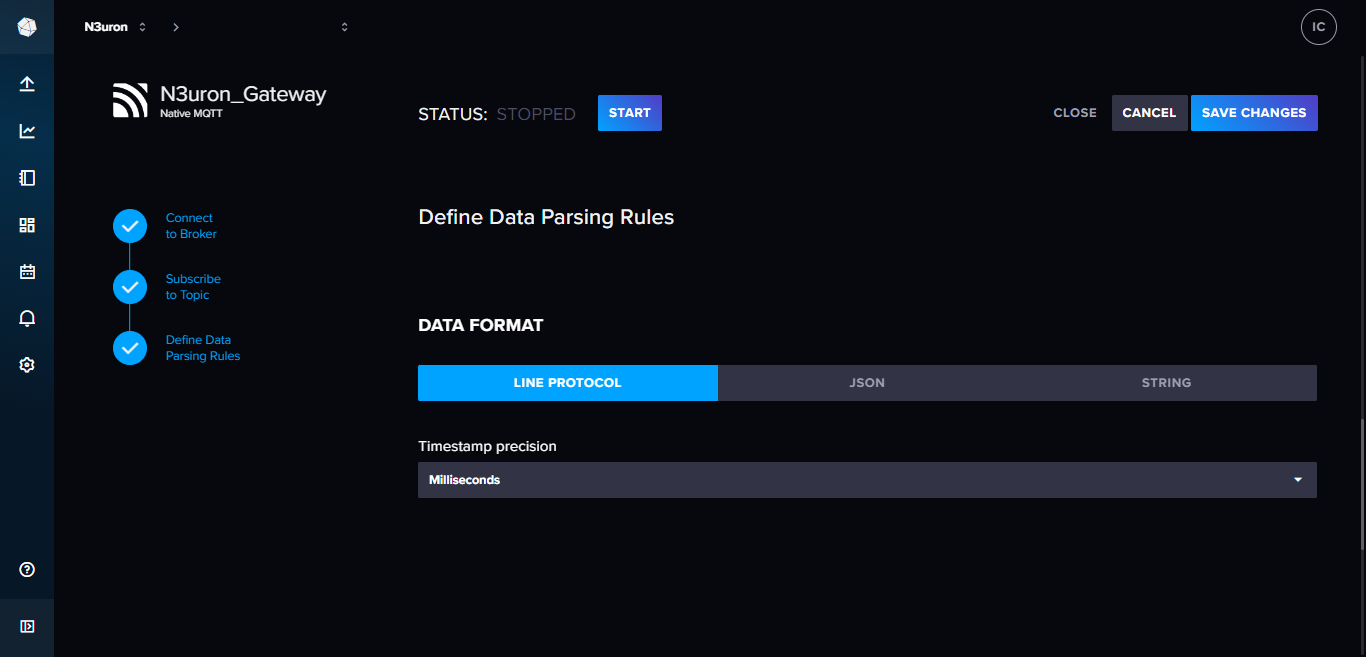
- Step 4: Finally, define the data parsing rules and save the subscription:
- Data format: Select Line protocol.
- Timestamp precision: milliseconds.
- Data format: Select Line protocol.
Visualizing MQTT Data in InfluxDB
InfluxDB allows users to display data received in many different formats. In order to visualize data pushed from N3uron, proceed as follows:
- Step 1: Make sure your subscription is running. Once created, select the “Native subscriptions” tab and check its status.
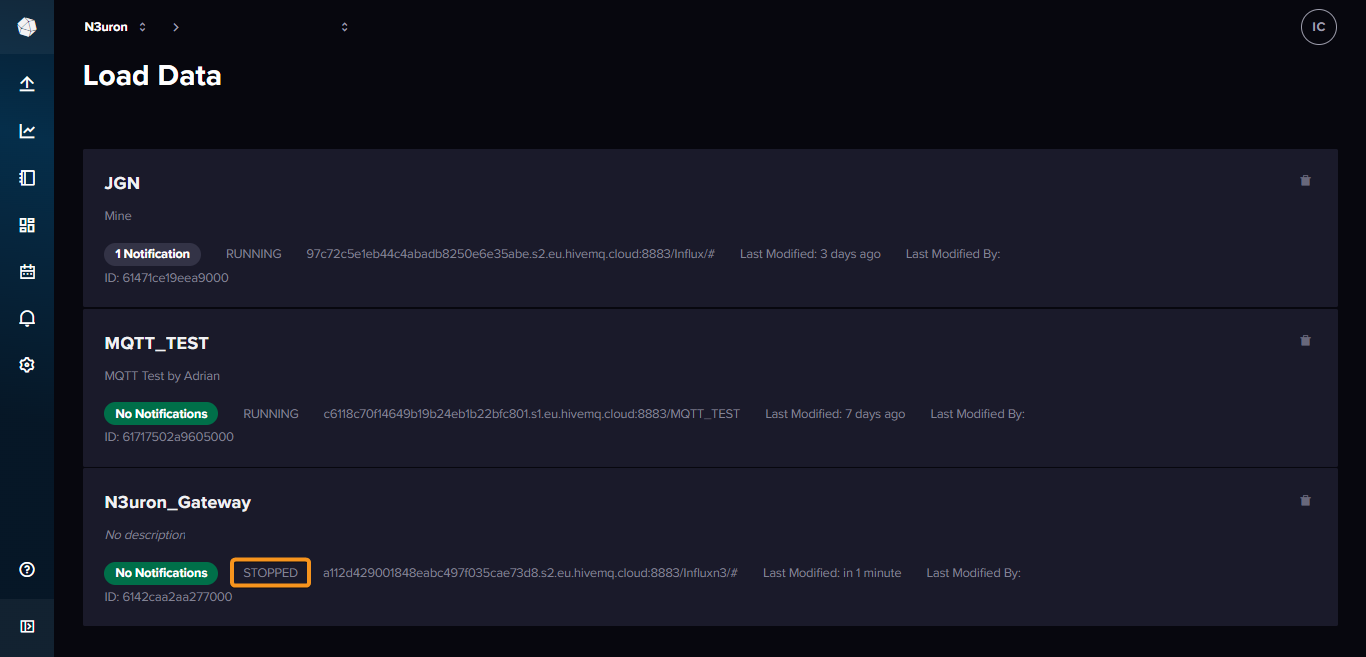
- Step 2: If it has stopped, access your subscription and click on the “Start” button.
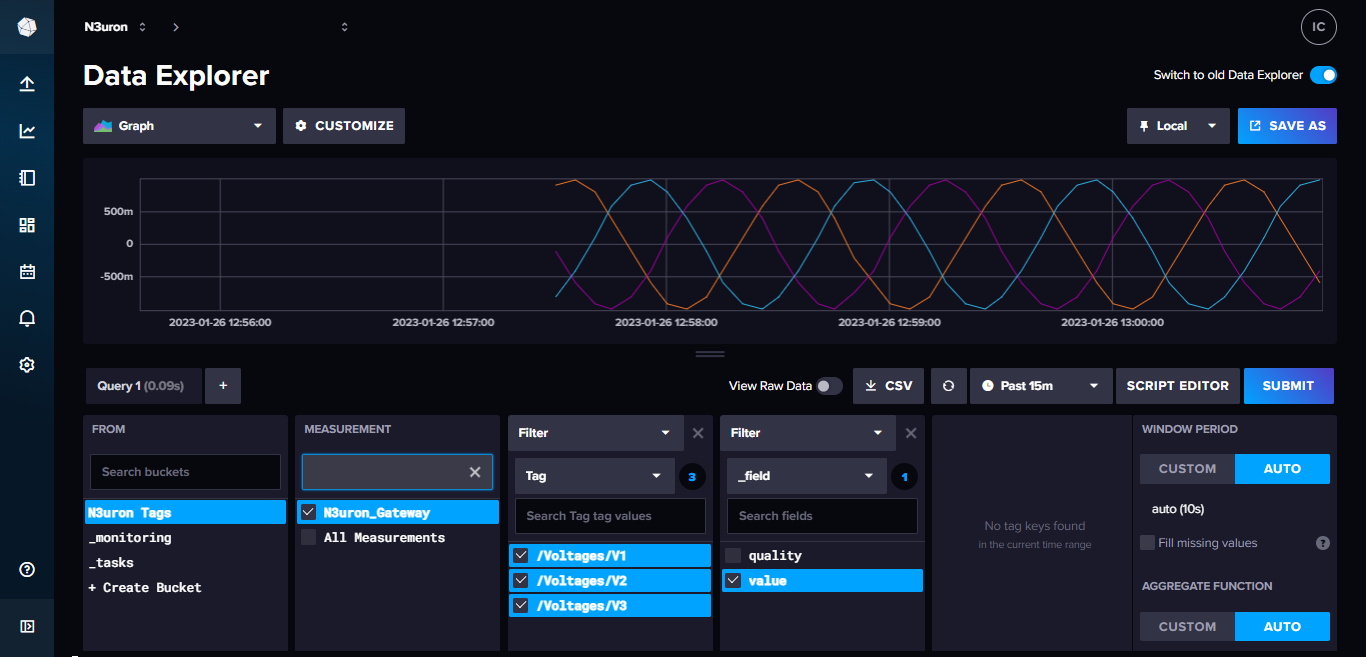
- Step 3: Once the subscription is running, navigate to “Data explorer” by clicking on the second button starting from the top on the left hand side of the screen.
- Step 4: Select the bucket you want to retrieve information from, as well as the Measurement, tag values and fields and start visualizing your data.