Example Connection for KEPServerEX and TOPServer
The following steps show how to connect to KEPServerEX and TOPServer using the OPC DA client.
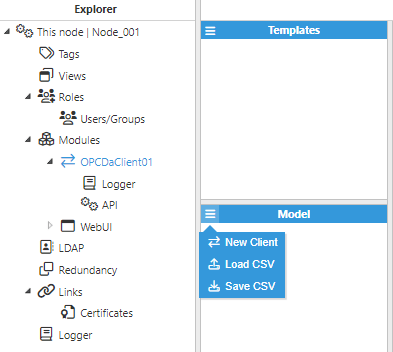
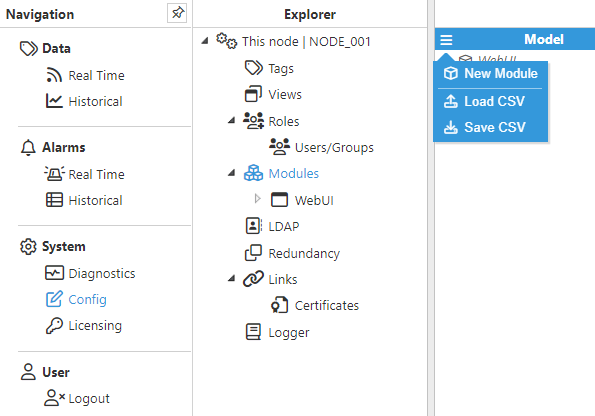
- Step 1: Create the module: (Config => Modules => Model => New module)

- Step 2: Provide a name for the module (in this case OPCDAClient01), assign the module type (in this case OpcDaClient), and save the new configuration.
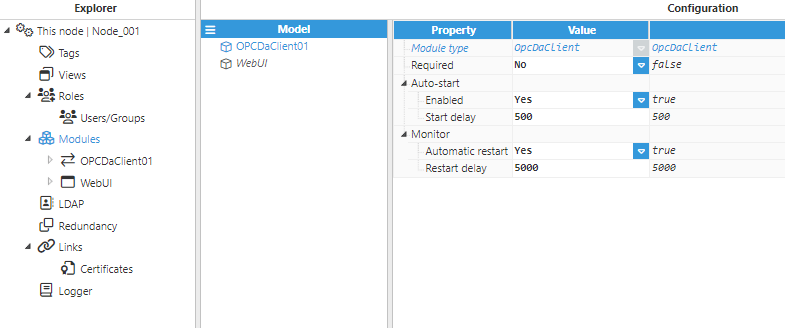
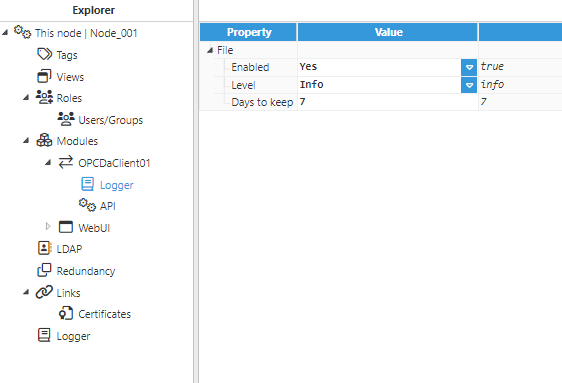
- Step 3: Configure the Logger and API sections (usually the default values are sufficient). Save the configuration.

- Step 4: Create the connection to the OPC DA Server. Each connection is an independent OPC DA client.
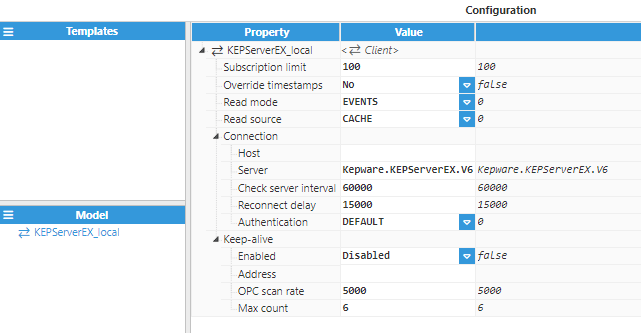
- Step 5: Configure the OPC DA client to connect to KEPServerEX or TOPServer.
- Host: Enter the Hostname/IP address of the target OPC server. Empty means localhost.
- Server: Instance name of the target OPC server, also known as Prog ID. For KEPServer6, the instance name is Kepware.KEPServerEX.V6 and for KEPServerEX 5, the instance name is Kepware.KEPServerEX.V5. For TOPServer 6, the instance name is SWToolbox.TOPServer.V6 and for TOPServer 5, the instance name is SWToolbox.TOPServer.V5.
Save the configuration settings and select "restart module".
- Step 6: Create a tag to connect to the OPC Server: Config => Model => New Tag

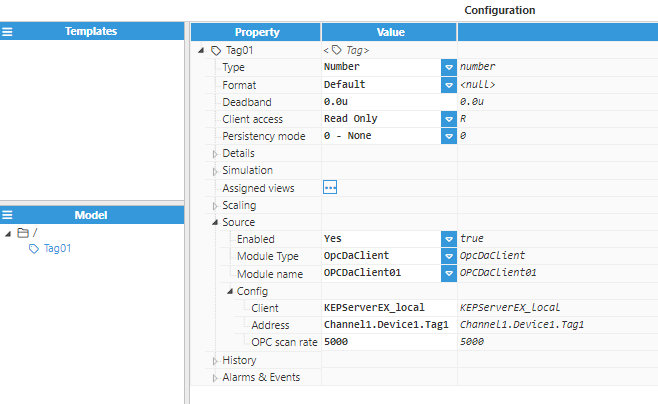
- Step 7: Configure the tag. All details regarding communication should be configured in Source entry:
- Source.Enabled: True
- Source.Module Type: OpcDaClient
- Source.Module name: OPCDAClient01 (the module created in previous steps)
- Source.Config.Client: KEPServerEX_local (the connection created in previous steps)
- Source.Config.Address: The tag ID in the OPC server. In this example, a valid tag ID would be Channel1.Device1.Tag1 since KEPServerEX is running the default configuration after installation.
- Step 8: The tag should now be available and displaying as good quality in Real-Time display.

Usually, no changes are required in the DCOM since N3uron runs as a service and the default configuration for KEPServerEX allows connections for local applications running as System.
Log files for troubleshooting can be downloaded from the WebUI in Diagnostics => This node => Export logs button.
Example Connection to Matrikon OPC Simulation
The following steps show how to connect to Matrikon OPC simulation using the N3uron OPC DA client:
- Step 1: Create the module: (Config => Modules => button to the left of Modules => New module)
- Step 2: Provide a name for the module (in this case OPCDAClient01), assign the type of module (in this case OpcDaClient) and save the new configuration.

- Step 3: Configure the log (usually the default values are sufficient). Save the log configuration.
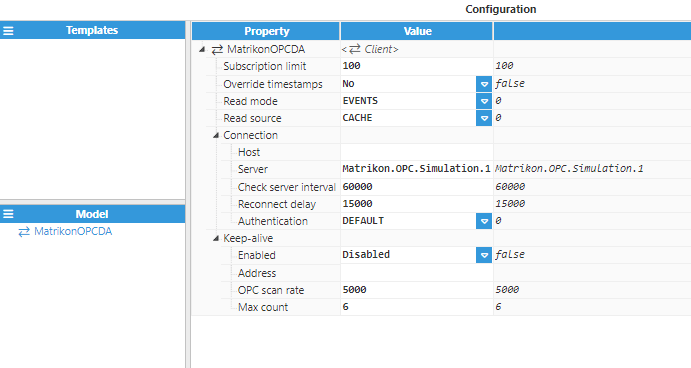
- Step 4: Create the OPC DA connection to an OPC client and name it MatrikonOPCDA. Each connection is an independent OPC DA Client.

- Step 5: Configure the OPC DA Client to connect to Matrikon.
- Host: Enter the Hostname/IP address of the target OPC server. Empty means localhost.
- Server: Instance name of the target OPC server, also known as Prog ID. For Matrikon Simulator, the instance name is “Matrikon.OPC.Simulation.1”.
Save the configuration and select "restart module".
- Step 6: Create a tag to connect to the OPC sever: Config => Model => New Tag

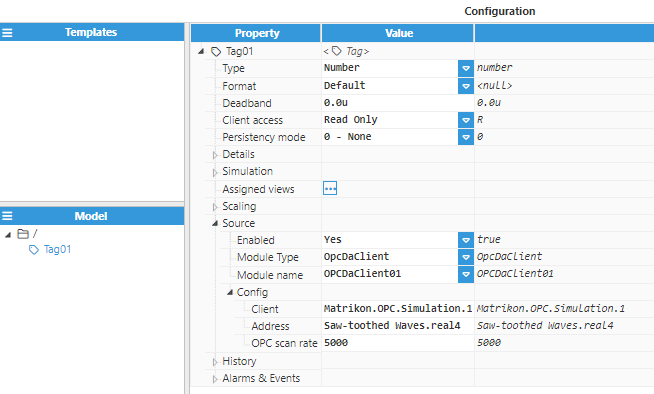
- Step 7: Configure the tag. All details regarding communication should be configured in Source entry:
- Source.Enabled: True
- Source.Module Type: OpcDaClient
- Source.Module name: OPCDAClient01 (the module created in previous steps)
- Source.Config.Client: MatrikonOPCDA (the connection created in previous steps)
- Source.Config.Address: The tag ID in the OPC server. In this example, a valid tag ID would be “Saw-toothed Waves.Real4” to retrieve simulated data from Matrikon Simulator.
- Step 8: The tag should now be available, displaying as good quality in Real-Time display.

Usually, no changes are required in the DCOM since N3uron runs as a service and the default configuration of Matrikon OPC allows connections for local applications running as System.
Log files for troubleshooting can be downloaded from the WebUI in Diagnostics => This node => Export logs button.