Connecting to KEPServerEX from N3uron using OPC UA
This is a detailed step-by-step guide to connecting to KEPServerEX from N3uron using the OPC UA Client module.
- Step 1: Create the module: (Config => Modules => Model => New Module)
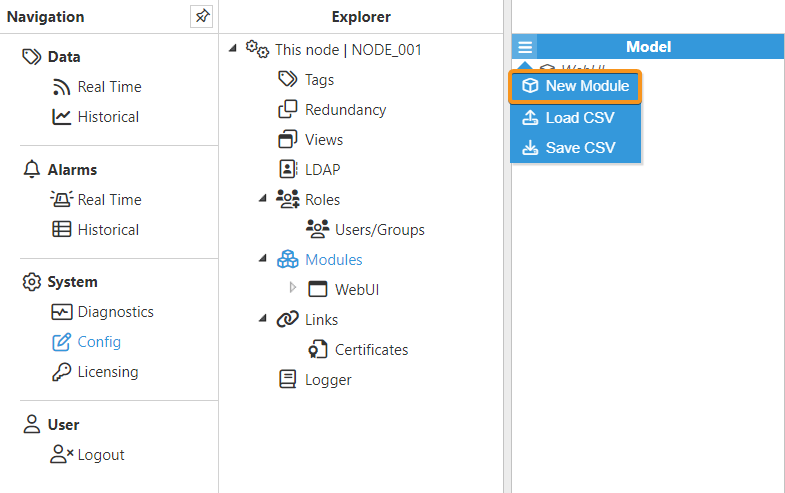
- Step 2: Provide a name for the module (in this case OPCUAClient01), assign the module type (in this case OpcUaClient) and save the new configuration.
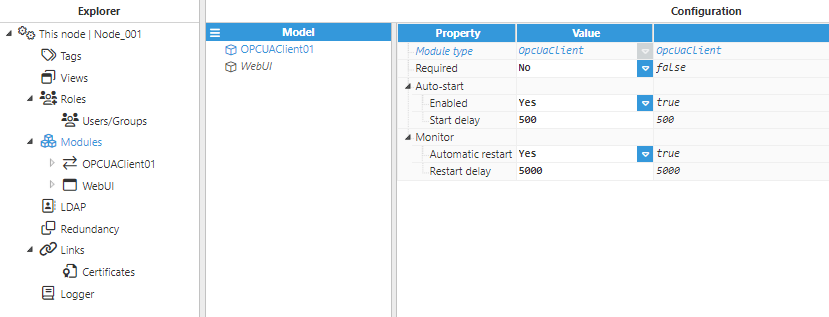
- Step 3: Configure the Logger and API sections (usually the default values are sufficient). Save the configuration.
.png)
- Step 4: Create the connection to the OPC UA Server. Each connection requires an independent Client.
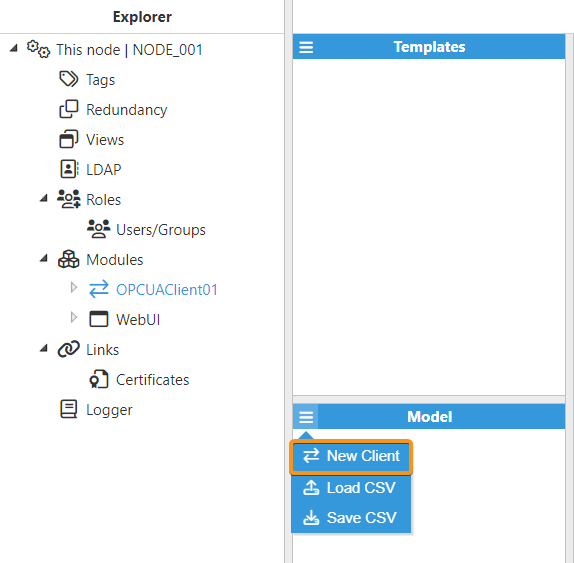
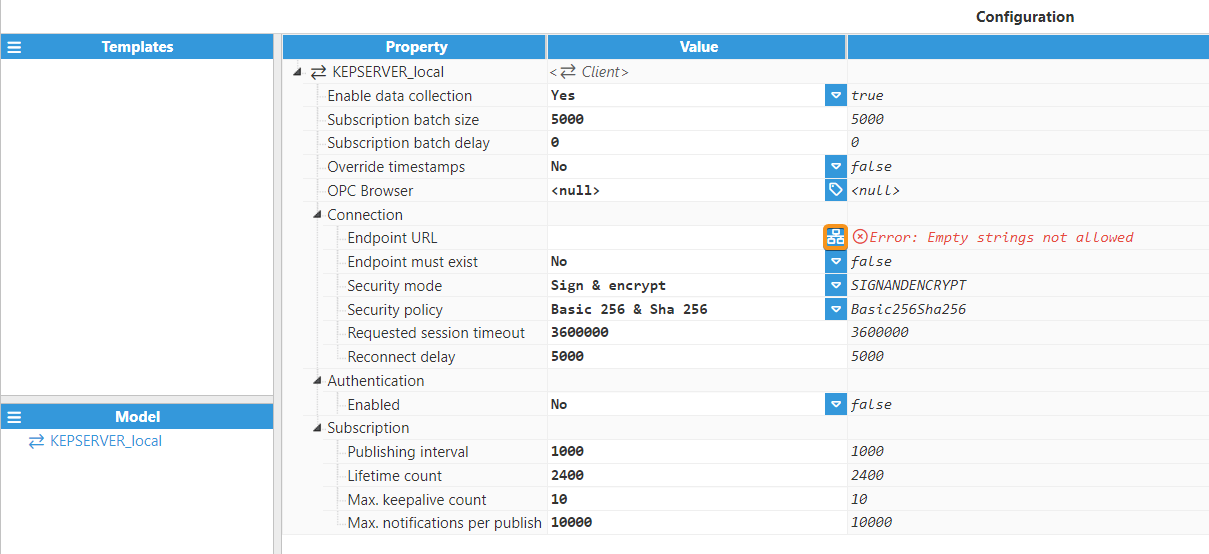
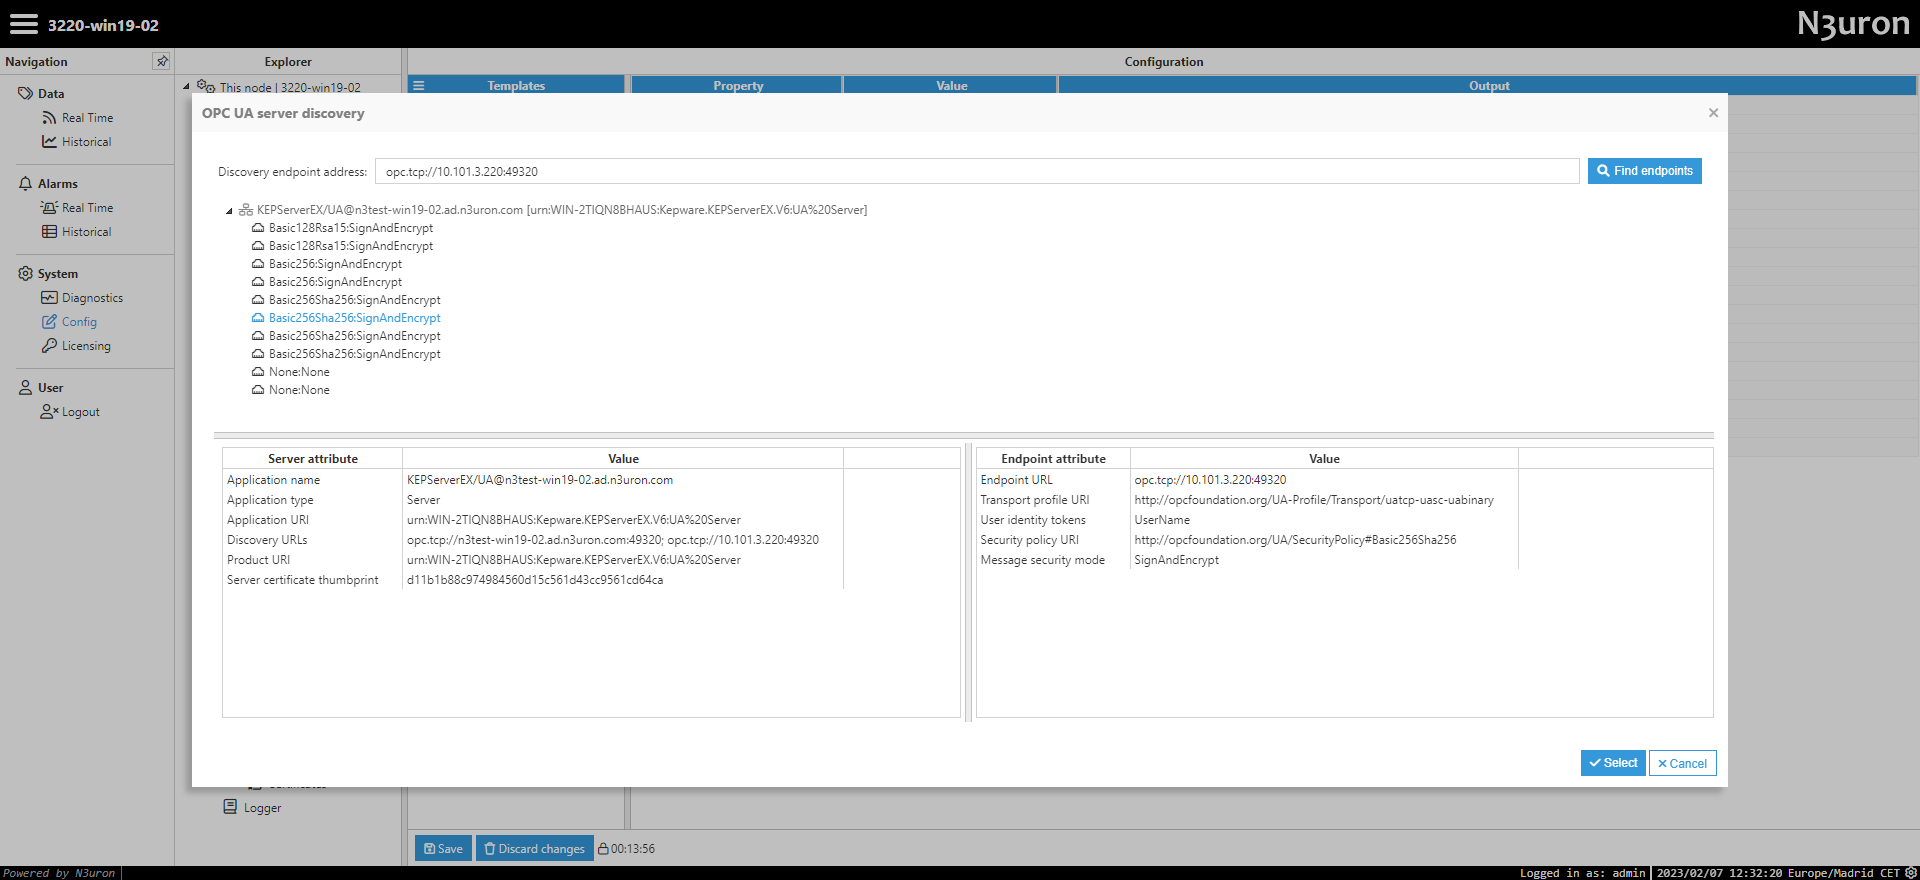
- Step 5: Configure the OPC UA Client to connect to the KEPServerEX. To do so, click on the OPC UA Server discovery button to the right of the Endpoint URL field and enter the corresponding endpoint of the server you want to connect to. The “Endpoint URL” is the Hostname/IP address of the target OPC server and the “port”, using the format opc.tcp://endpointURL:port. The default OPC UA port for the KEPServer is 49320.
As shown below, once the endpoint has been selected from the available options displayed in the OPC UA Server discovery interface, the Security mode and Security policy fields are automatically filled in.
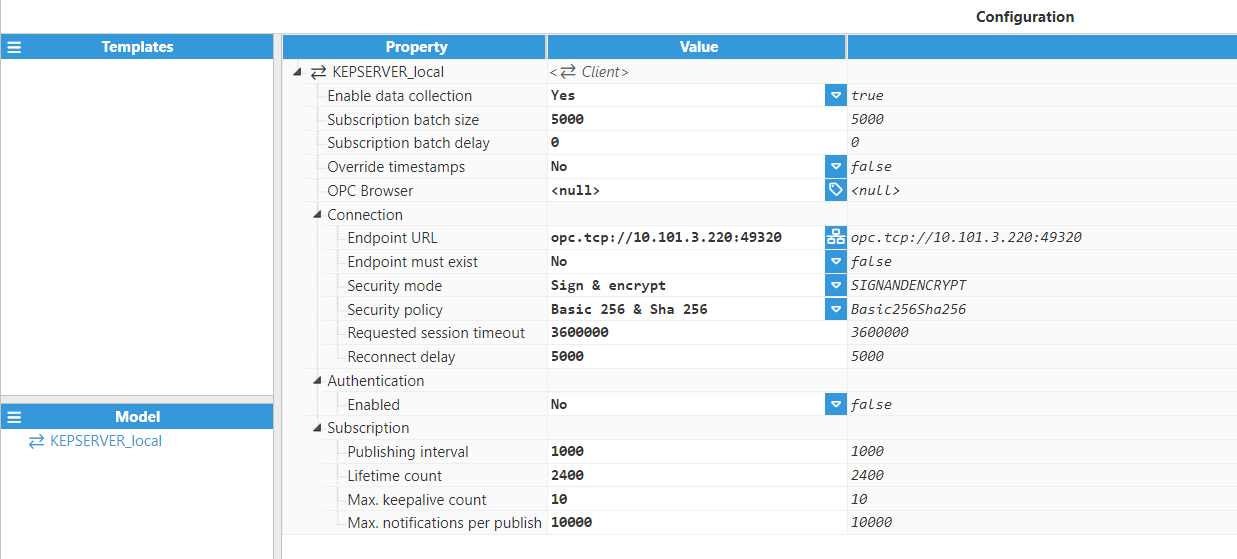
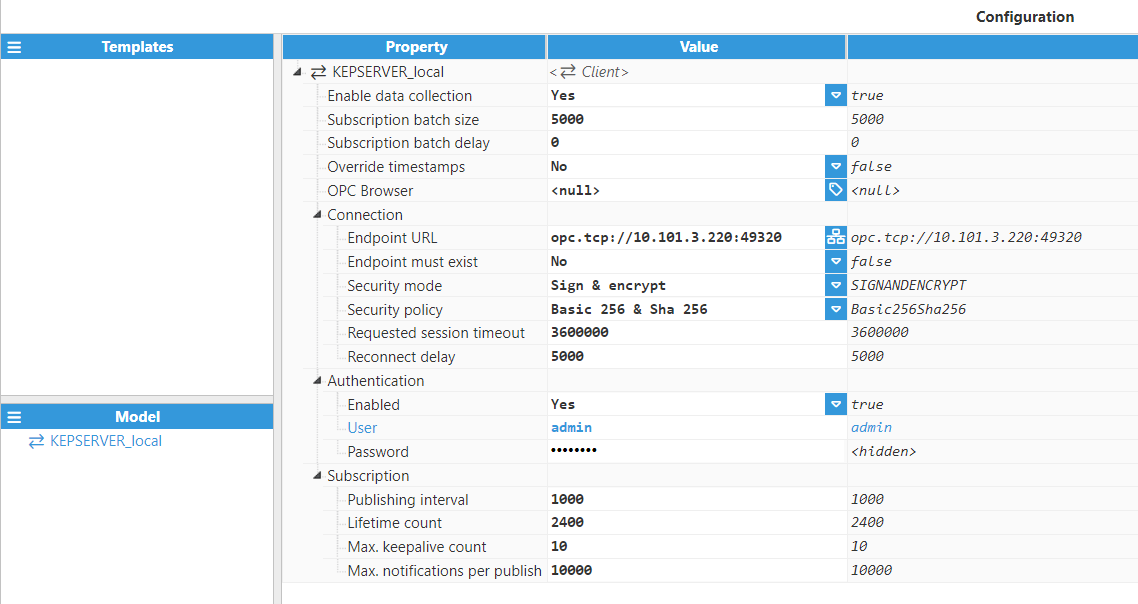
- Step 6: Enable Authentication and fill in the User and Password, if your KEPServerEX requires it. Remember to save the configuration.
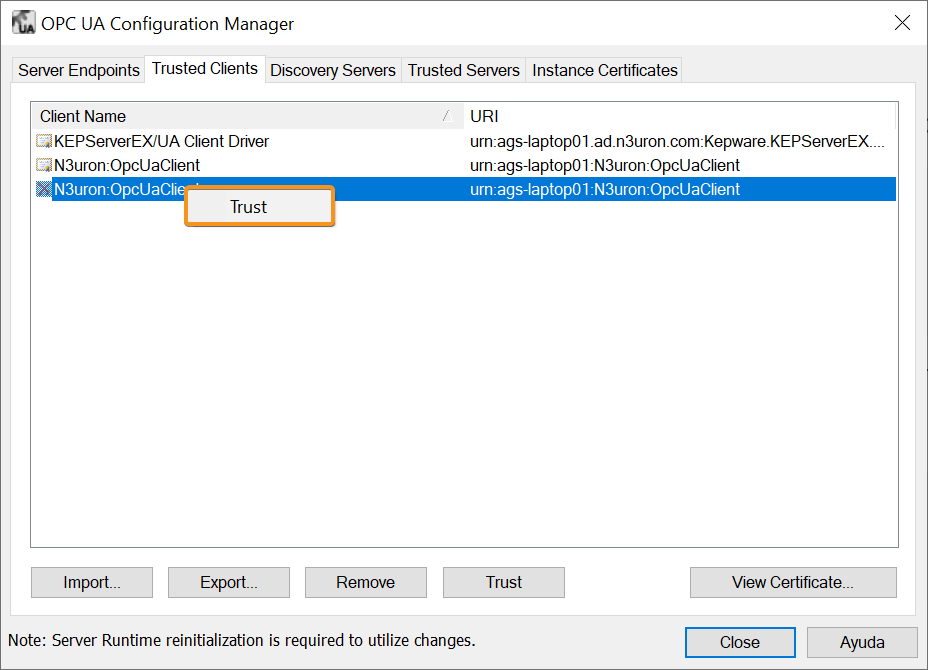
- Step 7: Trust the KEPServerEX certificate in the Certificates section within N3uron, as well as the N3uron OPC UA Client certificate in the KEPServer OPC UA Configuration Manager.

- Step 8: Create a tag to connect to the OPC sever: Config => Tags => New Tag
.png)
- Step 9: Configure the tag. All details regarding communication should be configured in the Source entry. First, select the module from the drop-down menu in the Module name settings and then enter the name of the connection that was created in previous steps into the OPC UA Client field. Next, click on the OPC UA tag browser button and select your Node ID.
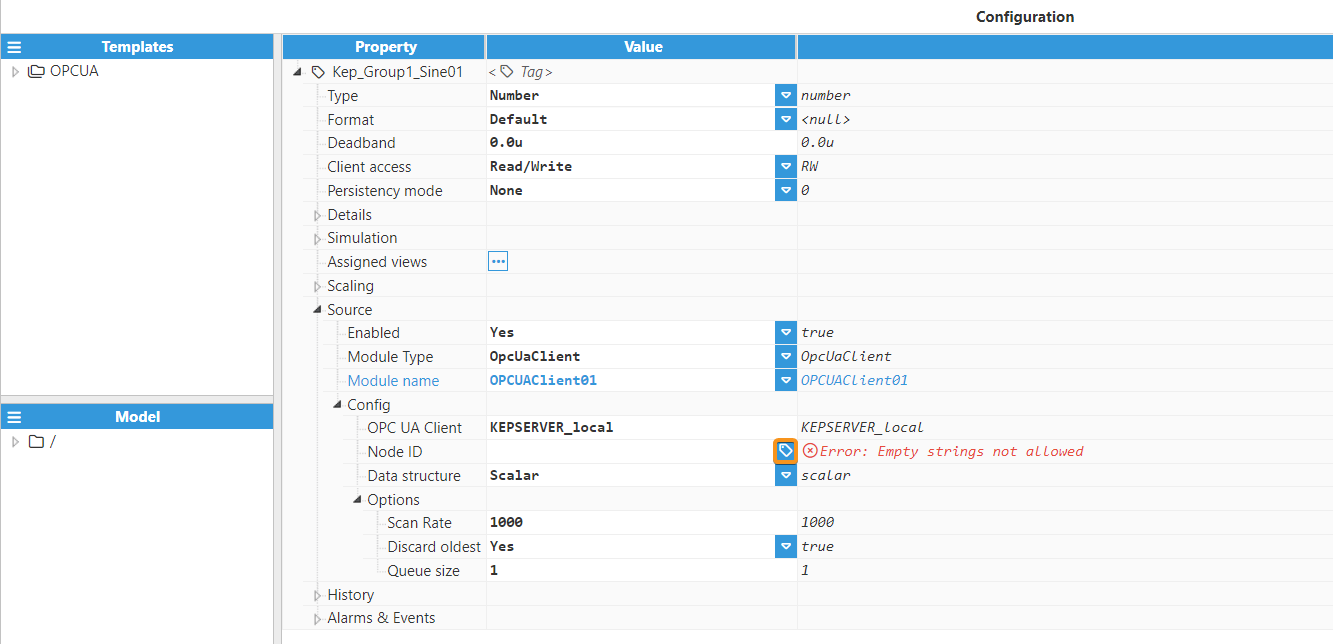
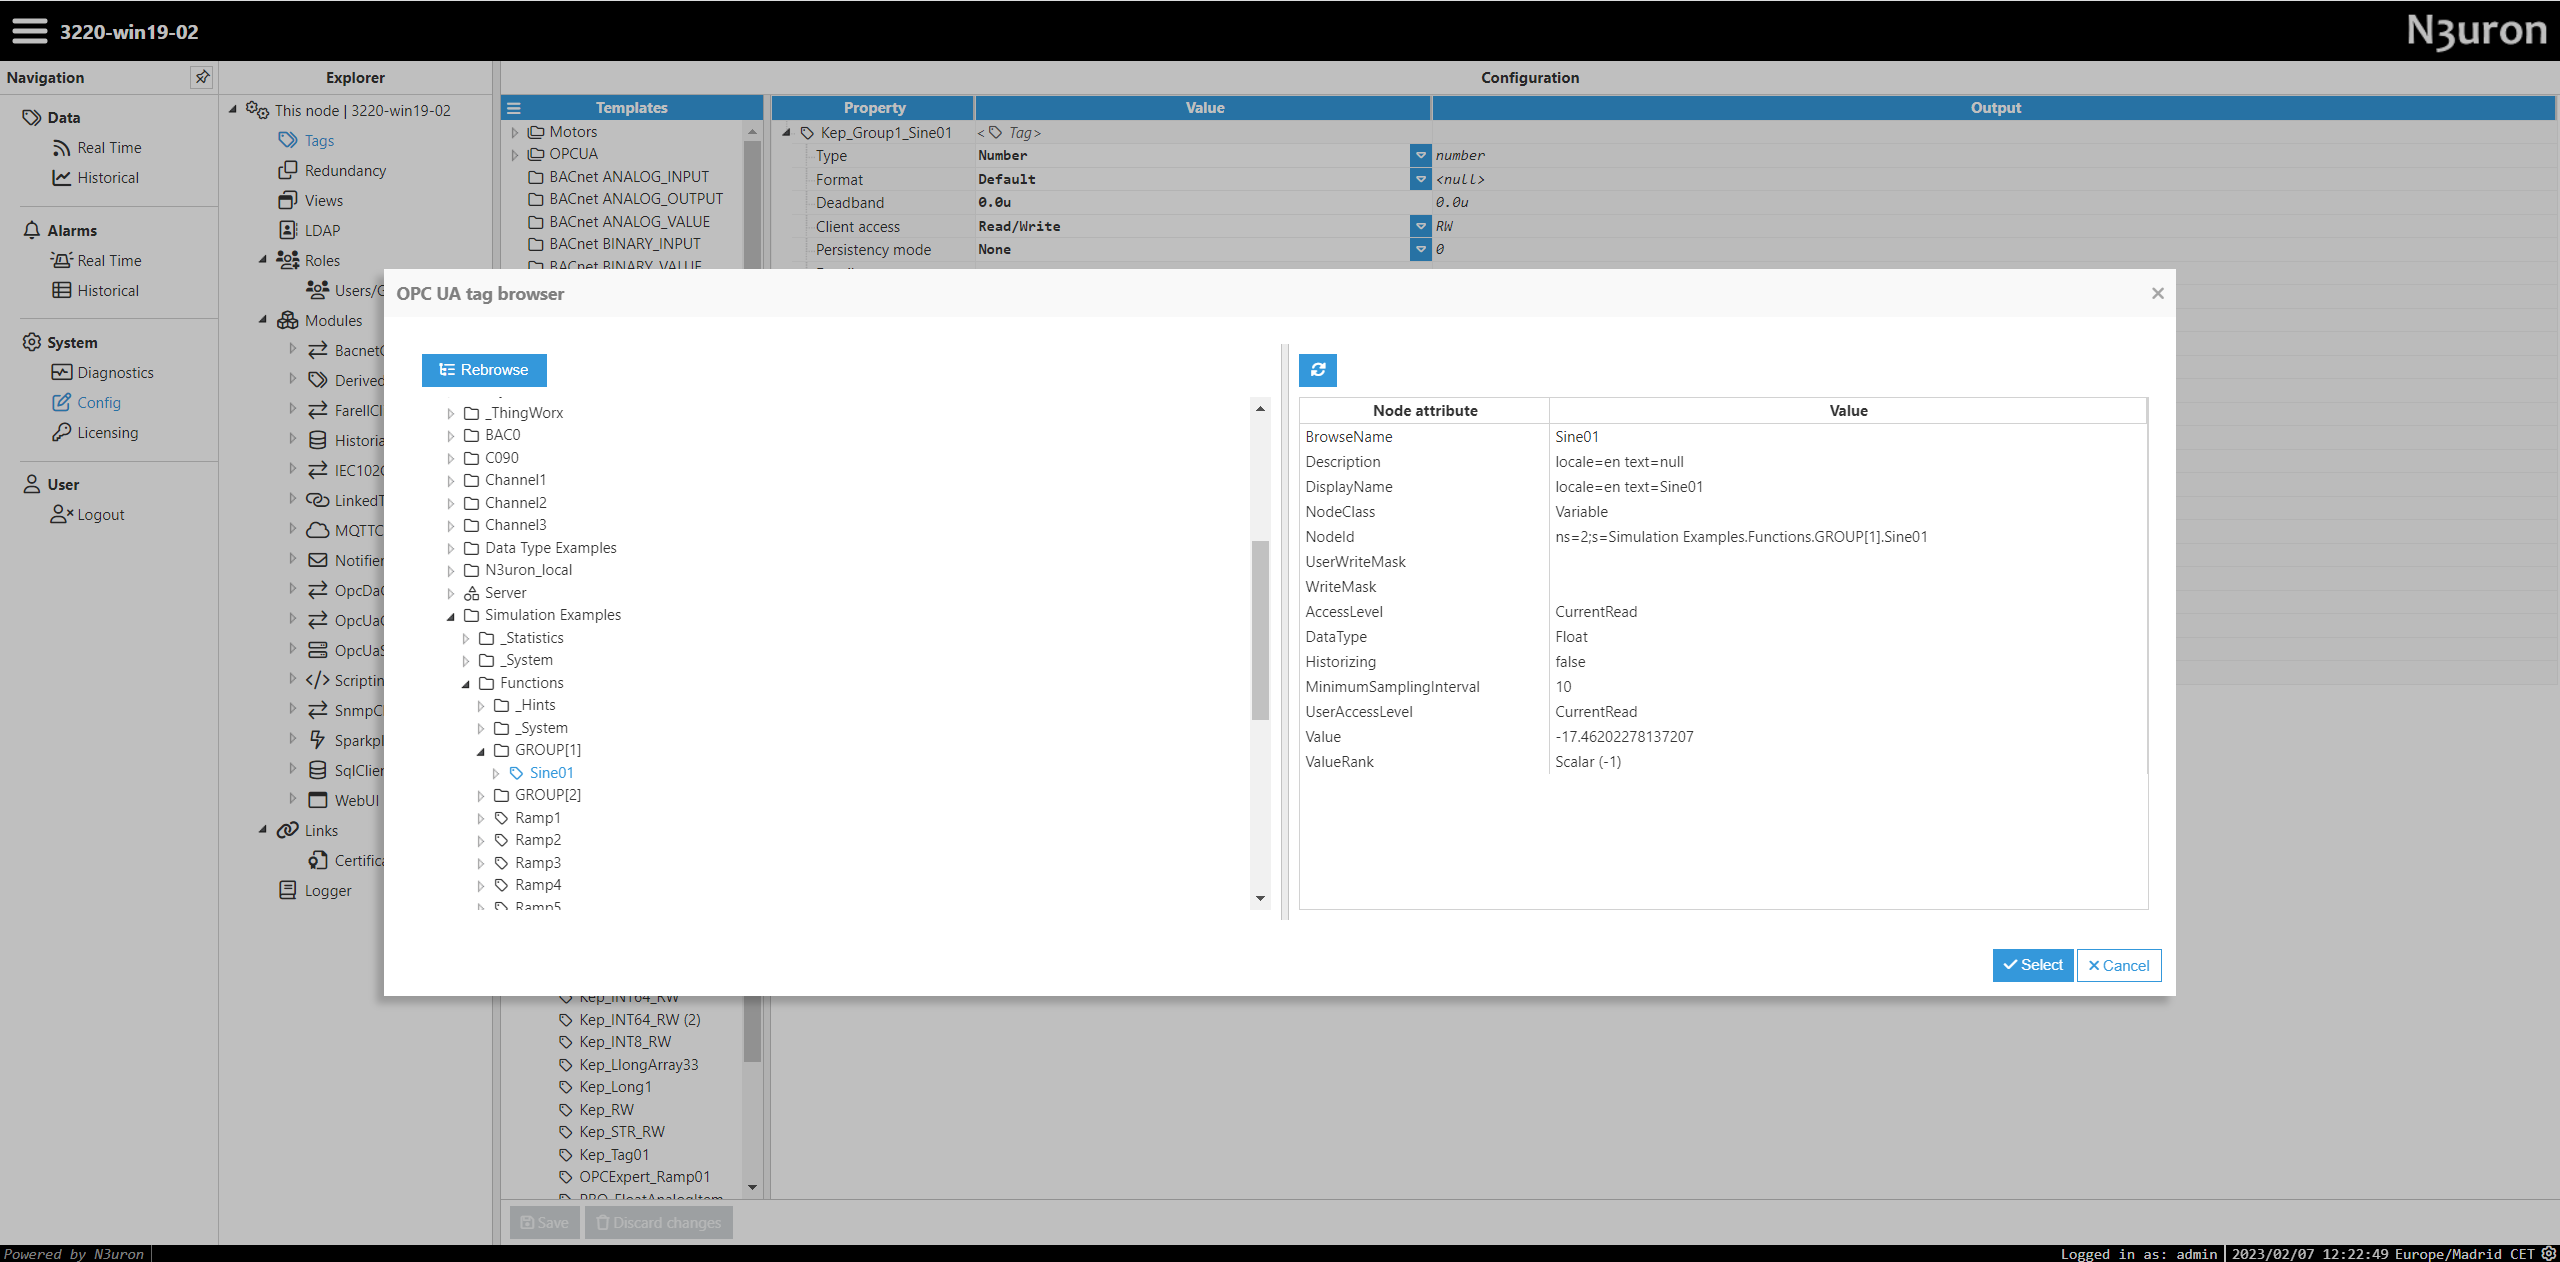
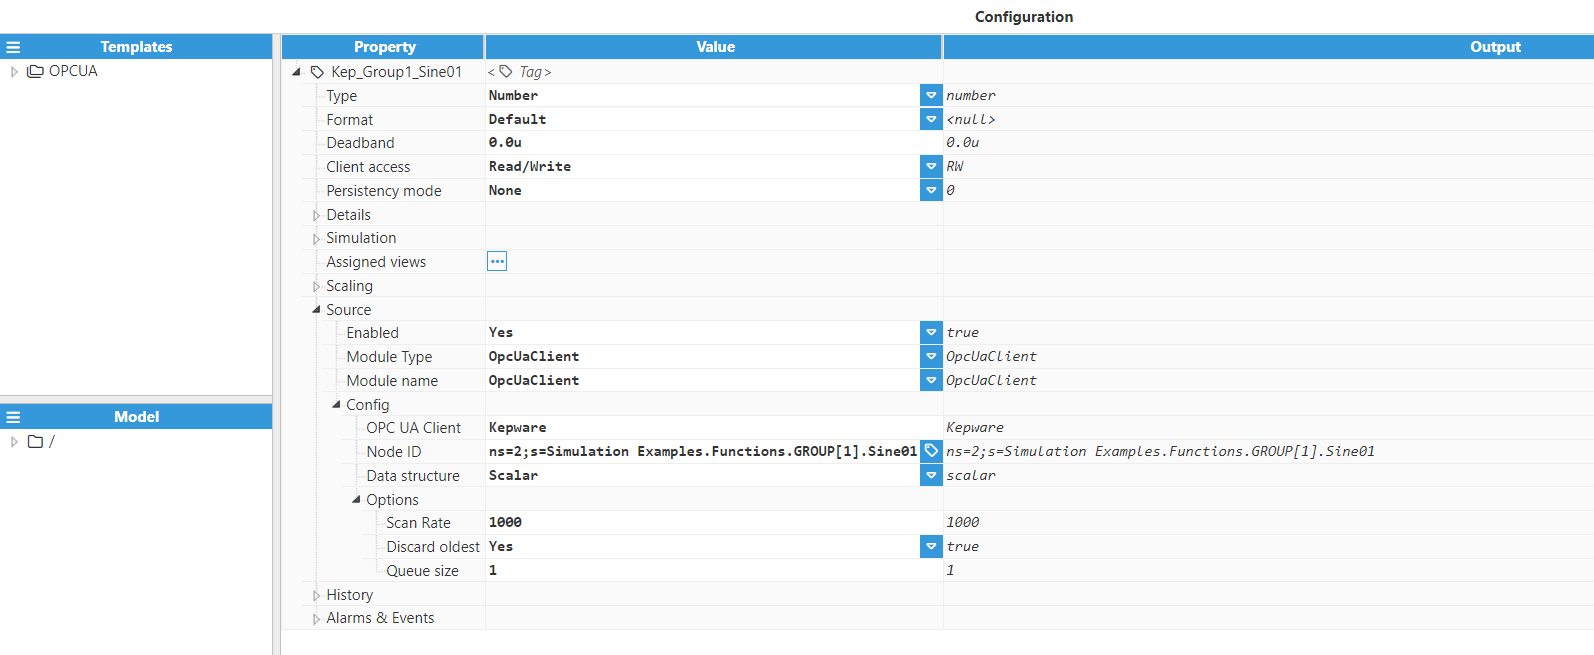
Save the tag configuration.
- Step 10: The tag should now be available and displaying as good quality in the Real-Time display panel.
