Note:
Before starting configuration, a new module instance must first be created. Click here for more information about creating Module instances.
Module Configuration
Once a new OPC UA Server module instance is created, users can configure different parameters to establish how connections to the server should be made. Below you will find a brief explanation of what each of these parameters mean and how to configure them:
Setting | Description |
|---|---|
Network interface | Specifies which network interface cards will be permitted for incoming connections. For example:
|
TCP Port | Specifies the port number for incoming connections. The valid range is 1 to 65535. The default value is 3005.
|
Alternate host | Specifies one or more alternate hosts to use during the initial handshake as a comma-separated list of hosts. Usually, the public IP address is used if the server is behind a firewall to avoid authentication problems for the client. |
Allow anonymous user | When set to True, users can login anonymously with all permissions. |
Disable discovery | Enables or disables discovery for this endpoint. The default value is Disabled. |
Security policies | Specifies which security mechanism should be used. Supported algorithms are as follows:
|
Server
Setting | Description |
|---|---|
Separator | Specifies which character will act as a separator for tag names. The default is ".". |
Maximum number of connections | Maximum number of connections per endpoint. The default value is 20. |
Include tag properties | Determines whether to include tag properties (such as full path, source name, engineering units, etc.) as part of the address space. The default value is Disabled.
|
Server capabilities
Setting | Description |
|---|---|
Maximum number of sessions | Maximum number of active sessions in the server. The default value is 20. |
Minimum supported sample rate | Minimum sampling rate for tag events that the server will support, displayed in milliseconds. The default value is 500ms. |
Store & Forward
Setting | Description |
|---|---|
Enabled | When Enabled, all data flowing from remote nodes via Links will be halted and data will be stored in the remote nodes whenever there are no active OPC Clients consuming this data. As soon as at least one OPC Client starts consuming data from a remote node, the data flow from this node will be resumed.
|
Buffer size | Defines the maximum number of events to store before sending a halt command to the source link. The default value is 100. |
.png)
Additional endpoints
Additional endpoints lets you expose the OPC UA Server through more than one listening endpoint, each with its own network binding and security configuration. This is useful when the same server needs to be reached over different network interfaces or ports — for example, an insecure endpoint on localhost for local tools and a secured endpoint on a public interface for remote clients — without running a second module instance.
To add one, click on the button to the right of Additional endpoints and select New Endpoint. Each endpoint is configured independently and offers the same connection parameters as the main endpoint:
Setting | Description |
|---|---|
Network interface | Specifies the network interface card permitted for incoming connections on this endpoint. Enter 0.0.0.0 to listen on all interfaces, or a specific IP address. The default value is 0.0.0.0. |
TCP port | Specifies the port number for incoming connections on this endpoint. The valid range is 1 to 65535.
|
Alternate host | Specifies one or more alternate hosts to use during the initial handshake as a comma-separated list of hosts. Usually, the public IP address is used if the server is behind a firewall to avoid authentication problems for the client. |
Allow anonymous user | When set to True, clients can connect to this endpoint anonymously with all permissions. |
Disable discovery | Enables or disables discovery for this endpoint. The default value is Disabled. |
Security policies | Specifies which security mechanisms are accepted on this endpoint. Each policy is independently set to a security mode (None, Sign, or Sign & Encrypt). Supported algorithms are as follows:
|
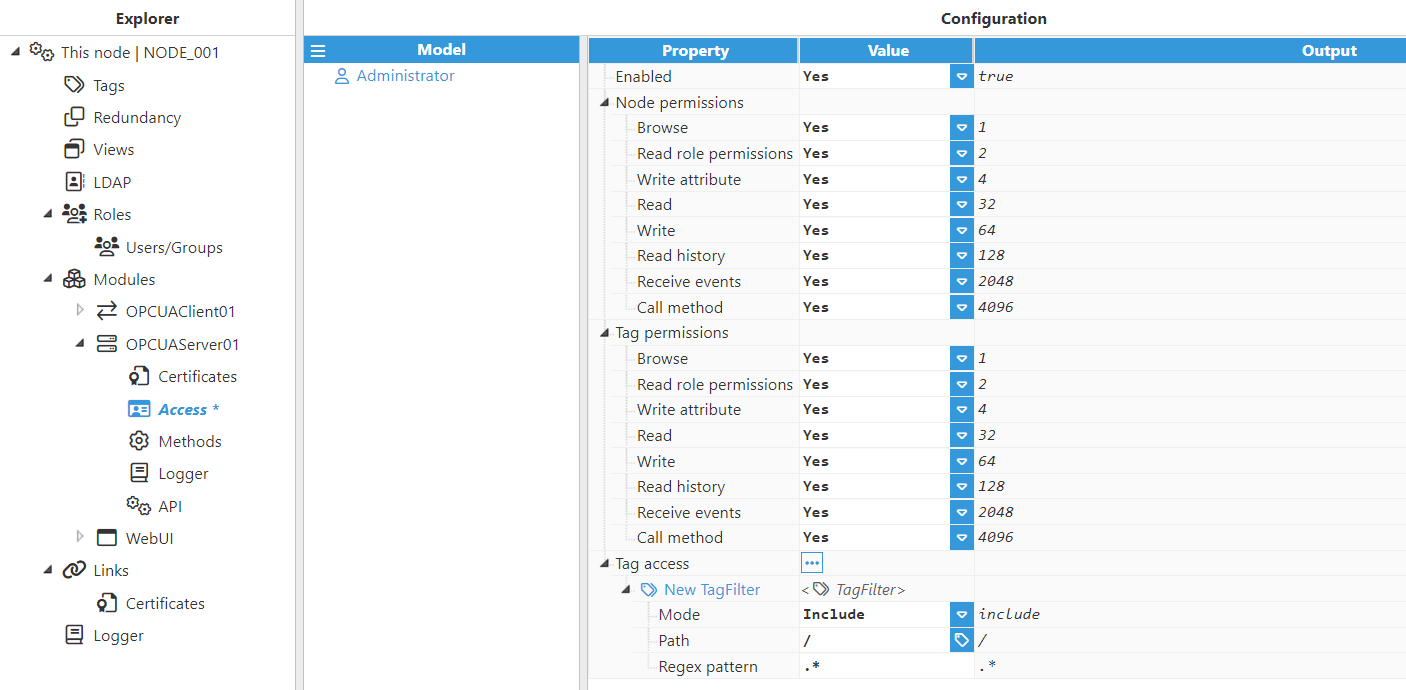
Access
In this area, you will assign the corresponding permissions to the Roles previously created in the Roles section.
Parameters:
Setting | Description |
|---|---|
Enabled | Specifies whether or not an authentication attempt will be blocked. |
Node permissions
Setting | Description |
|---|---|
Browse | Enables browsing of the _Node object. |
Read role permissions | Allows reading of role permissions in the _Node object. |
Write attribute | Allows attributes to be written in the _Node object. |
Read | Allows reading of values in the _Node object. |
Write | Allows values to be written in the _Node object. |
Read history | Allows reading of historic values in the _Node object. |
Receive events | Allows node events to be received from the _Node object. |
Call method | Allows calling of node methods in the _Node object. |
Tag permissions
Setting | Description |
|---|---|
Browse | Allows tag browsing. |
Read role permissions | Allows reading of tag role permissions. |
Write attribute | Allows attributes to be written to tags. |
Read | Allows reading of tag values. |
Write | Allows writing of tag values. |
Read history | Allows reading of tag history. |
Receive events | Allows OPCUA events to be received from tag objects. |
Call method | Allows calling of tag methods. |
Tag access
Note:
It is mandatory to add a filter even when the whole model is going to be exposed.
Setting | Description |
|---|---|
Mode | Selects whether the filter must include or exclude tags.
|
Path | Specifies the path of the tag or group of tags to be filtered. |
Regex pattern | This is a regular expression for filtering which tags will be included. By default, it is set to .*, which means that no filter is applied. Readers can find further information about regular expressions at RegExr. |
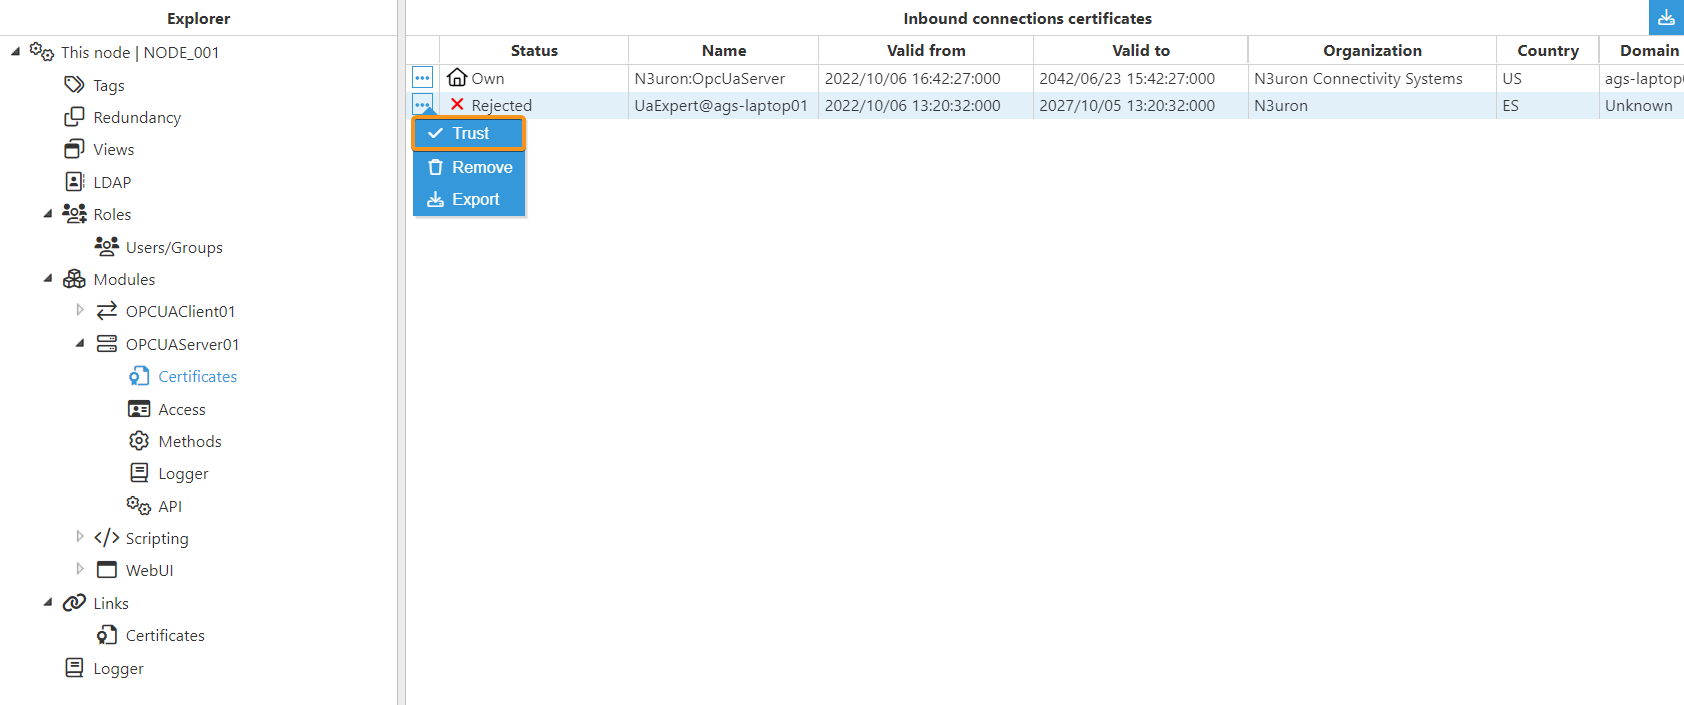
Certificates
Once the module is running, whenever a client connects with a secure connection (different from None/None), the server will receive the client's certificate. By default, any certificate received is Rejected in N3uron and therefore, must be manually trusted in order to be able to establish the connection. For those clients that by default reject certificates sent by the server, manual approval of the certificate on the client side will also be necessary.
Methods
The OPC UA Server module allows users to define methods along with their input and output arguments. These methods enable users to execute custom logic in the N3uron node by calling a script previously created in Scripting. Each method can have zero or more input and output parameters, which support a variety of data types and value ranks. When a method is defined, it will be available in the _Node/Methods/METHOD_NAME node of the OPC UA Address Space.
Note:
In order to use Methods, it is necessary to run both a Scripting module and at least one external script that will be invoked by the method.
Note:
The return value of the script has to be an object whose keys are the names of the output arguments and its values are the output values. The value type must be coherent with the OPC UA types declared in the method definition.
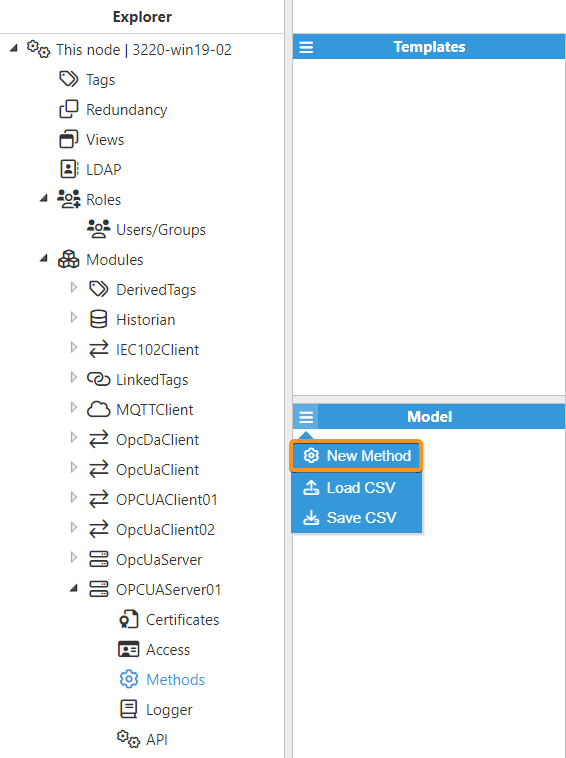
Creating a method
To create a new method, expand the OPC UA Server module instance menu and select Methods. From the Model panel burger menu, select New Method.
N3uron version <1.22.4
N3uron version >=1.22.4.png)
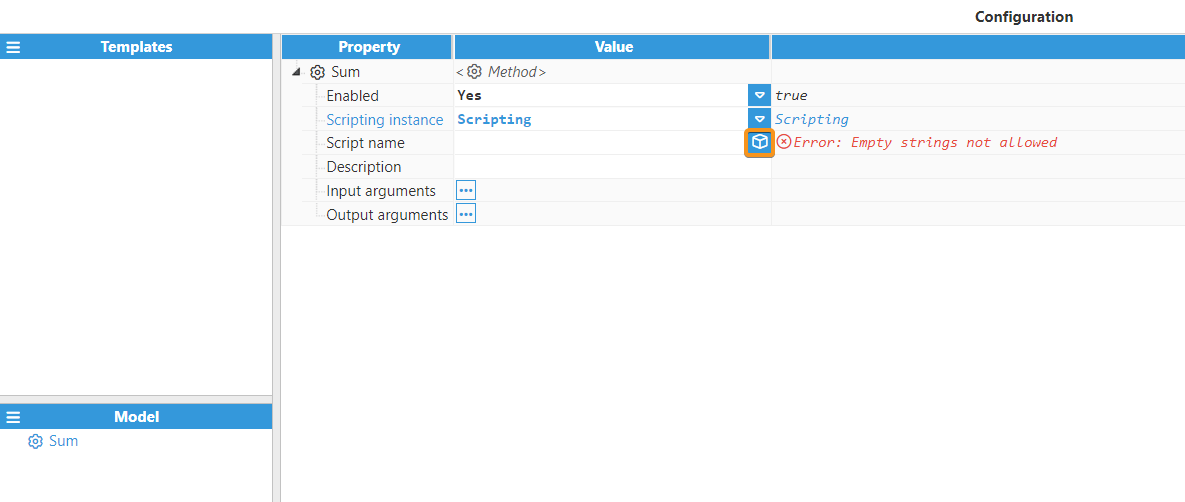
The method configuration settings contain the following options:
Setting | Description |
|---|---|
Enabled | Enables and disables the corresponding method. |
Scripting instance | Selects the corresponding Scripting module instance, which contains the script that will be executed when the method is called. |
Script name | Name of the script that will be executed when the method is called. It is possible to either enter the path manually or click on the button to the right of the Script name field and use the browser to select it, providing that the Scripting module instance is running. |
Description | Method description. |
N3uron version <1.22.4
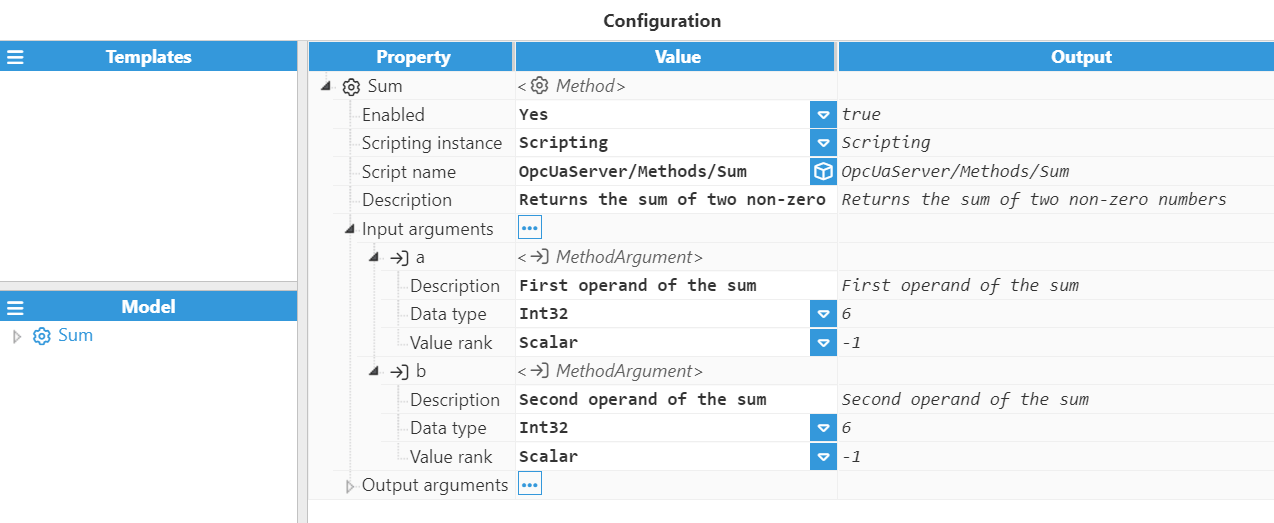
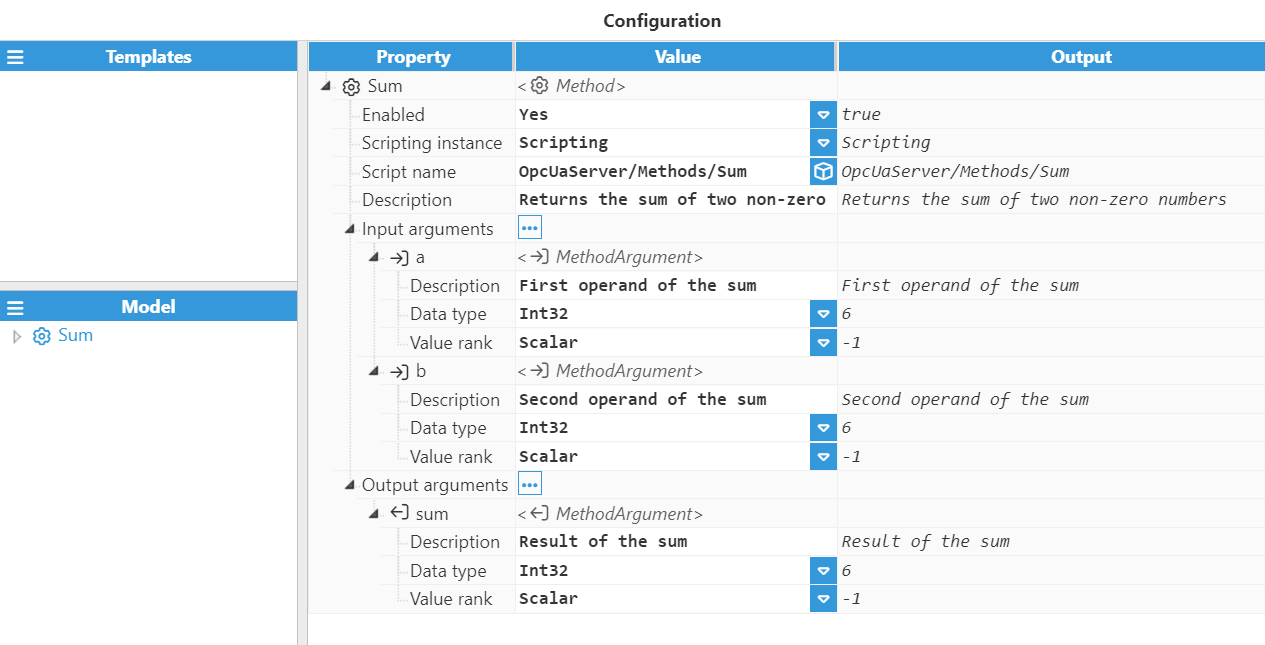
Once the corresponding script has been selected, the Input and Output arguments can be created if necessary. To do this, click either on the buttons to the right of Input arguments or Output arguments to add them, enter a description if you like, and select the corresponding settings for both the Data type and the Value rank fields.
Note:
The Method group (Module instance and Method name) is available from N3uron version 1.22.4. It generalizes the previous Scripting instance and Script name fields so that a method can target any compatible module instance. Existing method configurations remain fully compatible.
From version 1.22.4, the target method is configured under a Method group with the following fields:
Setting | Description |
|---|---|
Module instance | Selects the target module instance that contains the method that will be invoked. |
Method name | Name of the method that will be invoked when this OPC UA method is called. |
The Input and Outputs arguments each expose a Description, a Data type (for example JSON String), and a Value rank (for example Scalar).
N3uron version >=1.22.4.png)
Method groups
Note:
Method groups are available from N3uron version 1.22.4.
Methods can be organized into method groups (folders). Method groups let you group related methods together, creating a more organized and navigable method hierarchy within the OPC UA Address Space. To create one, expand the Methods menu in the Model panel and select New MethodGroup. Methods created inside a group are exposed under the corresponding folder in the _Node/Methods node.
Browse methods
Note:
The Browse methods action is available from N3uron version 1.22.4.
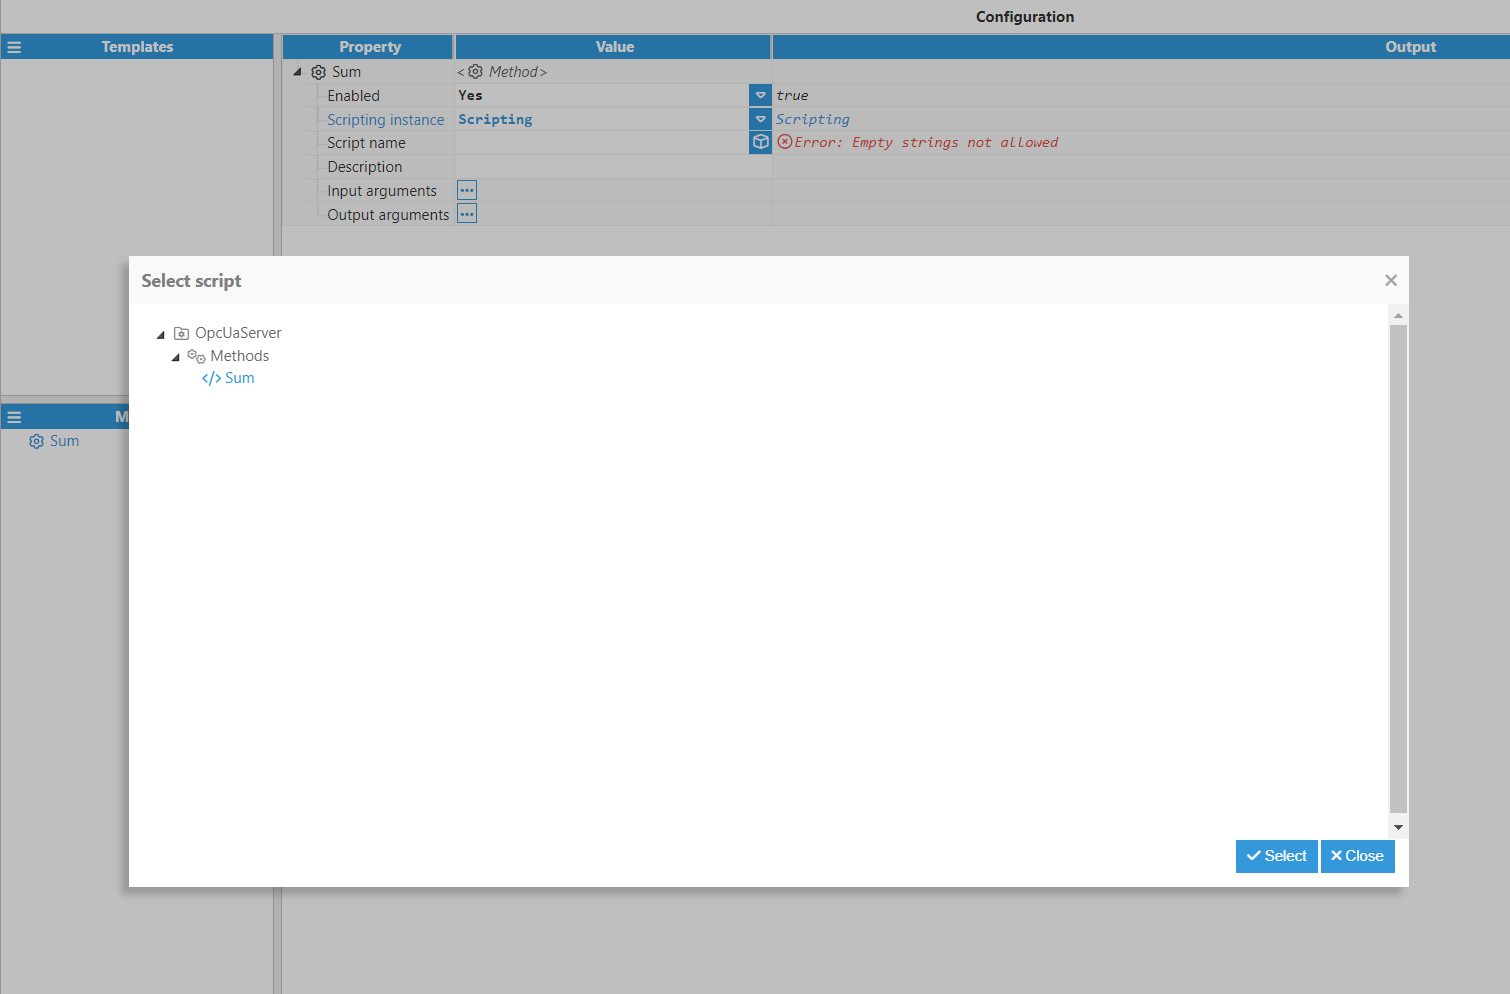
The Browse methods action lets you discover and inspect the methods available in this node and automatically create the corresponding OPC UA method definitions, instead of adding each one manually. Expand the Methods menu in the Model panel and select Browse methods to open the Select methods dialog.
Note:
For a script to appear in the Select methods dialog, the Scripting module instance must expose it as a named method. From N3uron version 1.22.4, external scripts in the Scripting module are exposed as named Methods: in the script Task, add an Action and set its Type to Method (Actions → Type → Method). Each script in that Task is then published as a named method (for example, ops_summary_daily or system_audit_node) that can be browsed and imported here.
In the Select methods dialog, the methods exposed by the running Scripting module instances are listed and organized by their group hierarchy. Select the check box next to each method you want to expose; the right-hand panel shows the selected method's details, including its Write flag and its Input and Output types. Click Apply to automatically create a method definition for each selected method.
Note:
Browse methods auto-creation handles the full Scripting type matrix, so all supported input and output argument types are correctly mapped when the methods are automatically generated.
Each generated method keeps the same group hierarchy it had in the Scripting module and is created with its Module instance, Method name, and Input and Output arguments already populated with the correct Data type and Value rank. After applying, remember to Save the configuration.