Connecting to N3uron's OPC UA Server from UA Expert Client
This is a detailed step-by-step guide to connecting to N3uron's OPC UA Server using the UA Expert Client, which can be downloaded from https://www.unified-automation.com/
- Step 1: Create an instance of the module: (Config => Modules => button to the left of Modules => New module)
.png)
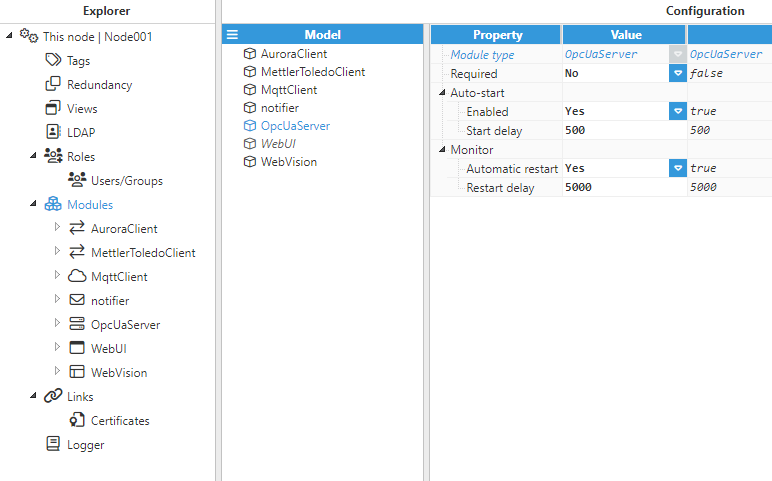
- Step 2: Provide a name for the module, in this case, OpcUaServer, set the module type to OpcUaServer, and configure the new module instance as shown below.
- Step 3: Set the API and Logger configuration as default. Next, it's time to configure the module to establish which networks will be able to establish communication.
- Step 4: Configure the main parameters of your OPC UA Server instance according to your needs.

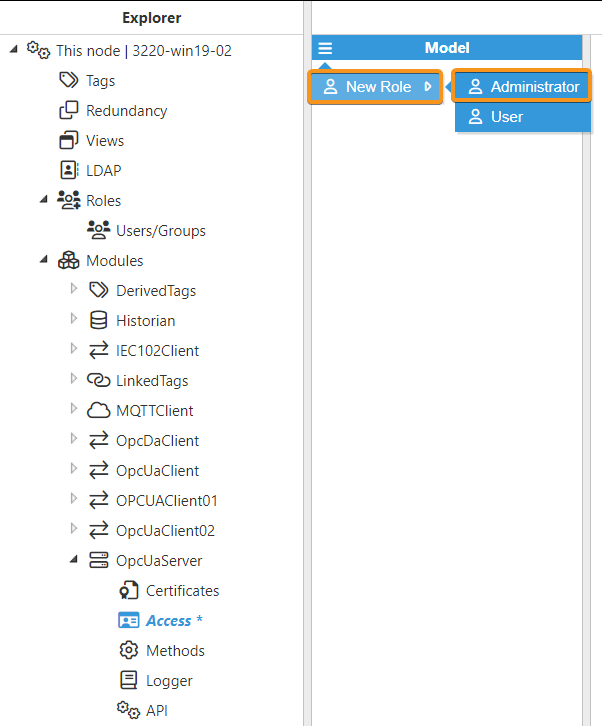
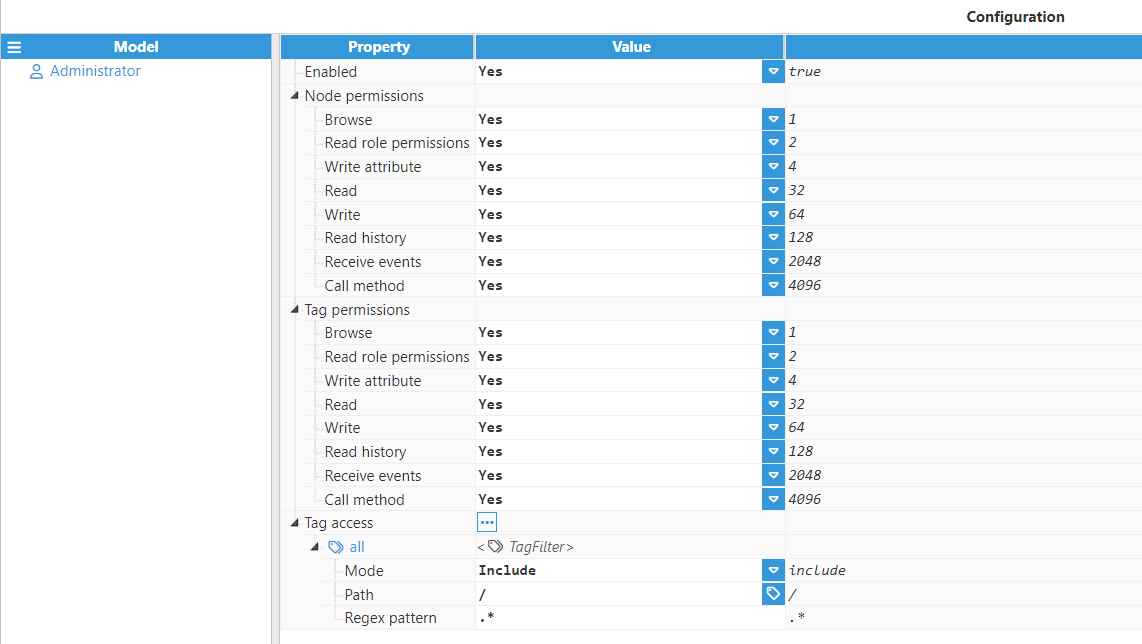
- Step 5: As we don't want to allow Anonymous users to access the server, we need to add a role with the corresponding permissions for it. In this case, we have added the Administrator role with all the permissions enabled and no restrictions regarding tag access.
At this point, the server is fully configured. Now, let's configure the connection in UA Expert.
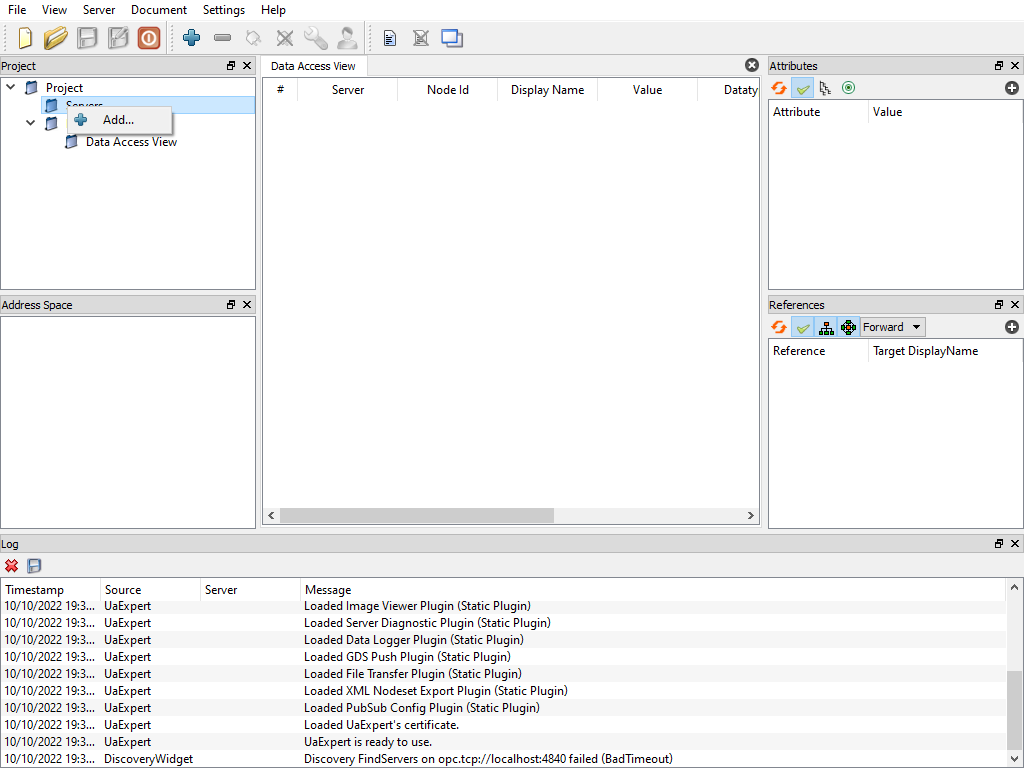
- Step 6: Inside UA Expert, click on Servers and select Add to add a new server.
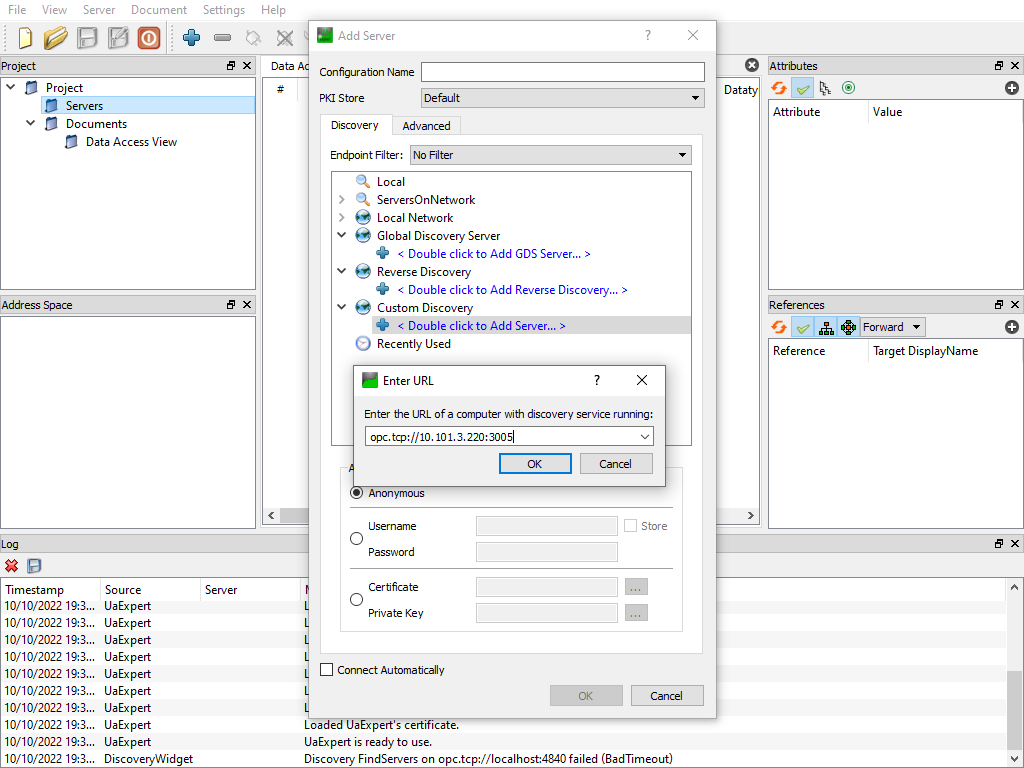
- Step 7: Click on Custom Discovery and introduce the discovery URL of the server previously configured.
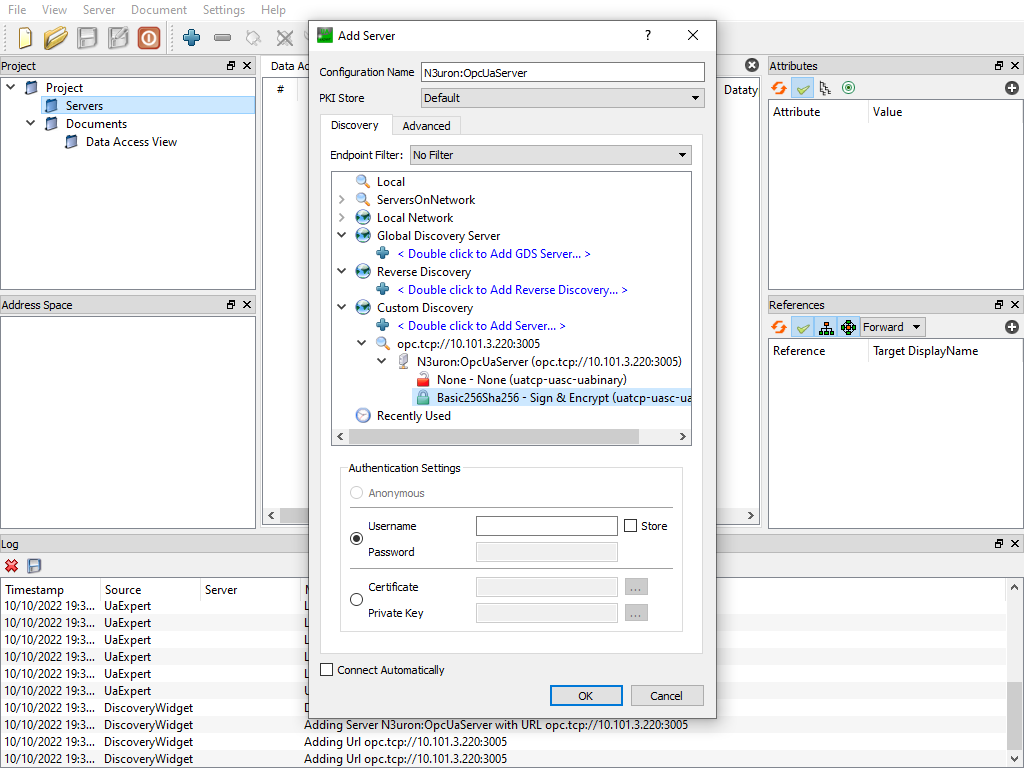
- Step 8: Select the target endpoint with the desired security policy. In this case, Basic256Sha256.
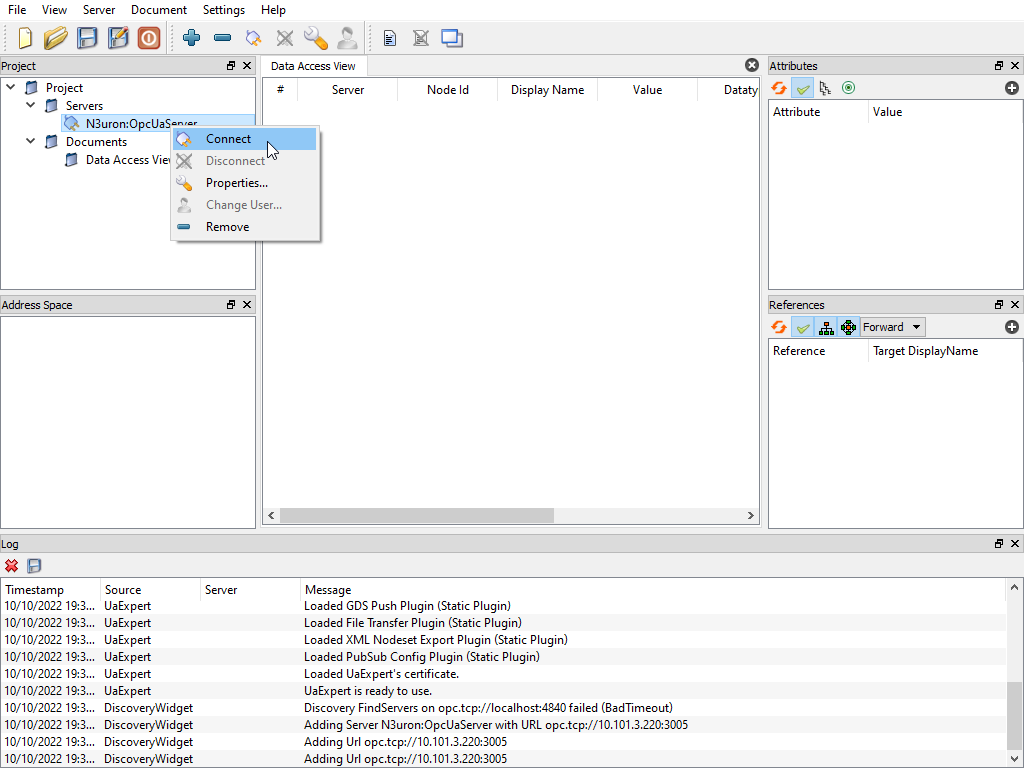
- Step 9: Now, connect with the N3uron OPC UA Server.
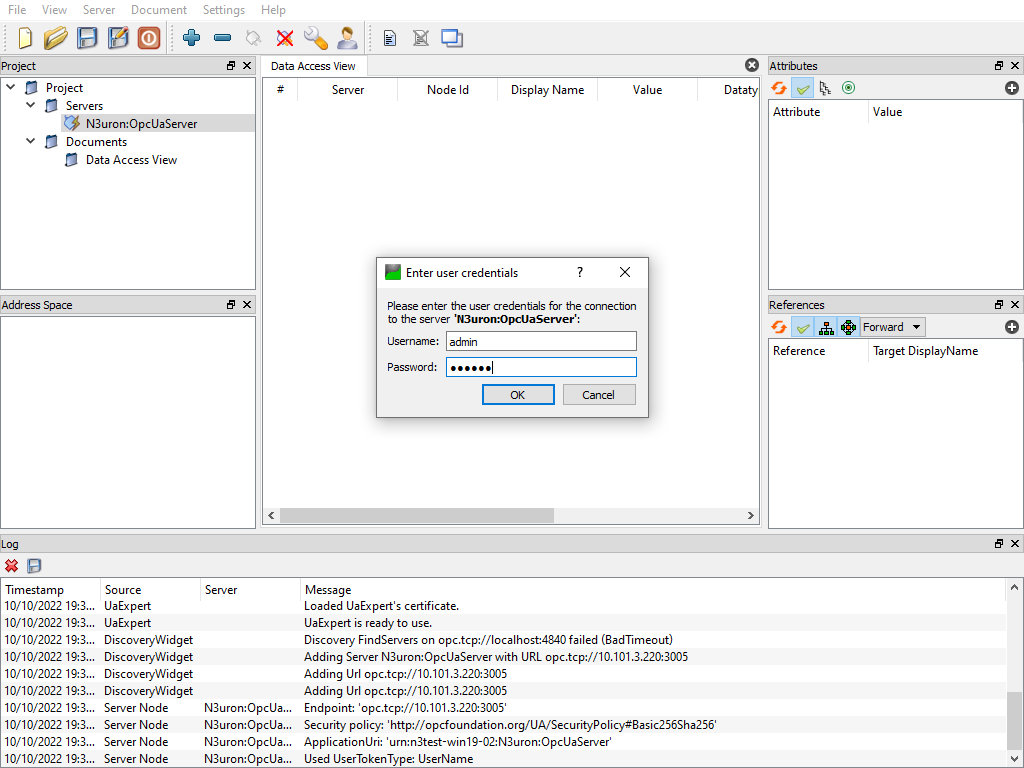
- Step 10: After connecting, enter the credentials of a user with administrator permissions. In this case:
- Username: admin.
- Password: n3uron.
- Step 11: Once the credentials are introduced, Trust the Server certificate.
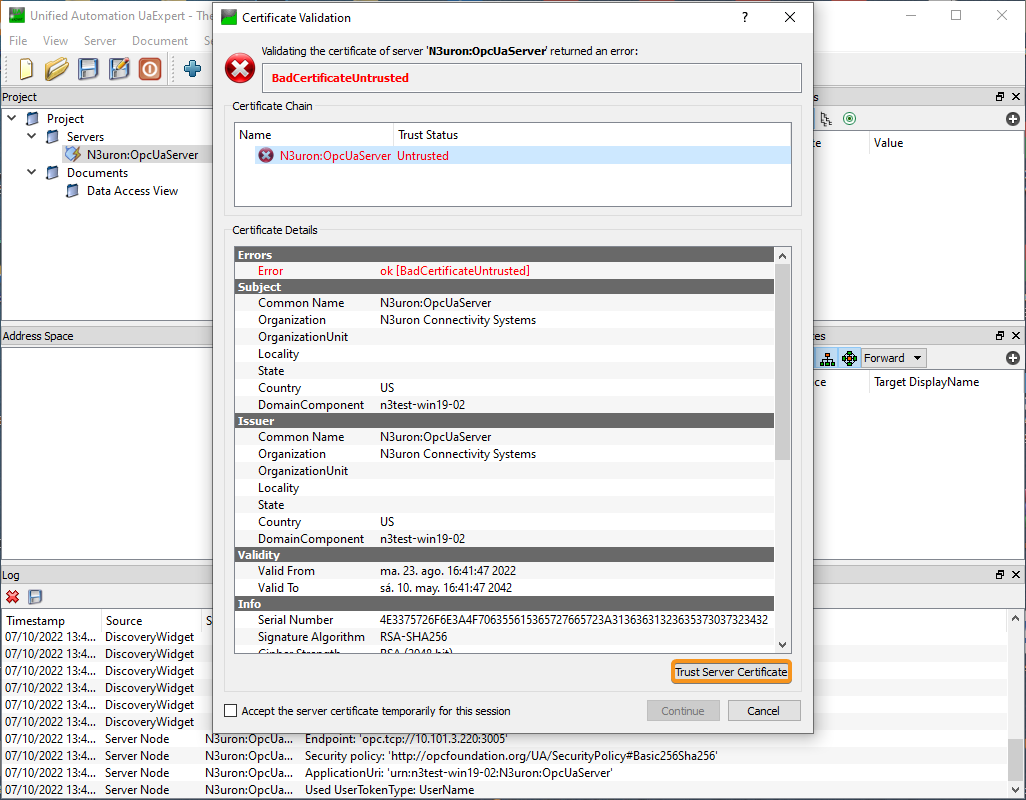
- Step 12: Navigate to N3uron and trust the certificate issued by UA Expert to enable the connection.
.png)
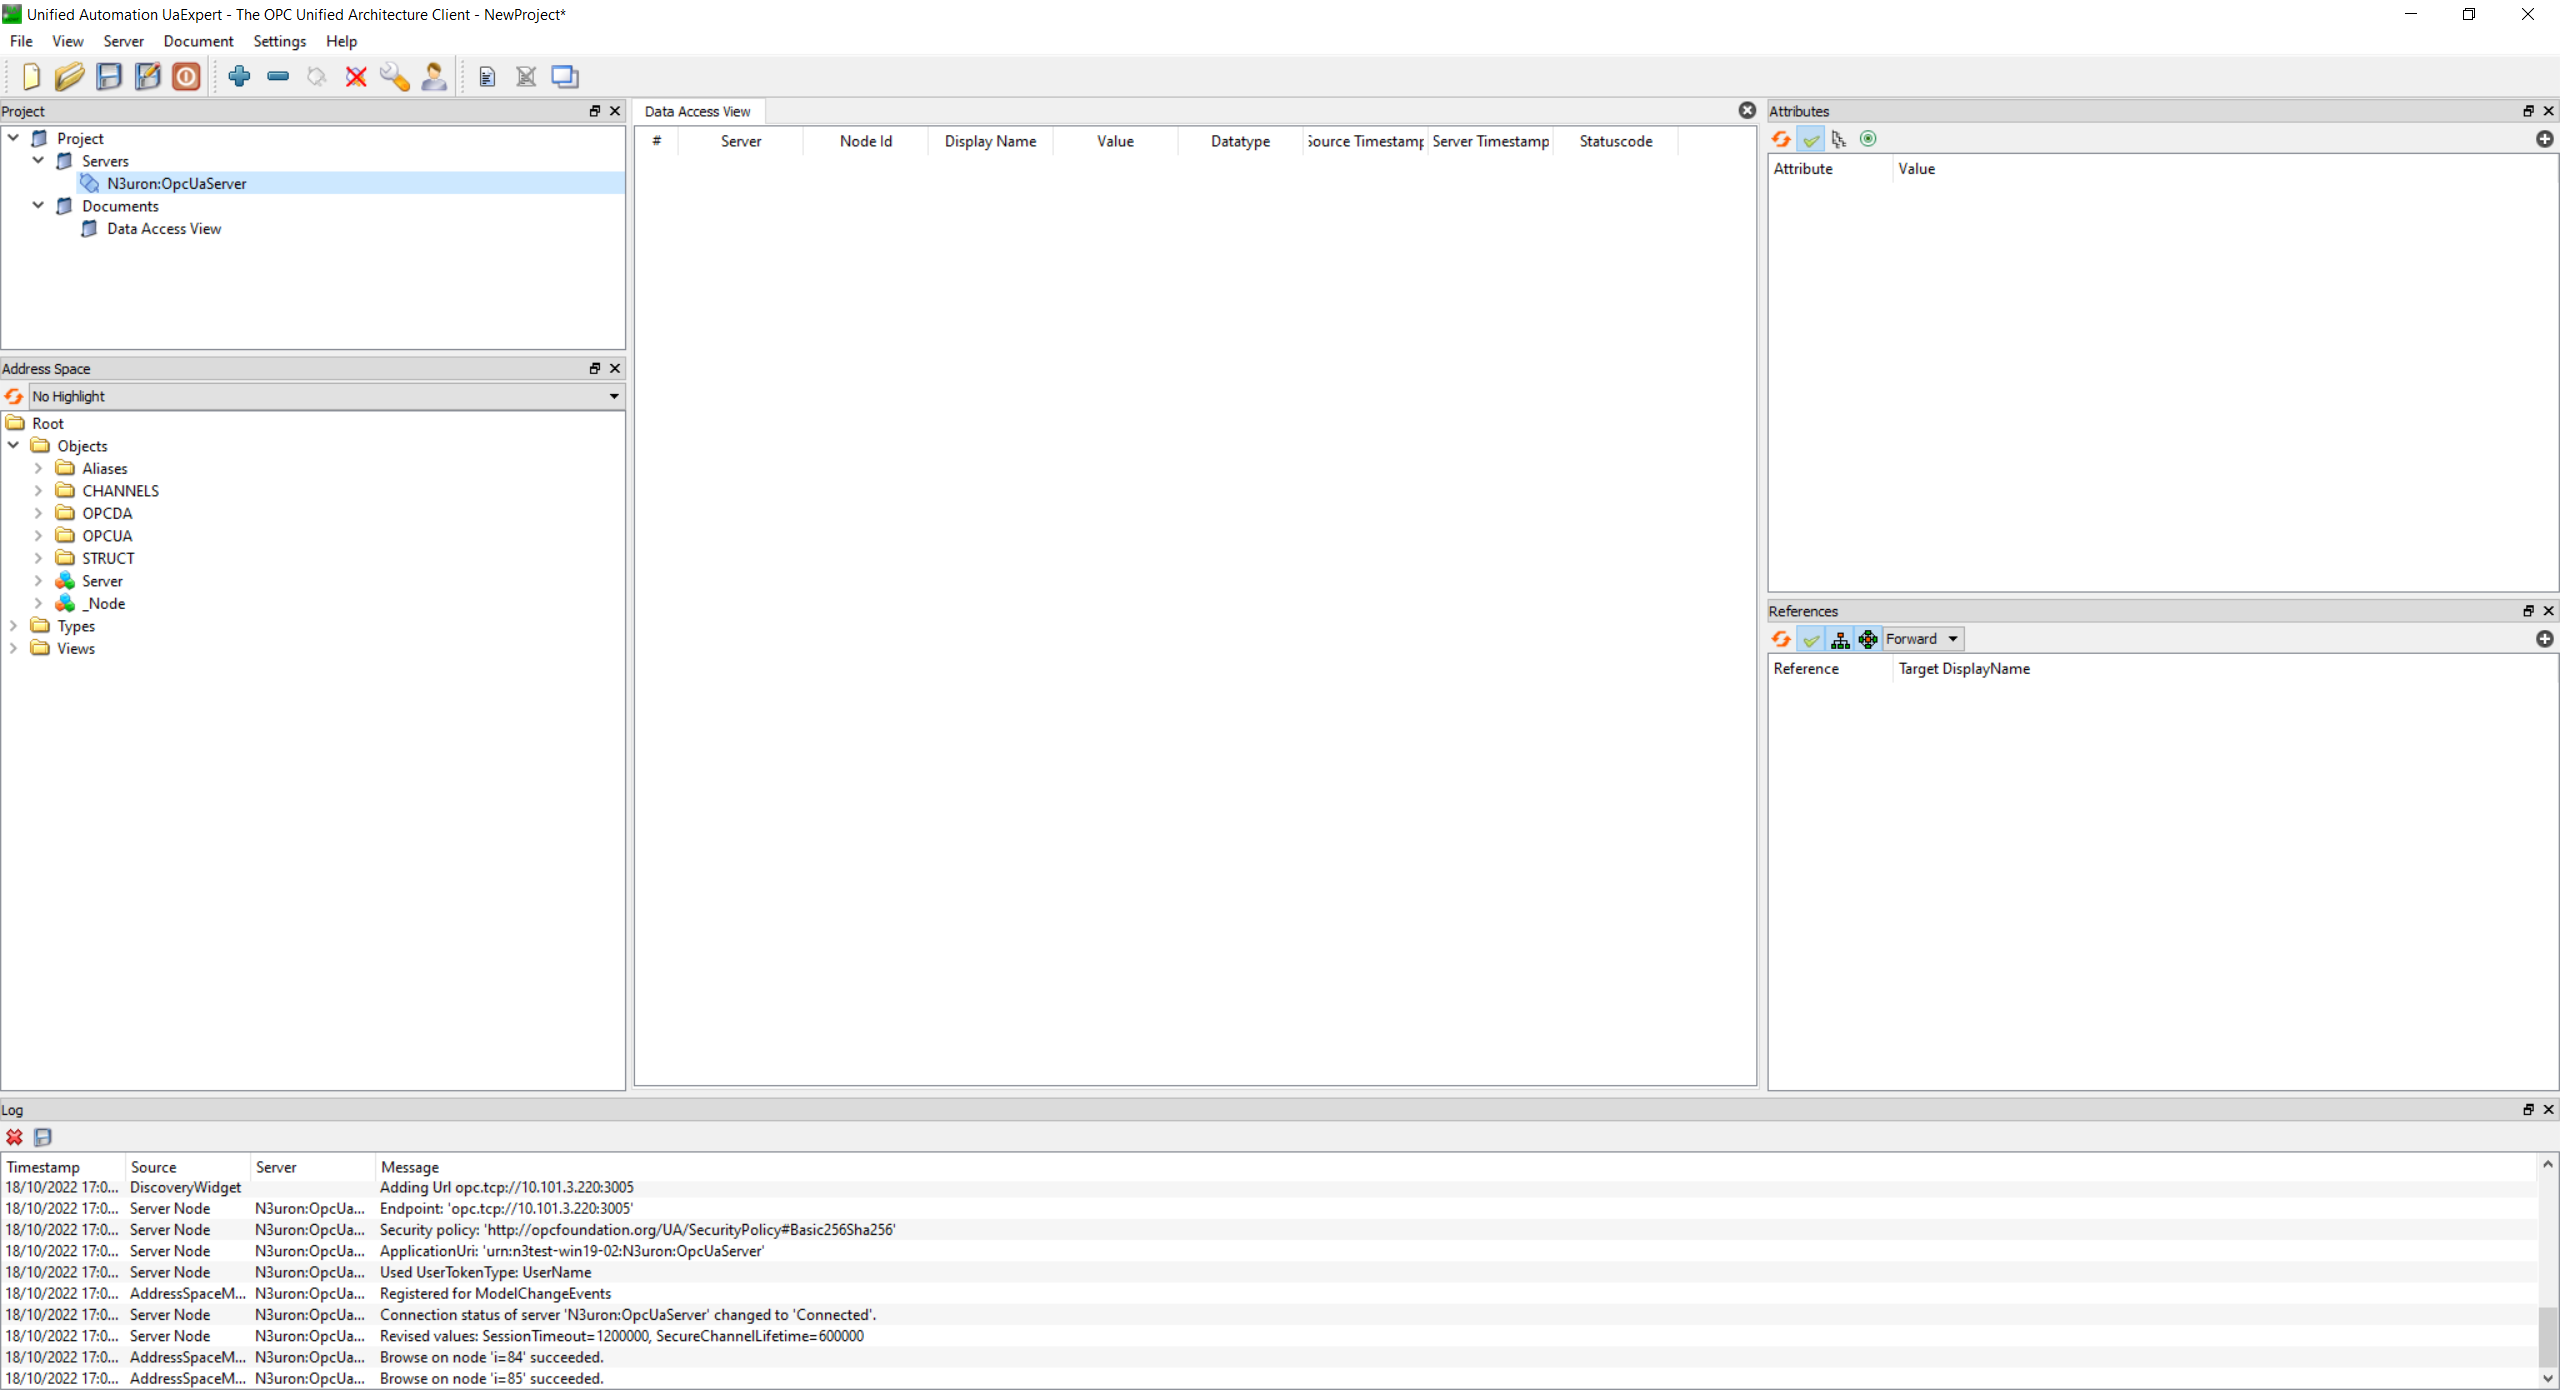
- Step 13: Once trusted, UA Expert will allow browsing of the server.
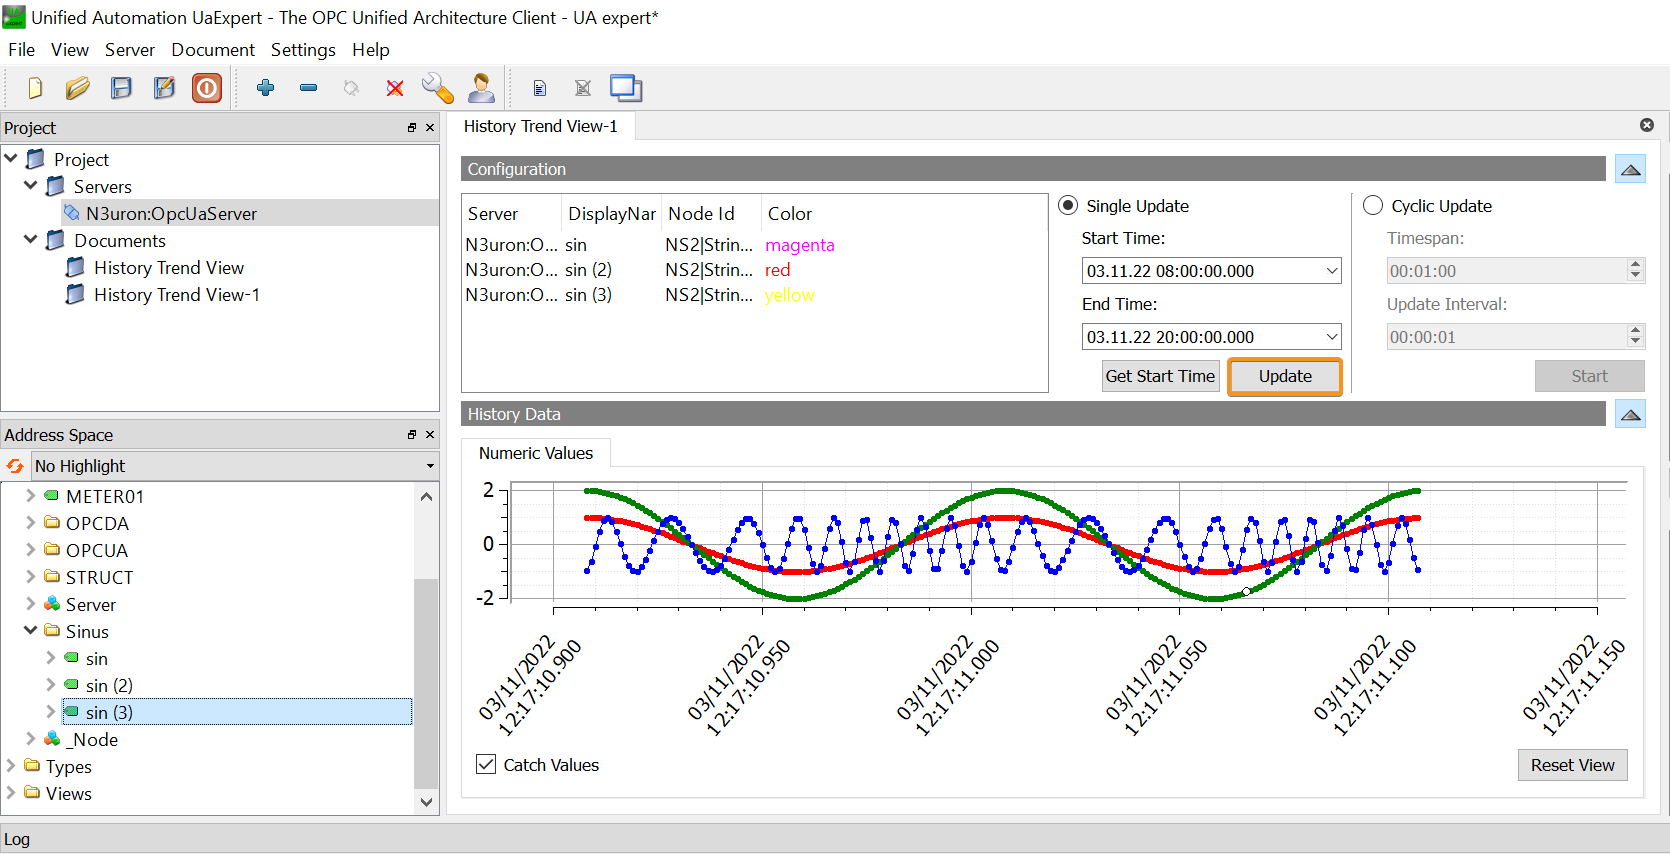
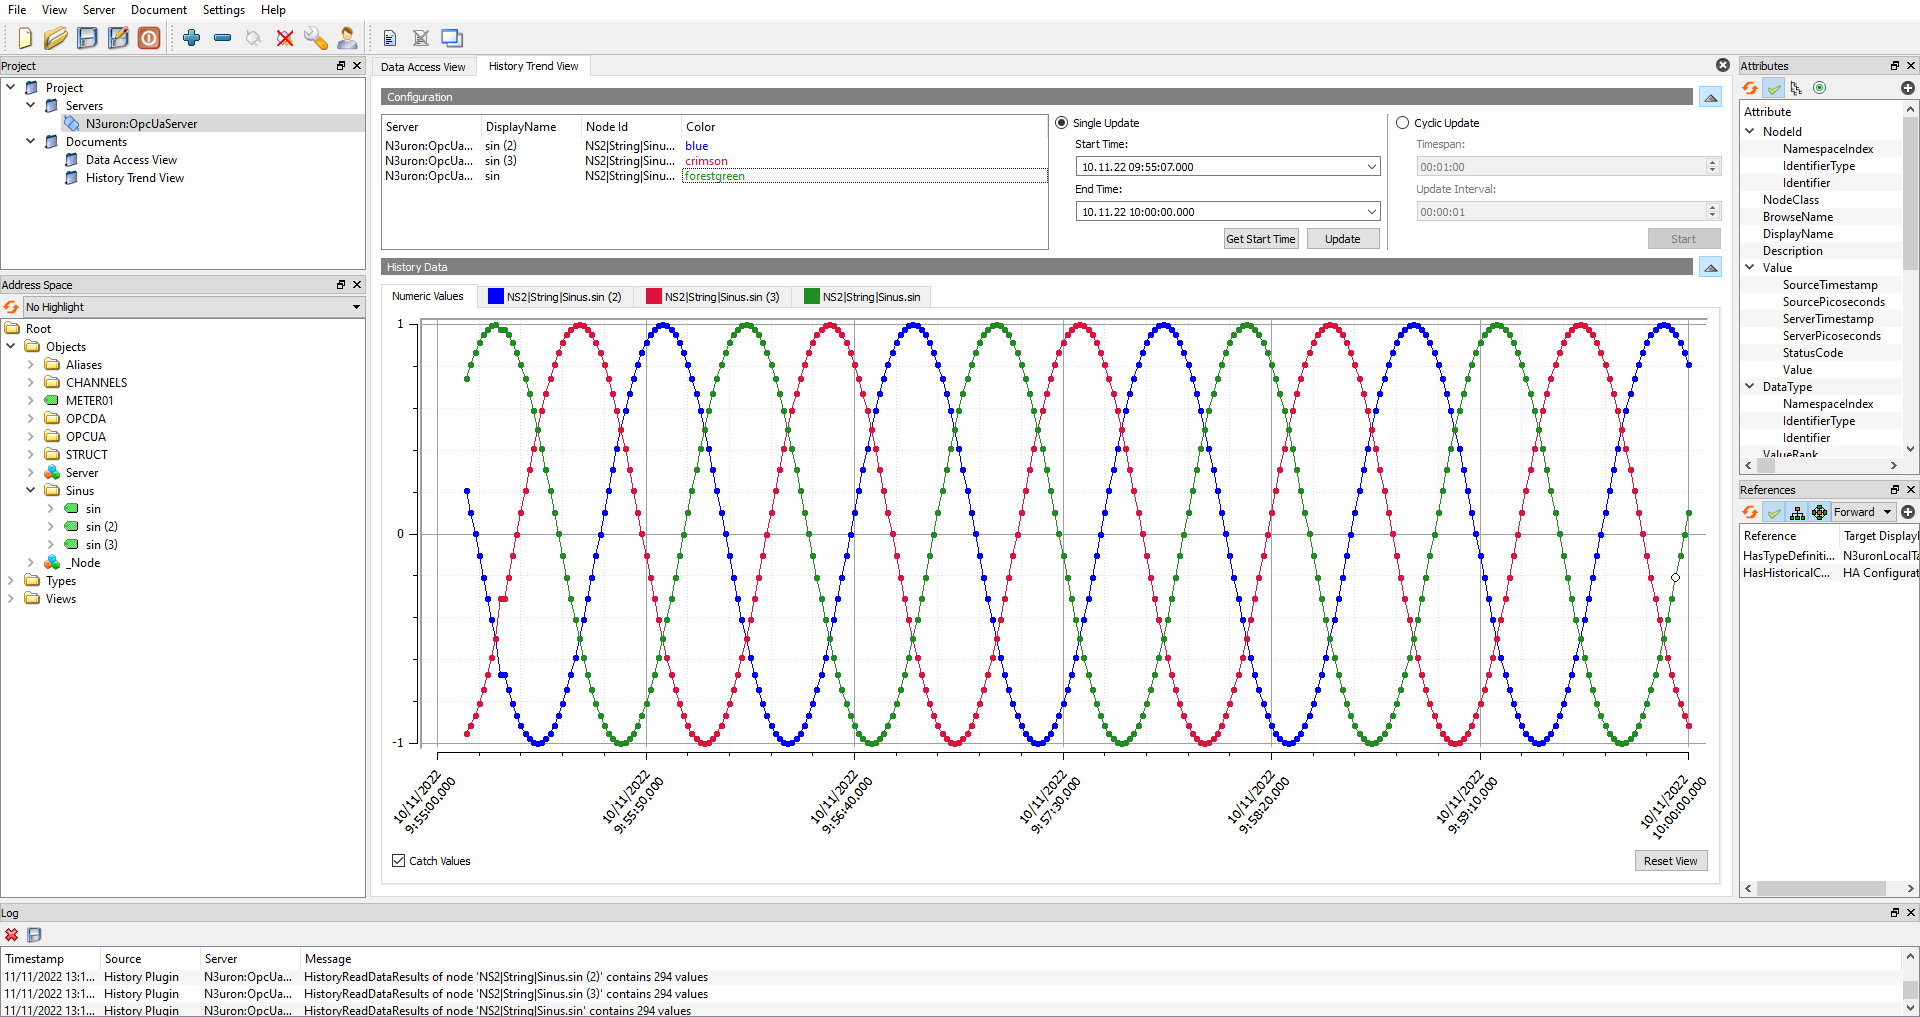
How to Access Historical Data (HA)
N3uron supports Historical Data Access (HA), which allows the client to fully access historical data from the server (using the Historian module). In this example, we're going to retrieve historical data corresponding to 3 sinusoidal signals that are 120º out of phase with each other.
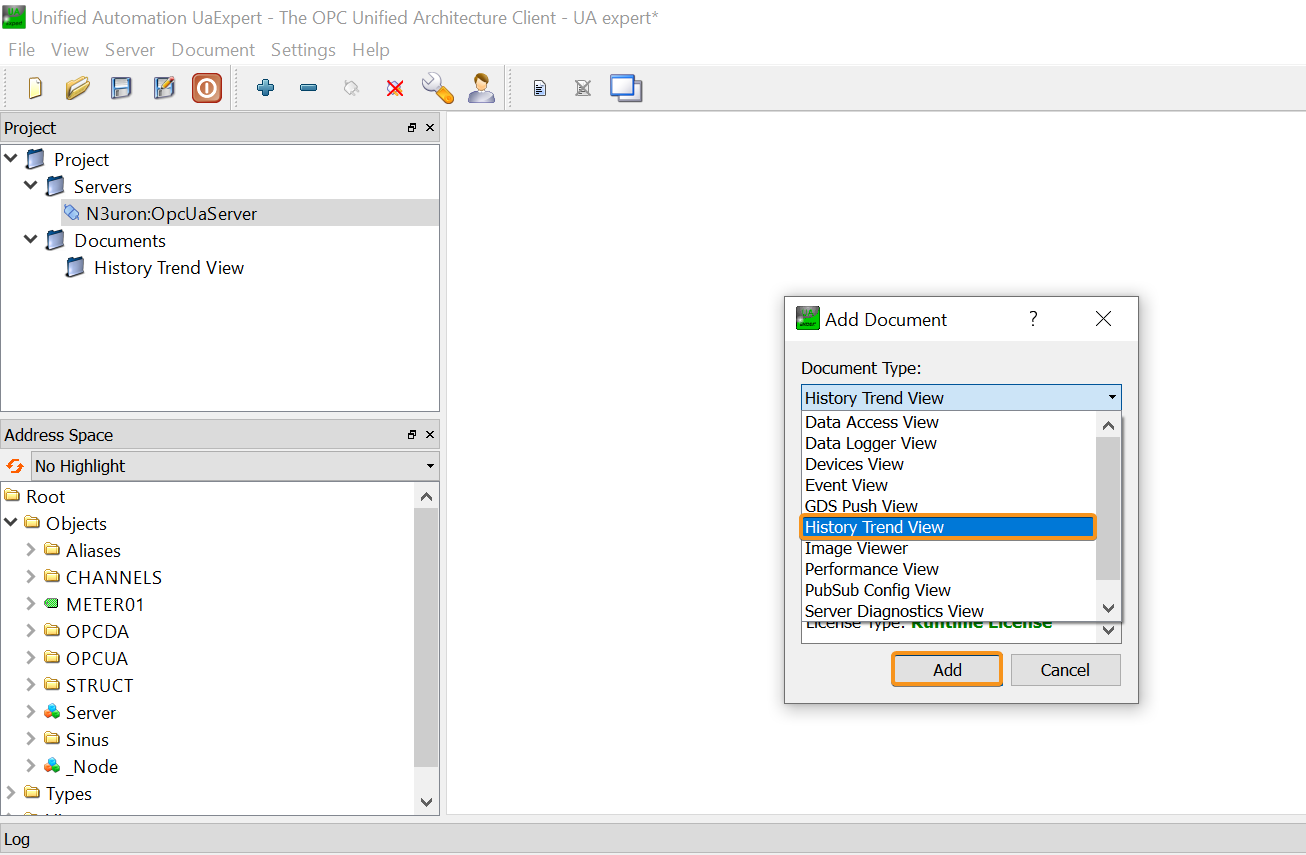
- Step 1: Once the OPC UA Server module is created and configured and the connection is successfully established, go to UA Expert and in Document, click on Add.
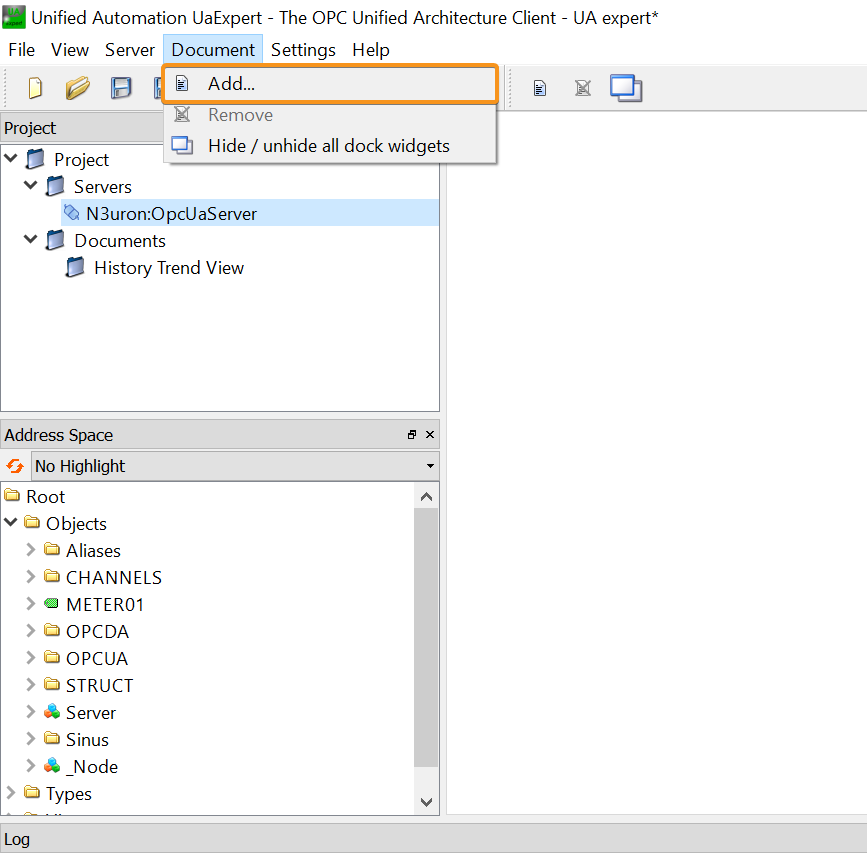
- Step 2: Now, select History Trend View and click on Add.
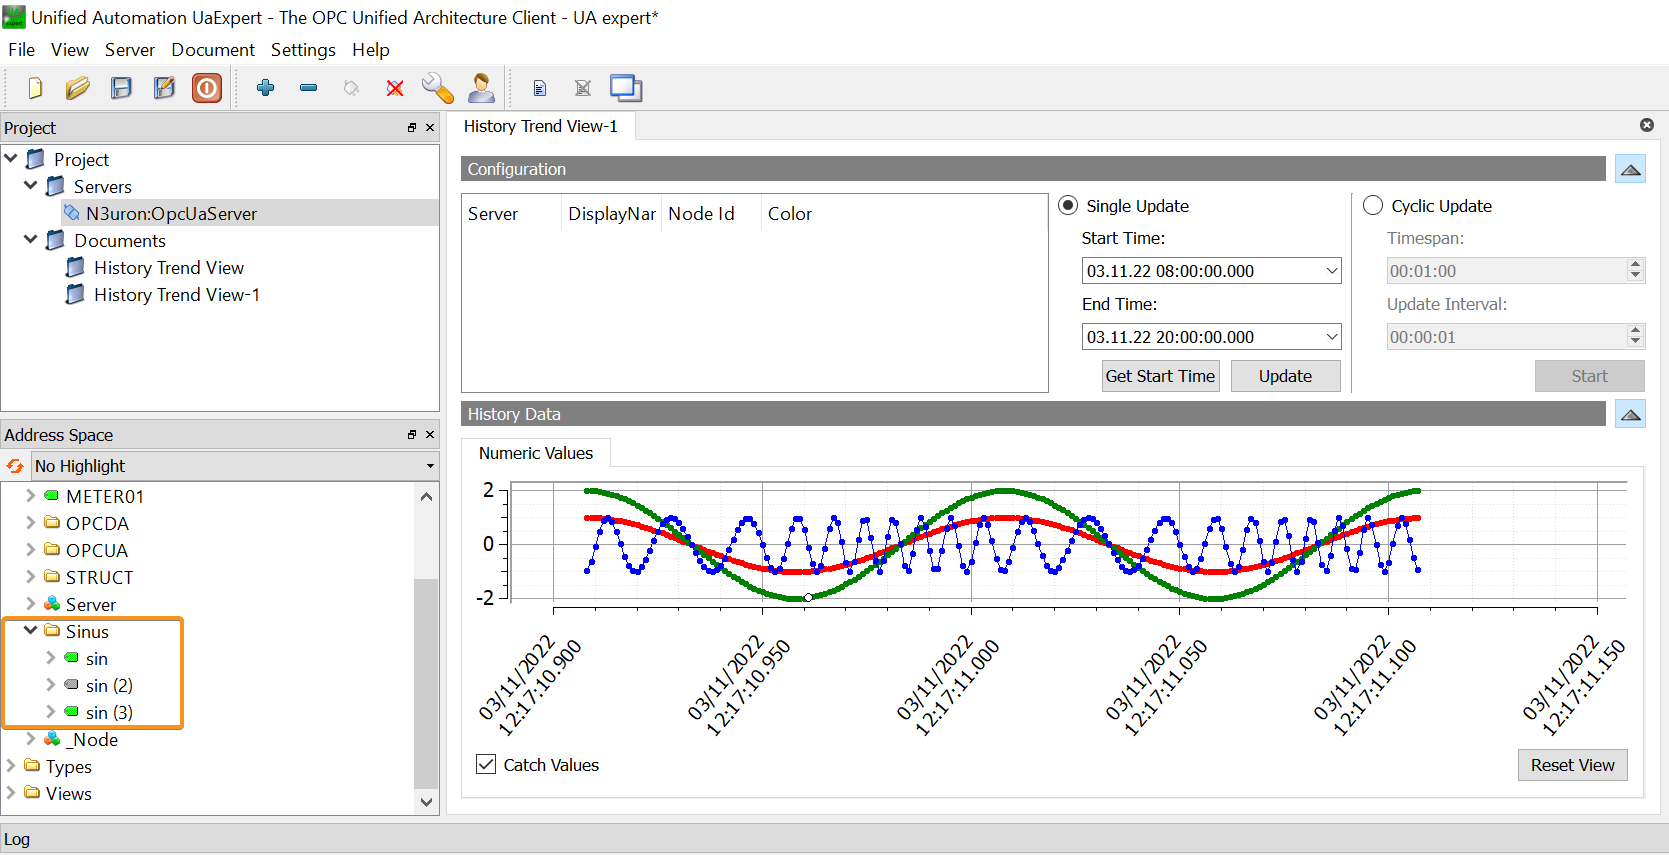
- Step 3: Inside the Address Space select the tags you want to visualize and drag them to the Configuration section within History Trend View.
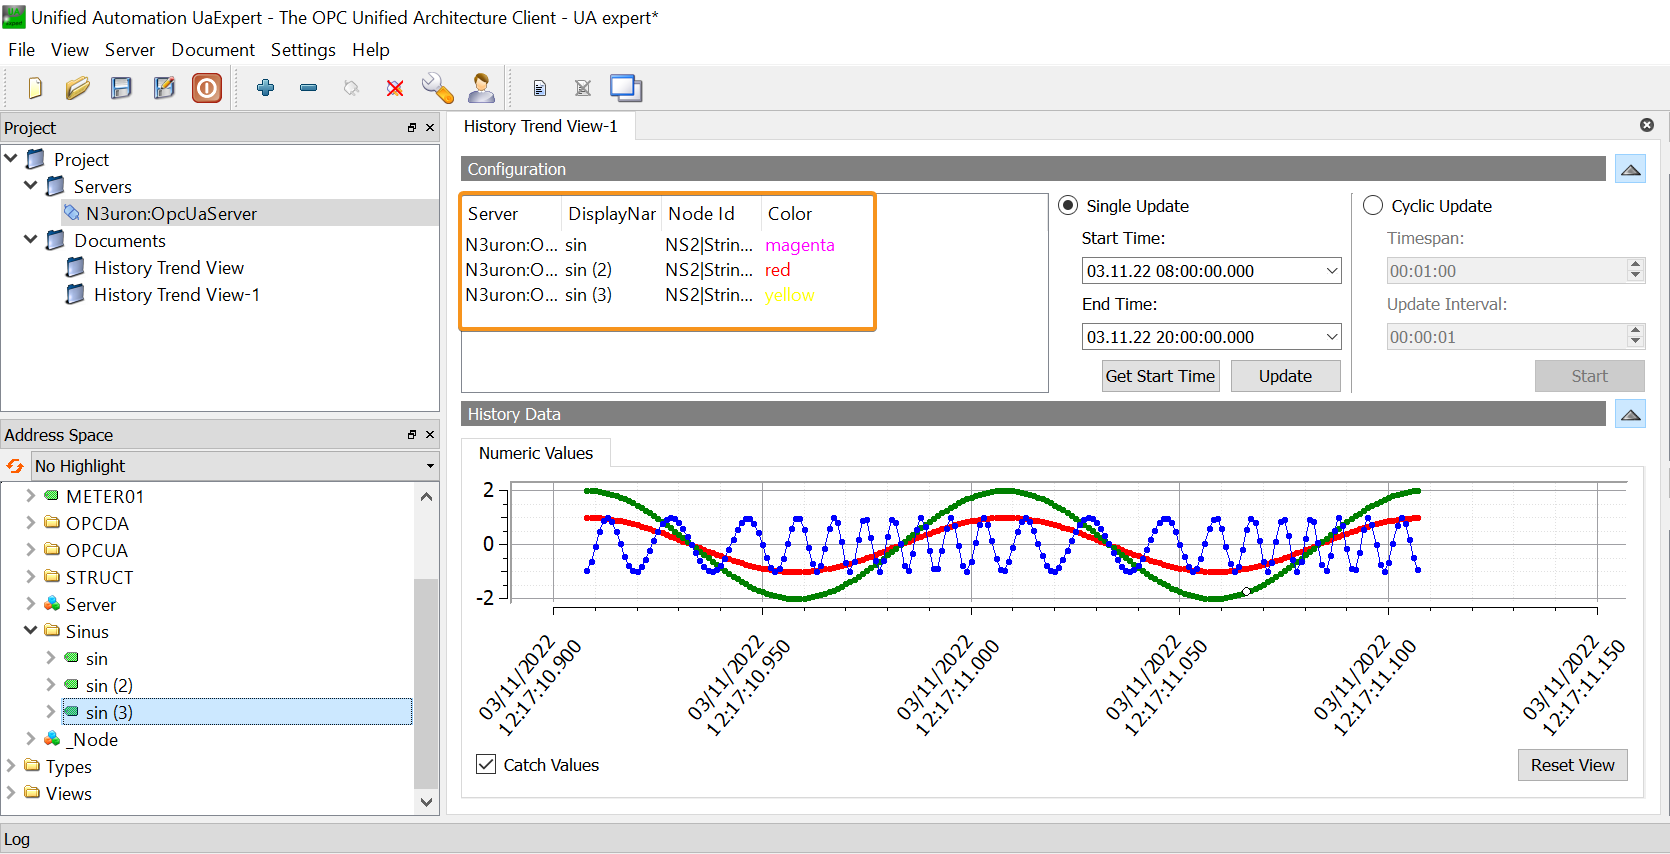
- Step 4: Enter the Start and the End time according to the period you want to visualize and click on Get Start Time.
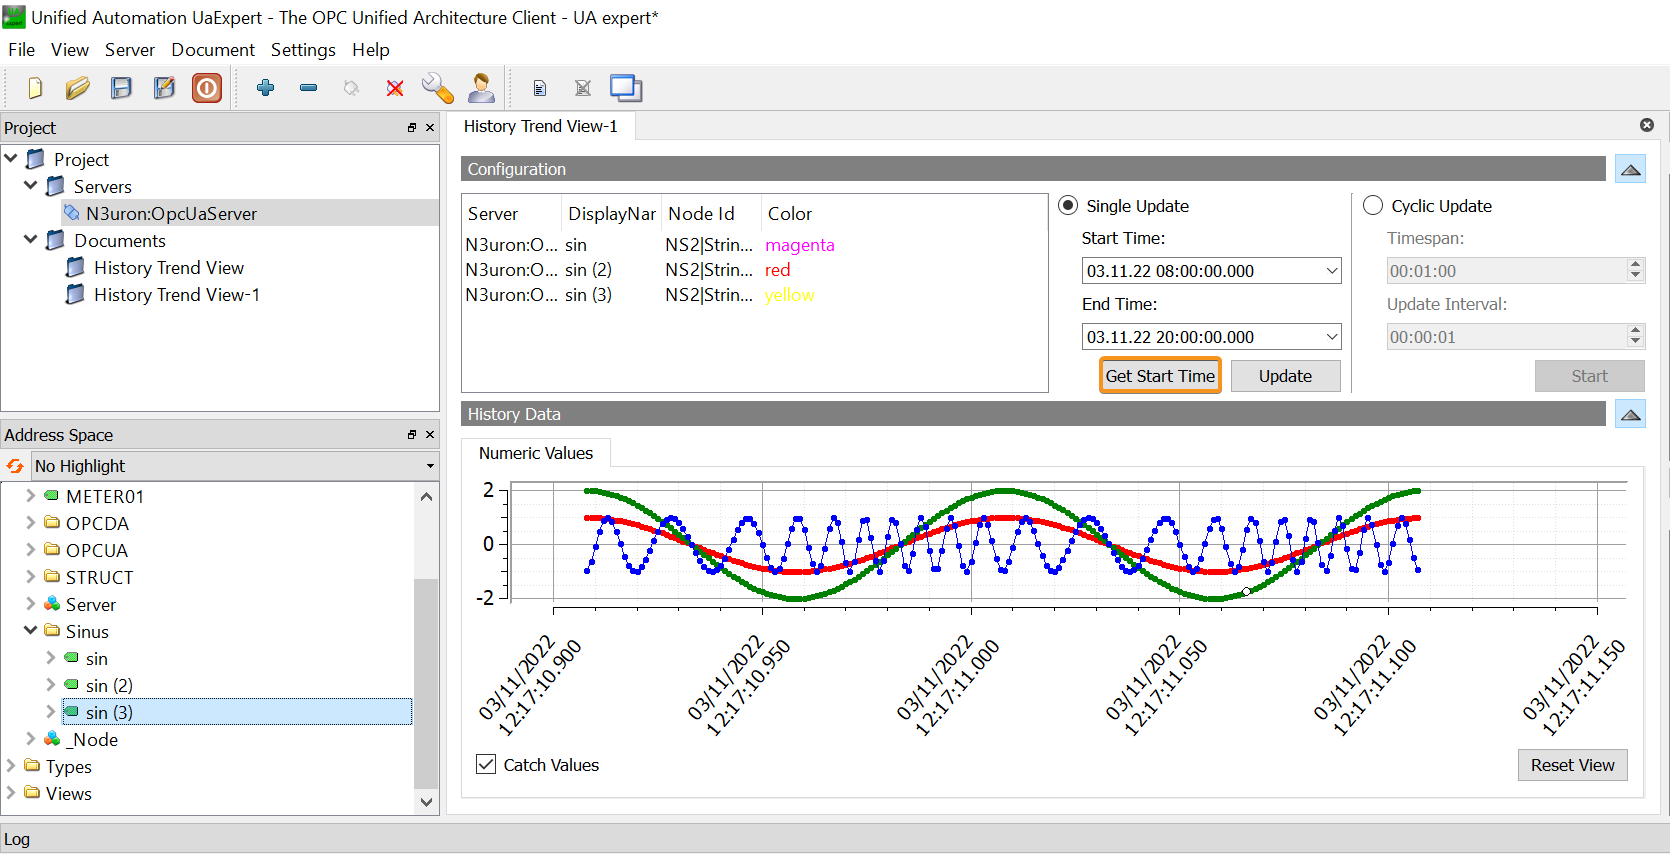
- Step 5: Now, click on Update to visualize the History Data diagram.
Creating and Configuring a Method
Using methods, N3uron enables additional complex functions to be launched (provided by the Scripting module) by using an OPC UA method. In this example, we're going to show how to create a method for adding two values.
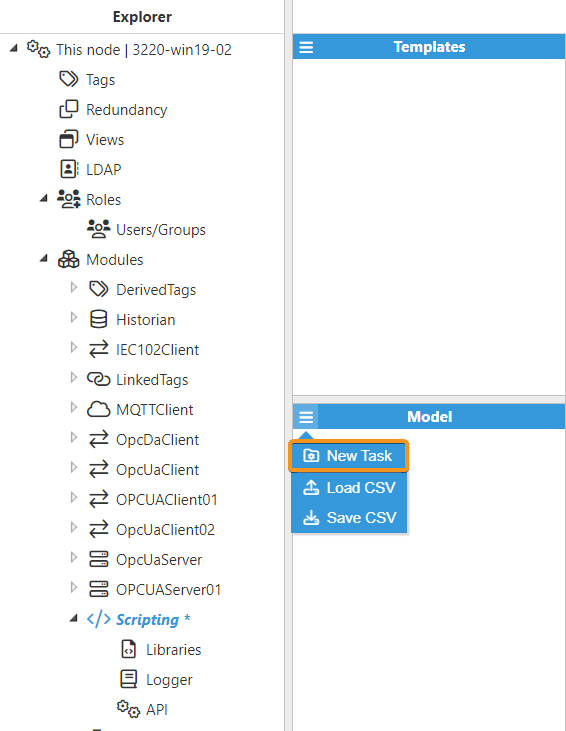
- Step 1: Create a New Task in the Scripting module.
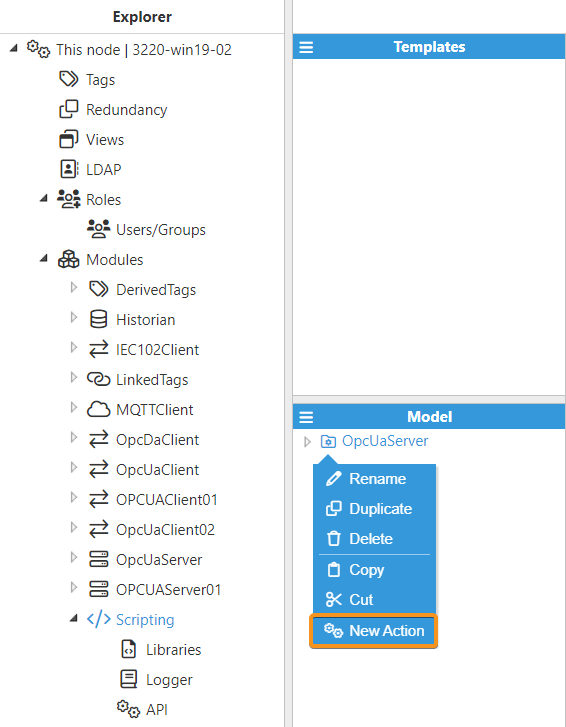
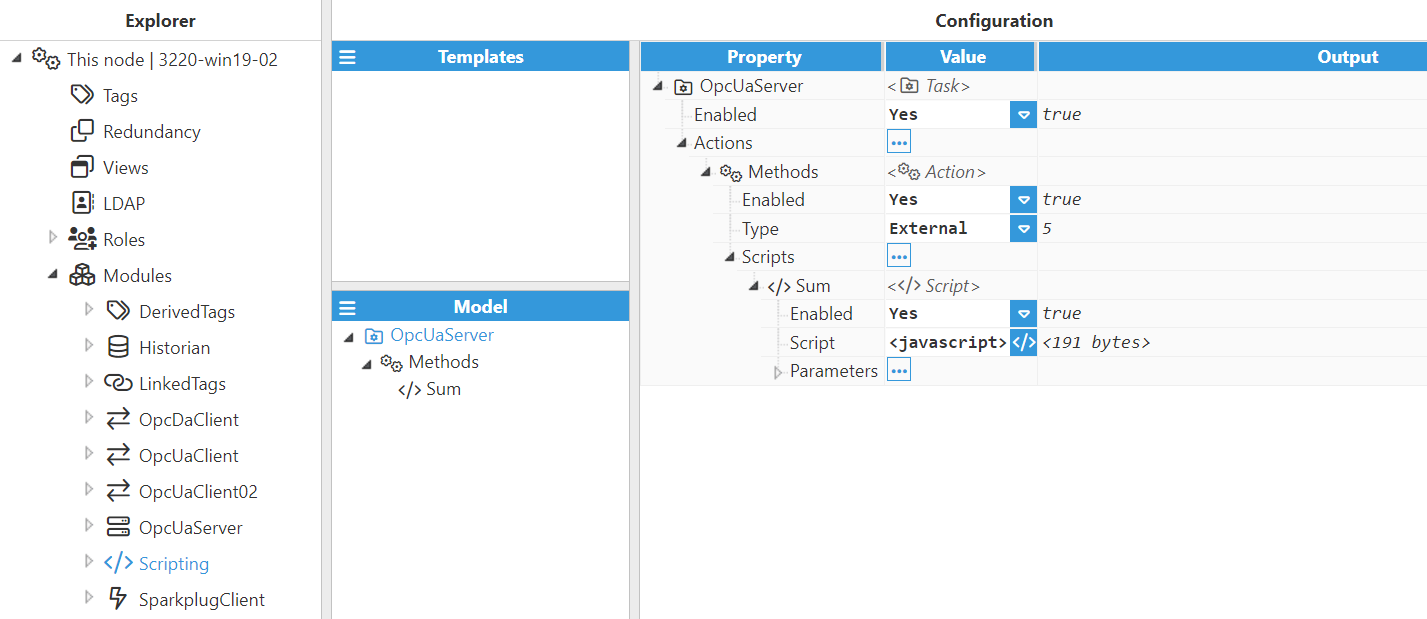
- Step 2: Then, create a New Action. We've called it Methods. This action must be an External action type.
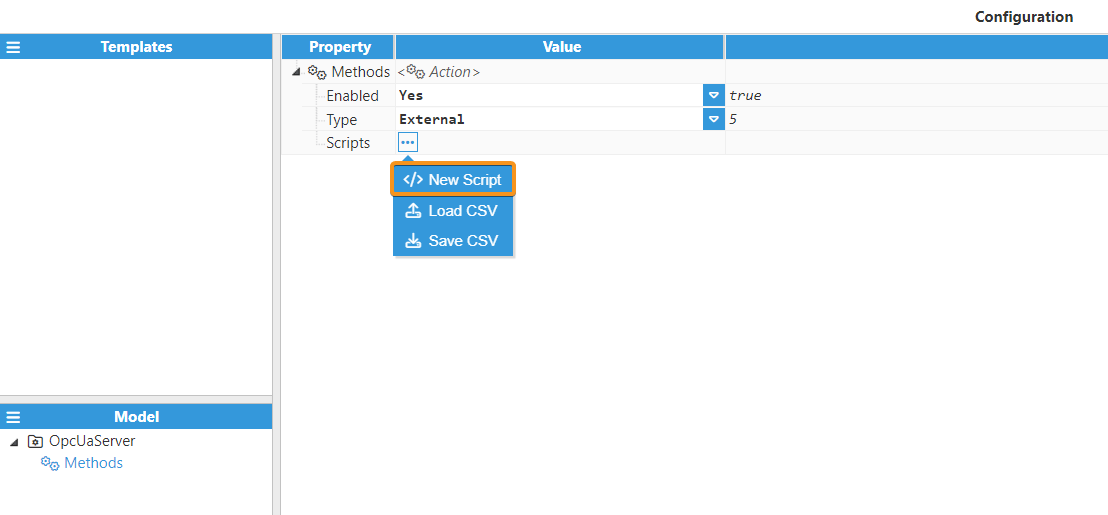
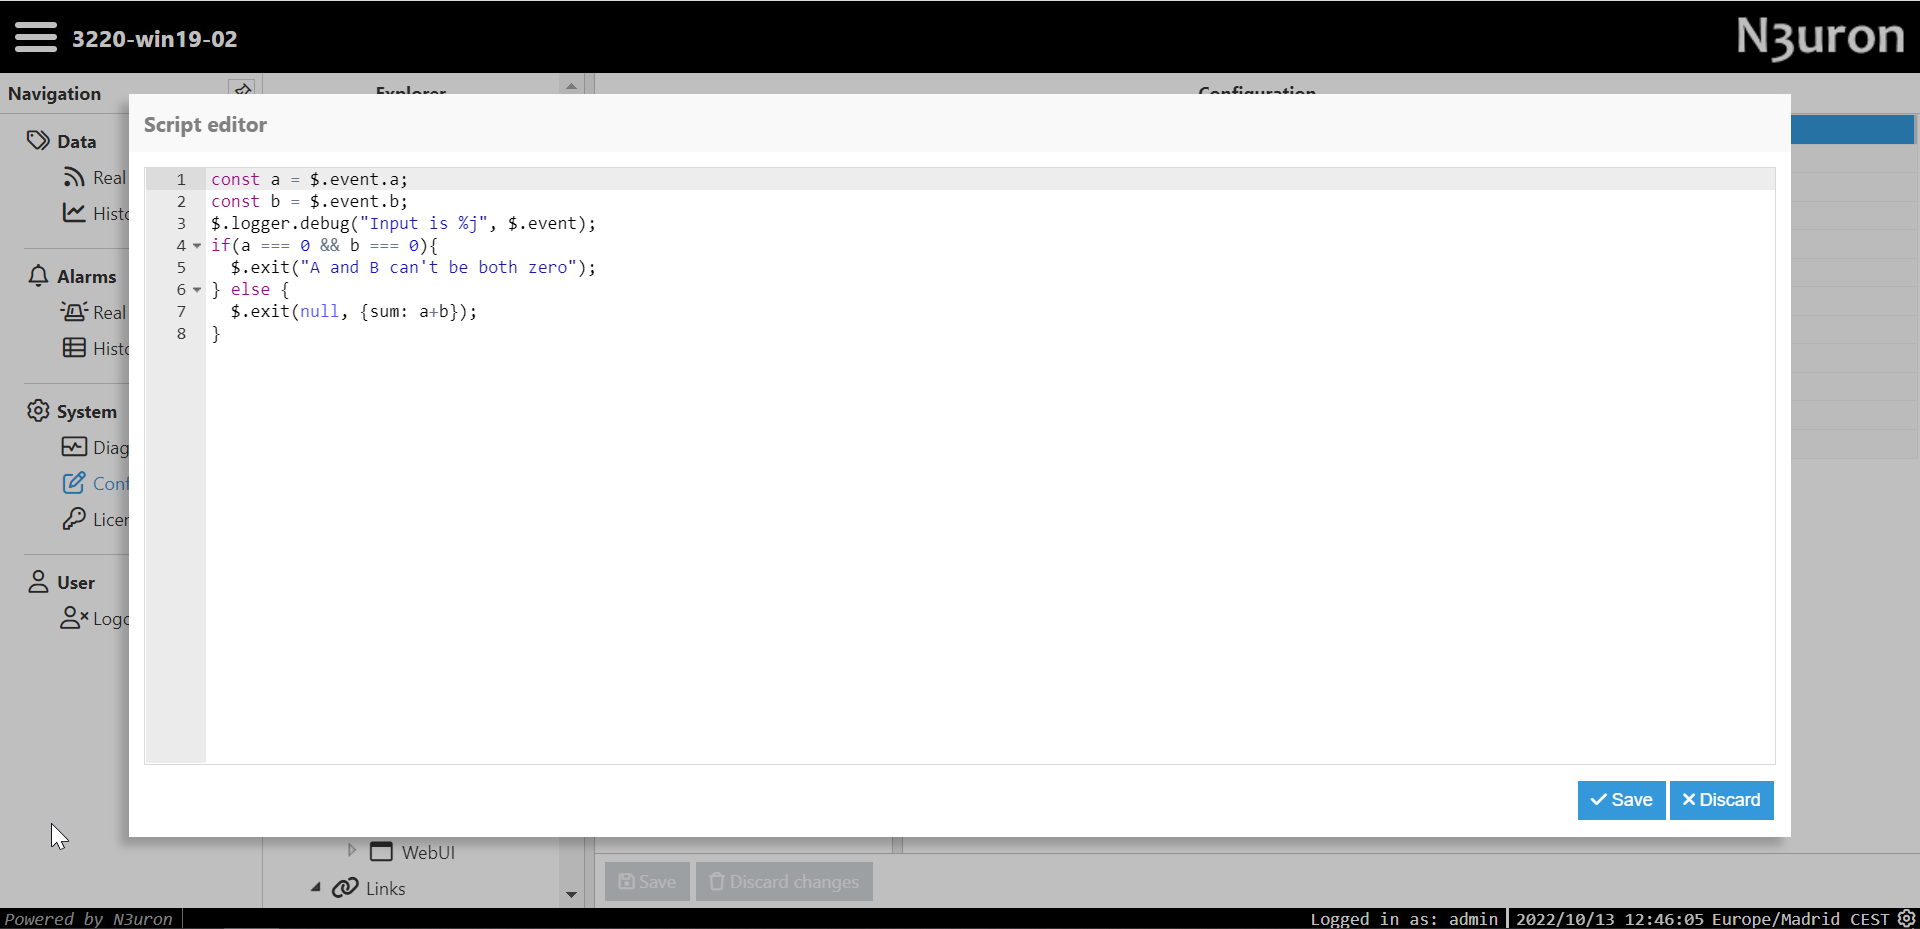
- Step 3: Once created, generate a new script named Sum by clicking on New Script. When the OPC UA Server module calls an external script, the input arguments can be used in the script by using $.event.ARGUMENT_NAME. Additionally, if the script needs to return one or more values to the OPC UA Server, this must be done by returning an object whose keys are the output arguments.
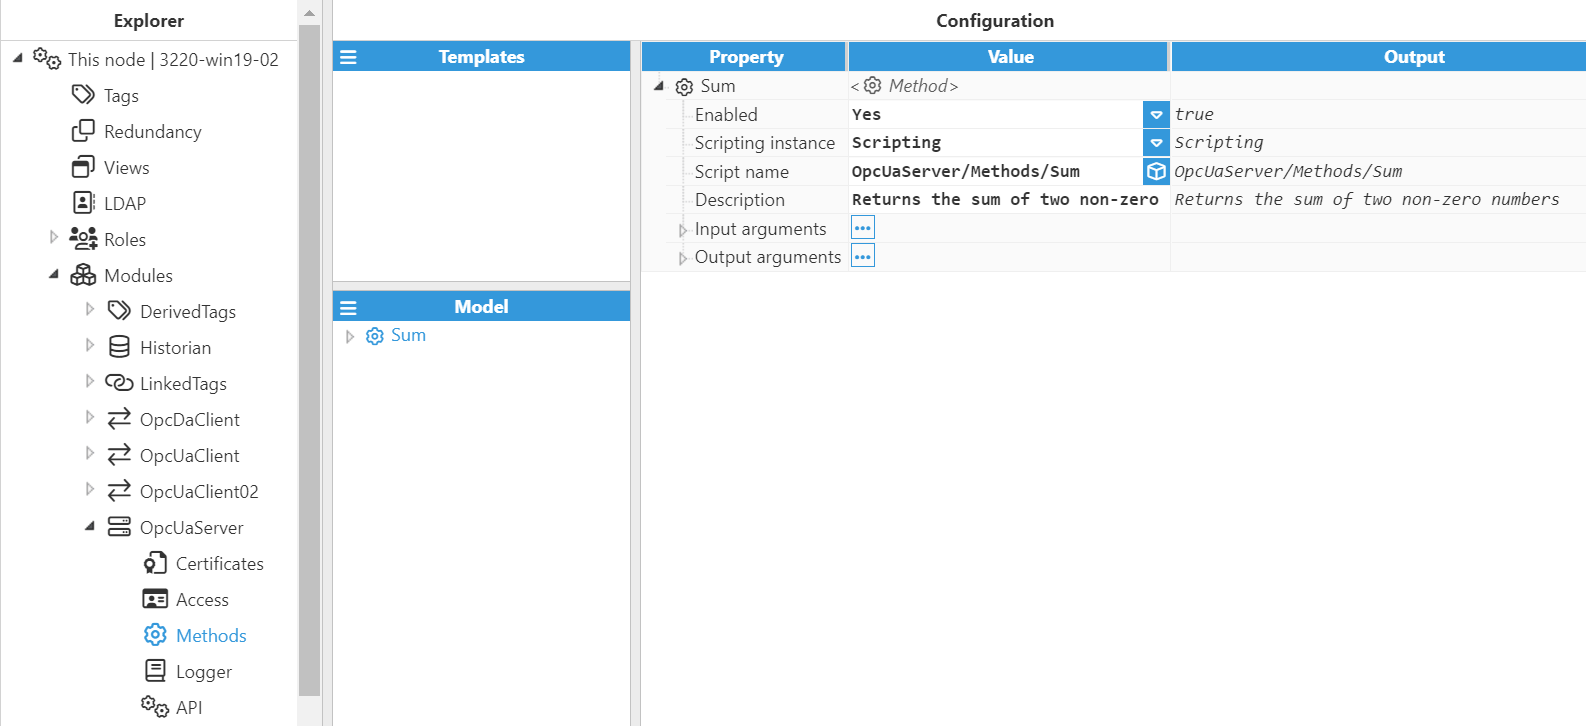
- Step 4: To configure the Method, go to Methods inside OPC UA Server and click on New Method.

- Step 5: Once created, enable it and select the corresponding Scripting instance and the name of the script. In this case, we select the Sum script previously created and insert a description of the method.
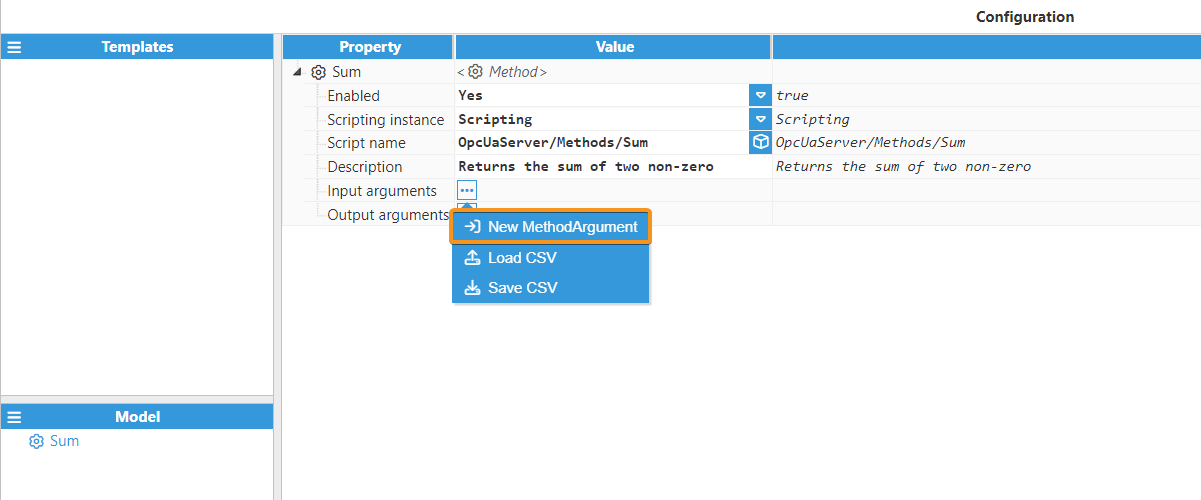
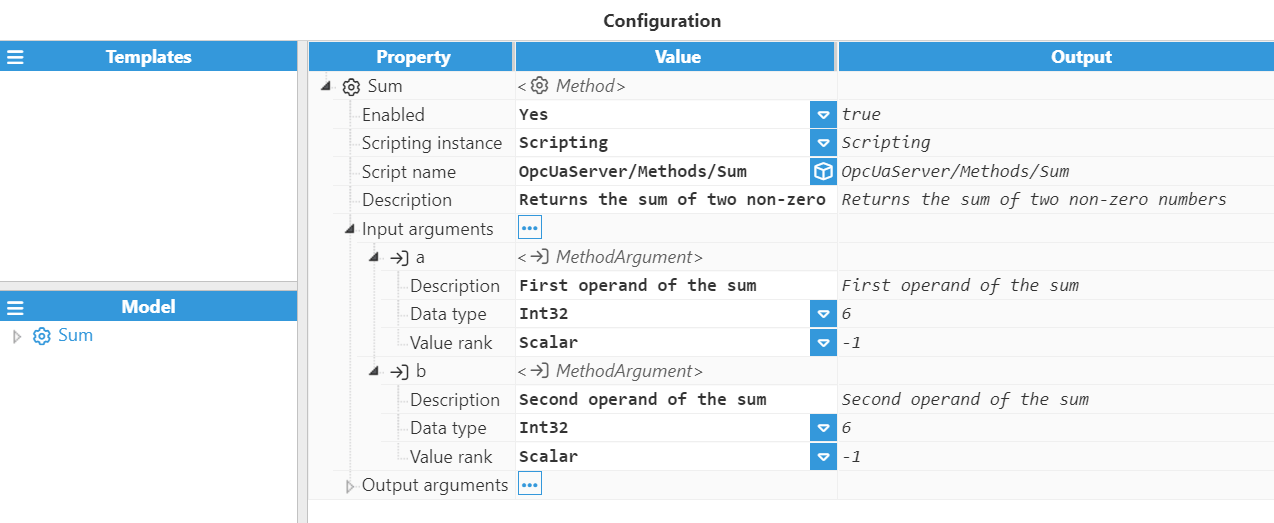
- Step 6: Now, let's create the corresponding arguments. First, we will create the Input arguments.
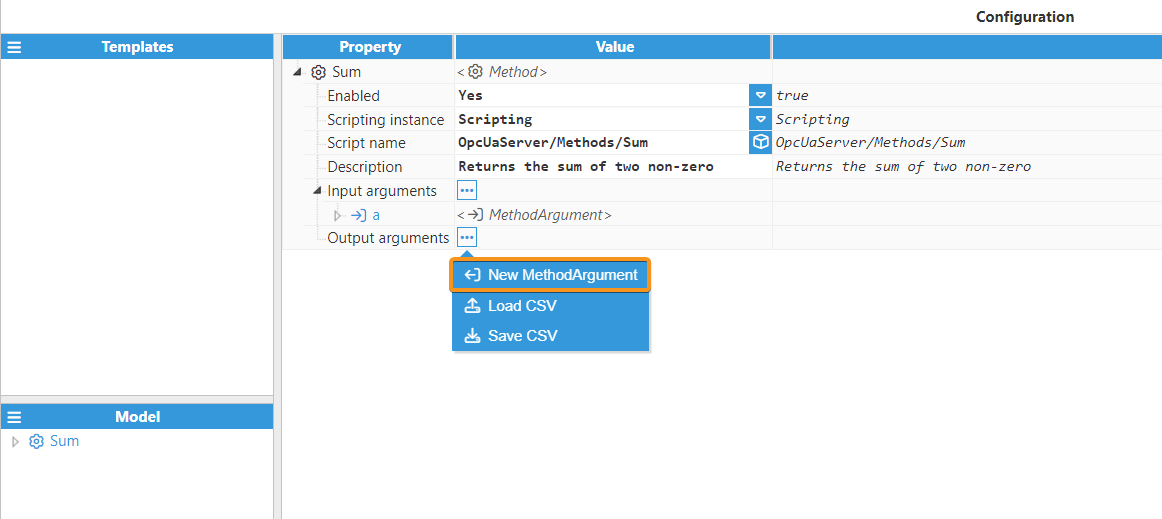
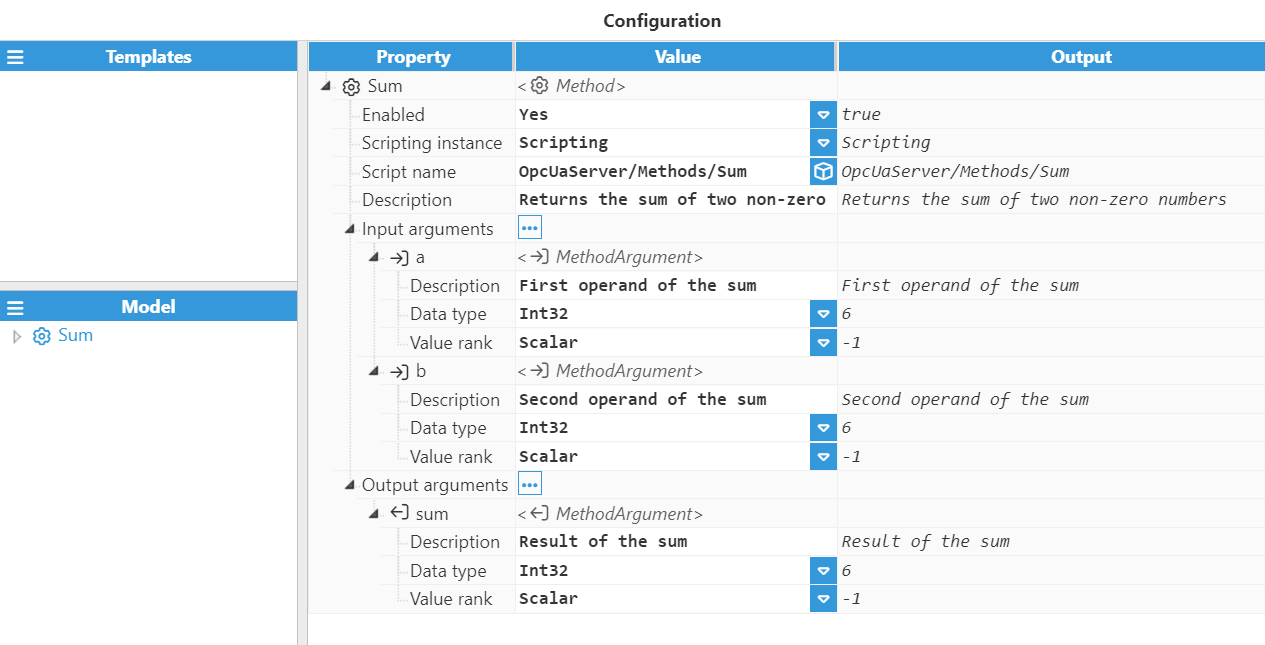
- Step 7: Then, create the Output arguments and the method is ready to use.
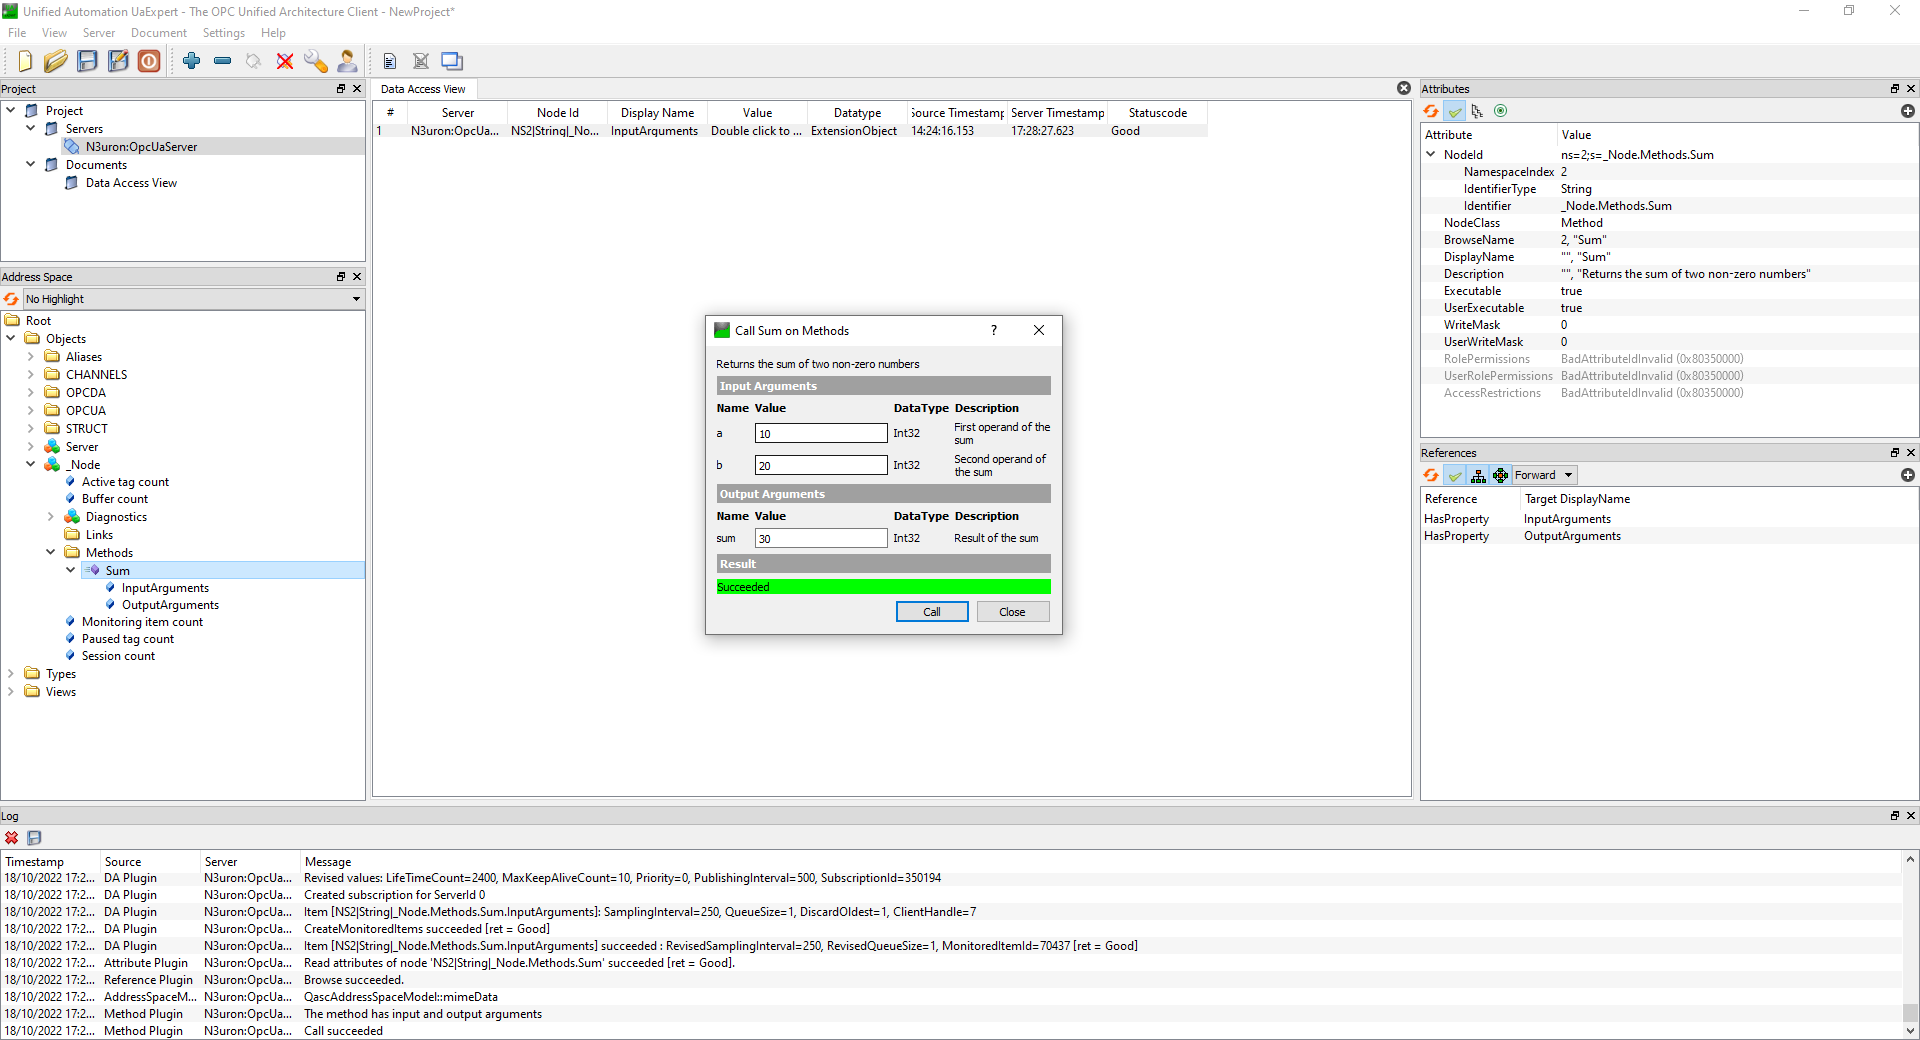
- Step 8: Now, if we go to UA Expert, we can invoke the Sum method as shown in the image below.