Overview
Custom properties effectively act as variables that can be referenced by properties on items within a template. A common use case for custom properties in templates is to make tag addresses dynamic, allowing users to replace parts of the data source configuration with the custom properties' values.
Custom properties are configured on template definitions. The values of custom properties are what differentiate instances of the same template.
Adding a Custom Property to a Template
In this example, our plant has multiple inverters. We created an Inverter Template but we want each instance of the Inverter Template to reference a different set of tags. Our Inverter Template has two tags, Frequency and Power, whose data source is a Modbus Client module. Each tag is pointing to the corresponding holding register in the inverter. In order to reference a different set of tags for each instance, we need to add a custom property to our Inverter Template that we called InverterNumber.
- Step 1: In the Templates panel, select the Inverter Template, click on the Custom Properties button, and from the drop-down menu select New custom property.
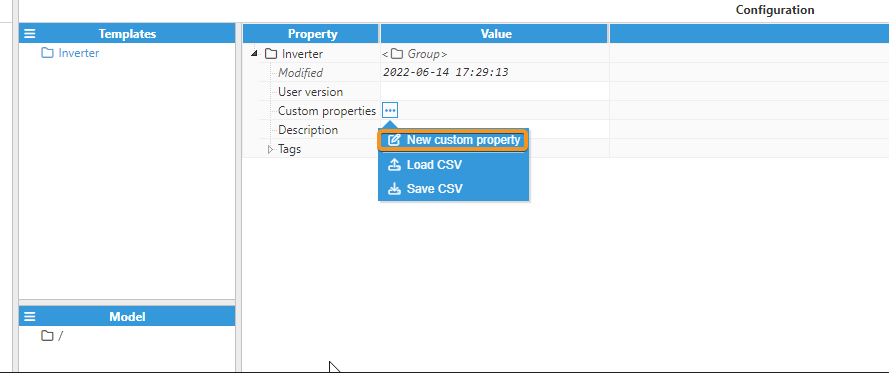
- Step 2: Enter the custom property Name and Type of Text. Click on Save.
.png)
Referencing Custom Properties from Tag Properties
Continuing with the example from above, this next example will show you how Custom Properties are referenced from tag properties within a template.
- Step 1: In the Templates panel, select the Inverter Template, expand the Tags section, and click on the Frequency tag.
- Step 2: Expand the Config properties under Source and replace CH01/SLV01 for the following expression = "CH01/SLV"+{InverterNumber}
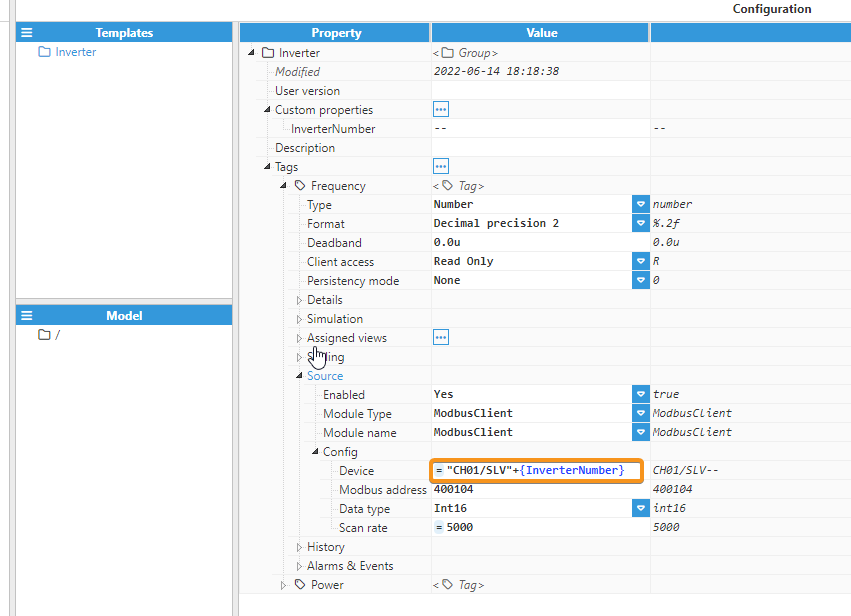
- Step 3: Repeat Step 2 for the Power tag.
- Step 4: Both tags will now show the expression = "CH01/SLV"+{InverterNumber} in the Device field.
- Step 5: Now, let's create an instance of the Inverter Template using the InverterNumber under the custom properties section. To keep the template instances organized, we created the Plant Inverters group.
- Step 6: Right-click on the Plant Inverters group and select New Group-->Inverter.
- Step 7: Enter a name for the instance (i.e., Inverter01).
- Step 8: Click on the InverterNumber field under Custom Properties and enter a value (i.e., 01). Click on Save.
- Step 9: In the Output column of the Configuration panel, you can see how the system is resolving the Device field value for both tags.
.png)
Custom Properties in Expressions
As we have just seen in the example above, JavaScript expressions can be used on each data entry to calculate the value. All expressions start with “=” (like in spreadsheets). Expressions are only evaluated during the module start-up.
Below you can see some examples of expressions assuming the following Custom Properties:
| Custom Property Name | Type | Value |
|---|---|---|
| Boolean01 | Boolean | True |
| Boolean02 | Boolean | False |
| Number01 | Number | 5 |
| Number02 | Number | 25 |
| Text01 | Text | Hello |
| Text02 | Text | World! |
| Action | Expression | Result |
|---|---|---|
| Concatenation | ={Text01}+" "+{Text02} | Hello World! |
| Sum | ={Number01}+{Number02} | 30 |
| Conditional | ={Boolean01}==1?{Number01}:{Number02} | 5 |
| Conditional | =['A','B','C','D','E'][{Number01}-2] | D |
| String methods | ={Text02}.substr(0,1)+{Text01}.slice(1,4) | Well |
The image below shows a real example of an expression in a template.
![]()
Editable Help for Custom Properties
You can create and edit help within custom properties, allowing for the addition of private internal explanatory notes. Simply right-click on the custom property and select "Edit Help". From there, you'll be able to create a text for the custom property, explaining its functionality. 
Drag and Drop to Simplify Data Model
Drag and Drop an input into the Custom Properties section and have it automatically created and assigned. If an input is dragged and dropped into a group, the value of that input is assigned to all the same inputs in that group. This allows for much faster building of the data model and quick and easy future modifications.
Drag and Drop an input into the Custom Properties section
Imagine you want to create a Custom Property for an input tag because its value changes when the template is instantiated. You can select any input tag by pressing down the left mouse button, dragging it, and dropping it into the Custom Properties section. This newly created Custom Property will automatically be assigned to the current value of the input tag. Additionally, the input tag will have its value assigned to the Custom Property with an automatically generated expression.
For example, consider a group named TANK, which consists of two tags: LEVEL (representing the content level inside the tank) and TEMP (representing the temperature of the tank). I wish to incorporate a Custom Property for the Client access input. Currently, the LEVEL tag has this input hardcoded to Read/Write permission. However, I aim to have the flexibility to modify it later when the template is instantiated, as illustrated in the following picture: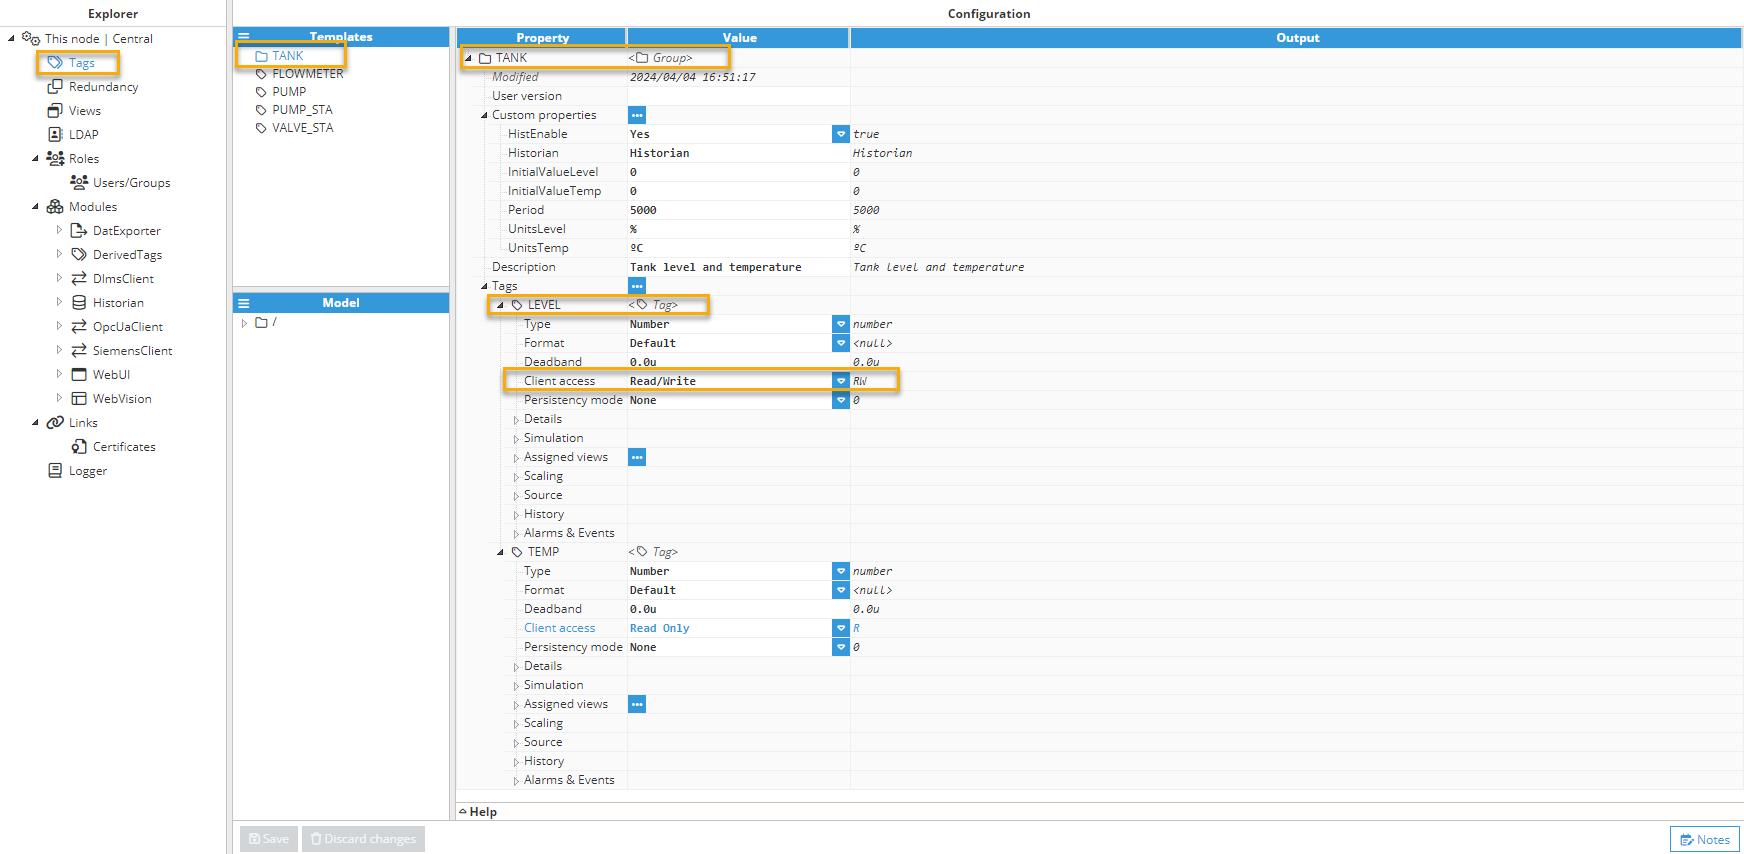
I will proceed to drag and drop it into the Custom Properties section, creating a new Custom Property with the same name as the input and the input of the tag assigned to the Custom property using an expression.
Propagate an input value from one tag to all tags within a Group using Drag and Drop
To propagate an input value from one tag to all tags within a group, let's expand on the previous example: We have established a Client access permission for a Custom Property and wish to apply it uniformly to both the LEVEL and TEMP tags. To accomplish this, drag and drop the input to the primary folder of the group or the Tags section within the group. A confirmation prompt will appear as this action will overwrite existing input values for the tags. If you approve, select "yes" to proceed.
.gif)
.gif)