Connecting to a Moxa Remote I/O Device from N3uron Using SNMP Client
This is a detailed step-by-step guide to connecting to a Moxa remote I/O device from N3uron using the SNMP Client module.
- Step 1: Create the module: (Config => Modules => Model => New Module).
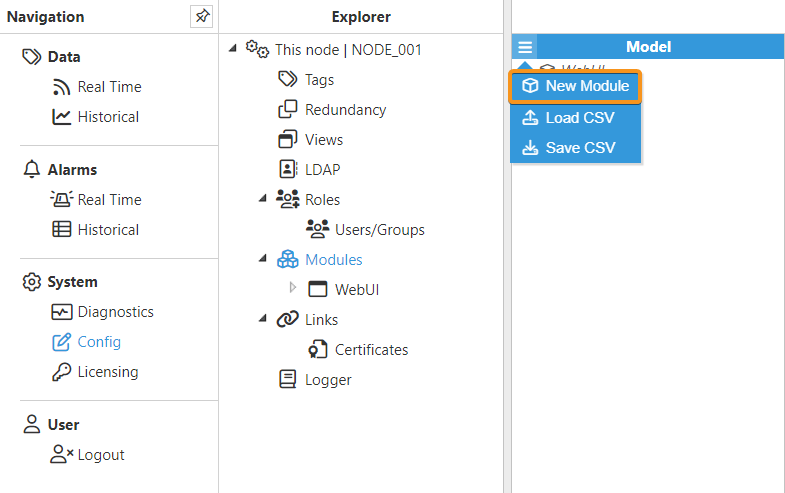
- Step 2: Provide a name for the module (in this case SnmpClient), assign the module type (in this case SnmpClient), and save the new configuration.
.png)
- Step 3: Configure the Logger and API sections (usually the default values are sufficient). Save the configuration.

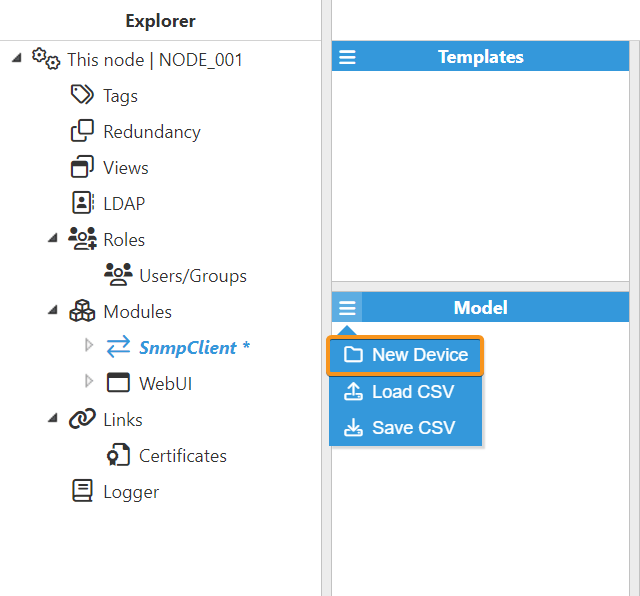
- Step 4: Click the button on the left-hand side of the Model header, select New Device, and give it a name. In this case, Moxa1212.
- Step 5: Configure the SNMP Client to connect to the PLC.
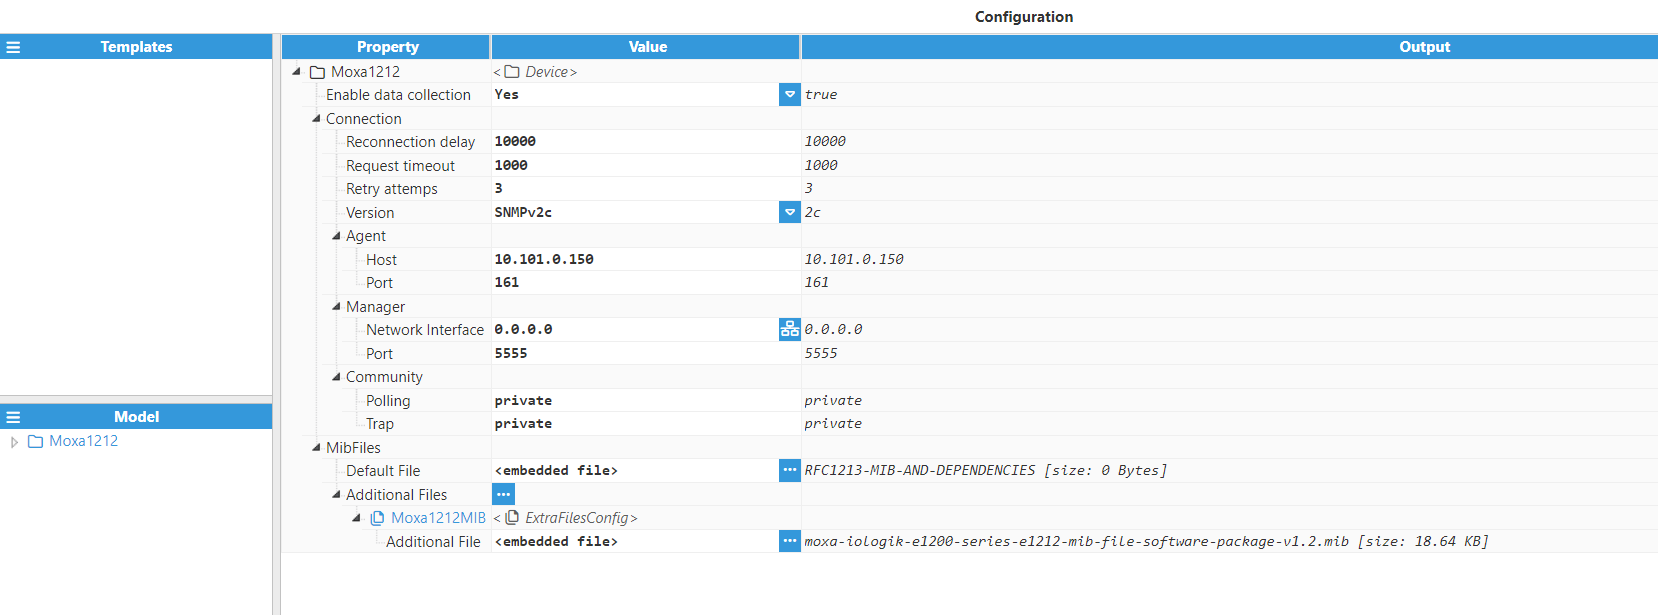
Parameters:
- Enable data collection: Yes.
- Connection:
- Reconnection delay: 10000.
- Request timeout: 5000.
- Retry attempts: 3.
- Version: SNMPv2c.
- Agent:
- Host: Hostname/IP address of the target device.
- Port: Agent port number to connect to.
- Manager:
- Network Interface: Click on the Network interface discovery button to the right of the Network interface field and select the corresponding interface of the network we want to connect to.
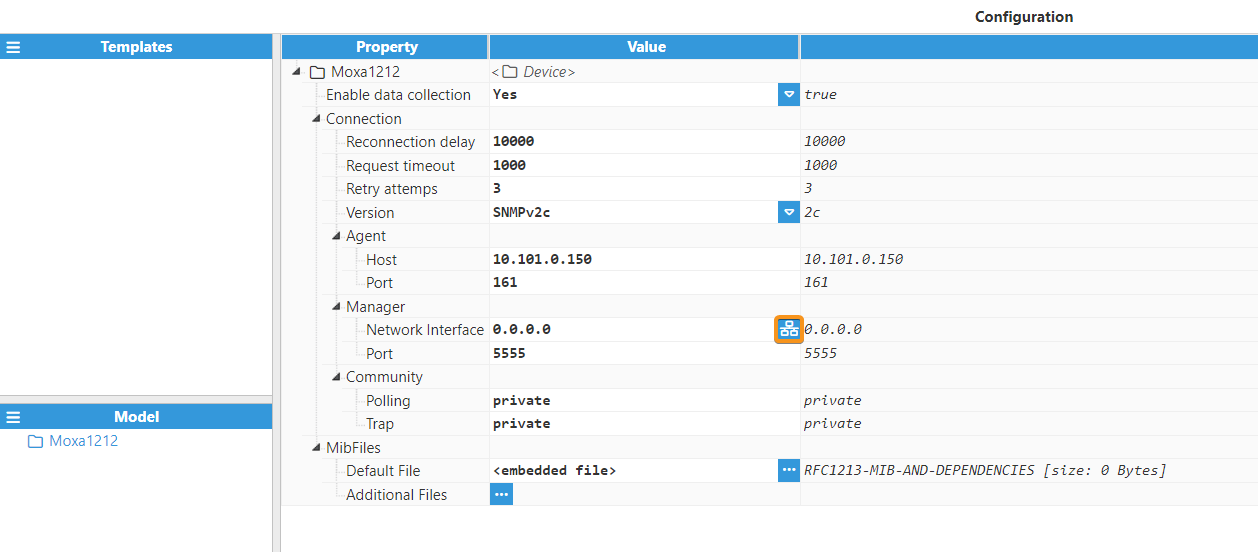
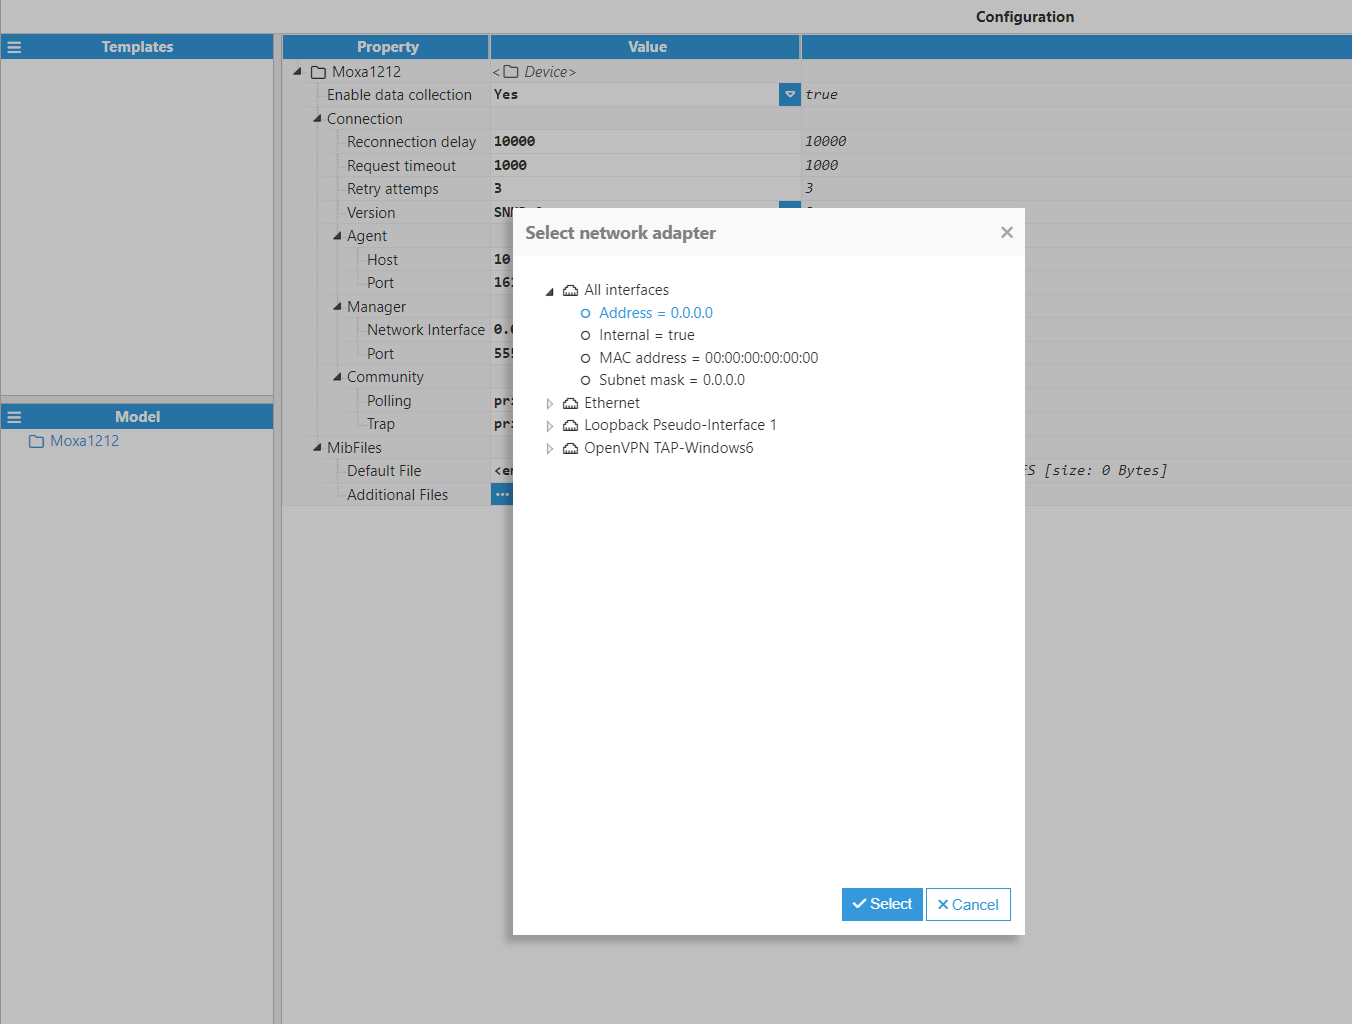
- Port: Port for incoming notifications.
- Network Interface: Click on the Network interface discovery button to the right of the Network interface field and select the corresponding interface of the network we want to connect to.
- Community:
- Polling: private.
- Trap: private.
- Default File: RFC1213-MIB, including its dependencies: RFC1155-SMI, RFC-1212, RFC1158-MIB, SNMPv2-SMI, SNMPv2-TC.
- Additional Files: Load the following file provided by the manufacturer moxa-iologik-e1200-series-e212-mib-file-software-package-v1.2.mib.
At this point, the connection is now ready and we can move on to creating new tags.
- Step 6: In the Explorer panel, select Tags. In the Model panel, create a new tag, and name it DIO01.
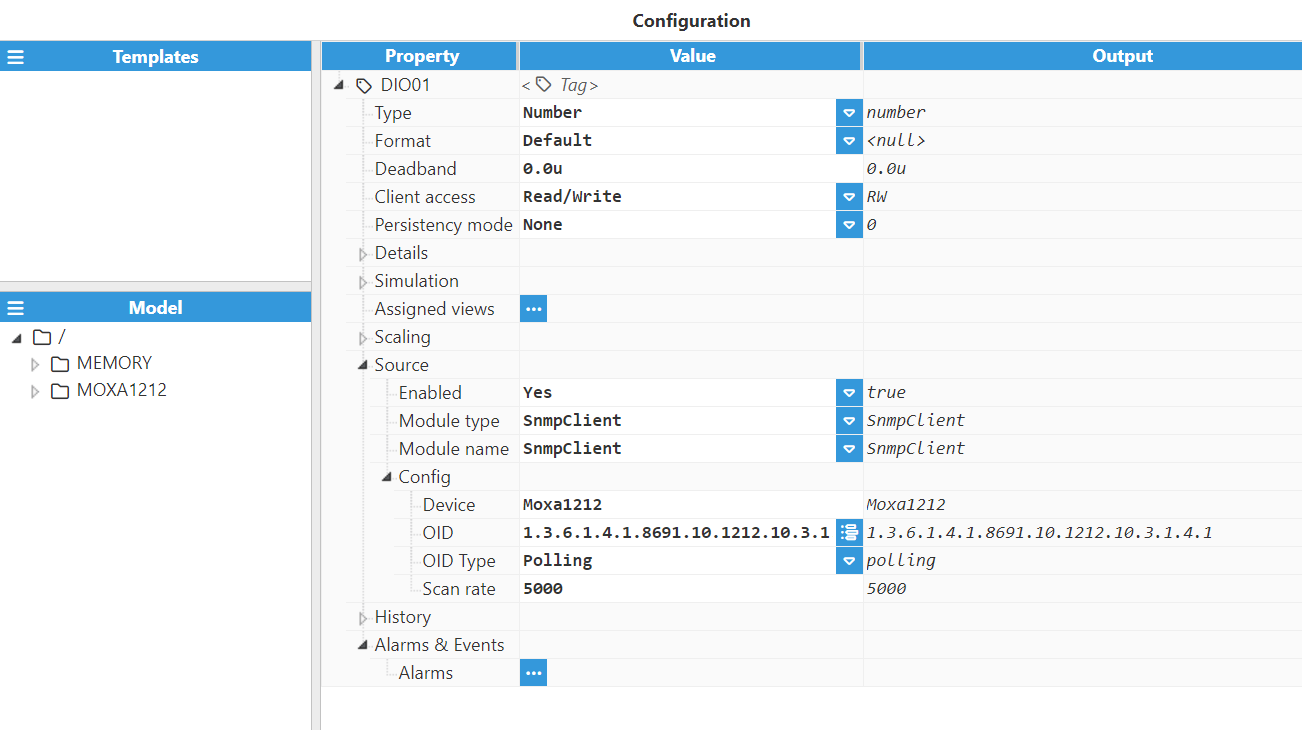
- Step 7: Set the configuration parameters properly:
- Type: Number.
- Format: Default.
- Client Access: RW.
- Source:
- Enabled: Yes.
- Module type: SnmpClient.
- Module name: SnmpClient.
- Config:
- Device: Moxa1212.
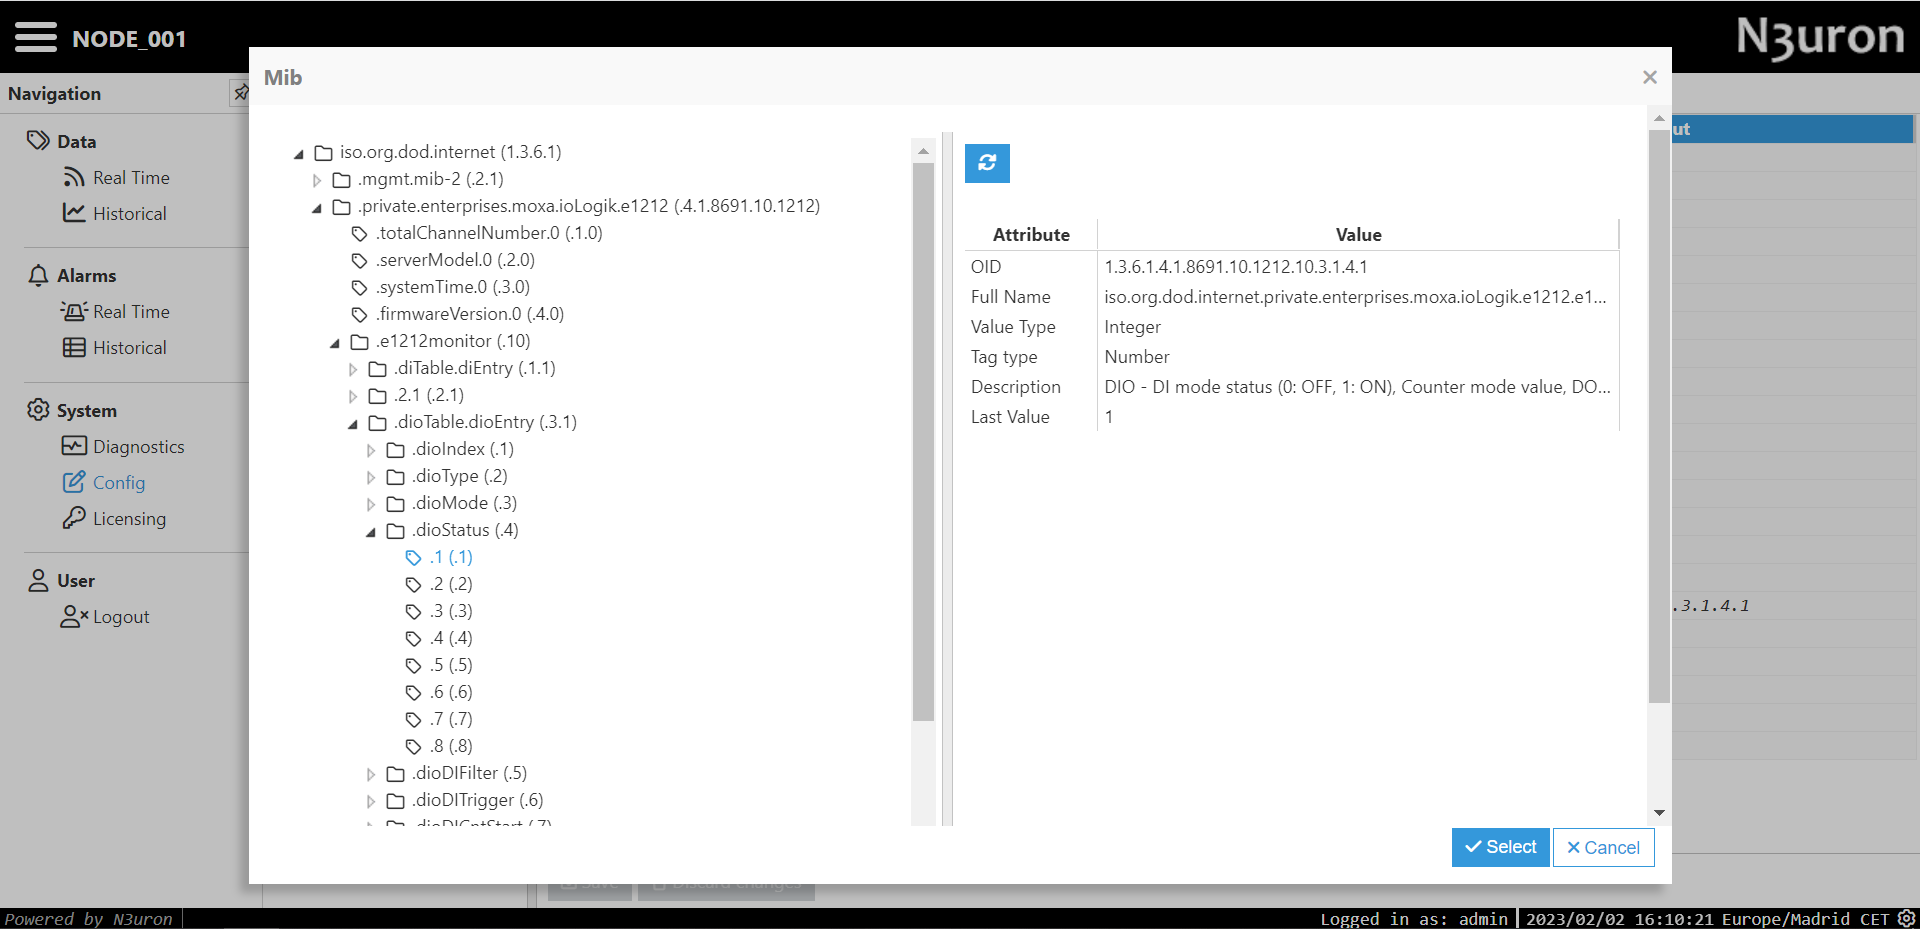
- OID: OID value for requesting information. Users can browse for the corresponding OID by clicking on the button on the right hand side of the OID field. Once the browser is open, the different OIDs with their attributes and values can now be found.

- OID Type: Polling.
- Scan rate: 5000.
- Step 8: Finally, head to the Data/Real-Time section in the Navigation panel, where you should now be able to see all data read from that device.
