Note:
Before starting configuration, a new module instance must be created. Click here for more information about creating Module instances.
Note:
Topic Namespace Format:
The Sparkplug specification clearly defines the Topic Namespace, which must follow this pattern, spBv1.0/<Group ID>/<MESSAGE TYPE>/<Edge Node ID>/<Device ID>. The table below explains the main components of the topic namespace.
Element | Definition | Source |
GroupID | A logical Identifier for a group of MQTT nodes. | Defined by the user. |
Message Type | Indicates whether the message contains state information, data, or a command and whether it pertains to a node, device, or the primary application. | Predefined by Sparkplug B specifications. Cannot be changed by user. |
Edge Node ID | Identifies a specific MQTT node. | Defined by user. The Group ID/Edge Node ID combination must be unique. |
Device ID | Identifies a device attached physically or logically to a node. | Defined by the user, if applicable. Its definition is optional. |
Edge Node Configuration
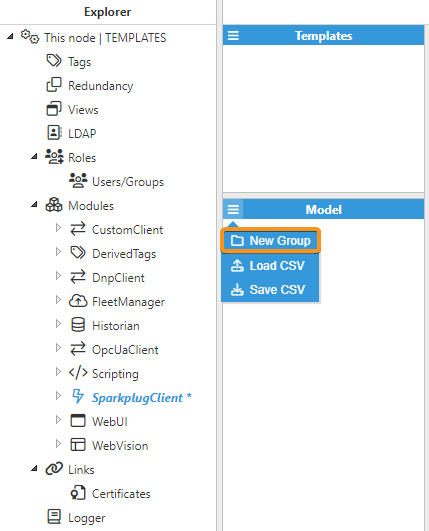
According to the above note, before creating a new Edge Node, you will first need to create a Group. To do so, select the module instance in the Explorer Panel, click on the button on the left-hand side of the Model header, select New Group, and give it a name.
Enabled: Enables the group.
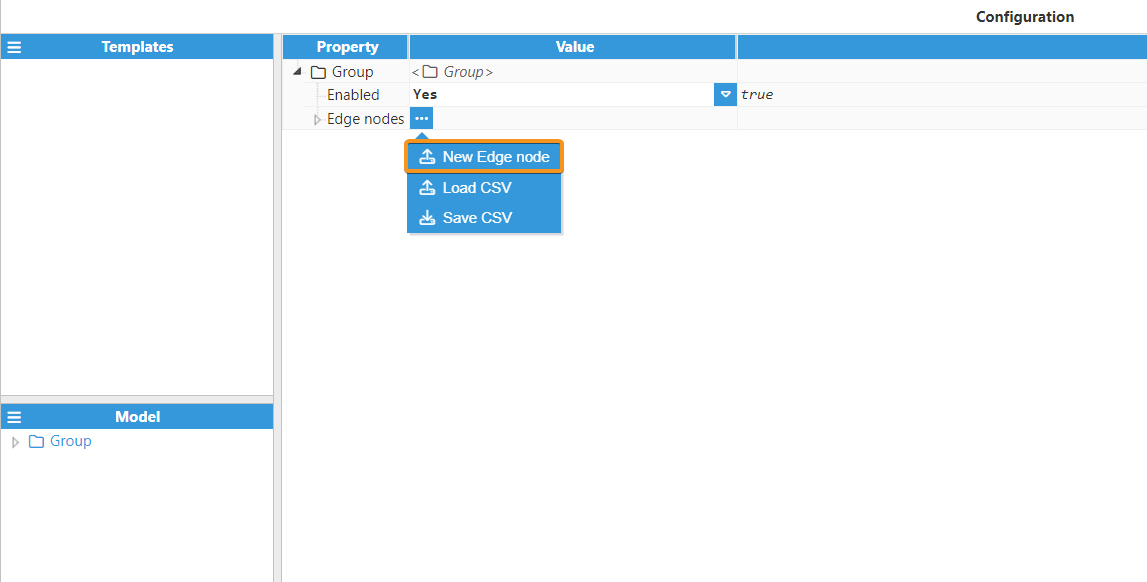
Once the Group has been created, click on the Edge nodes button and select New Edge node, as shown in the below image.
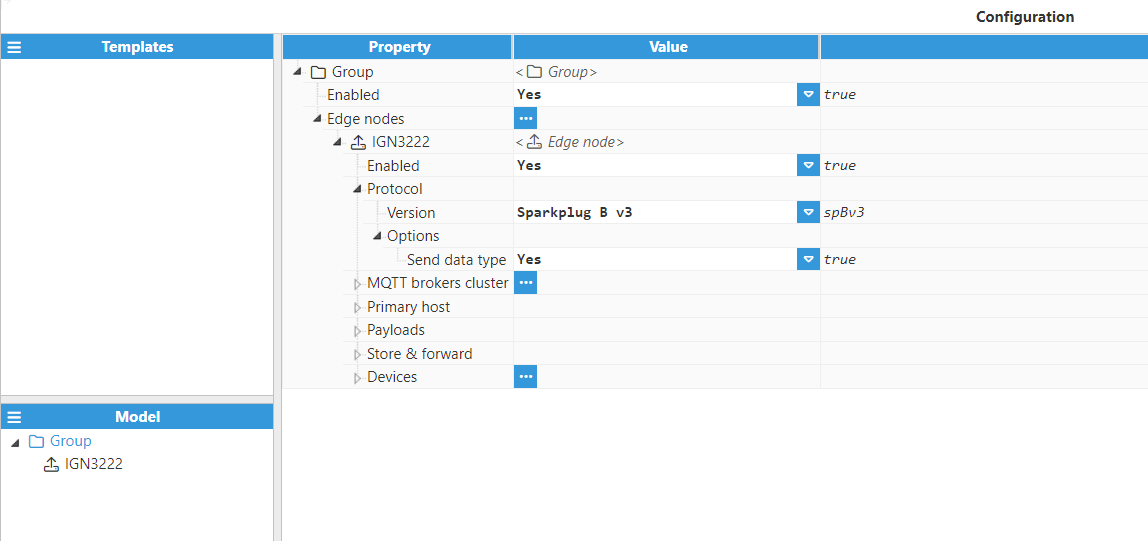
Each group can contain as many Edge nodes as necessary. The Edge node configuration options are as follows:
Enabled: Enables or disables the edge node.
Protocol:
Version: Both Sparkplug B v2 and Sparkplug B v3 versions are available.
Note:
Sparkplug B v3 is available from N3uron version 1.21.4.
Options:
Send data type: Send optional metric datatype properties in DATA commands.
Note:
Some applications require sending the Data Type, therefore this field may need to be enabled. Ignition is one of those applications.
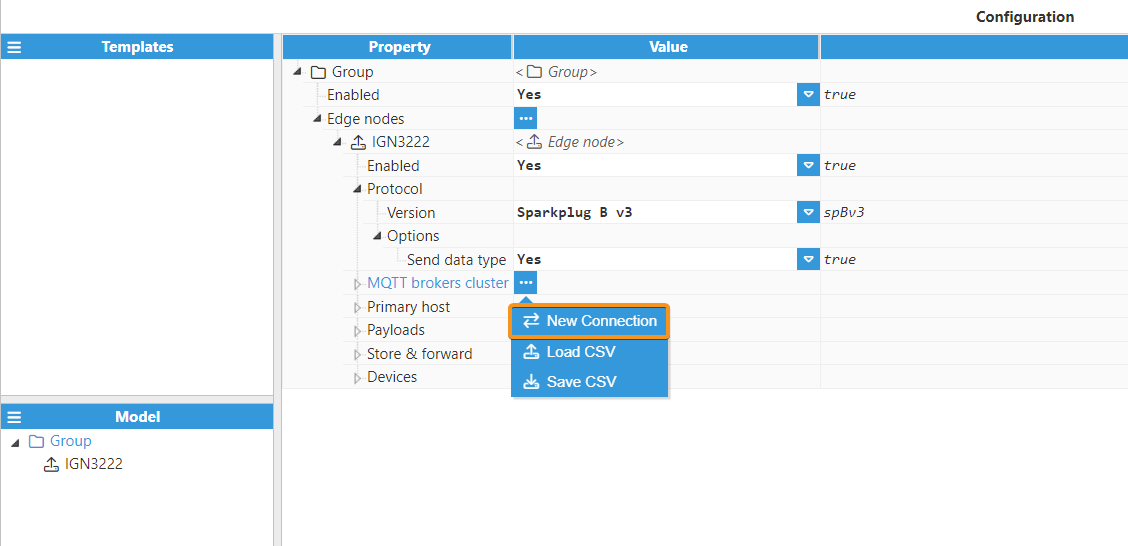
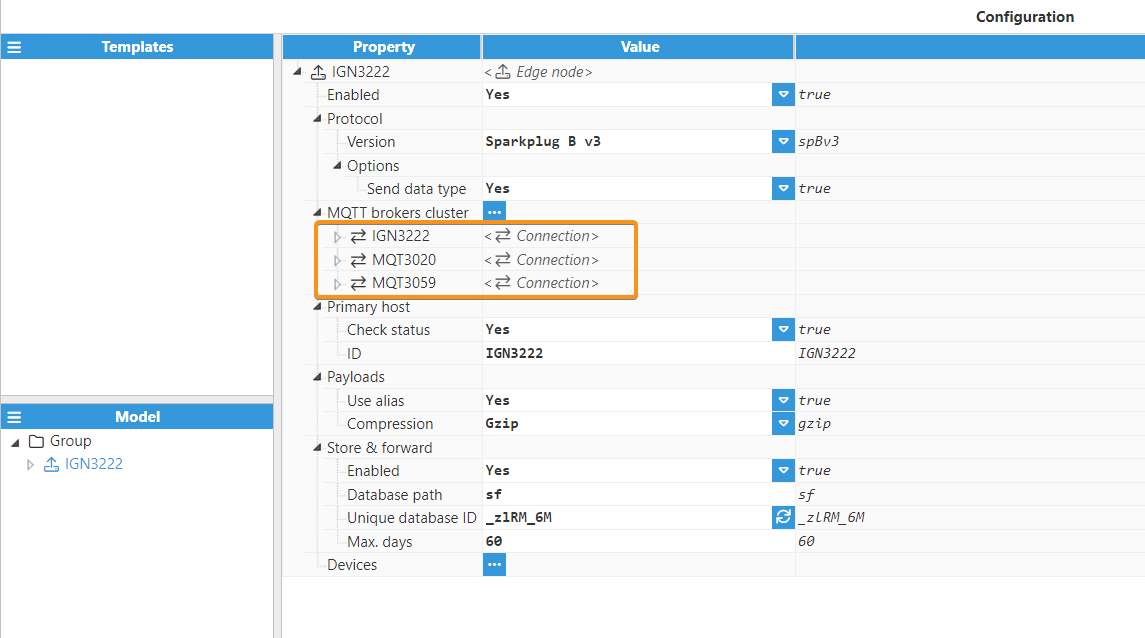
MQTT Brokers Cluster: In this section, we can create and configure as many connections to MQTT servers as needed, in order to deploy a redundant architecture. As shown in the image below, to create a new connection click the relevant button, select New Connection, and give it a name. The rest of the available options include loading connections using an external csv file or saving the current connections to a csv file for future use.
The main configuration options for any given connection are as follows:
Connection:
Enabled: Enables or disables the connection.
Note:
The Enabled connection field is available from N3uron version 1.21.4.
Protocol: Select either plain MQTT or secure MQTTS.
Broker URL: Hostname or IP address of the target broker.
Port: Select which port to use for connecting to the broker. Default ports are 1883 for MQTT and 8883 for MQTTS. The valid range is 1 to 65535.
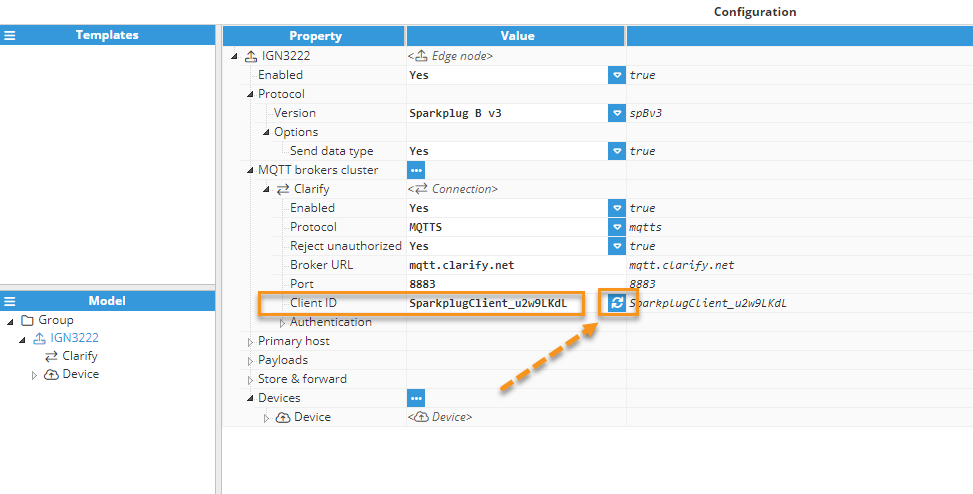
Client ID: Selects the client ID for this connection. Must be a unique ID for each connection, as the broker will drop any connections with duplicate client IDs.
Pressing the refresh button generates a random Client ID.
Note:
This feature is available from N3uron version 1.21.8.
Warning:
If two clients attempt to connect with the same client ID, one will be forcibly disconnected from the broker to allow the other client to connect.
Authentication: Defines how the client will authenticate with the broker.
Authentication mode: Selects one of the available authentication modes, permitted values are: None, Password, Certificate and Password-Certificate. The configuration parameters depend on the chosen option:
Password:
Username: Specifies the username used to authenticate with the broker.
Password: Specifies the password used to authenticate with the broker.
Certificates:
Certificate: Selects the certificate used to authenticate with the broker.
Private key: Selects the private key used to authenticate with the broker.
Root CA certificate: Selects the root CA certificate used to authenticate with the broker.
Reject unauthorized: If set to True, the connection will be rejected unless the server provides a certificate signed by a valid CA. Set to false for self-signed certificates.
Password: Certificate:
Username: Specifies the username used to authenticate with the broker.
Password: Specifies the password used to authenticate with the broker.
Certificate: Selects the certificate used to authenticate with the broker.
Private key: Selects the private key used to authenticate with the broker.
Root CA certificate: Selects the root CA certificate used to authenticate with the broker.
Reject unauthorized: If set to True, the connection will be rejected unless the server provides a valid certificate signed by a CA.
The following image shows an example of an MQTT broker connection already configured: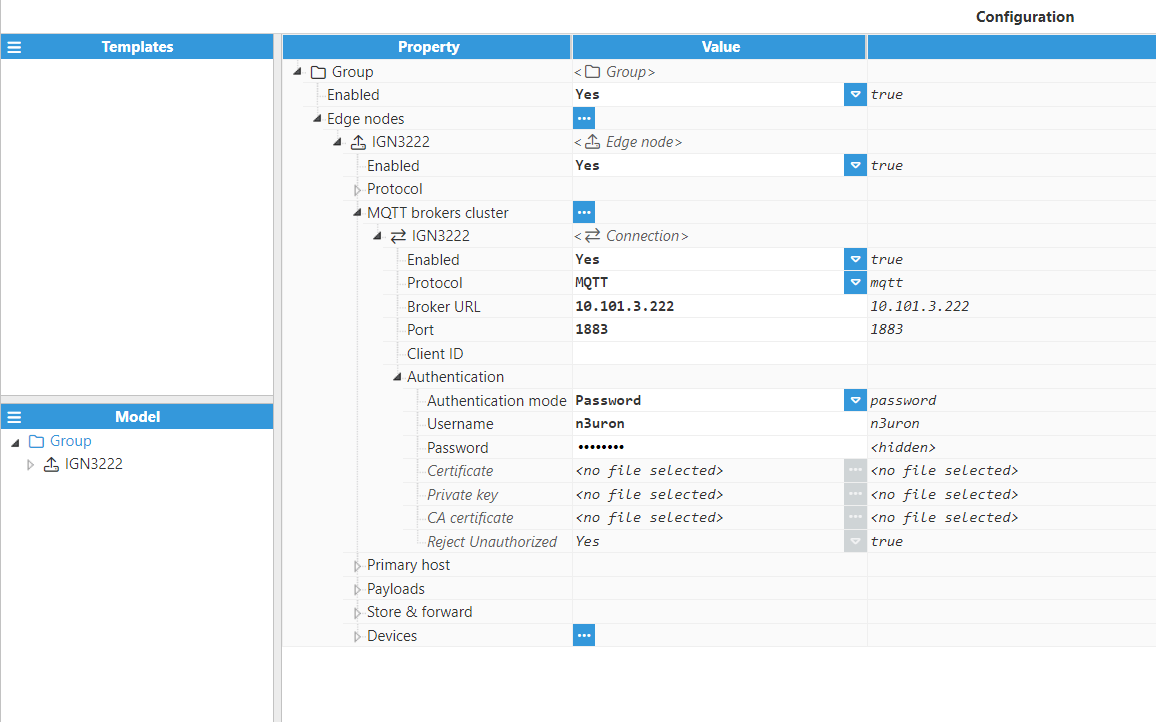
Primary host:
Check status: Pause publishing data if the primary host status is offline. If multiple connections are defined, it will rotate between connections searching for an online status.
ID: This parameter is used for STATE notifications, which are used to identify the primary backend application to ensure that data is being delivered to this application. When this application shuts down or disconnects from the broker, this node detects the offline state of the application, activates the Store & Forward mechanism to prevent any data loss, closes the connection to the current MQTT broker, and connects to the next MQTT broker defined in the MQTT brokers cluster to check if the primary application is ready to receive data through this broker. When no primary host ID is set, this Edge of Network node does not subscribe to STATE notifications. In this case, the Store & Forward mechanism is not aware of the status of the primary application and is only activated when the Edge of Network node disconnects from the broker.
Note:
The Primary Host ID only accepts letters, numbers and the following special characters:
$
%
@
!
-
_
^
*
Payloads:
Use alias: Enables or disables the use of incremental numeric aliases instead of tag names. This allows the name associated with the payload to be replaced by a numerical code to keep bandwidth usage to a minimum.
Note:
Some Sparkplug Host Applications do not support both using aliases and sending UDTs, if the destination host application is Ignition make sure to disable this setting if sending UDTs is enabled.
Compression: Select the compression method applied to the payload to save bandwidth. The application consuming the data must support the selected compression type. There are 3 options available:
None: Does not use compression.
GZIP: Uses GZIP data compression.
Deflate: Uses deflate data compression.
Additional Data: Select the additional property set fields that will be sent on each tag.
Note:
This feature is available from N3uron version 1.21.5.
None: This is the default option.
N3uron: The data will be in N3uron format.
Ignition: The data will be in Ignition format.
Note:
When establishing a connection with Ignition, it's crucial to consistently configure the 'Additional Data' setting to 'Ignition.'
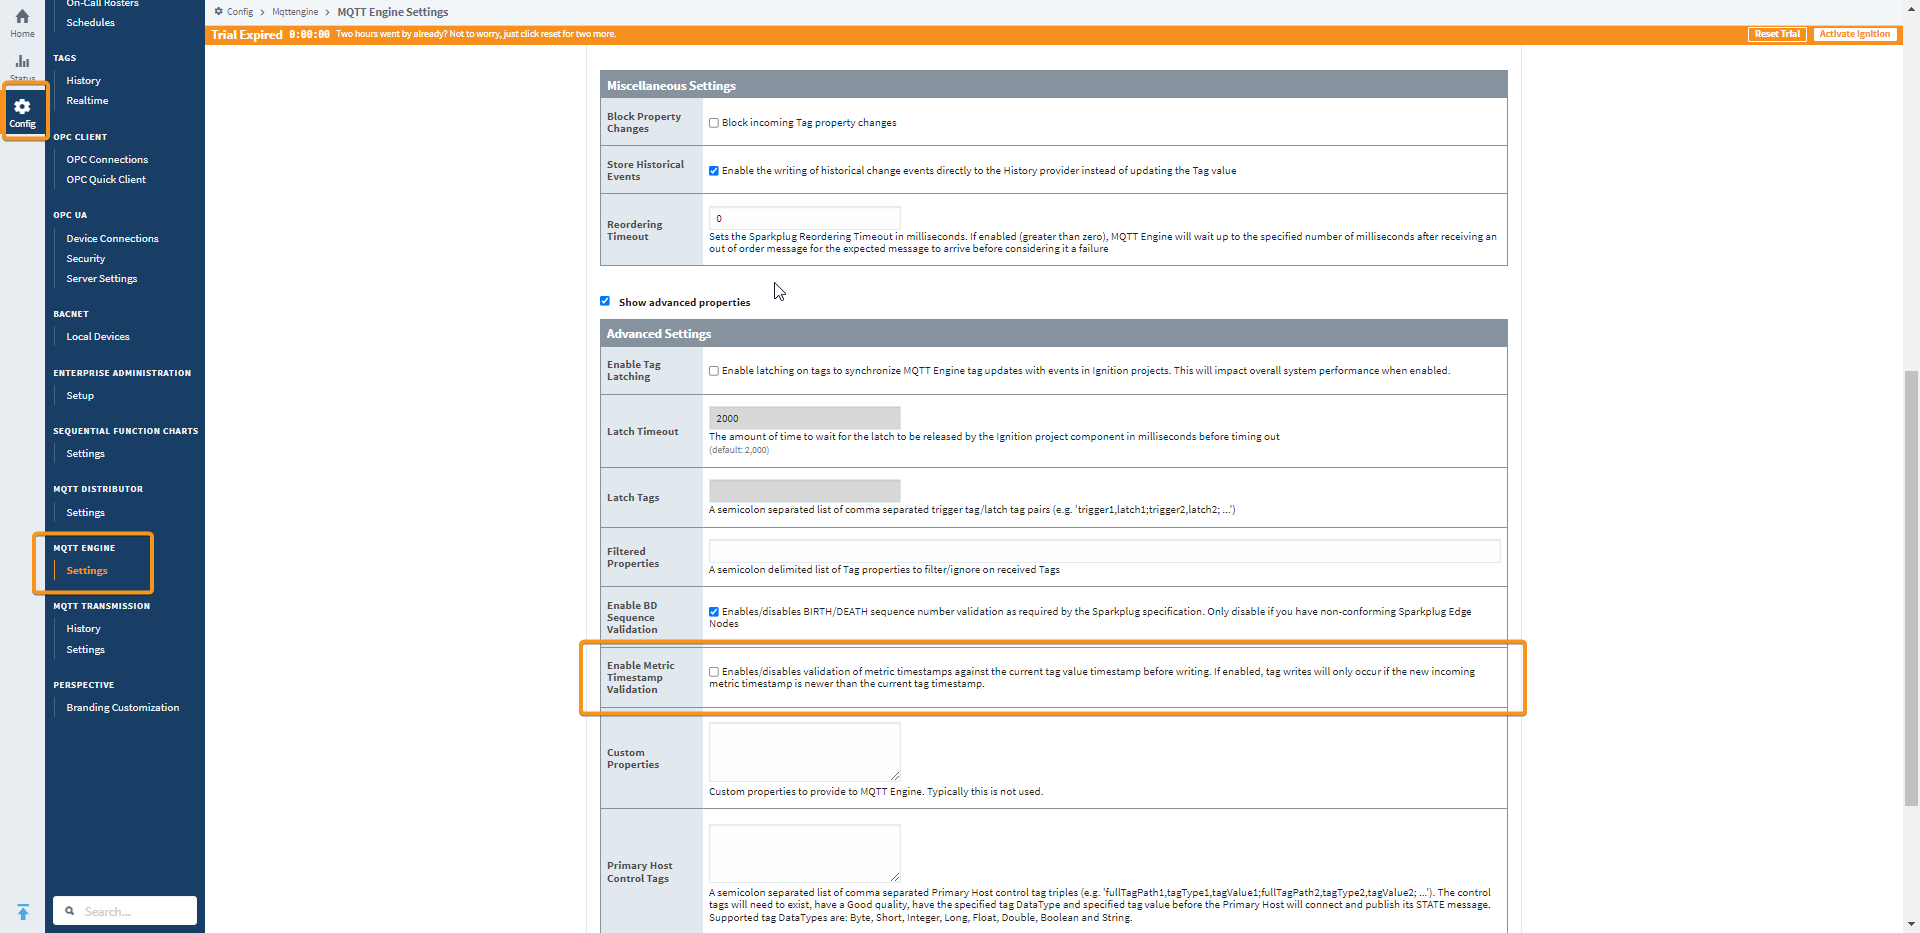
It's also strongly recommended to disable the 'Enable Metric Timestamp Validation' option in Ignition's MQTT Engine advanced properties, especially for unreliable networks.
To disable this function in Ignition, navigate to 'Config' > 'MQTT Engine', select the 'Show Advanced Properties', locate 'Enable Metric Timestamp Validation', and disable it, as shown below:
Examples:
Metadata | N3uron format | Ignition format |
BIRTH Message Type | ||
engUnits | engUnits | engUnit |
clientAccess | - | readOnly |
description | - | tooltip |
deadband | - | deadband |
deadband ("u" or "%") | - | deadbandMode ("absolute" or "percent") |
BIRTH/DATA Message Type | ||
quality | quality | Quality |
The following image shows an example payload configuration: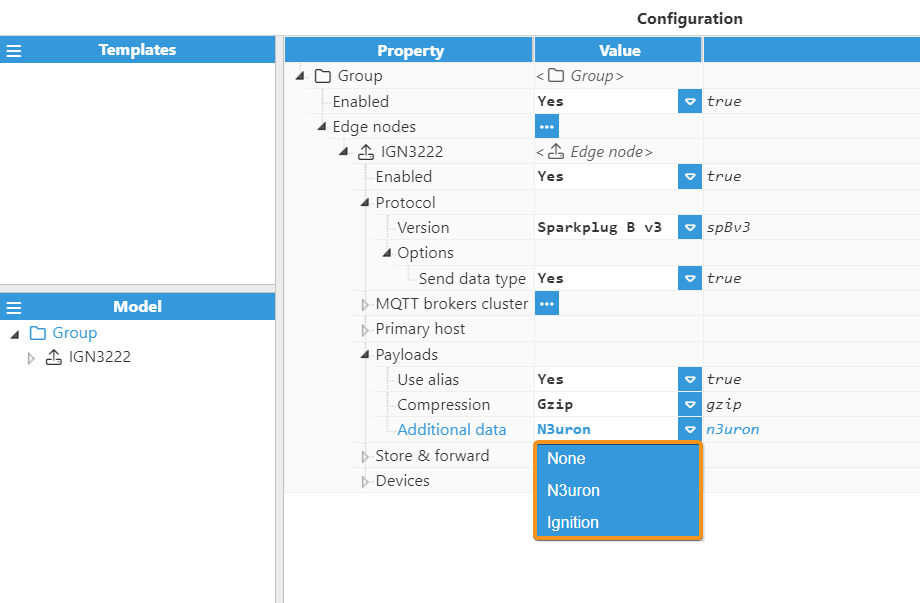
As stated above, when using the Sparkplug Client module, it is extremely easy to build a fault-tolerant solution by adding new Brokers to the cluster. If the client loses its current connection and other connections are available, it will automatically step through the list of brokers until it can connect to an available server. In addition, the client can also switch connections based on the value of the primary application's STATE topic. The client will begin storing records any time it or the primary application disconnects, queuing them until it can guarantee safe delivery, then publishing them as historical records. Since these messages are distinguishable from real-time data, Store & Forward provides better continuity for time-series data and time-critical operations compared with MQTT's standard quality of service levels.
Store & Forward: These settings are used to configure the Store & Forward (S&F) mechanism, which is used to store records in the disk.
Enabled: Enables or disables the S&F mechanism.
Database Path: Path to the S&F database. This can be an absolute path or relative to the data folder. Data/sf is used if left blank.
Unique Database ID: ID that identifies the Store & Forward database. Must be unique among all the databases stored in the same Database Path. Generally, the automatically generated ID should be used.
Max. days: Determines the maximum number of days for storage in the disk. Older data will automatically be deleted.
.png)
According to the topic namespace defined by the Sparkplug specification, once we have created an Edge node, we can start creating the Devices assigned to it.
Devices: This enables the creation of different devices related to each node. There are 2 available options: load the configuration from an external file or create it manually.
Device Configuration
According to the topic namespace defined by the Sparkplug specification, once we have created an Edge node, we can start creating the Devices assigned to it. To create a new Device, click on the Devices button under the node, select New Edge Device, and give it a name, as shown in the below image.
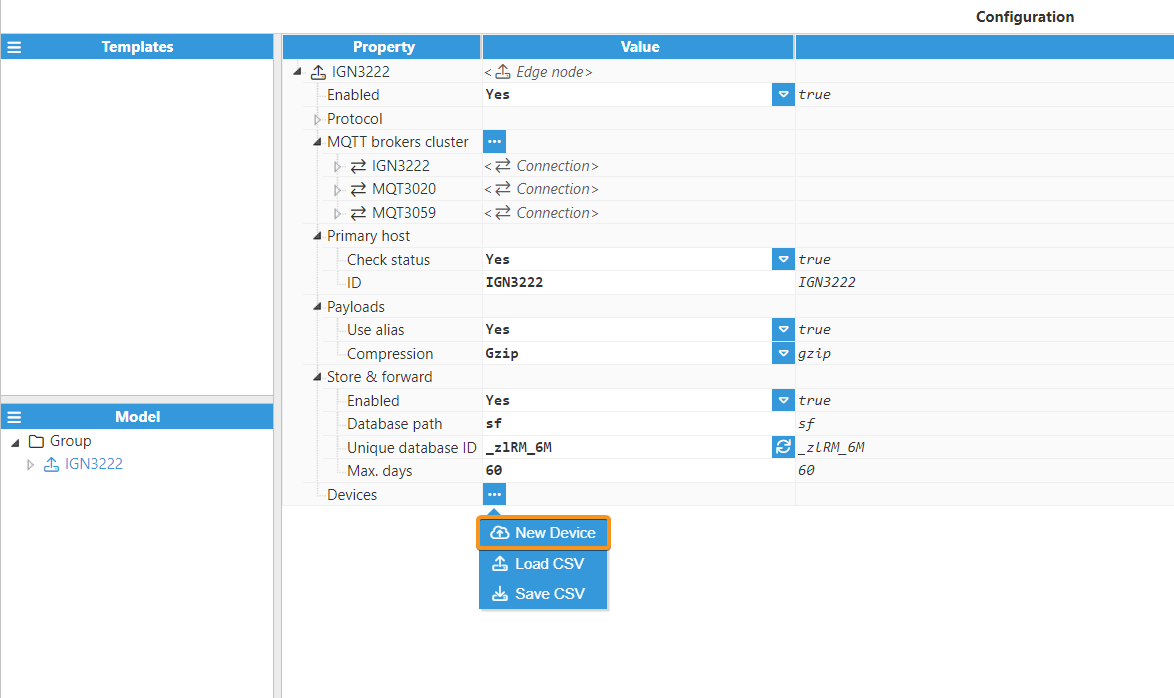
Once the device is created, you can configure the following parameters:
Enabled: Enables or disables the device.
Tag path: The root path where the tag tree starts.
Block Writes: If Enabled, any incoming writes to read-write tags will be blocked.
Children UDTs: If enabled, children groups instanced from Templates in the Tags configuration will be published as Sparkplug templates.
Note:
This feature is available from N3uron version 1.21.5.
Tag filters:
Note:
It is mandatory to add a filter even when the whole model is going to be published.
Mode: Selects whether the filter must include or exclude tags.
Note:
Include filters are applied first and exclude filters are applied to the result of the include filters.
Regex Pattern: This is a regular expression for filtering all tags that are included. By default, it is set to .*, which means that no filter is applied. Readers can find more information about regular expressions at RegExr .
The following image shows an example configuration:
(1).png)