Note:
Before starting configuration, a new module instance must be created.Click here for more information about creating Module instances.
Module Configuration
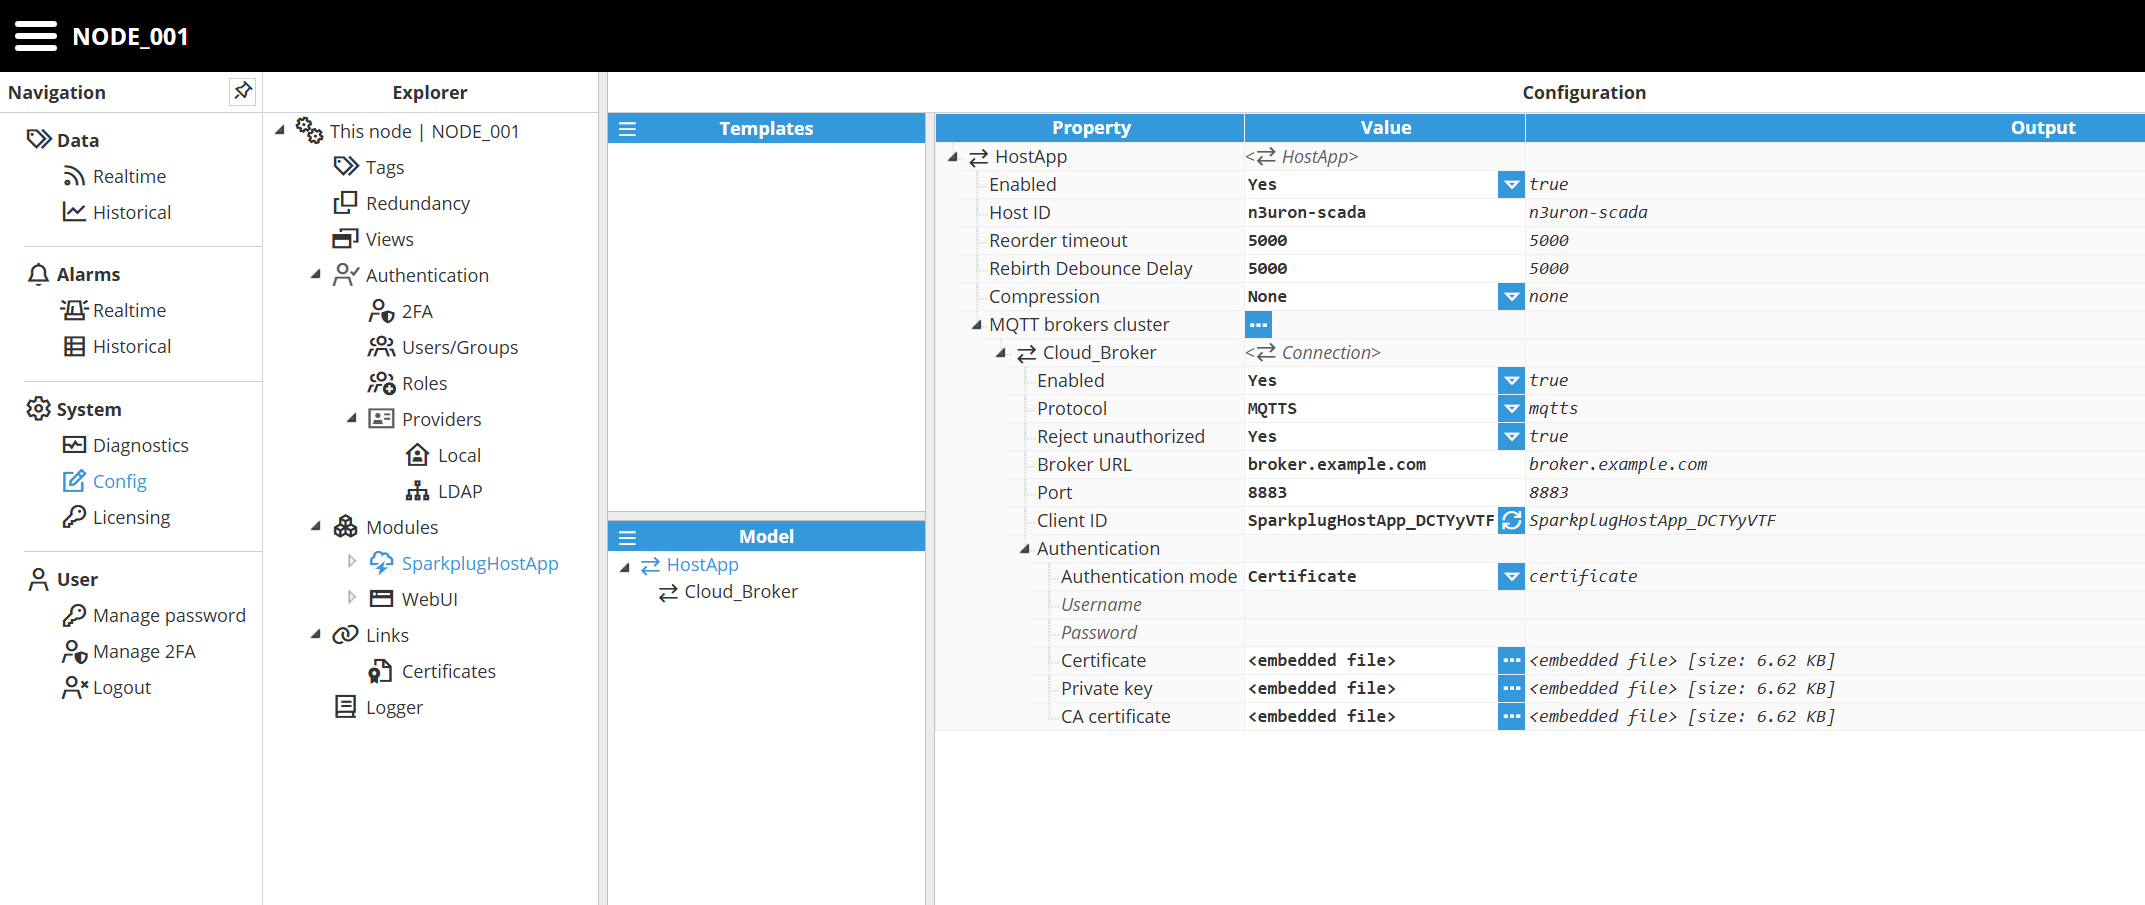
After creating the module instance, to access the Sparkplug Host Application module configuration, navigate within the WebUI to Config → Modules → [SparkplugHostApp instance name].
Setting | Description |
|---|---|
Enabled | If true, the application will attempt to connect to the configured MQTT brokers. When false, the application will stay idle, and no connections will be made. |
Host ID | A unique identifier for this Sparkplug Host Application within its configured group. This Host ID is used for STATE notifications and is a key part of the MQTT topic namespace. Important:
|
Reorder Timeout | Time in milliseconds to wait for missing sequence numbers before reordering messages. In the Sparkplug specification, messages from an Edge node are expected to arrive in order based on their sequence number. If the host receives a message out of order, it will hold the newer message in a buffer, waiting for the expected message to arrive. If this timeout expires before the missing message is received, the host will request a new birth sequence to the Edge node. The default value is 5000 ms. |
Rebirh Debounce Delay | Time in milliseconds to wait before sending another rebirth request to an Edge node to avoid unnecessary rebirth storms. The default value is 5000 ms. |
Compression | Compression algorithm used for Sparkplug payloads sent to the EdgeNodes:
|
MQTT brokers clusters
Setting | Description |
|---|---|
Enabled | Enables or disables this specific broker connection. The Sparkplug Host Application can connect to an MQTT broker cluster for redundancy. When enabled, this broker will be used. When disabled, this connection will not be used. |
Protocol | Protocol used to connect to the MQTT broker.
|
Broker URL | Specifies the URL or IP address of the MQTT broker to connect to. The protocol prefix (e.g., mqtt:// or mqtts:// ) should not be included here. The Sparkplug Host Application can connect to an MQTT broker cluster for redundancy. Examples: Good: localhost or test.mosquitto.org |
Port | The network port number of the MQTT broker. The standard ports are 1883 for an unencrypted MQTT connection and 8883 for an encrypted MQTTS connection. The valid range is 1 to 65535. |
Client ID | A unique identifier for this client's connection to the MQTT broker. The broker uses this ID to maintain the client's state, including its subscriptions and unacknowledged messages. A unique, random client ID is generated automatically, but you can also define your own. Warning: If two clients attempt to connect with the same client ID, the broker will disconnect the first client. Each client must have a unique ID to prevent connection instability. |
Authentication
Setting | Description |
|---|---|
Authentication mode | Specifies the type of authentication used to connect to the MQTT broker.
|
Username | The username for client authentication. |
Password | The password for client authentication. |
Certificates | The client's public certificate file, used for authentication when Certificate or Password - Certificate mode is selected. The file must be in PEM format. This certificate is sent to the broker to prove the client's identity. |
Private key | The client's private key file, used for authentication when Certificate or Password - Certificate mode is selected. The file must be in PEM format. This key works with the public certificate to securely establish the client's identity and encrypt communication. |
CA certificate | The Certificate Authority (CA) certificate file in PEM format. This certificate is used by the client to verify that the MQTT broker's certificate is valid and signed by a trusted authority when connecting over TLS. This is an optional setting:
|
Tag Configuration
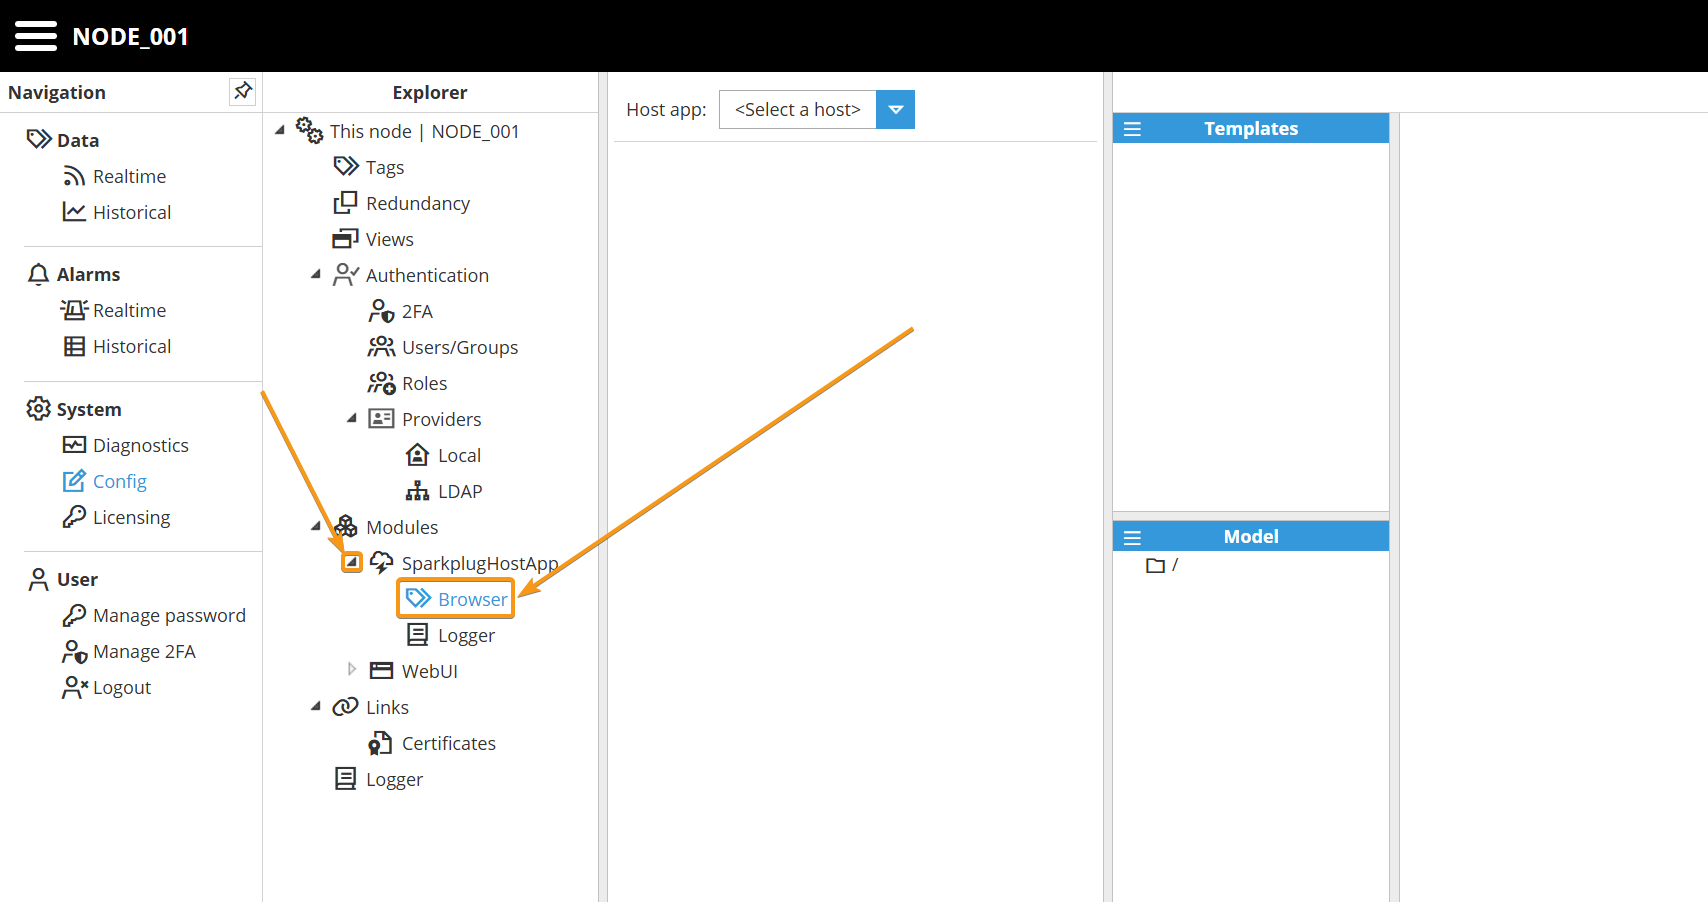
The Sparkplug Host Application module includes a built-in Browser to explore the data available in your Sparkplug network of nodes and create the desired tags using a friendly drag-and-drop interface.
Step 1: Navigate to the Browser section inside the module configuration:
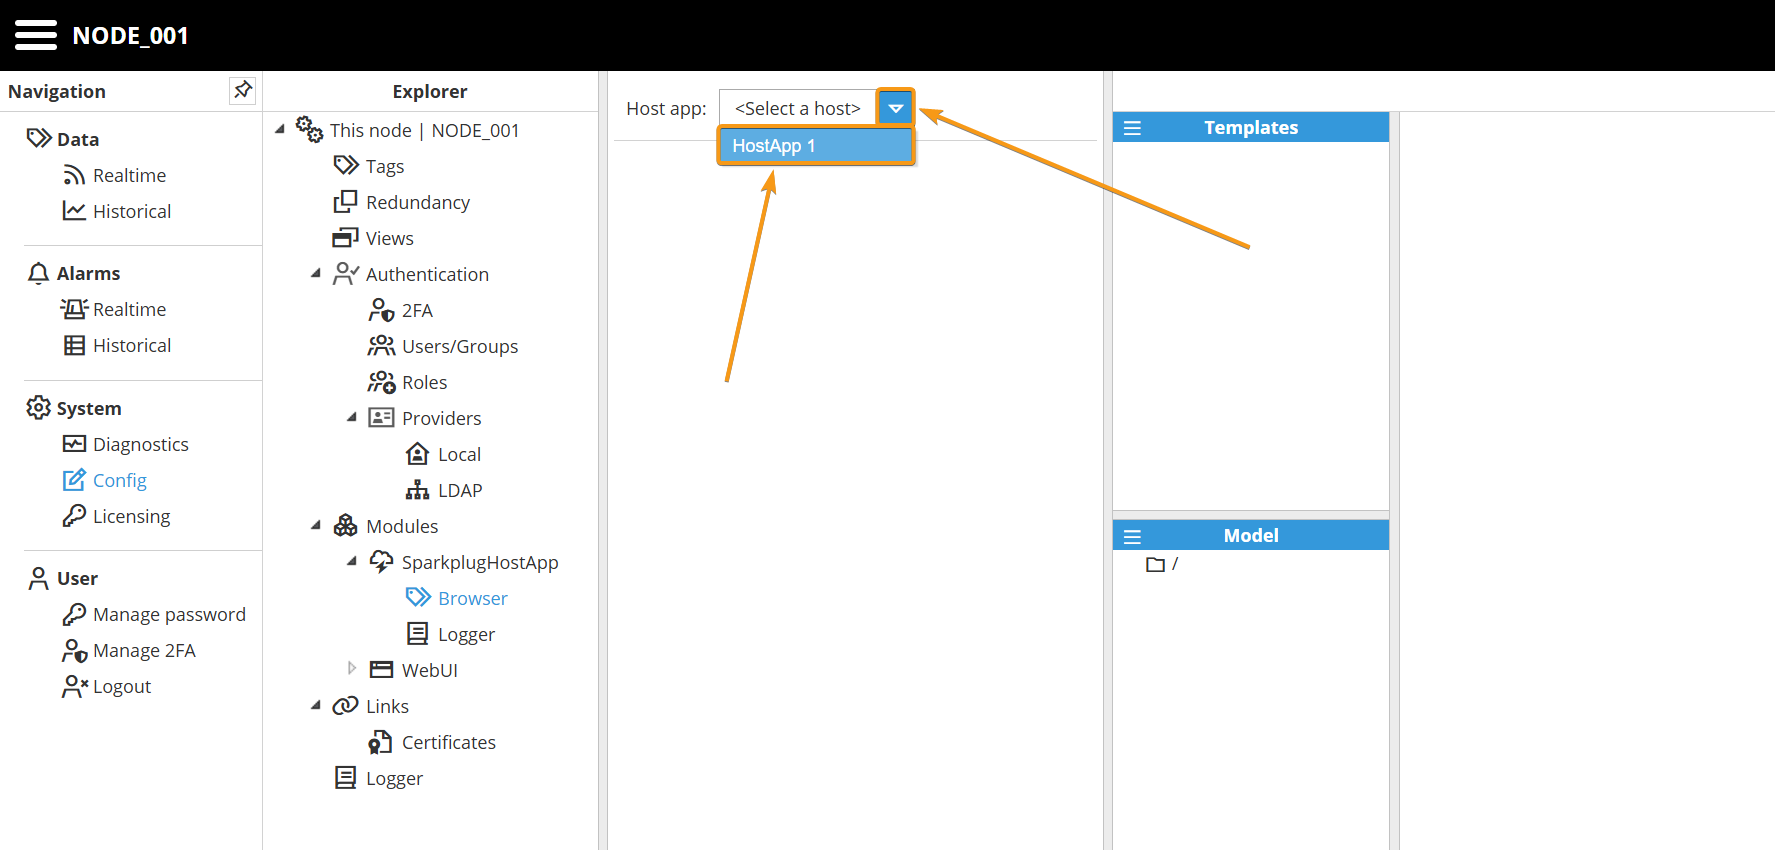
Step 2: Select the already created and configured HostApp instance:
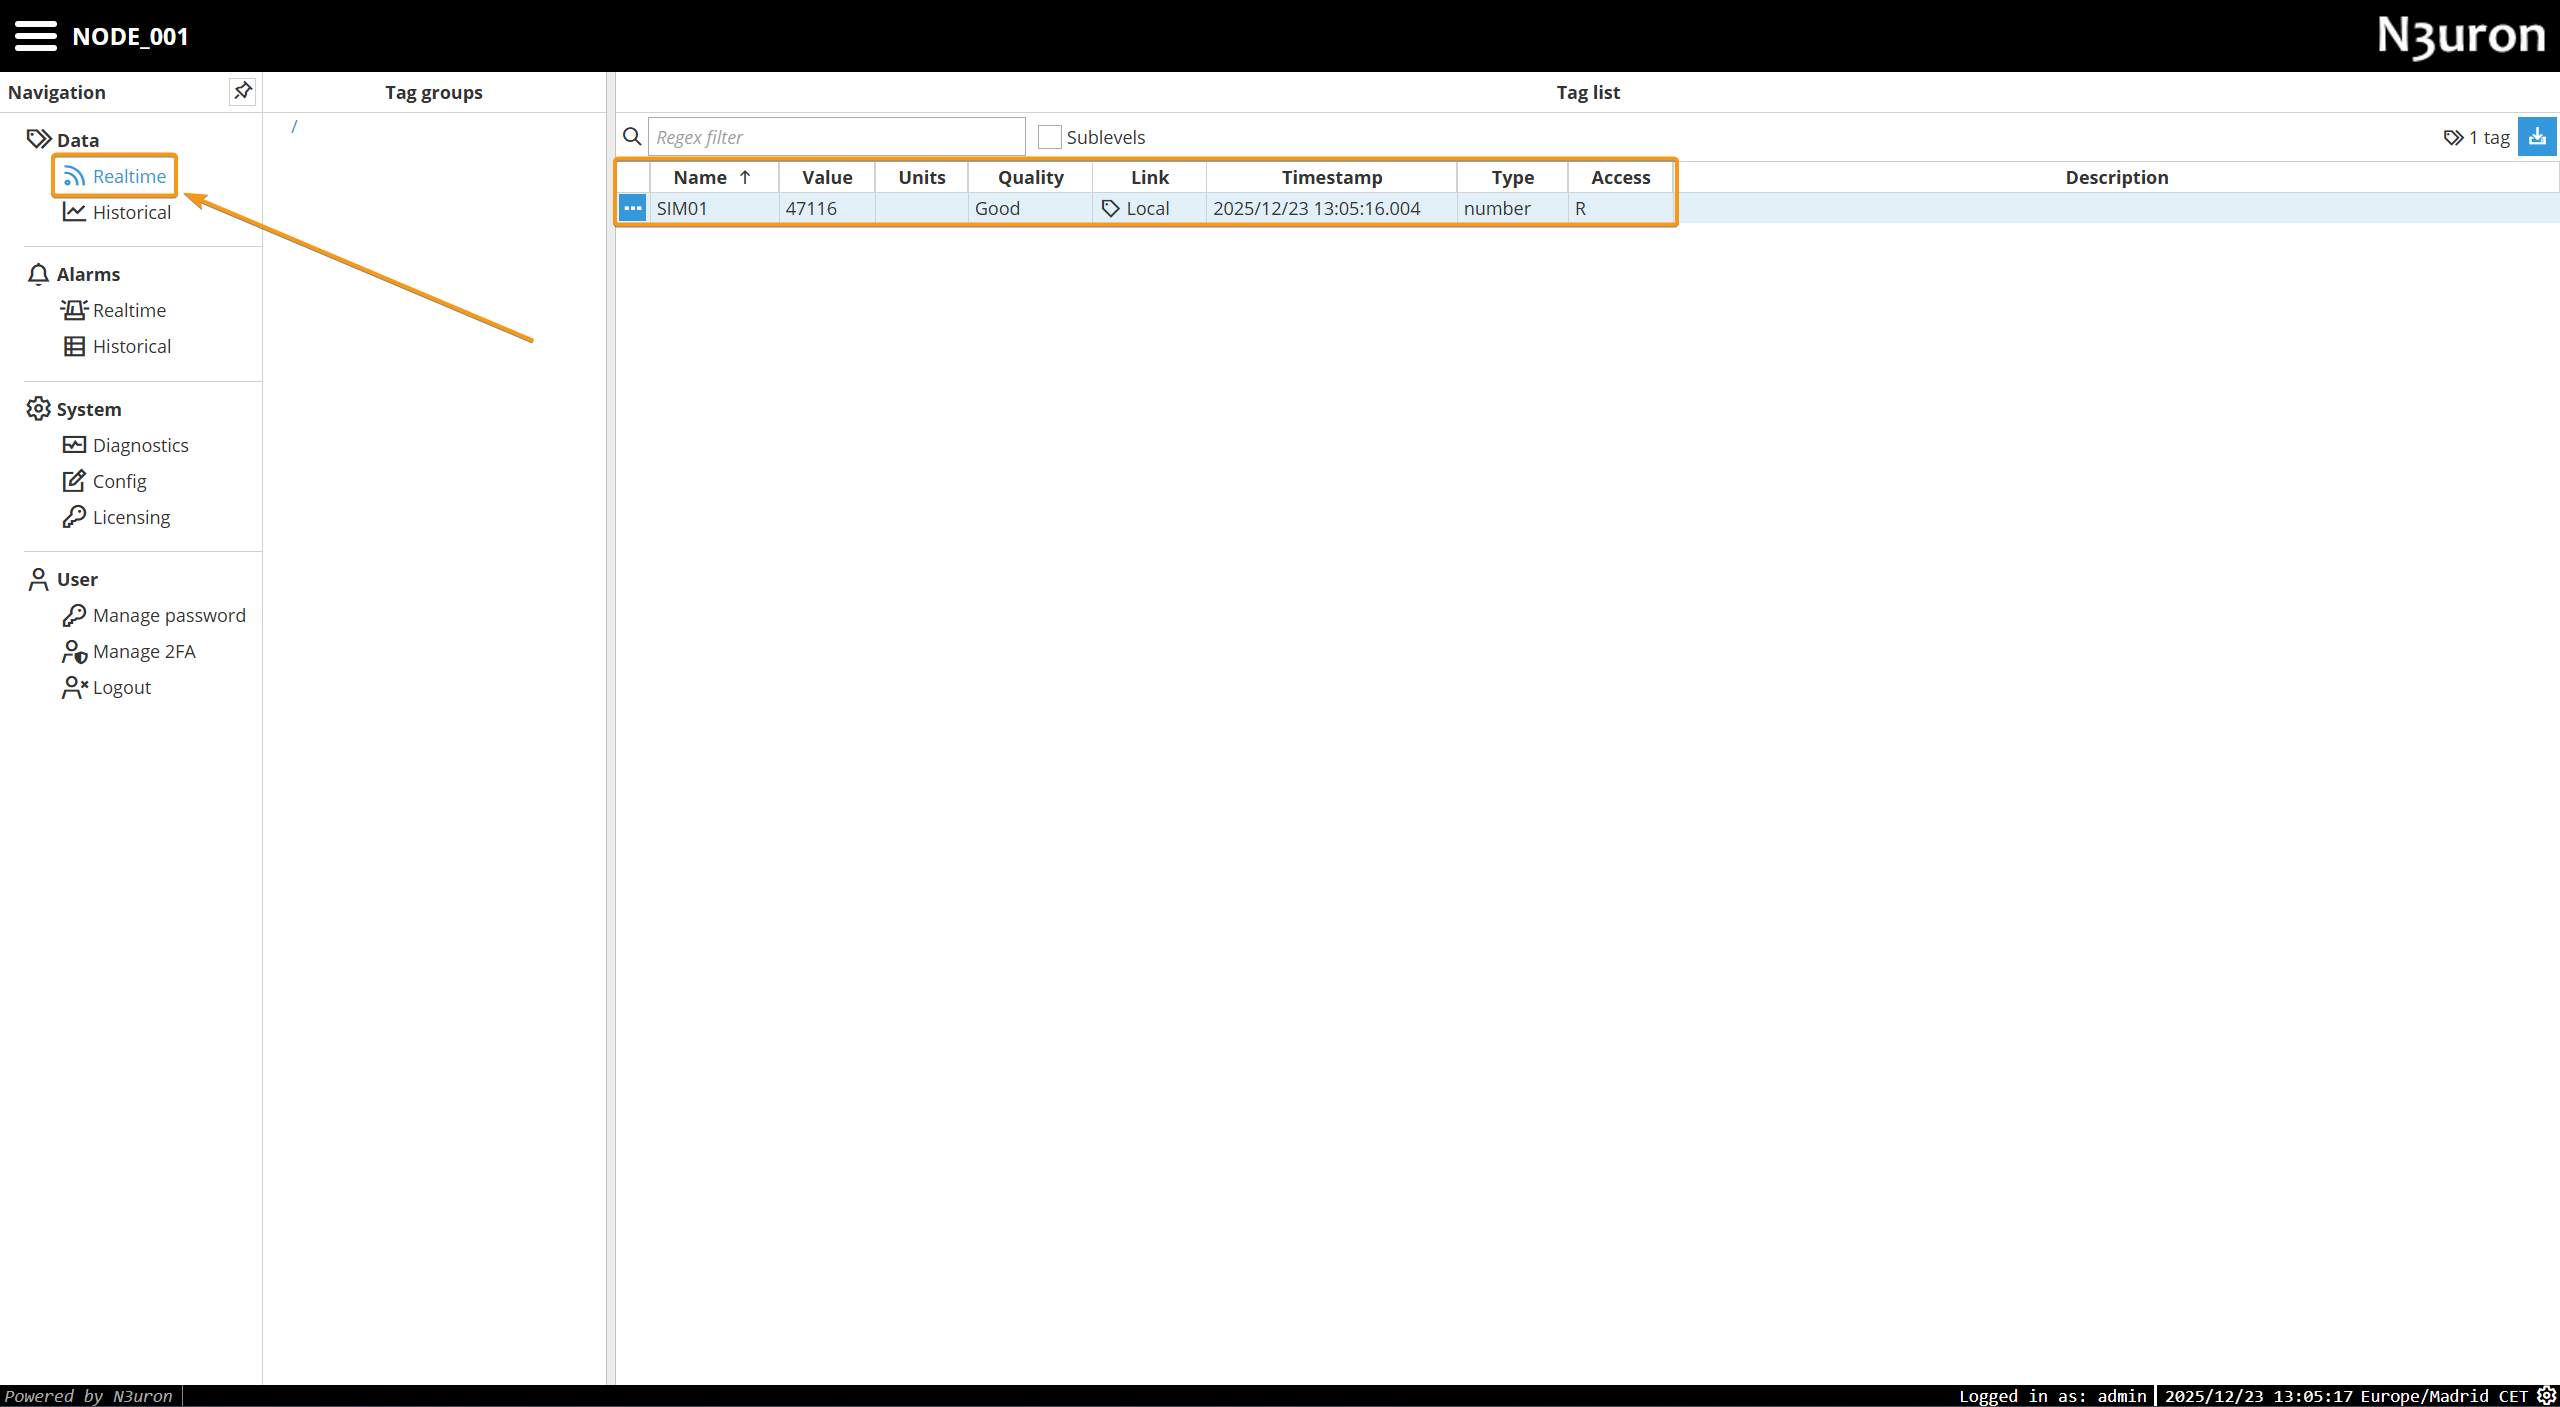
Step 3: Explore the data model and use drag-and-drop to create tags in N3uron:
Step 4: Save changes and go to Realtime to see the newly created tag: