FTP Example
In this example, the DataExporter module is used to upload all data sent from an OPC UA client to an FTP server.
- Step 1: Add a new module in the "Modules" section, choose a name, and select "DataExporter" in the "Module type" field.
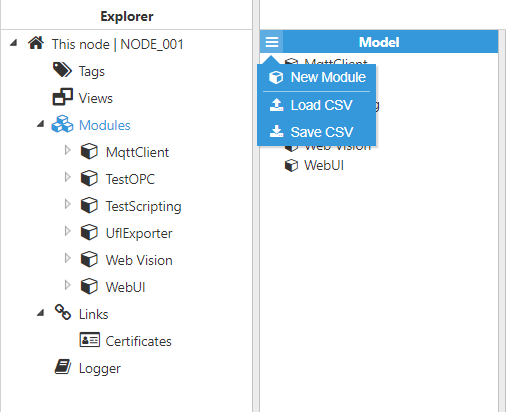 Figure 10: Creating a new module
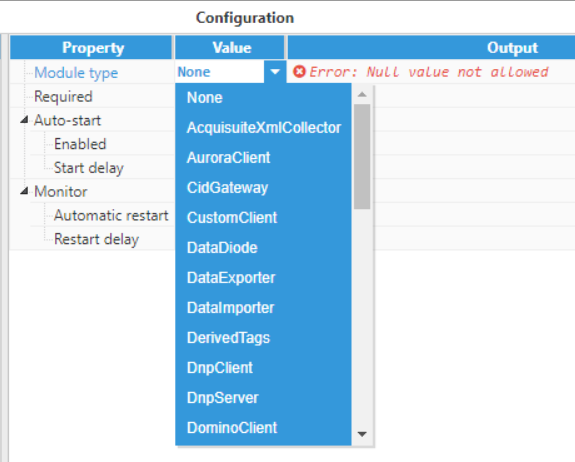 Figure 11: Choosing a module
- Step 2: Configure the Logger and API for the DataExporter module. In this example, the default configuration has been left unchanged, since in most cases, this is a valid configuration option.
- Step 3: Add a new agent in the “Model” section and choose a name for it.
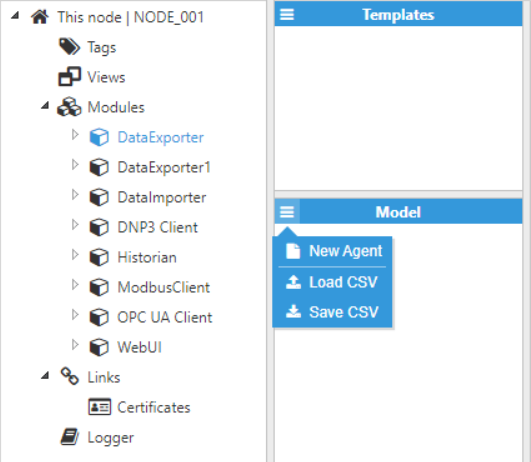 Figure 12: Creating a new Agent
- Step 4: Configure the Agent (Output path, File compression, File type, Date format, File upload, etc.) and save the changes. In this example, data will be transferred to FileZilla, which is a free local FTP client. Since the files will be uploaded to an FTP server, the agent has been named “Agent_FTP“. All files will be exported as XML Files. The date format is ISO8601. For the connection section, configuration would be as follows: Host: localhost, Port: 21, Username: FTP server.
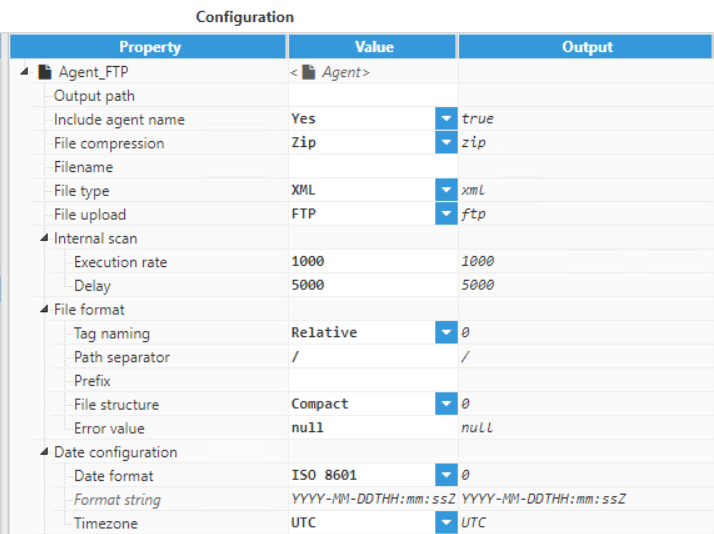 Figure 13: Agent parameters
 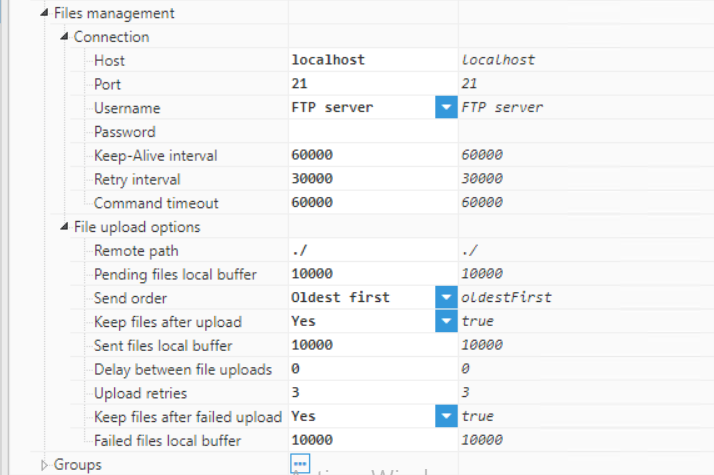 Figure 14: Agent parameters
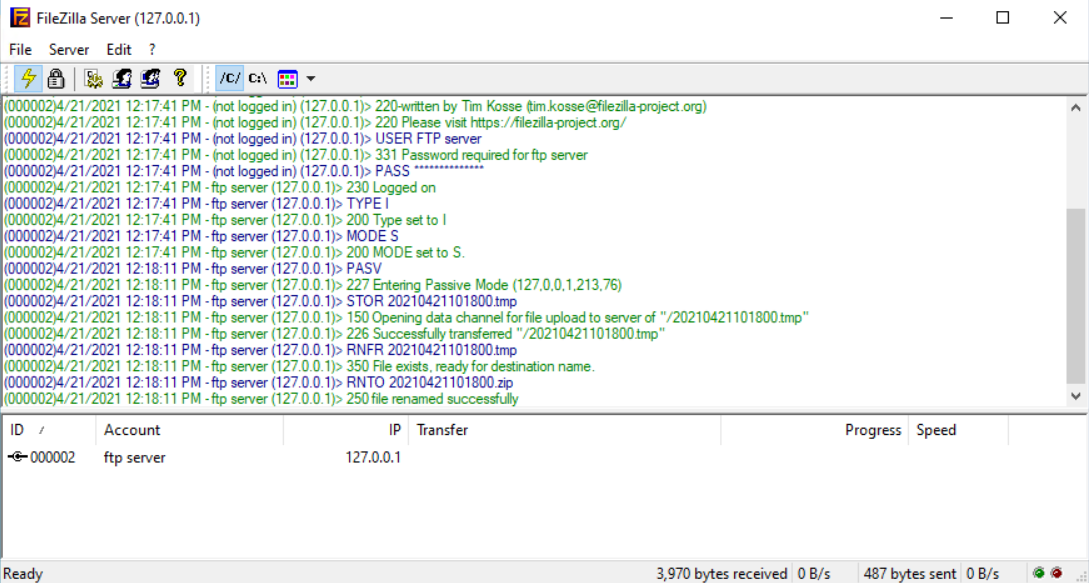 Figure 15: FileZilla FTP server
- Step 5: Add a new group in Agent and select a name for it.
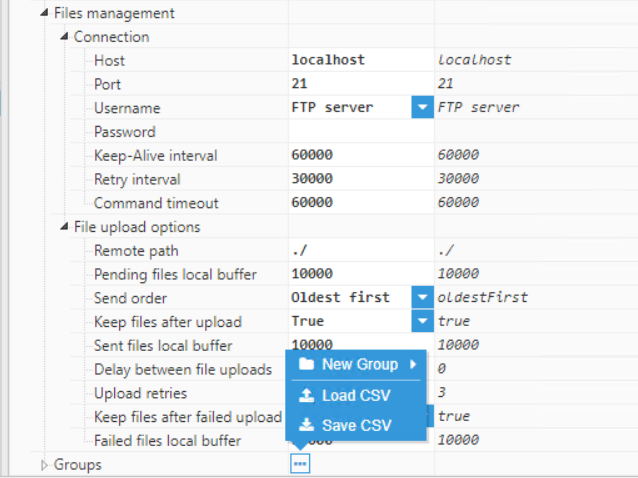 Figure 16: Creating a new Group
- Step 6: Configure the Group (Filename, Period, Mode, Input tag group, etc.). In this example, the Group has been named “Electrical meter”, since the data has been collected from an electrical meter. The “Electrical meter” tag group has been selected in the “Input Tag Group” field in order to filter the data due to be exported.
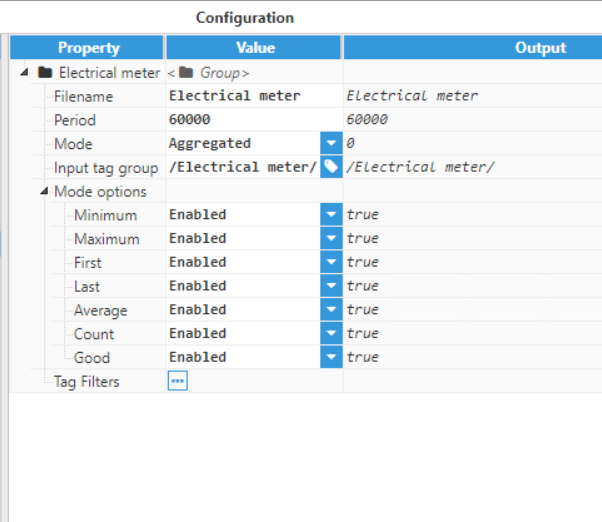 Figure 17: Group parameters
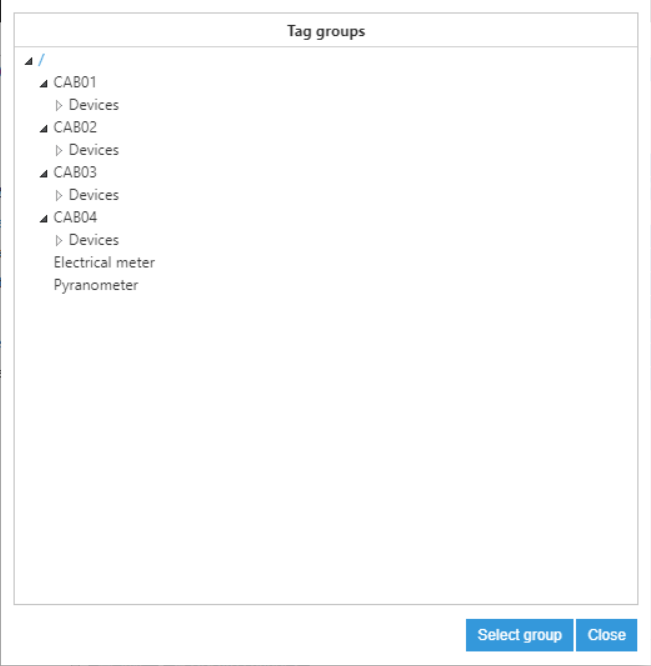 Figure 18: Tag groups options
Result:
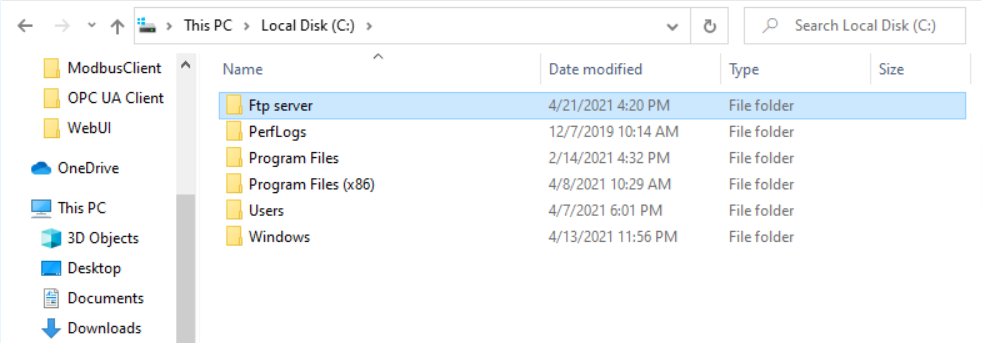 Figure 19: Exported file folders
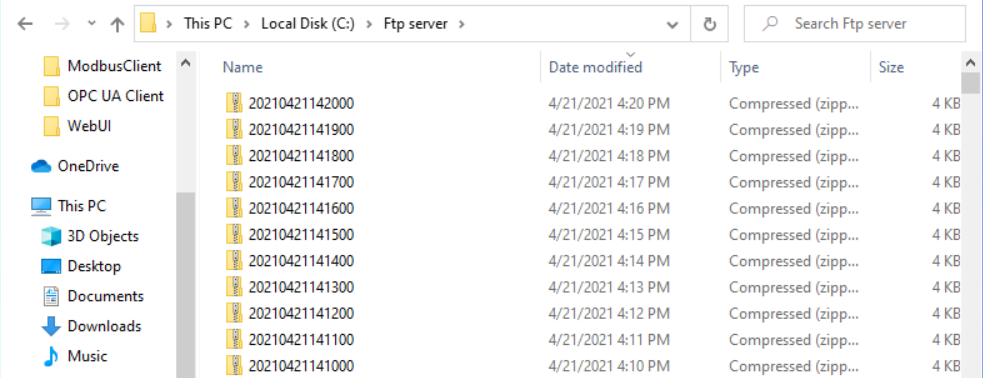 Figure 20: Exported group folders
<?xml version="1.0"?>

-<Data End="2021-04-21T09:47:00Z" Start="2021-04-21T09:46:00Z" Name="Electrical meter">

<Tag Name="ANGLE_PHASE" good="1.00" count="8" avg="333.74" last="333.58" first="336.33" max="336.33" min="333.17"/>

<Tag Name="CURRENT" good="1.00" count="11" avg="4.65" last="4.69" first="4.79" max="4.79" min="4.58"/>

<Tag Name="ENERGY_ACTIVE_IMPORTED" good="1.00" count="2" avg="8583.66" last="8583.67" first="8583.66" max="8583.67" min="8583.66"/>

<Tag Name="ENERGY_ACTIVE_EXPORTED" good="1.00" count="1" avg="0" last="0" first="0" max="0" min="0"/>

<Tag Name="FREQUENCY" good="1.00" count="5" avg="49.98" last="50" first="50" max="50" min="49.95"/>

<Tag Name="POWER_ACTIVE" good="1.00" count="13" avg="828.85" last="819.89" first="895.75" max="898.59" min="808.91"/>

<Tag Name="POWER_ACTIVE_MAX" good="1.00" count="1" avg="4872.16" last="4872.16" first="4872.16" max="4872.16" min="4872.16"/>

<Tag Name="POWER_APPARENT" good="1.00" count="13" avg="923.84" last="915.51" first="978.01" max="980.75" min="906.44"/>

<Tag Name="POWER_FACTOR" good="1.00" count="2" avg="0.90" last="0.89" first="0.92" max="0.92" min="0.89"/>

<Tag Name="POWER_REACTIVE" good="1.00" count="13" avg="-407.25" last="-407.32" first="-392.55" max="-392.55" min="-412.67"/>

<Tag Name="VOLTAGE" good="1.00" count="13" avg="232.76" last="231.53" first="232.86" max="233.11" min="231.53"/>

</Data>
SFTP Example
In this example, the DataExporter module is used to upload data being sent from an OPC UA client to an SFTP server.
- Step 1: Add a new module in the "Modules" section, choose a name and select "DataExporter" in the "Module type" field.
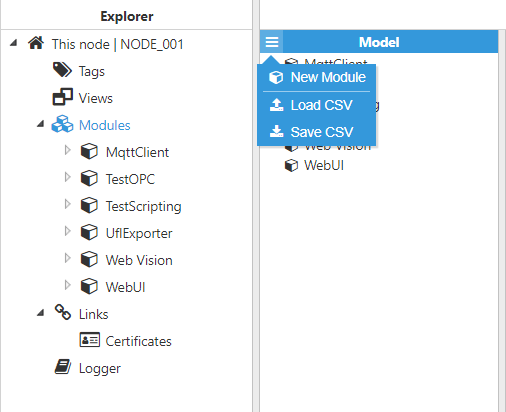 Figure 21: Creating a new module
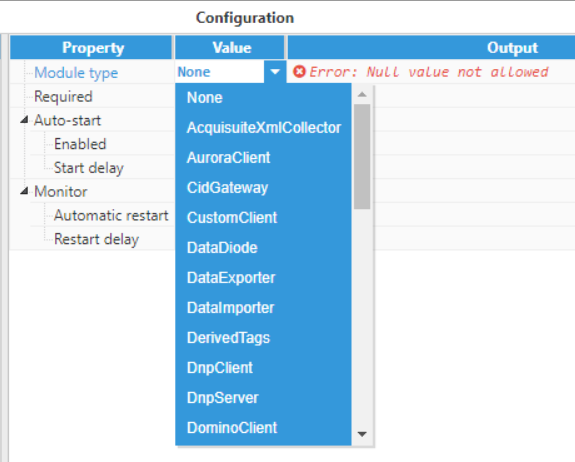 Figure 22: Choosing a module
- Step 2: Configure the Logger and API for the DataExporter module. In this example, the default configuration has been left as it is, since in most cases, this is a valid configuration option.
- Step 3: Add a new agent in the “Model” section and choose a name for it.
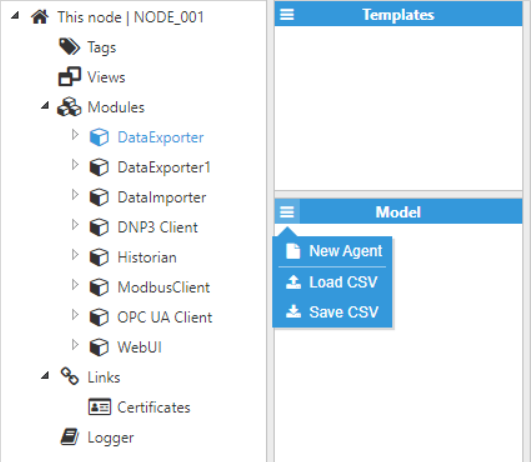 Figure 23: Creating a new Agent
- Step 4: Configure the Agent (Output path, File compression, File type, Date format, File upload, etc.) and save the changes. In this example, the data will be transferred to Rebex Tiny, which is a free local SFTP server.
Since the files will be uploaded to a local SFTP server, the Agent has been named "Agent_SFTP". The files will be exported as CSV Files. The date format is ISO8601. For the connection section, the configuration would be: Host: localhost, Port:22, Username: tester.
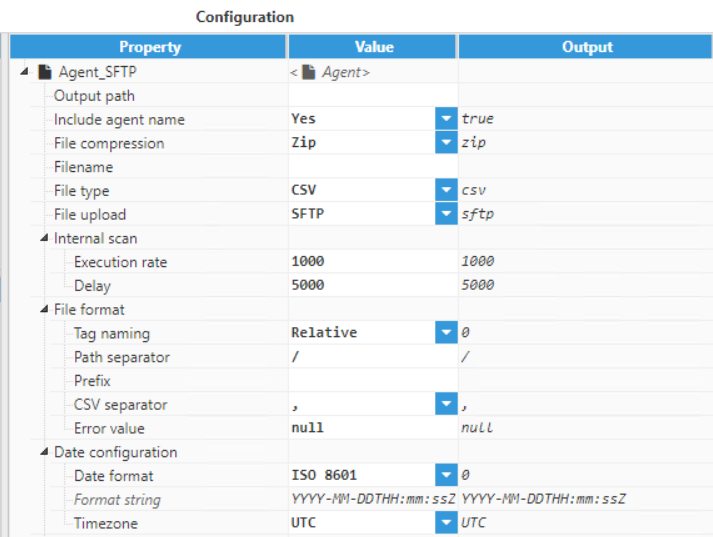 Figure 24: Agent parameters
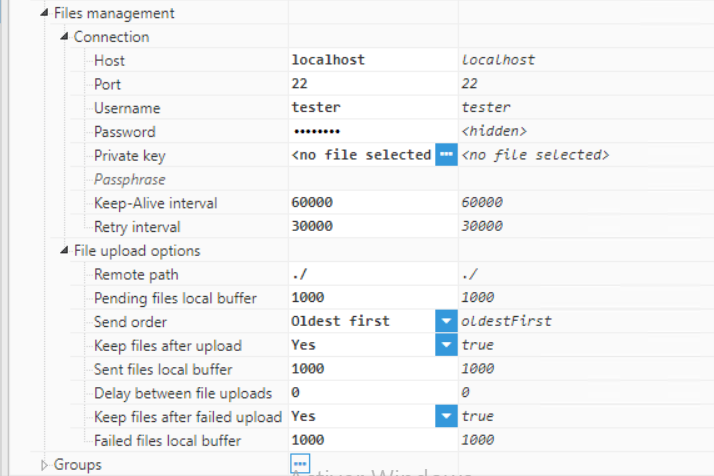 Figure 25: Agent parameters
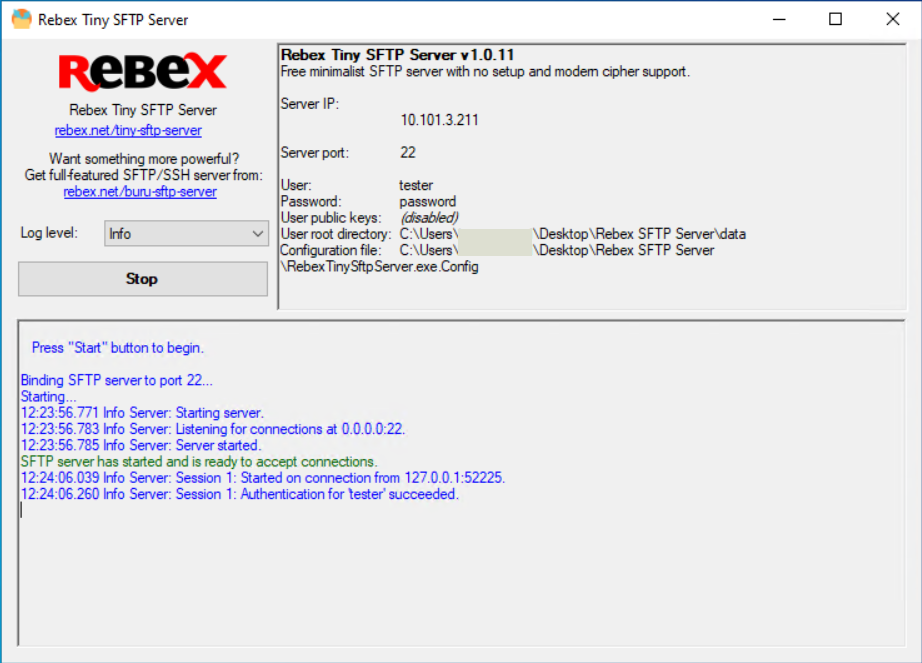 Figure 26: Rebex Tiny SFTP server
- Step 5: Add a new group in the “Agent” field and specify a name for it.
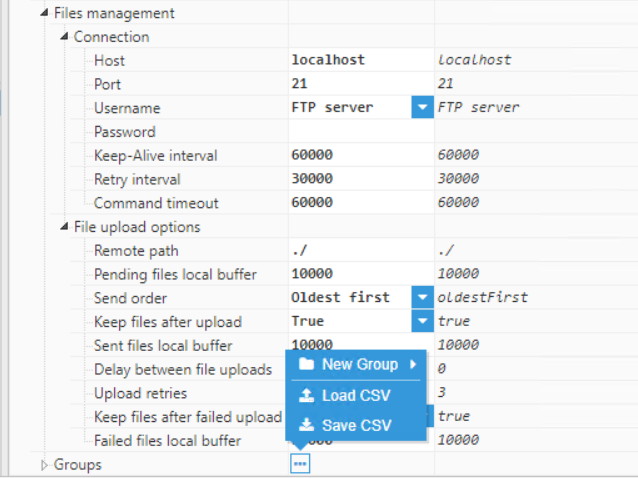 Figure 27: Creating a new Group
- Step 6: Configure the Group (Filename, Period, Mode, Input tag group, etc.). In this example, the Group has been named “Electrical meter”, since the data has been collected from an electrical meter. The “Electrical meter” tag group has been selected in the “Input Tag Group” field in order to filter the data due to be exported.
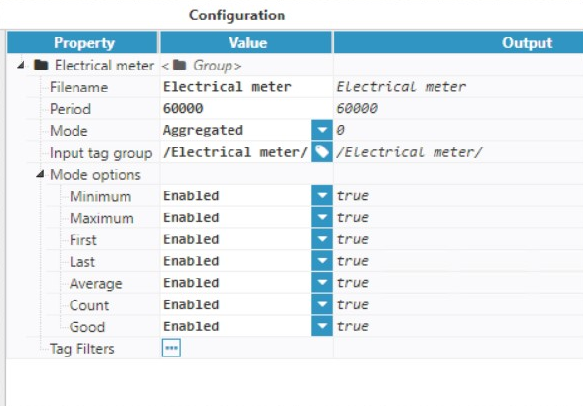 Figure 28: Group parameters
 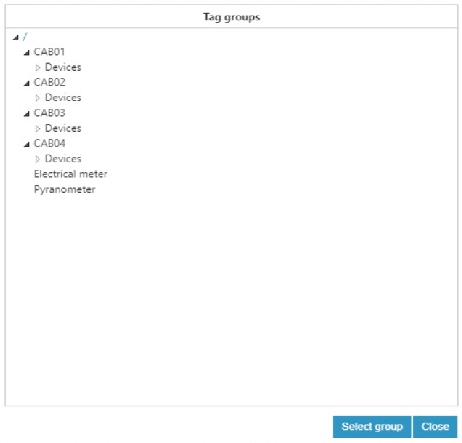 Figure 29: Tag group options
Result:
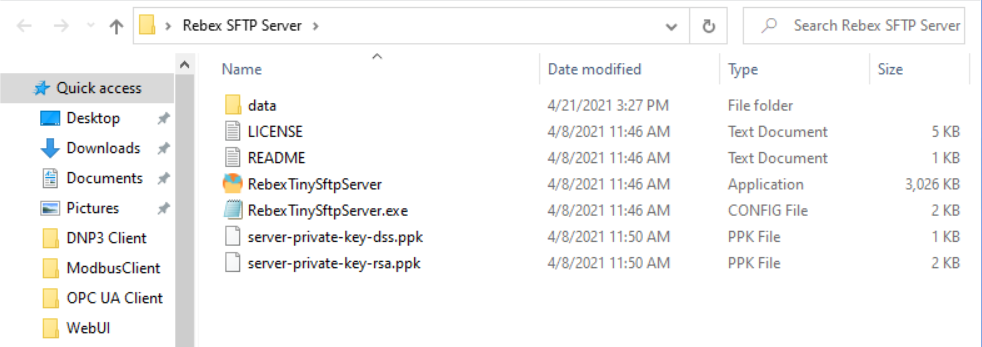 Figure 30: Exported data folder
Exported CSV file:
#Name=Electrical meter
#Start=2021-04-19T10:39:00Z
#End=2021-04-19T10:40:00Z
:Tag,min,max,first,last,avg,count,good
ANGLE_PHASE,333.97,333.97,333.97,333.97,333.97,1,1.00
CURRENT,4.77,4.77,4.77,4.77,4.77,1,1.00
ENERGY_ACTIVE_IMPORTED,8545.32,8545.32,8545.32,8545.32,8545.32,1,1.00
ENERGY_ACTIVE_EXPORTED,"null","null","null","null","null",0,0
FREQUENCY,"null","null","null","null","null",0,0
POWER_ACTIVE,856.02,856.02,856.02,856.02,856.02,1,1.00
POWER_ACTIVE_MAX,"null","null","null","null","null",0,0
POWER_APPARENT,952.82,952.82,952.82,952.82,952.82,1,1.00
POWER_FACTOR,"null","null","null","null","null",0,0
POWER_REACTIVE,-418.39,-418.39,-418.39,-418.39,-418.39,1,1.00
VOLTAGE,234.61,234.61,234.61,234.61,234.61,1,1.00