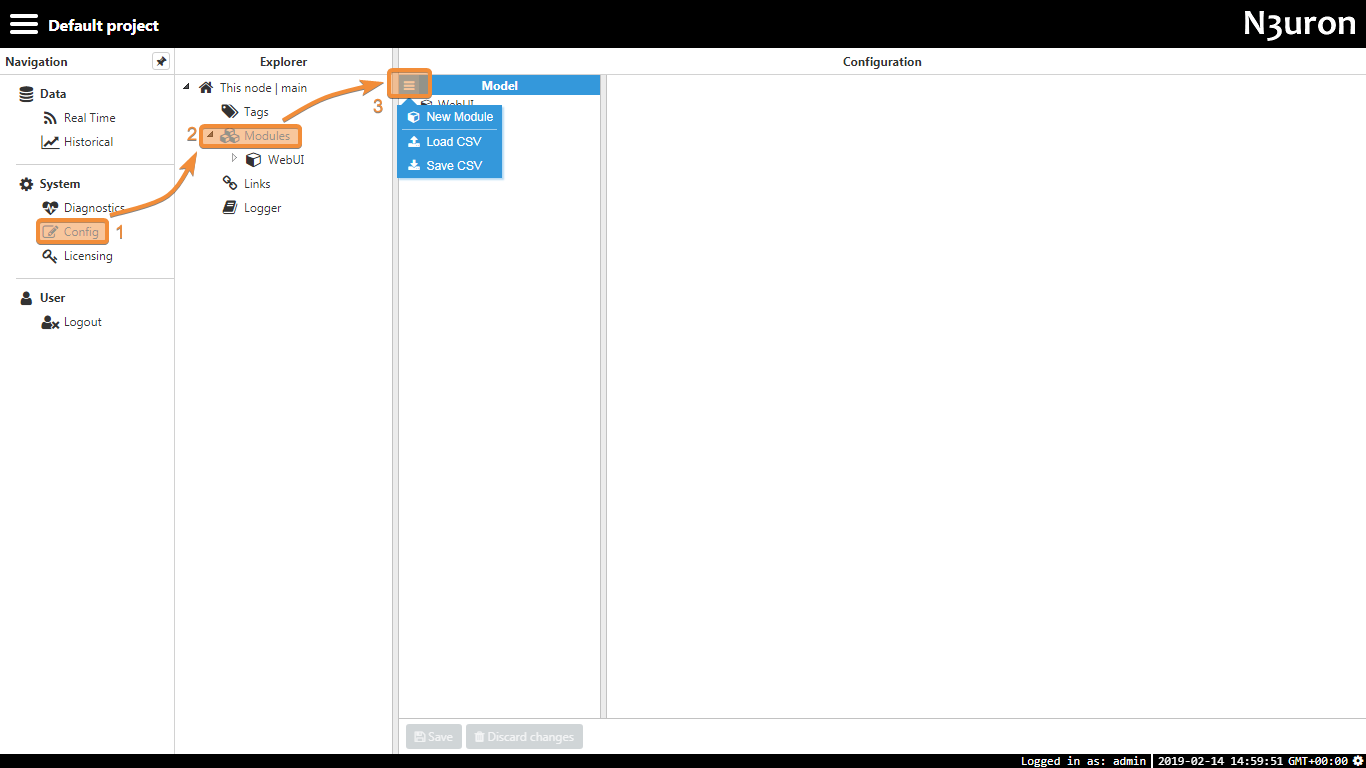
- Open N3uron and navigate to the “Config” panel.
- Click on “Modules”, then create a new module. This instance can be given any name (except names with special characters like ‘.’, ‘/’, etc.), although users are recommended to name instances in a similar way to the name of the module being instantiated. In this example, it has been named Linked Tags.
 Figure 1: Creating a new module instance
By setting the module type to Linked Tags, the new instance will automatically become a Linked Tags instance. Once saved, Linked Tags should appear in the module list, in bold because there are unsaved changes.
.png) Figure 2: Setting the instance type
Figure 2: Setting the instance type
Note:
In addition to configuring this instance, each module has a Logger which needs to be configured separately. The default settings will be sufficient for this, but users will need to actively open the Logger configuration settings and save the default values in order for the configuration file to be generated.
Additionally, each instance can be configured with the following options:
- Required: When enabled, all links will be paused when the module is offline to avoid data loss. If not enabled, this module will have no effect on links when offline.
- Start: This section controls how the module behaves when the N3uron service is started (which also includes service restarts).
- Enabled: If true, the module will start when the N3uron services starts. Alternatively, the module must be started manually.
- Start delay: When automatic start is enabled, this setting is used to control how much delay there should be between starting the N3uron service and starting the module. This value is displayed in milliseconds.