The following example involves two nodes: a remote node collecting and sending data through a N3uron Link to a second node that is running Historian.
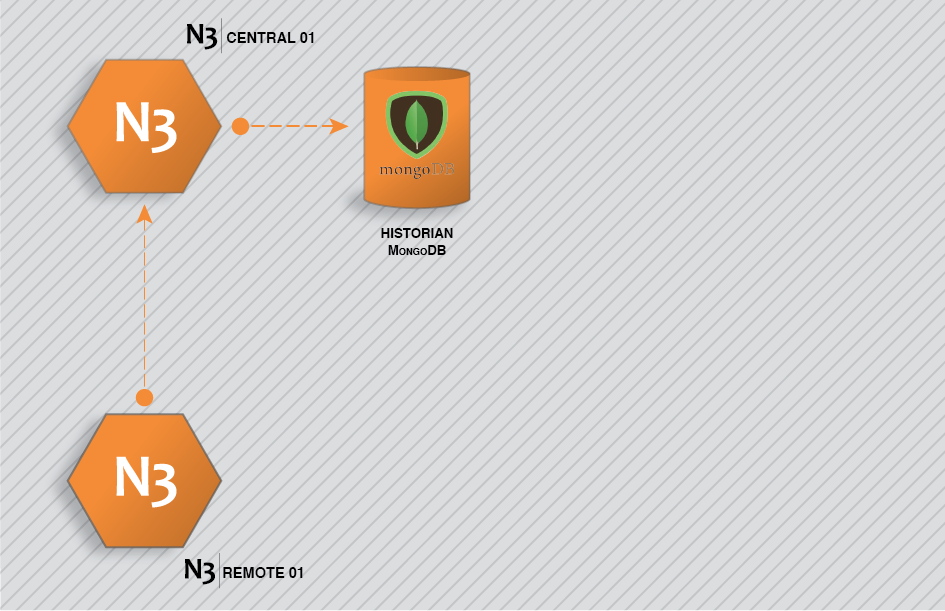
Figure 49. N3uron Historian configuration example
Step 1: Create the module: (Config => Modules => button to the left of Model => New module)
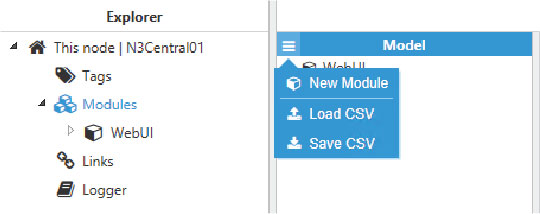 Figure 50. New module creation
Step 2: Provide a name for the module (in this case Historian01), assign the module type (in this case Historian) and save the new configuration.
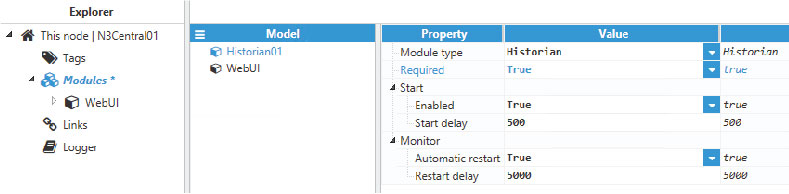 Figure 51. Configuring a new module as Historian
Step 3: Configure the log (usually the default values are sufficient). Save the log configuration.
 Figure 52. Default log configuration
Step 4: Configure the historian instance.
- Buffer limit: displays the maximum size of the event’s buffer in kilobytes.
- Insert rate: displays the period for sending the event’s buffer to the database.
- Max days: displays the maximum number of days data will be stored in the database. Data older than this will be automatically pruned.
- Embedded DB engine: enables the use of the MongoDB instance, which is automatically created by N3uron. In order to use a MongoDB that has been installed by the user, this parameter must be disabled.
- TCP port: for connecting to MongoDB, both if for an instance created by N3uron or a MongoDB installed by the user.
 Figure 53. Historian default configuration
Step 5: In the remote node N3Remote01, create a new tag and navigate to the History section to enable the historization of the tag pointing to the Historian instance in node N3Central01. Both nodes (N3Remote01 and N3Central01) must already be linked.
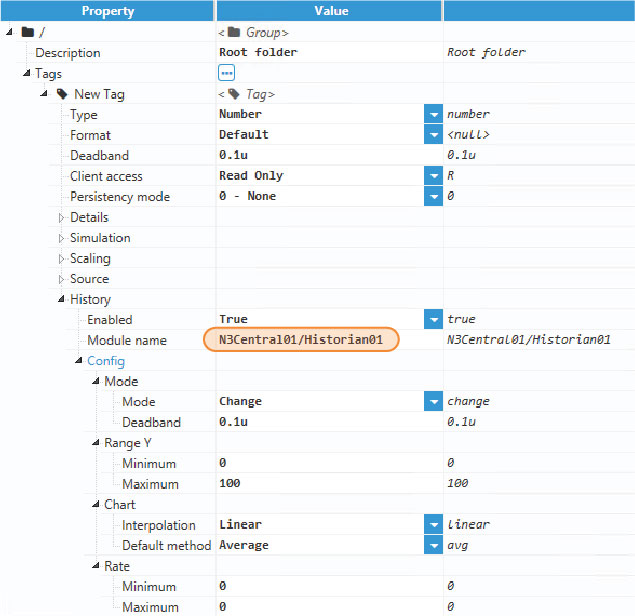 Figure 54. Tag History configuration
If the Historian instance was running locally in the N3Remote01 node, then the Module name in the History configuration of the tag should be N3Remote01/Historian01 or simply Historian01.
Step 6: Values stored in the database can be visualized in a chart within the WebUI of both the central and remote node, regardless of where the database is located.
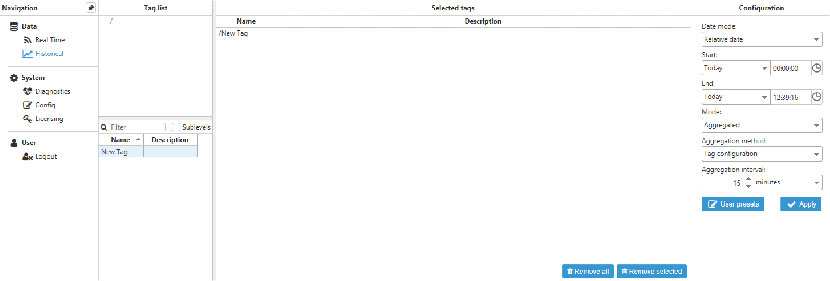 Figure 55. Example of tag picking
Select the tags, start and end date, retrieval mode and click apply.