Example connection for KEPServerEX and TOPServer
The following steps show how to connect to KEPServerEX and TOPServer using the OPC UA client.
Step 1: Create the module: (Config => Modules => button to the left of Modules => New module)
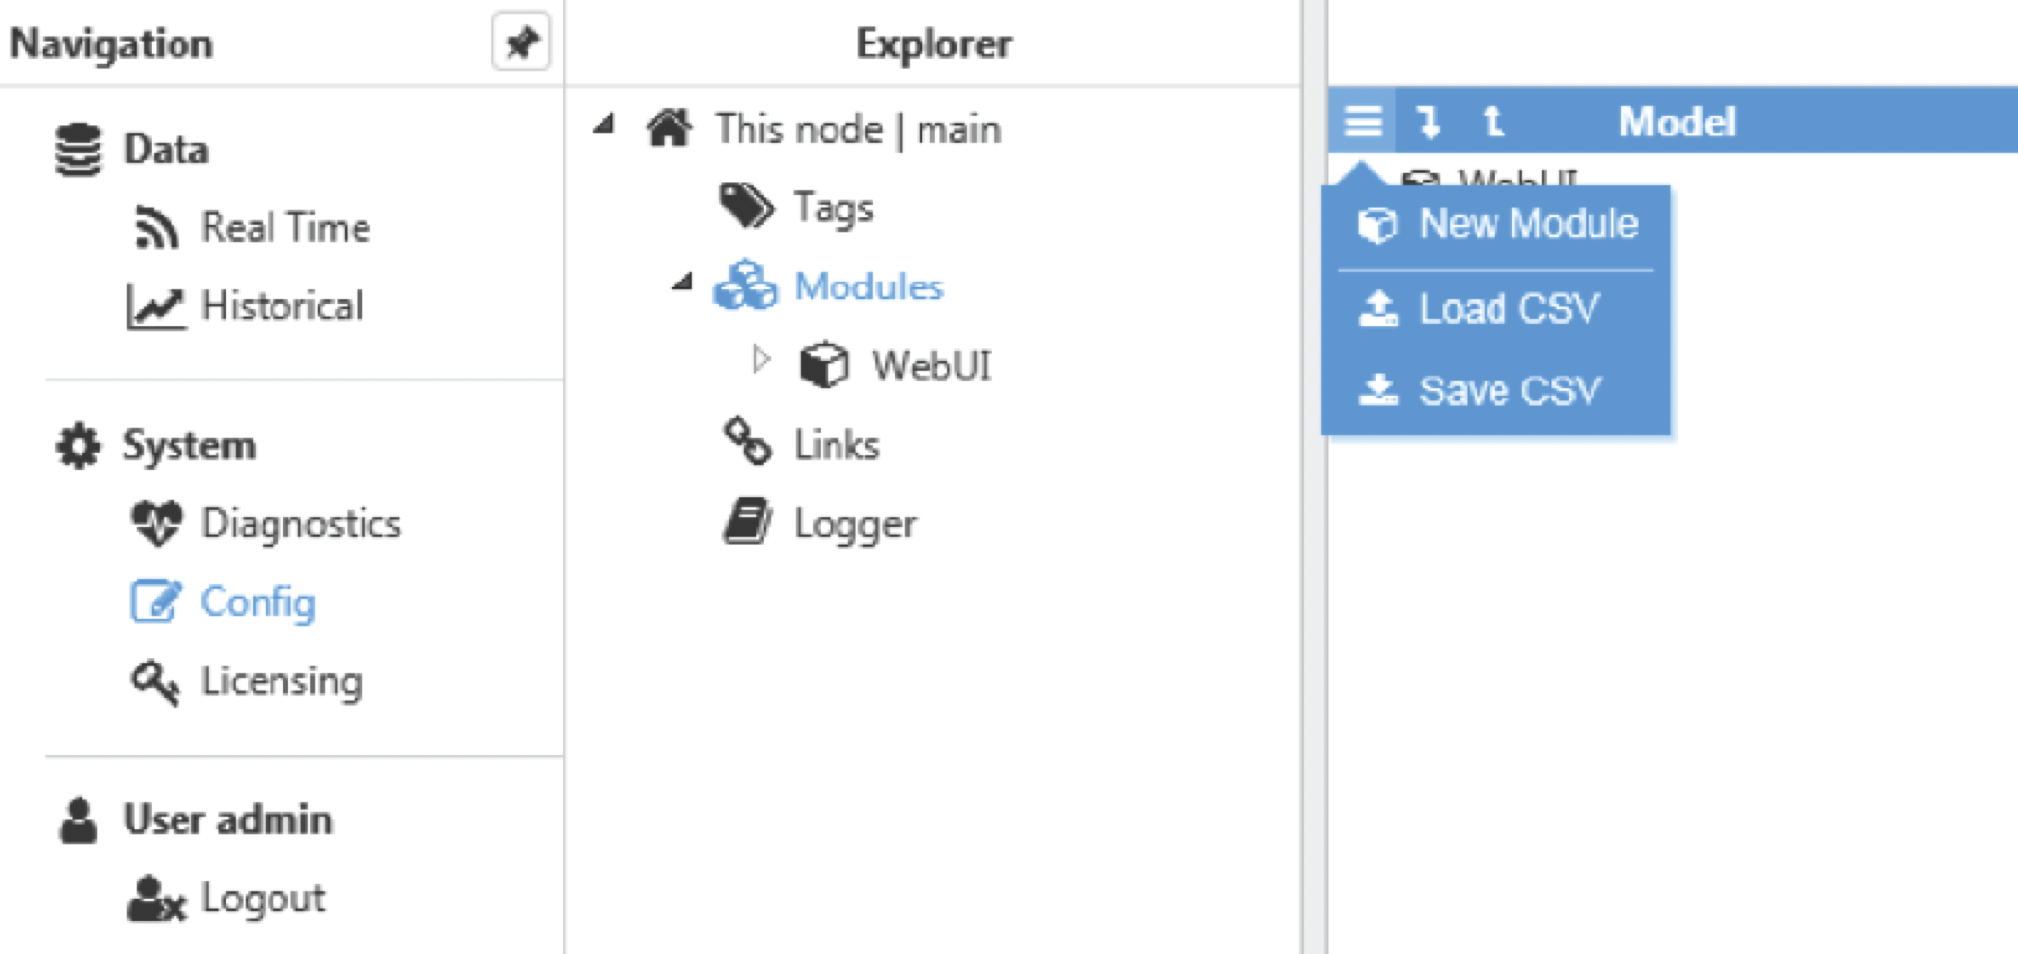 Figure 33.New module creation
Step 2: Provide a name for the module (in this case OPCUAClient01), assign the module type (in this case OpcUaClient) and save the new configuration.
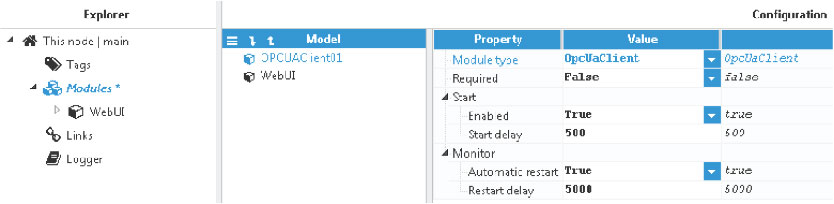 Figure 34. Configuring the new module as OpcUaClient
Step 3: Configure the log (usually the default values are sufficient). Save the log configuration.
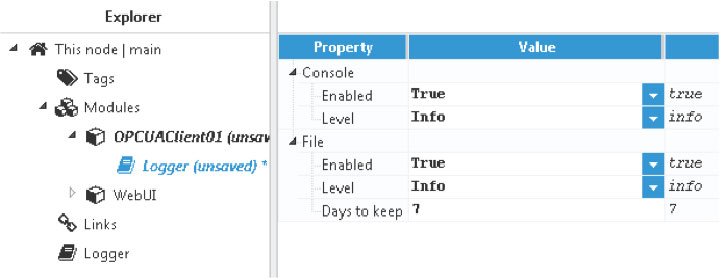 Figure 35. Default log configuration
Step 4: Create the OPC UA connections. Each connection is an independent OPC UA client.
 Figure 36. Creation of a new OPC UA connection to a server
Step 5: Configure the OPC UA client to connect to KEPServerEX or TOPServer.
- Connection: The “Endpoint URL” is the Hostname/IP address of the target OPC server and the “port” with the format opc.tcp://endpointURL:port. Default OPC UA port for KEPServer is 49320 and for TOPServer is 49380.
- Authentication: Permits user and password authentications to be enabled for server connections. If authentication is not enabled, the OPC UA server must permit anonymous login.
- Subscription: Permits configuration of the tag subscriptions in the OPC UA server.
Save the configuration and select restart the module.
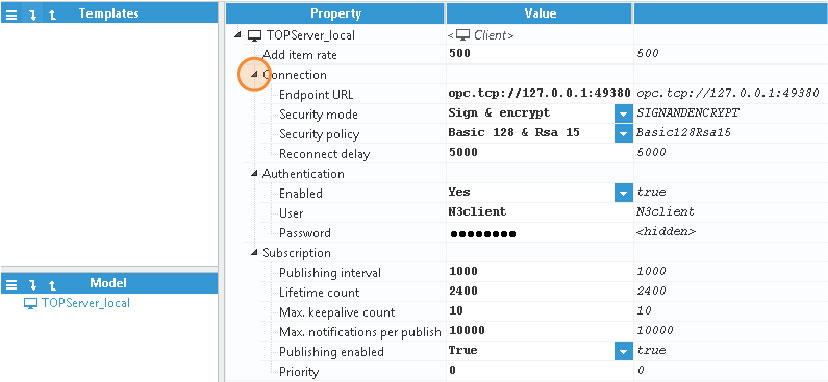 Figure 37. OPC UA client configuration for connecting to TOPServer in the same host
Step 6: Create a tag to connect to the OPC sever: Config => Tags => New Tag
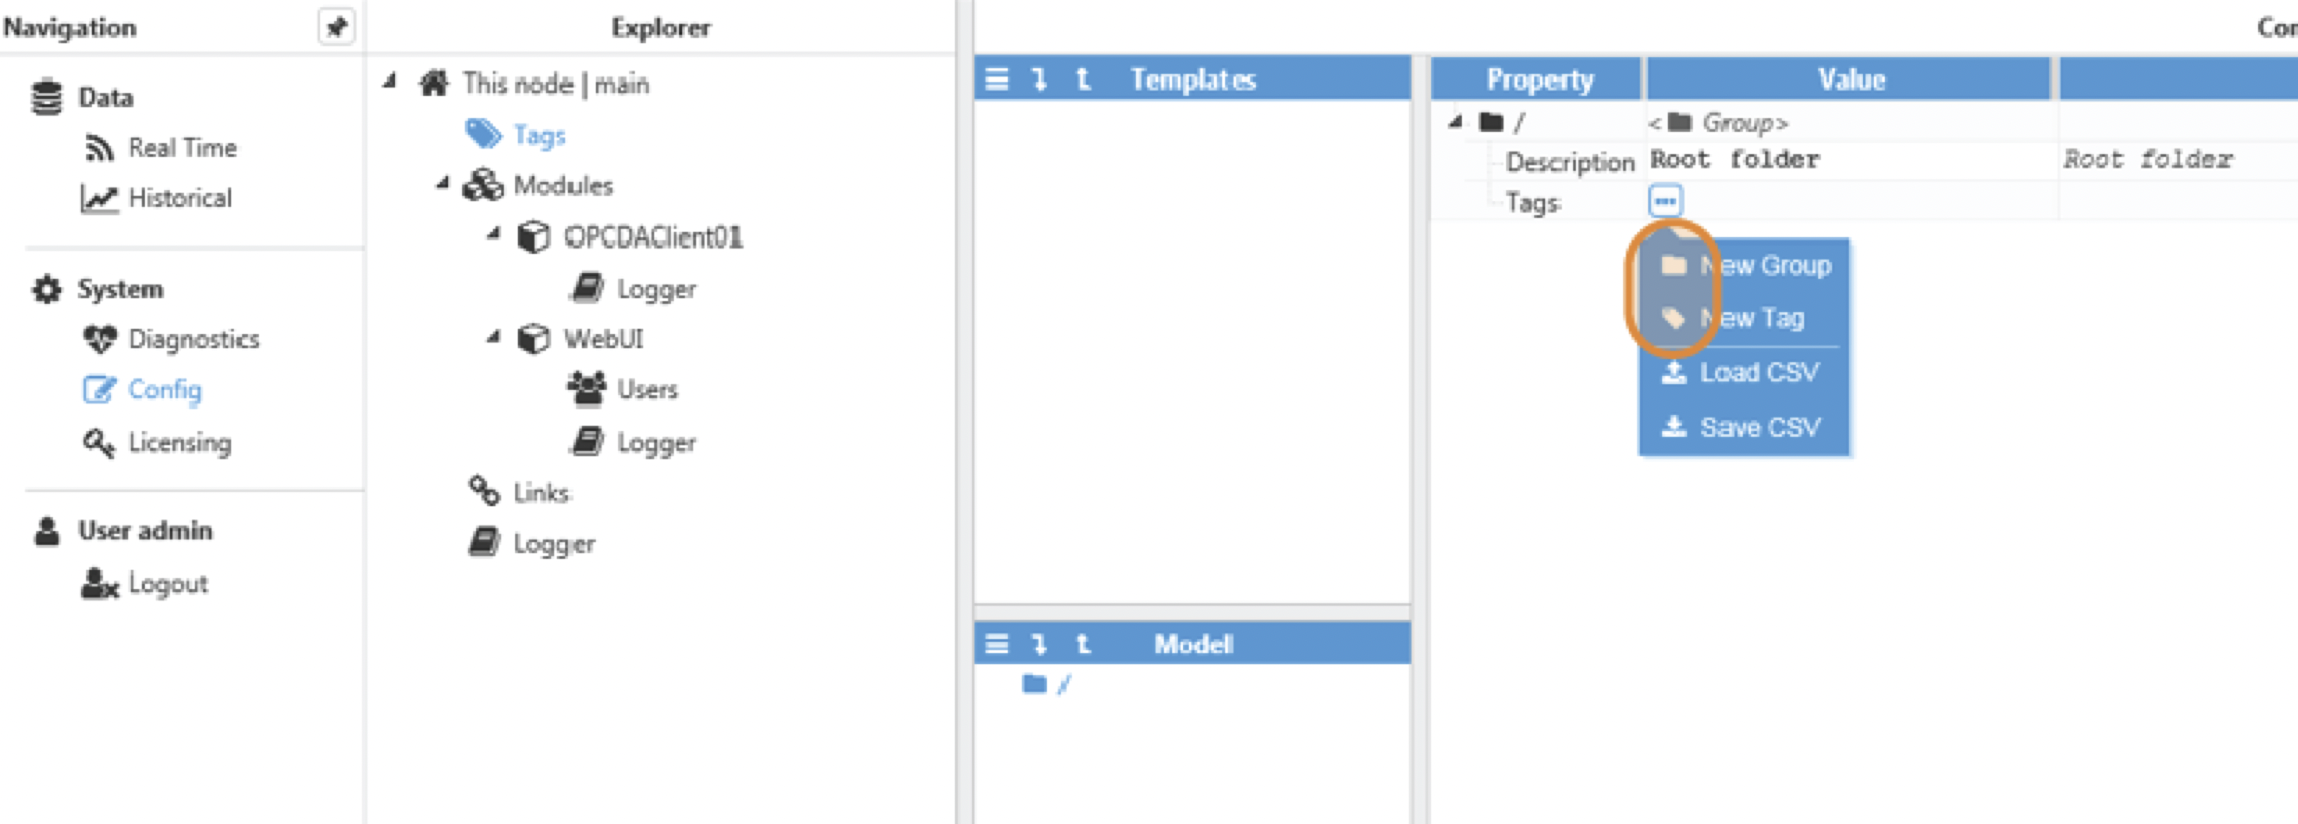 Figure 38. New tag creation
Step 7: Configure the tag. All details regarding the communication should be configured in Source entry:
- Source.Enabled: True
- Source.Module Type: OpcUaClient
- Source.Module name: OPCUAClient01 (the module created in previous steps)
- Source.Config.OPC UA Client: TOPServer_local (the connection created in previous steps)
- Source.Config.Node ID: The Node ID in the OPC server including the Name Space Index (ns) and the Identifier separated by semi-colon. In this example, the ns would be 2 and a valid tag Identifier would be “Simulation Examples.Functions.Ramp1” so the Node ID is:
ns=2;s=Simulation Examples.Functions.Ramp1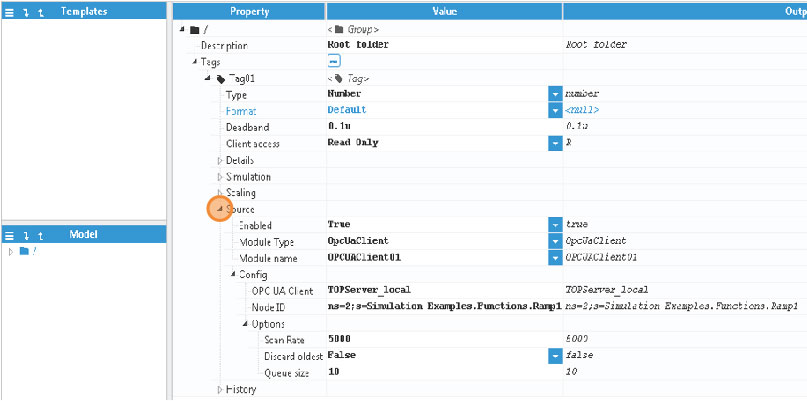 Figure 39. New tag configuration
Save the tag configuration.
Step 8: Trust N3uron OpcUaClient certificate in KEPServer/TOPServer OPC UA Configuration Manager.
 Figure 40. Digital Certificate trust process
Step 9: The tag should now be available, displaying as good quality in the Real-Time display.
 Figure 41. Tag value in real-time display