- 16 Dec 2021
- 4 Minutes to read
- Print
- PDF
Configuration
- Updated on 16 Dec 2021
- 4 Minutes to read
- Print
- PDF
API Configuration
API parameters define the communication settings between the module and N3uron's bootstrap..png)
Figure 3: API parameters
The API configuration settings include the following parameters:
- Event rate: Determines the Event exchange rate between bootstrap and the module, displayed in milliseconds. The default value is 1,000ms with a minimum value of 100ms.
- Timeout: Maximum waiting time for a response from bootstrap, displayed in milliseconds. The minimum value is 100ms and the default value is 5,000ms. For nodes dealing with a large number of tags, this time can be increased to avoid timeouts when communicating with bootstrap.
- Keep-alive period: Time between keep-alive checks with bootstrap, displayed in milliseconds. Set to 0 to disable keep-alive checks for this module. The default value is 60,000ms. When the module fails to respond to keep-alive requests, bootstrap will automatically restart the module process.
Once the API parameters have been set, the configuration settings must be saved and the module needs to be restarted in order to apply the new values.
Logger Configuration
These parameters define how the module logs activity..png)
Figure 4: Logger parameters
Parameters:
- Enabled: When enabled, the module sends logs to a text file located at <installation_folder>/N3uron/log/<module_name>. The default value is set to enabled.
- Level: Level of detail provided in the information sent to the log file.
- Error: Only logs errors.
- Warning: Logs errors and warnings.
- Info (default): Logs errors, warnings, and general information.
- Debug: Logs most module activity for debugging and troubleshooting purposes.
- Trace: Logs full module activity. This mode may log large amounts of data and for this reason it is not recommended for production environments.
- Days to keep: Log files are automatically deleted when they become older than the number of days specified in this section. The default value is seven days.
Module Configuration
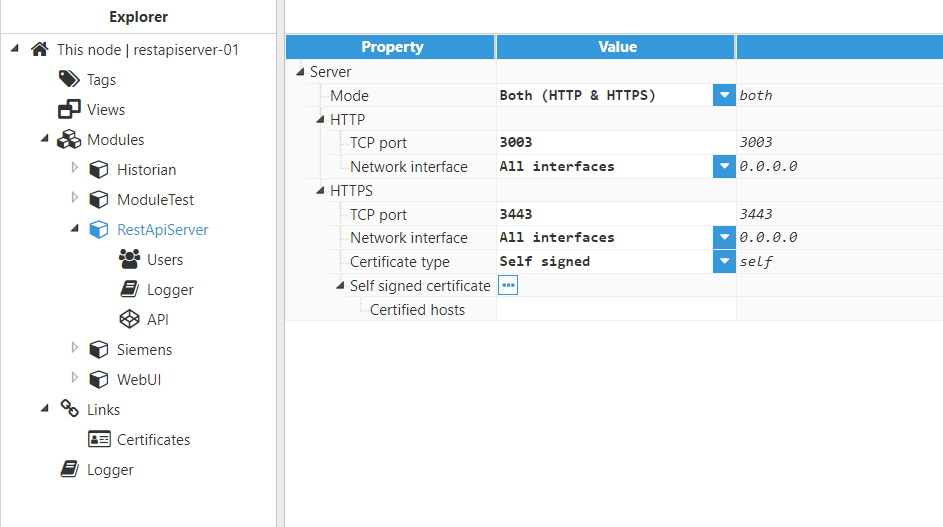
By selecting RestApiServer in the explorer tree menu, users can configure how the module will accept connections. The following screenshot shows the different available options for RestApiServer Configuration:

Figure 5: RestApiServer module parameters
Parameters:
Mode: Specifies what protocols will be accepted by the REST API Server. Available options are “HTTP”, “HTTPS” and “Both (HTTP & HTTPS)”.
HTTP:
- TCP port: specifies the HTTP port number for connecting to RestApiServer. The default port number is 3003. The valid range is 1 to 65535. This port may not be used by any other application in the same machine.
- Network interface: specifies the interface through which the RestApiServer will be accessible via HTTP. If set to All interfaces, the http server will listen to connections on all the interfaces. If set to Localhost only, the http server will listen only to localhost connections. In addition to previous options, an IP address of a specific network interface can be set to only allow connections from it.
HTTPS:
- TCP port: specifies the HTTPS port number for connecting to the RestApiServer. The default port number is 3443. Valid range is 1 to 65535. This port may not be used by any other application in the same machine.
- Network interface: specifies the interface through which the RestApiServer will be accessible via HTTPS. If set to All interfaces, the http server will listen to connections on all the interfaces. If set to Localhost only, the http server will listen only to localhost connections. In addition to previous options, an IP address of a specific network interface can be set to only allow connections from it.
- Certificate type: specifies the server HTTPS certificate. The following options are available:
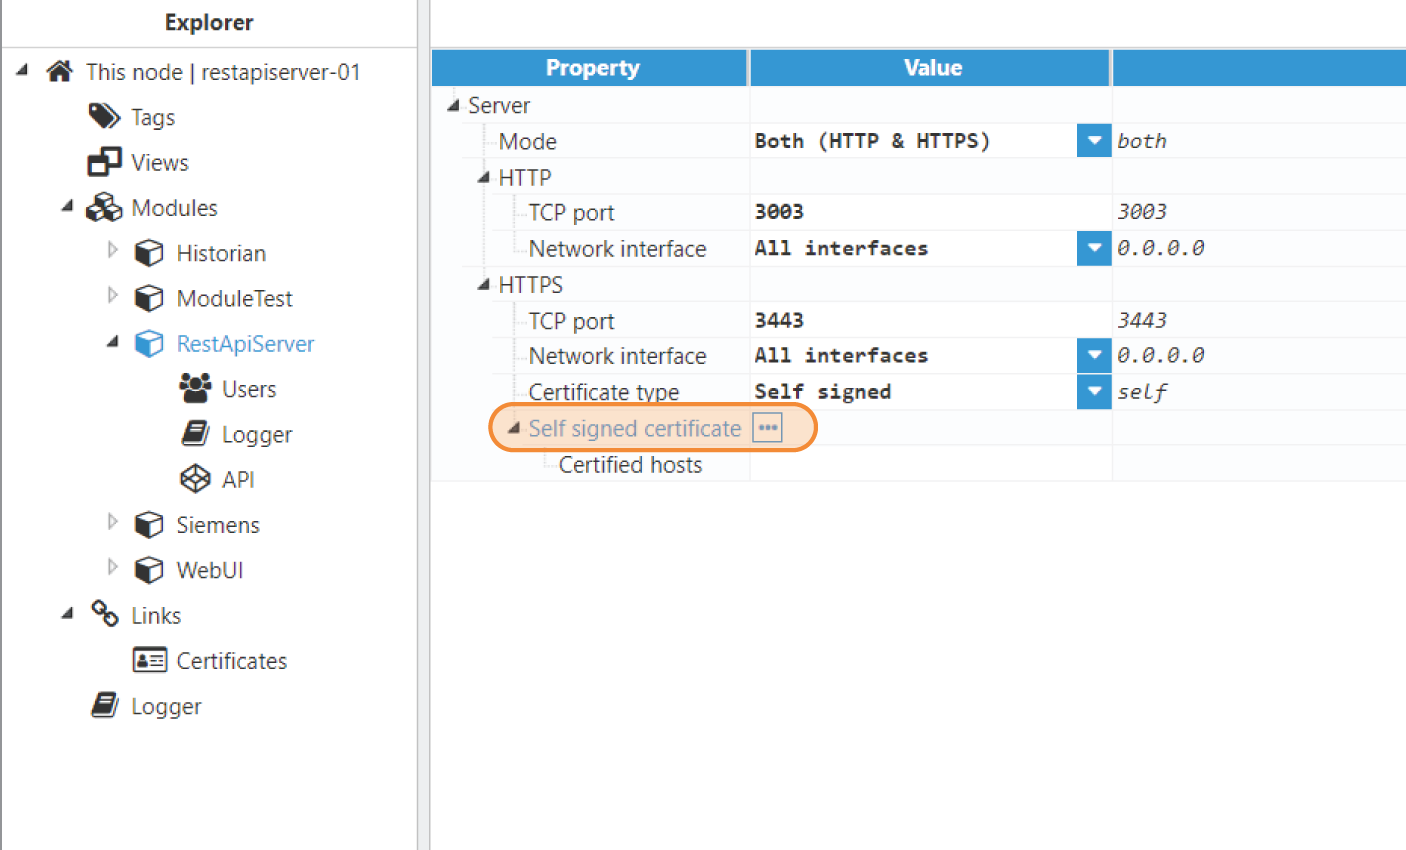
- Self-signed: the server will create and sign a certificate automatically using an internal certification authority that can be downloaded in the Self-signed certificate menu (as shown in the following screenshot). This certification authority is valid for all the RestApiServer instances and must be imported in each system/web client that will access the RestApiServer via HTTPS. When selecting “Self-signed” option, the following section will appear:
- Self-signed certificate parameters:
- Certified hosts: Comma separated host list (domains/host names and/or IPs) that will be included in the auto generated SSL certificate. It is important to include all the hosts where the RestApiServer will be accessed so the web client doesn't show any error. Hosts 127.0.0.1, localhost and system hostname will be automatically added to the certificate.
- Self-signed certificate parameters:
- Self-signed: the server will create and sign a certificate automatically using an internal certification authority that can be downloaded in the Self-signed certificate menu (as shown in the following screenshot). This certification authority is valid for all the RestApiServer instances and must be imported in each system/web client that will access the RestApiServer via HTTPS. When selecting “Self-signed” option, the following section will appear:

Figure 6: Download button of the certification authority
- Embedded: the provided certificates will be embedded in the configuration file. When selecting the “Embedded” option, the following section will appear:
- Custom certificate parameters:
- Key: certificate key in PEM format.
- Certificate: certificate in PEM format.
- Custom certificate parameters:
- File path: File paths where the certificate files are located, with a hot-reload option. The path is relative to the data/<instance name>/cert/ folder. When selecting “File path” option, the following section will appear:
- File path certificate parameters:
- Key path: Certificate key in PEM format. The path is relative to the data/<instance name>/cert/ folder.
- Certificate path: Certificate in PEM format. The path is relative to the data/<instance name>/cert/ folder.
- Reload interval: expressed in seconds, specifies the interval to reload certificates if file changes were detected. Set to 0 to disable.
- File path certificate parameters:
- Embedded: the provided certificates will be embedded in the configuration file. When selecting the “Embedded” option, the following section will appear:
User Configuration
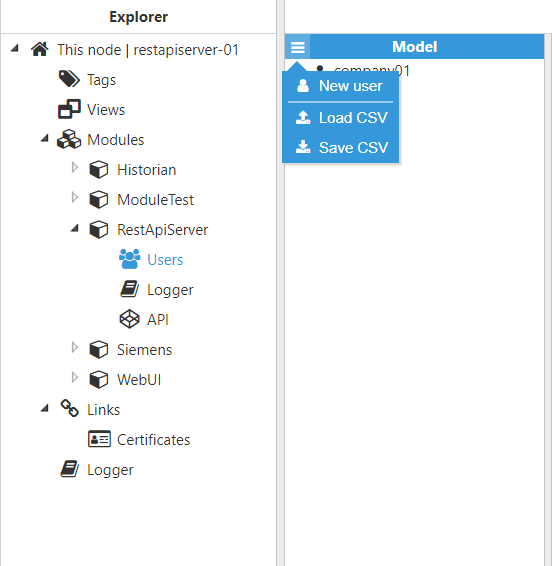
After configuring the RestApiServer module, a New user (as shown in the following screenshot) can be created in order to configure the authentication mode and request permissions to that specific user.

Figure 7: Create a new user

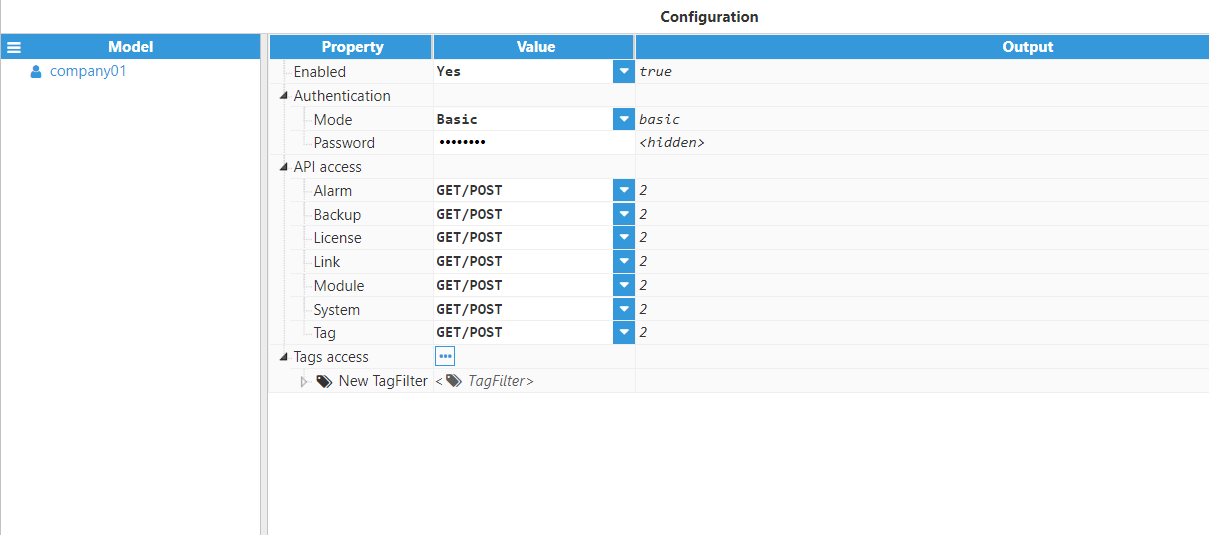
Figure 8: User configuration
User parameters:
- Enabled: specifies whether or not any authentication attempt will be blocked.
Authentication:
- Mode: specifies the mode of authentication. Available options are “Basic” and “Token”.
- Password: password for this user when “Basic” is selected.
- Token: Login token for this user when “Token” is selected.
API access:
N3uron REST API calls use the GET and POST methods and can be categorized into the following groups:
- Alarm
- Backup
- License
- Links
- Module
- System
- Tag
GET (allows read operations) and GET/POST (allows read and write operations) permissions are available for each group.

