Parsing a JSON message
In this example, a subscriber received a message serialized in JSON, which then needed be parsed into a tag event collection, and the data saved to tags. In the below example, the following JSON message is used (this message represents weather data from a given location):
{
    "ts": "2020-04-15T09:00:00.000Z",
    "data": {
        "Temperature": {
            "value": 21.3,
            "unit": "ºC"
        },
        "Humidity": {
            "value": 31.1,
            "unit": "%"
        },
        "Wind speed": {
            "value": 2.3,
            "unit": "m/s"
        }
    }
}
- Create both the connection and the subscriber that will be receiving the events. The encoding and compression must both match the settings on the publisher side. For example, if a publisher sends data compressed in GZip in base64 format, it must be decoded from base64 and uncompressed. In the below example, the following settings are used:

- Next, the parser script must be written. More information about the different utilities permitted for scripts can be found here. To correctly parse the message, the following script will be used:
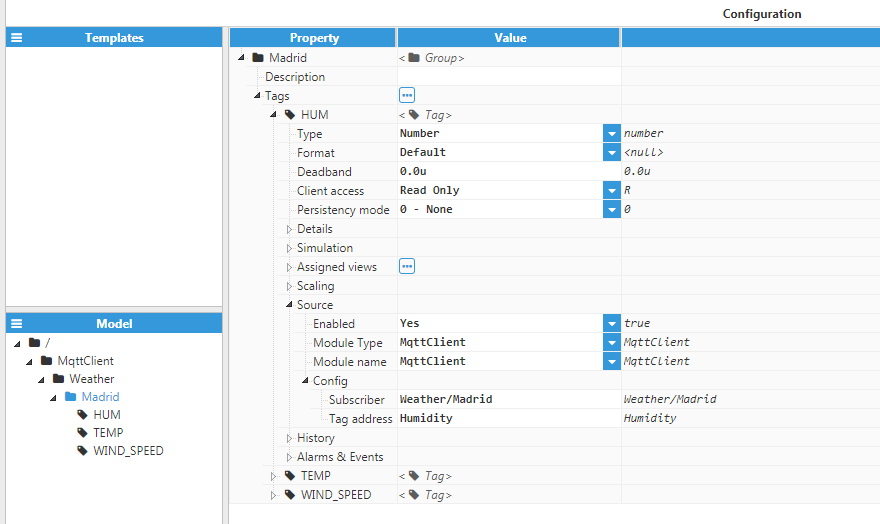
$.logger.info("Parsing message: %j", $.input); const ts = Date.parse($.input.ts); $.logger.debug("Timestamp: %d", ts); for (const [tag, data] of Object.entries($.input.data)){ const ev = { tag: tag, value: data.value, quality: 192, ts: ts }; $.logger.trace("Event: %j", ev); $.output.push(ev) } - Once the script is finished, the tags for storing the saved data must be created. As scripts use the key values of each data point as the tag name, each tag alias should be named according to the corresponding name in the message. The below screenshot shows the configuration settings:
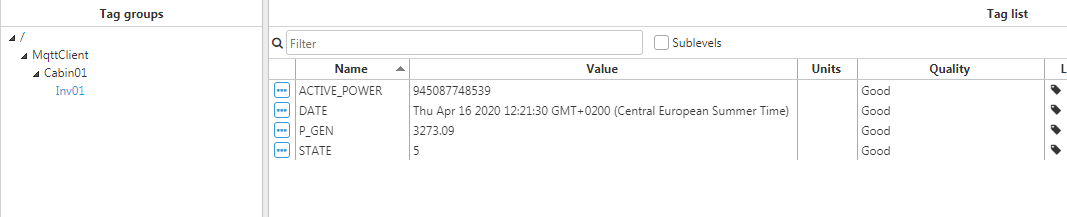
- If the configuration is correct, the next time a packet arrives with a message, the tags will automatically be updated. See the below screenshot for an example:

Parsing a Protocol Buffers message
This example shows how to parse a message encoded in protobuf format and then extract tag data from the message. The following .proto file will be used for this example:
syntax = "proto3";
import "google/protobuf/timestamp.proto";

message Message{
    repeated TagEvent events = 1;
}

message TagEvent{
    string tag = 1;
    oneof valueType{
        int32 Integer = 2;
        double Double = 3;
        string String = 4;
        int64 Long = 5;
    }
    uint32 quality = 6;
    google.protobuf.Timestamp googleTs = 7;
}
The next snippet shows the message used in this example. A message encoded with Protocol Buffer will be in binary format, however, the below example is shown in JSON format for clarity.
[{
    "tag": "STATE",
    "Integer": 5,
    "quality": 192,
    "ts": {
        "seconds": 15869597100,
        "nanos": 0
    }
}, {
    "tag": "P_GEN",
    "Double": 7367.66,
    "quality": 192,
    "ts": {
        "seconds": 15869597100,
        "nanos": 0
    }
}, {
    "tag": "DATE",
    "String": "Wed Apr 15 2020 16:08:30 GMT+0200 (Central European Summer Time)",
    "quality": 192,
    "ts": {
        "seconds": 15869597100,
        "nanos": 0
    }
}, {
    "tag": "ACTIVE_POWER",
    "Long": 316677879202,
    "quality": 192,
    "ts": {
        "seconds": 15869597100,
        "nanos": 0
    }
}]
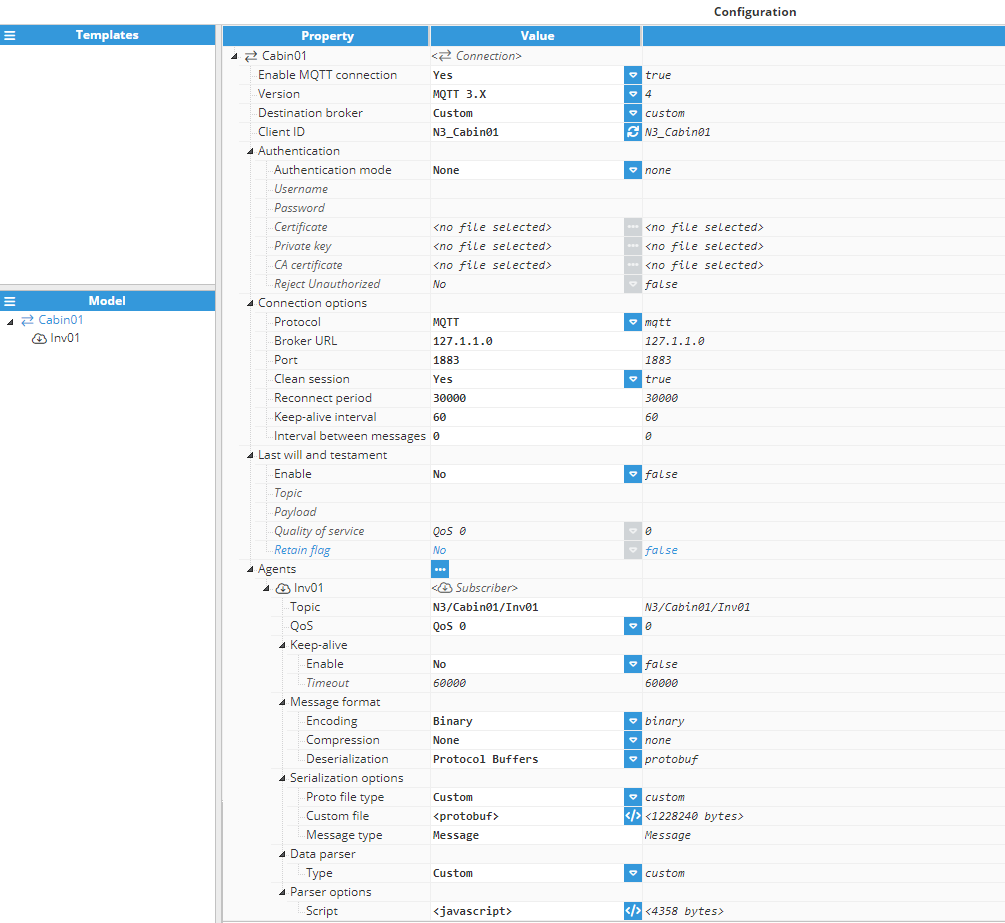
- The first step is to create a new MQTT Client connection and a subscriber to receive messages on a specified topic. Since protobuf is a binary format, the encoding must be set to binary (unless the publisher is using a different encoding) and compression must match the data publisher. The following screenshot shows the configuration settings used in this example:
- Next, the parsing script needs to be written. Since the serialization settings are set to Protocol Buffers, data will automatically be converted to a JavaScript object. This example uses both oneof, googleTimestamp and int64 fields, which are special cases for protobuf messages.
- oneof: When present, this field will show a string to indicate which of the oneof fields is being used.
- googleTimestamp: This is a timestamp format used by Google in protobuf messages. It’s similar to the C timespec format, as it uses one field for seconds and another field for nanoseconds.
- int64/uint64: Since JavaScript numbers are Double, conversion from int64 and uint64 could result in a loss of precision. As such, these values are encoded as a Long object containing high, low, and sign fields, as well as a .toNumber() method to convert the result into a JavaScript Number.
const events = $.input.events;
$.logger.info("Parsing message: %j", events);
for(const ev of events){
    const event = {
        tag: ev.tag,
        quality: ev.quality,
        ts: googleTsToEpoch(ev.ts)
    };
    switch(ev.valueType){
        case "Integer":
            event.value = ev.Integer;
            break;
        case "Double":
            event.value = ev.Double;
            break;
        case "String":
            event.value = ev.String;
            break;
        case "Long":
            event.value = ev.Long.toNumber();
            break;
    }
    $.logger.trace("Tag event: %j", event);
    $.output.push(event);
}

//Converts from google ts to epoch
function googleTsToEpoch(googleTs){
  return googleTs.seconds.toNumber() * 1000 + googleTs.nanos / 1000000;
}
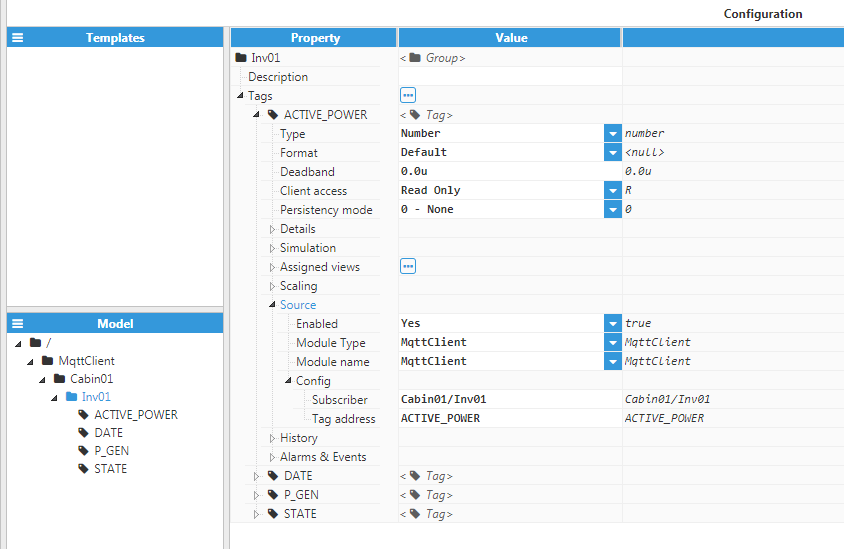
3. Once the script has finished, all necessary tags must be created. Since the script uses the tag name from the message as the tag path, each tag must have an alias that points to the tag name used in the message. See the below screenshot for the configuration settings for one of the tags used in this example:
Parsing a custom format
In this example, a message with a custom format (neither JSON nor protobuf) will be parsed. This example will use the following message format:
TAGNAME|VALUE|QUALITY|TS\r\nAn example message using this custom format is shown in the following code snippet:
Product_Count|3412|192|1586938995000\r\n
Remaining|1588|192|1586938995000\r\n
Uptime|441235|192|1586938980000\r\n
- First, an MQTT Connection must be created and its settings should be applied according to the desired message. Since this message uses a completely custom deserializer and parser, the serializer must be set to “None” to pass the raw message directly to the parser. The configuration settings will be as follows:
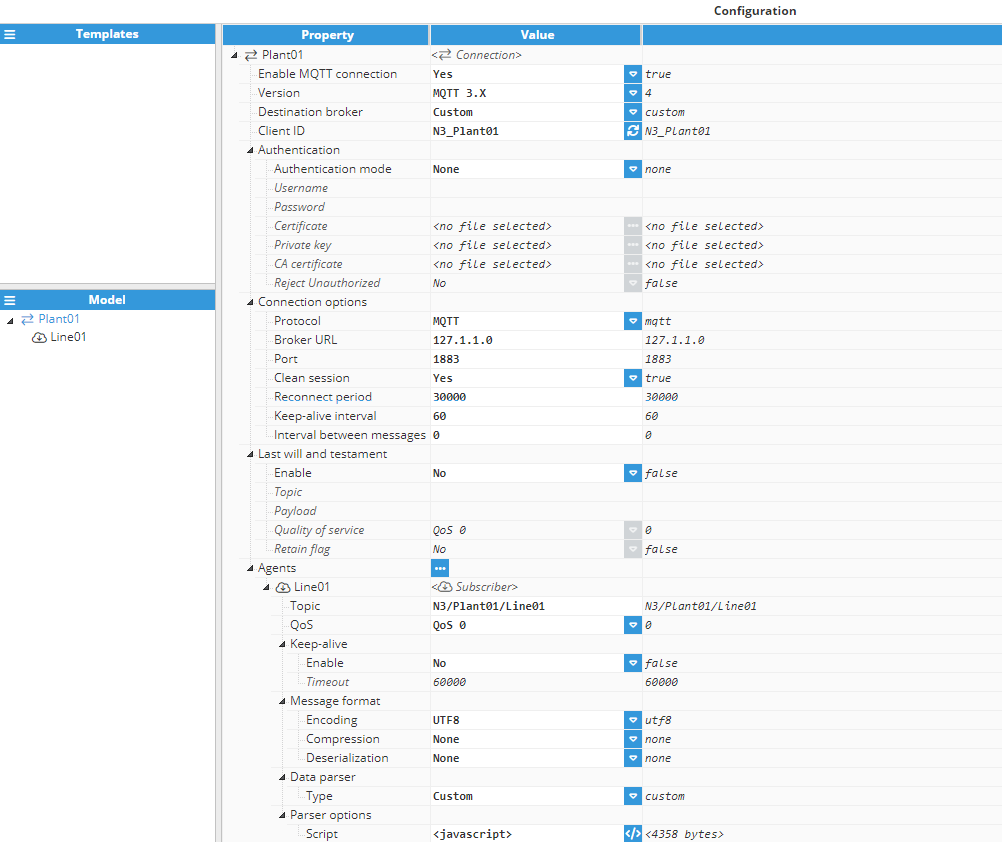
- After the configuration is complete, the parsing script must be prepared. In this example, as there is no deserializer, the input data will be the raw Buffer received from the broker. More information about Buffers can be found at Node.js Buffer. The code used in this example is as follows:
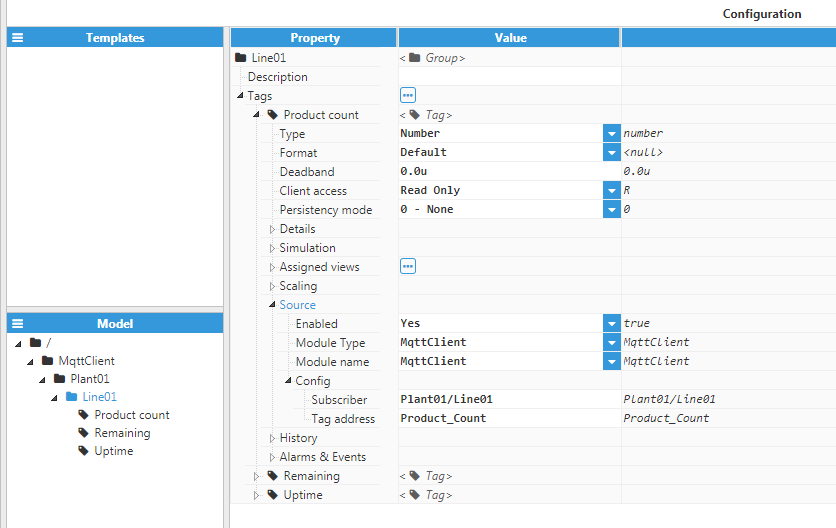
const message = $.input.toString(); $.logger.info("Parsing message: %j", message); const lines= message.split("\r\n"); for (const line of lines){ //Skip empty lines if(line === "") continue; const event = line.split("|"); const ev = { tag: event[0], value: Number(event[1]), quality: Number(event[2]), ts: Number(event[3]) }; $.logger.trace("Event: %j", ev); $.output.push(ev) } - Finally, the tags must be created and the tag alias for each tag must be set to the same name as the tag in the message. This is required to match the tag name in the message to the tag in the tag model. See the below screenshot for an example of the configuration settings for these tags:
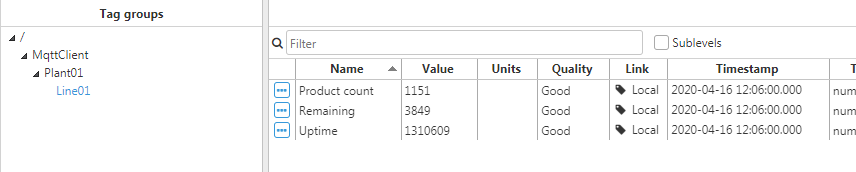
- If the configuration is correct, tags will automatically update the next time a message is received on the topic of the subscriber. See an example in the below screenshot: