Users and Roles
Since N3uron's V1.21, the management of Roles and Users has been improved to make its configuration much easier for users. You can easily create a user and assign them to different roles according to the permissions they will be granted. A user can perform different roles without any restrictions and each user can have as many roles as needed. The permissions for every role are provided in the Access section of the following modules:
It's important to think about the different roles in your project and how they affect the security of your project. For instance, what level of access a particular module needs may determine the functional type roles that you create and the different users assigned to each role.
Roles
You can create and configure a role in WebUI by following the steps below:
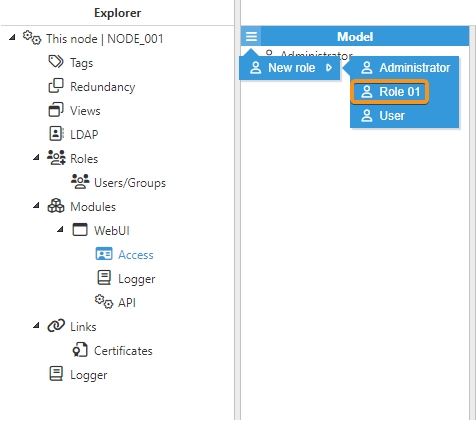
- Step 1: Go to System-->Config and in the Explorer panel, click on This node and select Roles. Now, click on the button on the left-hand side of the Model header and select New Role. By default, Administrator and User roles are already created at installation
.png)
- Step 2: Enter a name and description for the new role you have just created. The role is now available to be associated with specific users.

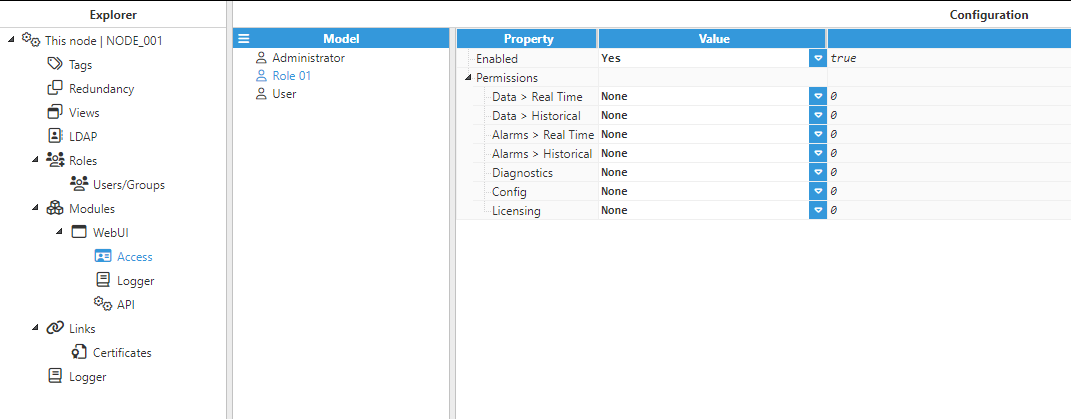
- Step 3: As shown in the images below, once you have created the role, you can go to any of the modules listed above, i. e. WebUI, WebVision, RestApiServer or OPCUAServer to assign the corresponding permissions for that particular module.
Local Users
In this section, we will show you how to create and configure a Local user.
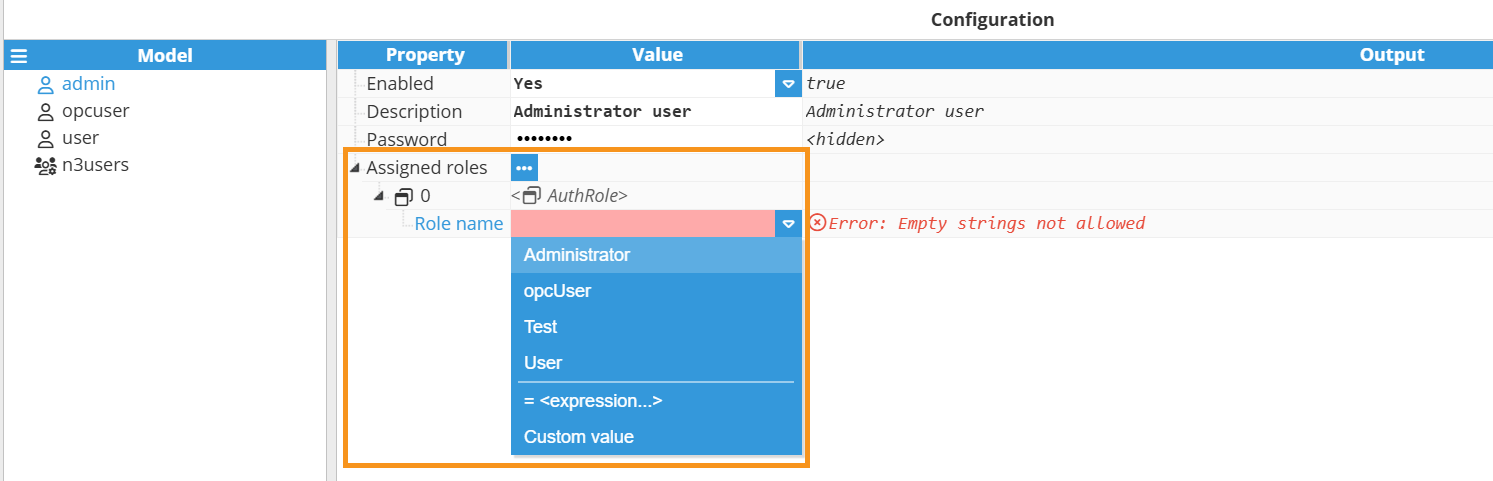
- Step 1: Go to System-->Config and in the Explorer panel, click on This node and select Users/Groups under Roles. Now click on the button on the left-hand side of the Model header and select New Local User, name it, and hit the Save button. By default, admin and user are already created at installation.
.png)
- Step 2: Click on the user you have just created and in the Configuration panel, enable it, provide a Description and enter the Password they will use.

- Step 3: Now, expand the Assigned roles menu by clicking on the ellipsis button and assign them a new role. Remember that a user can have as many roles as needed.

LDAP
The Active Directory Authentication profile uses Microsoft's Active Directory over LDAP (Lightweight Directory Access Protocol) to store all users, roles, and more, that make up an Authentication profile. Active Directory Groups are used for N3uron's roles and user-role mappings.
While using an Active Directory User Source, administration of users and roles will be carried out through the Active Directory itself and will not be manageable within N3uron. Thus, adding new users to an Active Directory User Source, or modifying pre-existing users, requires modifications to be made from the Active Directory, usually through an AD Administrator.
In this section, we will show you how to create and configure an LDAP user.
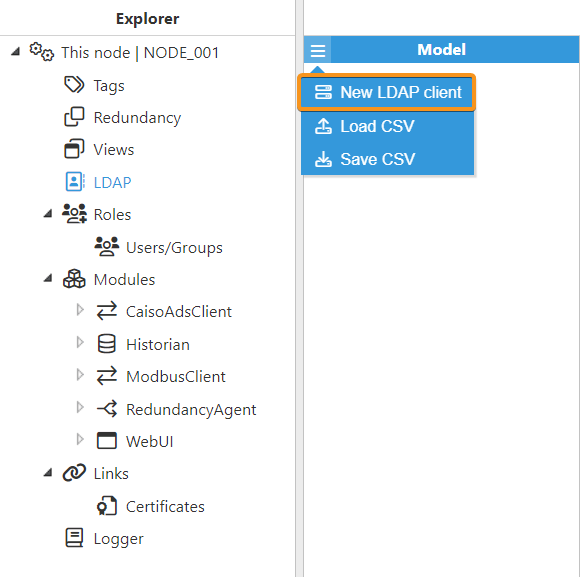
- Step 1: Create the connection to the Active Directory server.
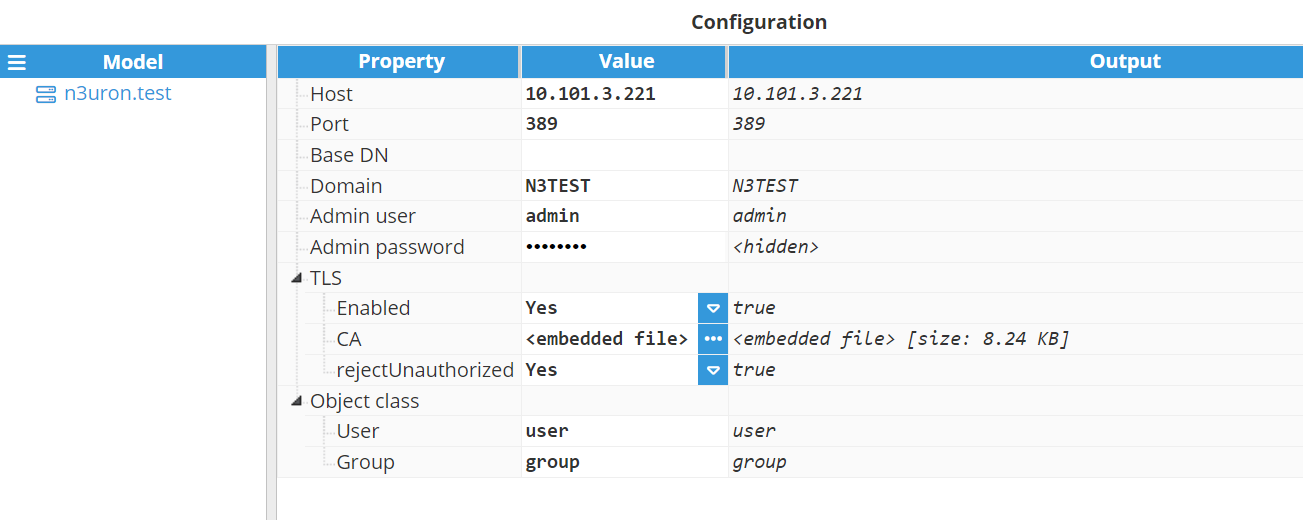
- Parameters:
- Host: LDAP host
- Port: LDAP port. The default value is 389.
- Base DN: Optional and usually not required. Base distinguished name.
- Domain: Optional parameter. If not provided, users will need to use the Distinguished Name when they log in or alternatively enter either DOMAIN\LOGIN or LOGIN@DOMAIN.
- Admin user: Optional. Only needed in case users don’t have permission to retrieve their own groups. If no admin user is provided, the login user credentials will be used instead.
- Admin password: Optional. Only needed in case users don’t have permission to retrieve their own groups. If no admin user is provided, the login user credentials will be used instead.
- TLS:Note:This feature is new in N3uron version 1.21.5.
- Enabled: Enables connection over TLS to the host.
- CA: CA certificate.
- rejectUnauthorized: Reject unknown certificates.Note:Object class is available from N3uron version 1.21.7.
- Object class:
- User: When querying for users, filter to objects that match this class. The default value is user.
- Group: When querying for groups, filter to objects that match this class. The default value is group.
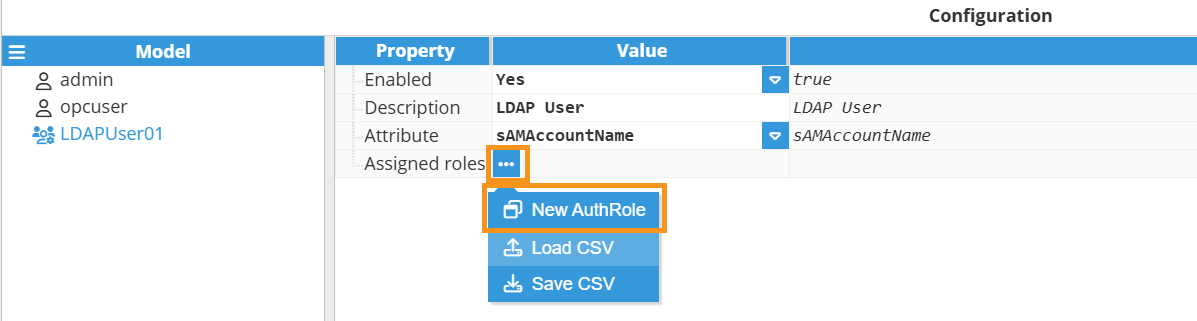
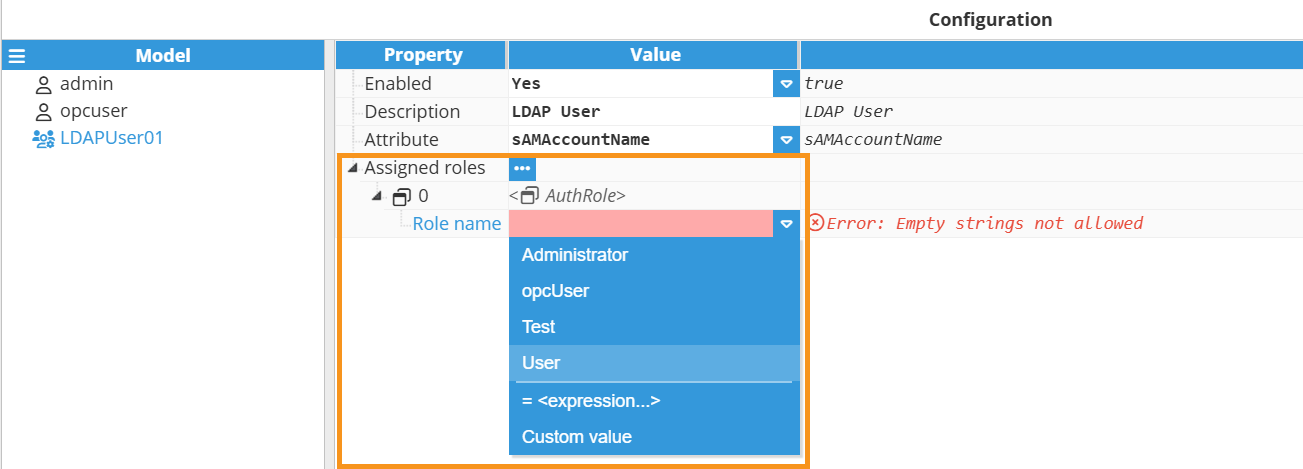
- Step 2: Follow the same steps as used to create a Local user, but this time select New LDAP user. Warning:The name we use for the user in N3uron will be compared to the value of the object attribute we select when we create the user. There must exist a user in Active Directory with the same exact name as the one we use in N3uron.
- Step 3: Configure the following parameters:
- Enabled: A disabled user or group will not be taken into account when authentication is processed.
- Attribute: The attribute on the user object for defining the username.
- Step 4: Now, assign as many roles as required to the new user.
The configuration of an LDAP group is identical, except for the fact that it would apply to the group objects assigned to the user trying to authenticate rather than to the user object in your Active Directory.