What is a Template?
Templates offer the ability to leverage object-oriented data design principles in N3uron. Templates allow users to dramatically reduce the amount of time invested in deploying a new project.
By creating and using Templates, users can generate new instances to rapidly build complex data structures and communication configurations. Any changes to the template definition are then inherited by all instances, drastically saving time when making routing changes.
Templates can be created and used in the N3uron node for both Tags and Communications configurations.
Template Features
- Object-Oriented: Use groups of tags to create a single object. Create objects that match real-world assets, e.g. a motor, a machine, etc.
- Central Definition: Once a template has been defined, users can create instances of it. If at a later time any changes are needed, the template definition can simply be modified, and all instances will be automatically updated.
- Custom properties: Define custom properties in your template and reference them inside Tags. When it comes to creating instances, you can simply modify their custom properties values in order to change where the underlying data comes from.
- Inheritance: Templates can inherit custom property values from other templates in order to add additional items or change settings.
Template Terminology
As shown in the two images below, within WebUI, templates can be created not only in the Tags configuration menu section but also in the configuration menu of the modules that support templates.
- Tag Template: Templates are tag definitions and groups typically containing several tag definitions. Templates do not run, so any tags inside them will not poll or subscribe to anything. Rather, they represent tag structures which instances will inherit from. Changes made to a template are automatically applied to any of its instances.
- Communication Templates: Similarly to tag templates, communication templates are definitions of Channels and Devices that the instances will inherit from.
.png)
.png)
- Instances: Instances are running copies of a template. All instances have a parent, which is the template that the instance is inheriting from. The structure of an instance is defined by its parent template, which means you cannot add new items to an instance. However, it is possible to modify the values of the Custom Properties of each instance.
- Custom Properties: Custom properties are user created parameters that can be used to create parameterized data templates. Custom properties are configured in templates, and their values can be set in each individual instance. You can replace values on an item in a template with a reference to a custom property.
- Items: Items are the tags, groups, channels, and devices inside a template or instance. Items can be standard tags, channels, and devices or an instance of another template, since template nesting is allowed.
Create a Template Instance
In this series of examples, we will create a very simple Template, create an instance of it and make some additional configuration changes.
Creating a Template
In this example, we will demonstrate how to create a Template.
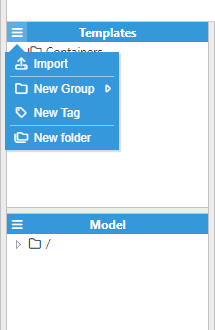
- Step 1: In the Navigation panel, go to System-->Config and select Tags in the Explorer panel. Click on the menu on the left-hand side of the Templates header, which will display the menu shown in the image below with the following options:
- Import: Allows importing of zip files containing templates.
- New group: Allows the creation of a group of tags that will typically make up a template.
- New tag: Create a new tag.
- New Folder: Create a new folder. Folders are usually used for organizing templates.
- Step 2: Click on New Group and enter a name for the template (in this example, it has been named Inverter). This name is how the template will be identified by the rest of the system. Once created, you can enter a Description as well as an identifier for version tracking in the User version field.
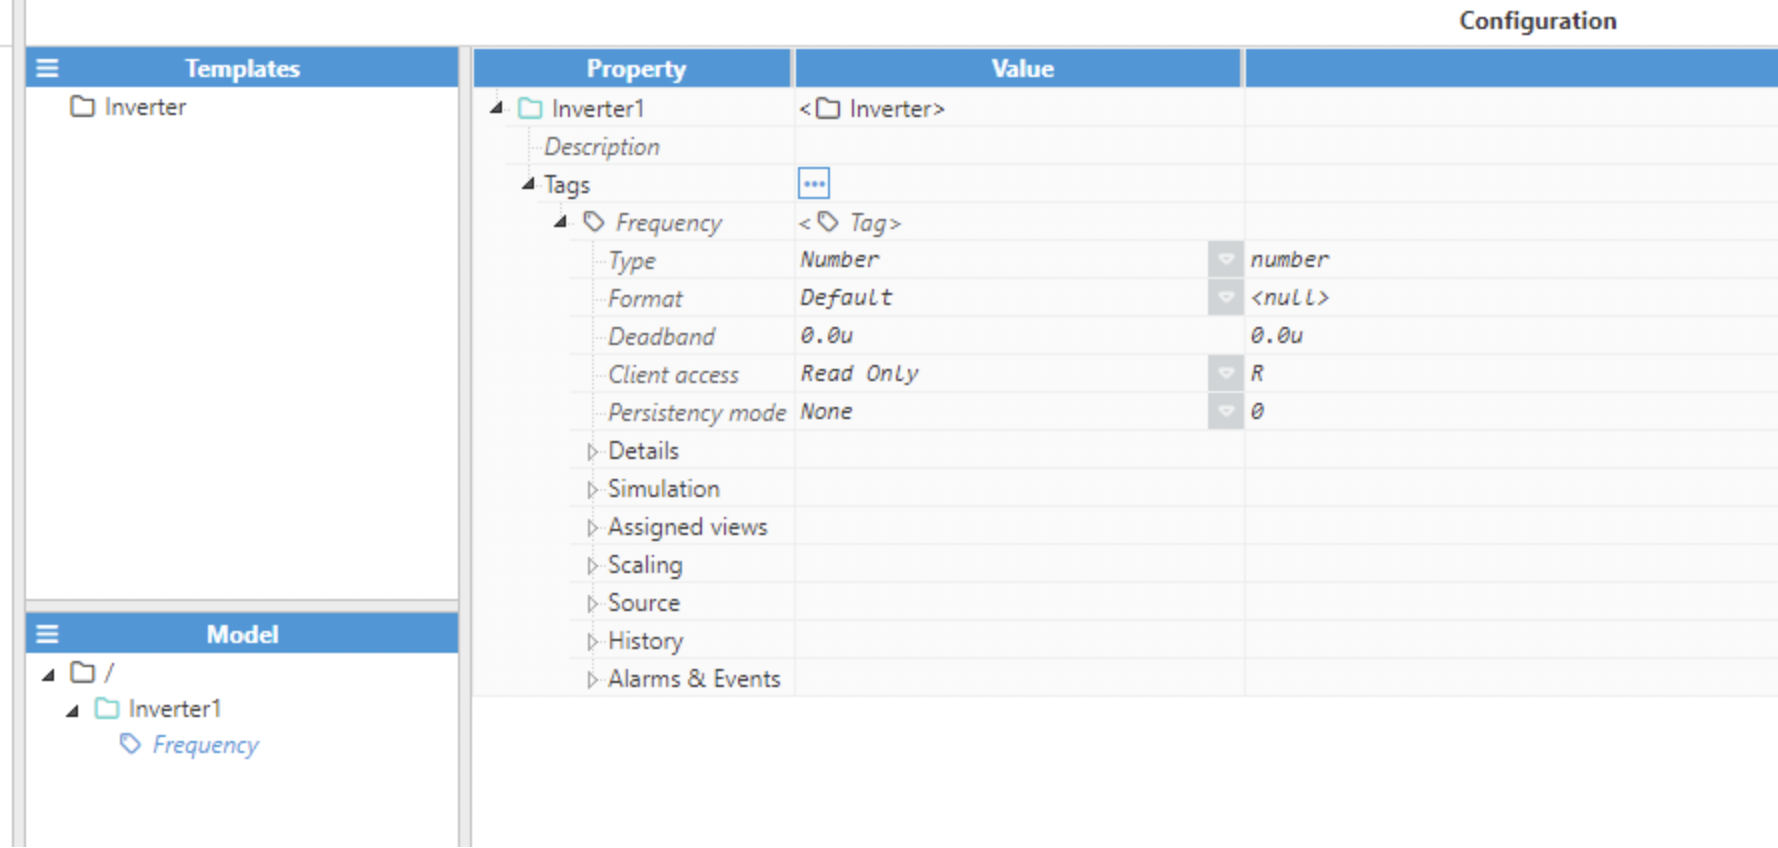
- Step 3: We'll keep this demonstration simple and only add one tag to the template. Click on the ellipsis button, on the right-hand side of the Tags label, select New Tag, and enter a name (in this example, it has been named Frequency).
.png)
- Step 4: Select the Frequency tag, and you'll see all the property settings for it. Click Save.
.png)
Creating a Template from Existing Tags
To create a template from existing tags, create a New Template as described in the above example. Now, simply select the tags or folders in the Model panel that you wish to include and drag & drop them onto the template you've just created. From here, you can modify the tags, add custom properties, and so on. The original tags will not be affected.
Creating an Instance
Now that we have a template definition, we can create an instance.
To create an instance, click on the menu on the left-hand side of the Model header, select New Group-->Inverter, enter a name for the instance (in this example Inverter1), and click Save.
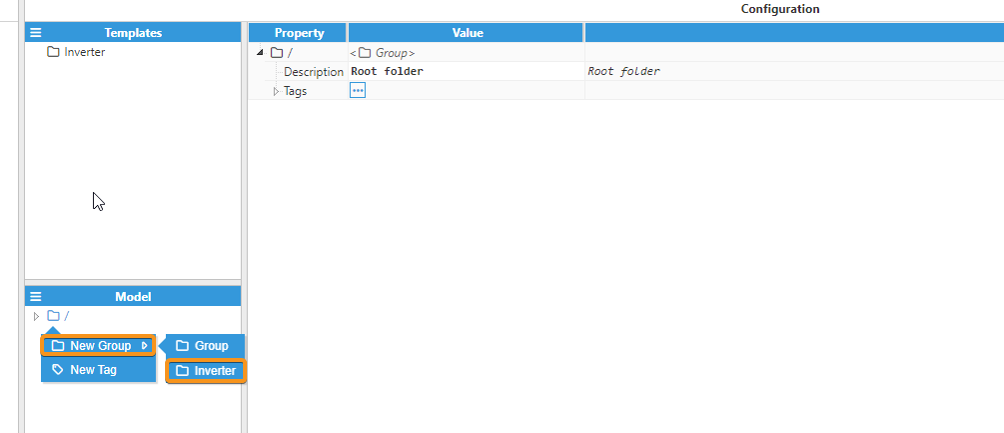
The instance will be shown in the model panel with a characteristic green color, indicating that it's an instance from an existing template.
Make Changes to the Template
Now that we have an instance, we can make a modification to the template, which will propagate the changes down to the instances. For example, try adding one or two more tags to the template and see what happens.
N3uron ChatGPT Assistant

The N3uron Tags Assistant is a specialized AI tool available in the ChatGPT Store, designed to accelerate your work with N3uron’s Tags and Templates system. It provides expert assistance for creating, editing, validating, and automating tag configurations, ensuring data models are consistent, scalable, and production-ready.
Whether you’re bulk-editing exported tag CSVs or building reusable JSON templates, the assistant guides you step-by-step with precision.
Get hands-on support to:
- Create and verify tag templates using data from manufacturer datasheets, CSV files, Excel sheets, PDFs, or images.
- Perform mass edits safely on exported N3uron Tags CSV files.
- Map and organize tag configurations efficiently.
- Troubleshoot data type mismatches, scaling, and historian configuration.
- Learn best practices for tag hierarchy, naming conventions, and parameter inheritance.