Prerequisites:
A Web Vision distributed architecture requires N3uron version 1.22.4 or later. HTTPS with certificates is mandatory — every connection between the Central Web Vision node and a distributed node runs over HTTPS/TLS. The first time a connection is established, the certificate must be Trusted at both ends; this is required only once, after which the trust persists.
The Web Vision module — its server, access, and node connections — is configured within the N3uron WebUI. The configuration is organized under three sections: Web Vision server, access, and nodes. The HMI project itself (screens and dashboards) is built in the Web Vision Designer.
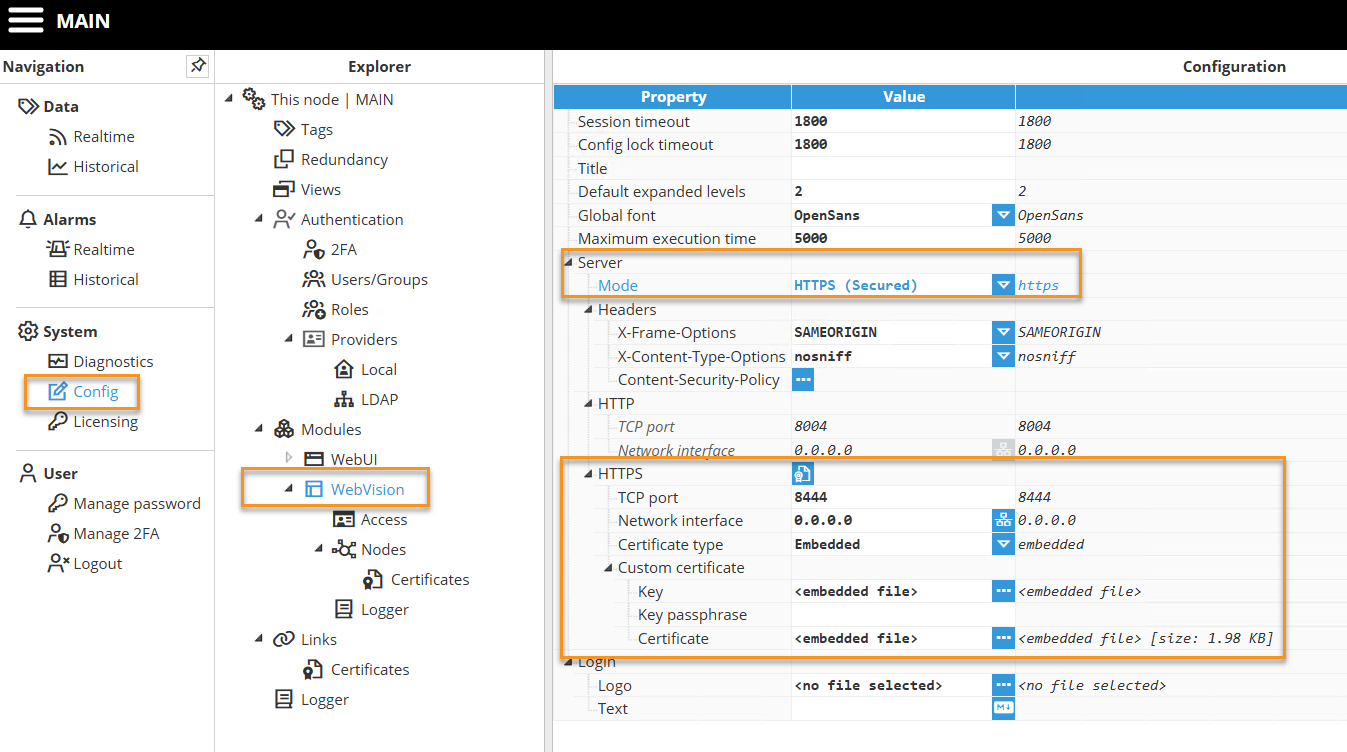
Server Configuration
The Server and general settings (session timeouts, global font, ports, certificates, headers, login screen, etc.) are identical to standalone Web Vision, with one mandatory difference: HTTPS must be enabled and configured with a certificate, because all connectivity between nodes relies on TLS.
Access
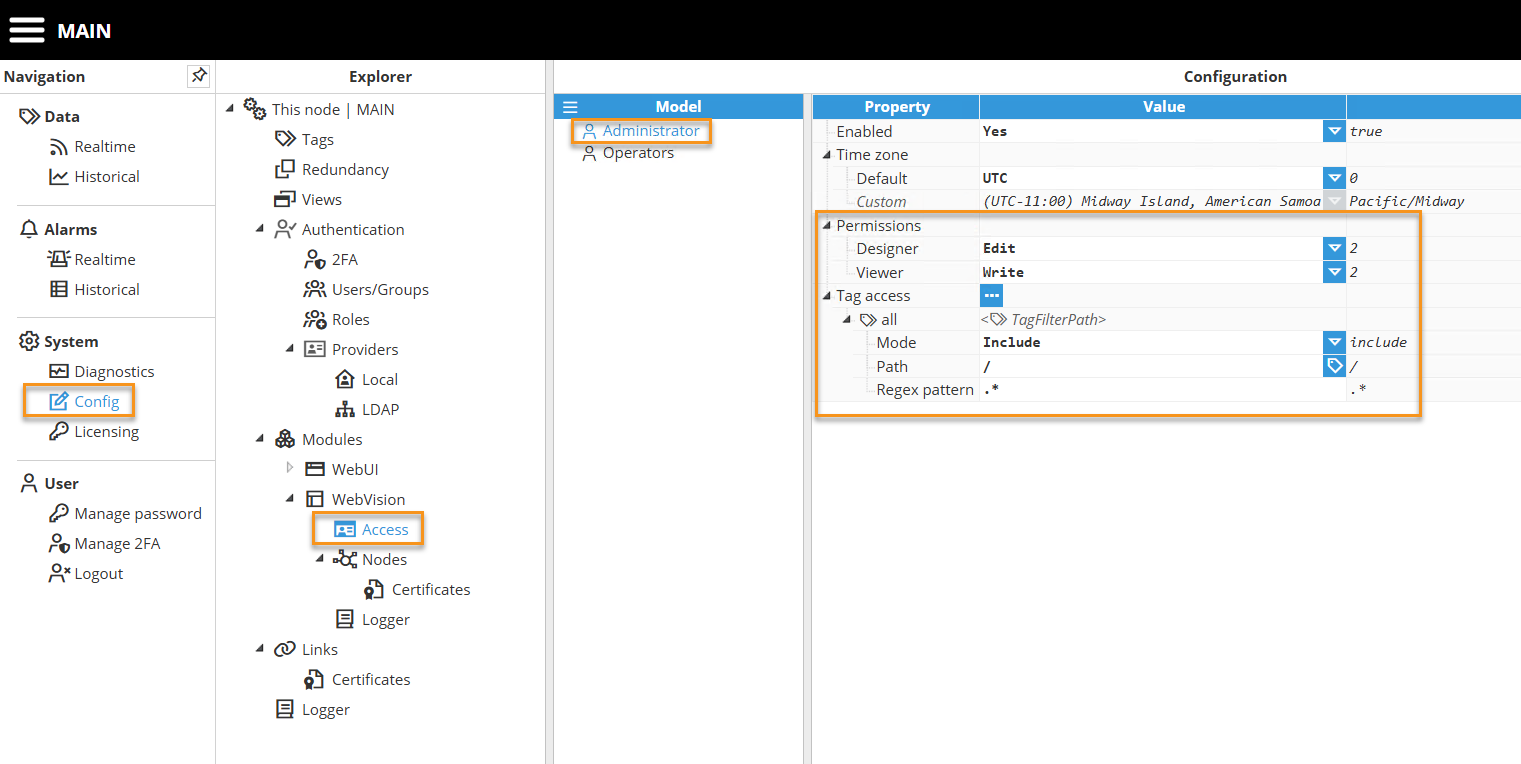
The Access section controls user roles, permissions, and which tags each user can interact with. Access is managed centrally on the Central Web Vision node and applies across the whole unified tag model — local tags and those from the distributed nodes alike. The configuration itself is identical to standalone Web Vision and covers:
Designer / Viewer permissions (e.g. Edit, Write).
Tag access filters — path and regex pattern that restrict which tags each role can see or write.
Nodes
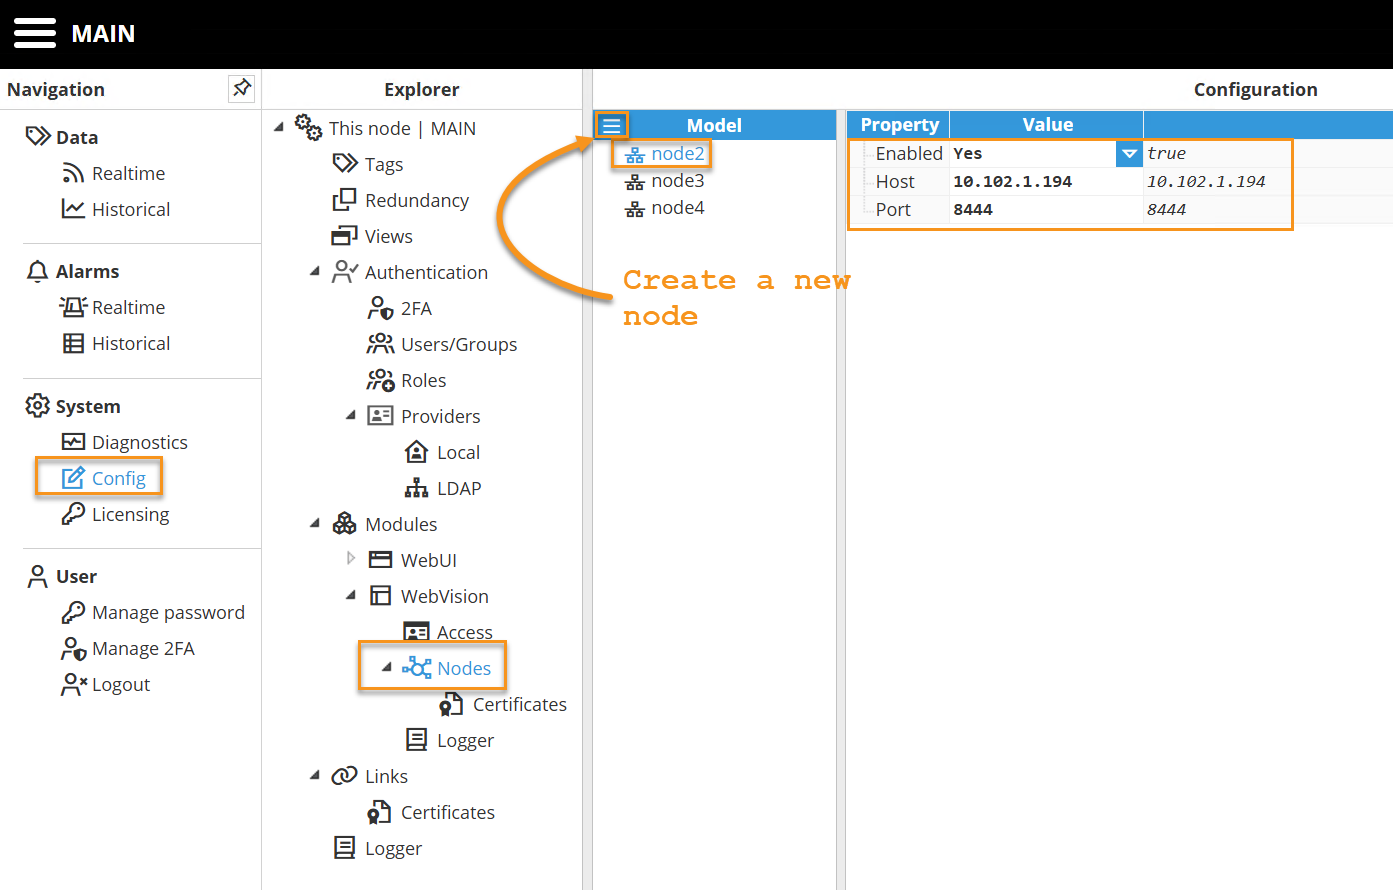
The Nodes section (WebVision → Nodes) is the configuration area exclusive to the distributed architecture. Each entry represents a distributed node whose tag model is made accessible within the Web Vision interface.
To add a node:
Right-click Nodes in the Model panel and select New Outbound Node.
Give the node a meaningful name that identifies it (e.g. node2, node3).
Configure the properties below.
Property | Description |
|---|---|
Enabled | Activates the connection to this node. |
Host | Hostname or IP address to connect to the node |
Port | HTTPS port to connect to the node. Default: 8444. |
Node Certificates
Because all connectivity uses TLS, the certificate exchanged when a connection is first established must be Trusted at both ends before data can flow. Certificates are managed under WebVision → Nodes → Certificates, which lists two groups:
Inbound nodes certificates — the certificates of nodes that connect in to this node.
Outbound nodes certificates — the certificates of the nodes this Central Web Vision node connects to.
.png)
.png)
Note:
Trusting the certificate on both ends is only required the first time a connection is established; the trust then persists. An untrusted or expired certificate prevents the connection and leaves the node's tags unavailable, so keep certificates up to date to avoid connectivity drops on expiration.
Viewing Node Connections in the Designer
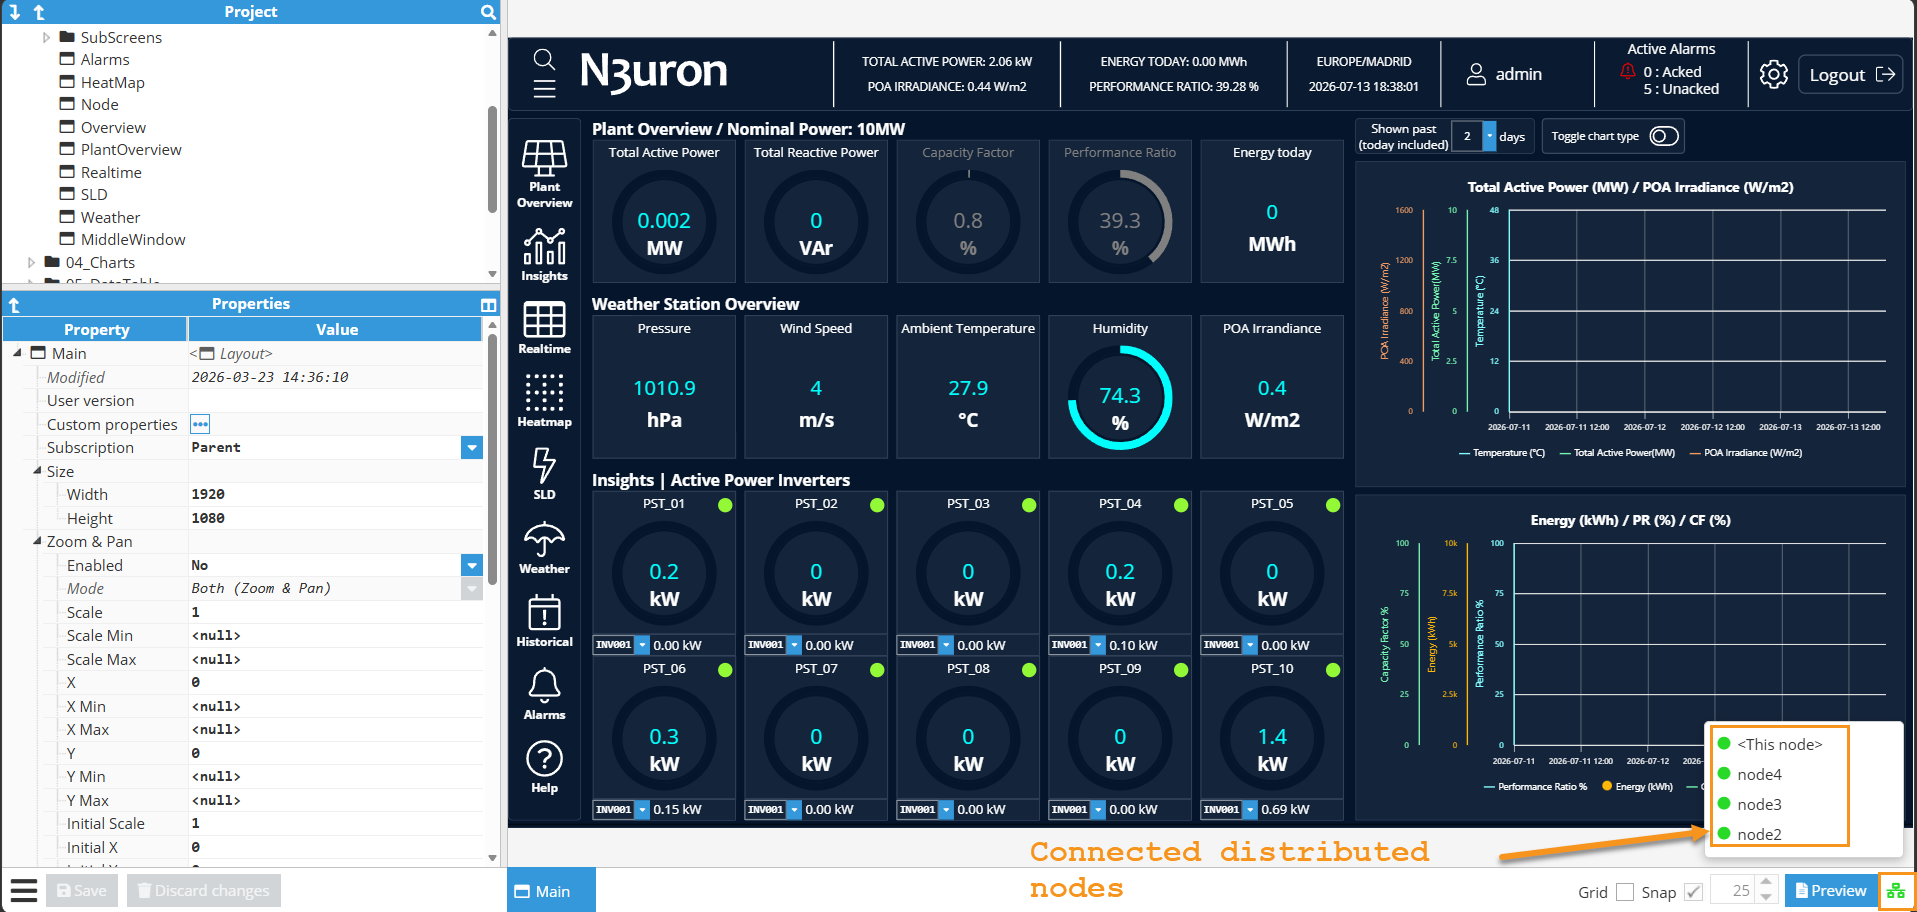
Once the nodes are configured, their connection status can be checked directly in the Web Vision Designer, where an icon shows the state of each distributed node connection — a quick way to confirm that every node is reachable.
Accessing Distributed Node Data
Once a node is configured and its certificate is trusted, Web Vision accesses its tag model seamlessly and transparently — the tags of every connected node appear alongside the local ones within a single, unified tag model, with no additional dashboard configuration. From each node, Web Vision can access:
Real-time tags — live tag values from the node's tag model.
Historical tags — historized tag data for trends and charts.
Real-time alarms — the current alarm state from the node.
Historical alarms — the node's alarm history.
Each distributed node's tag model is accessed seamlessly, with its tags addressed using the tag paths defined in that node's tag model. As more distributed nodes are added, they are accessed dynamically and transparently. For example:
/Enterprise/Site01/Area_Production/Line01/Station01/Temperature
/Enterprise/Site02/Area_Production/Line01/Station01/Temperature
Note:
Design each distributed node's tag model so that its root path or a subpath uniquely identifies the node — for example Site01 / Site02, or Plant01 / Plant02. This keeps every tag path unique across the nodes and ensures each tag always resolves to the correct node.