Restricting Access to Specific WebVision Application Sections by Role
To make certain parts of a WebVision application accessible only to specific roles, follow these steps:
Backend Restrictions
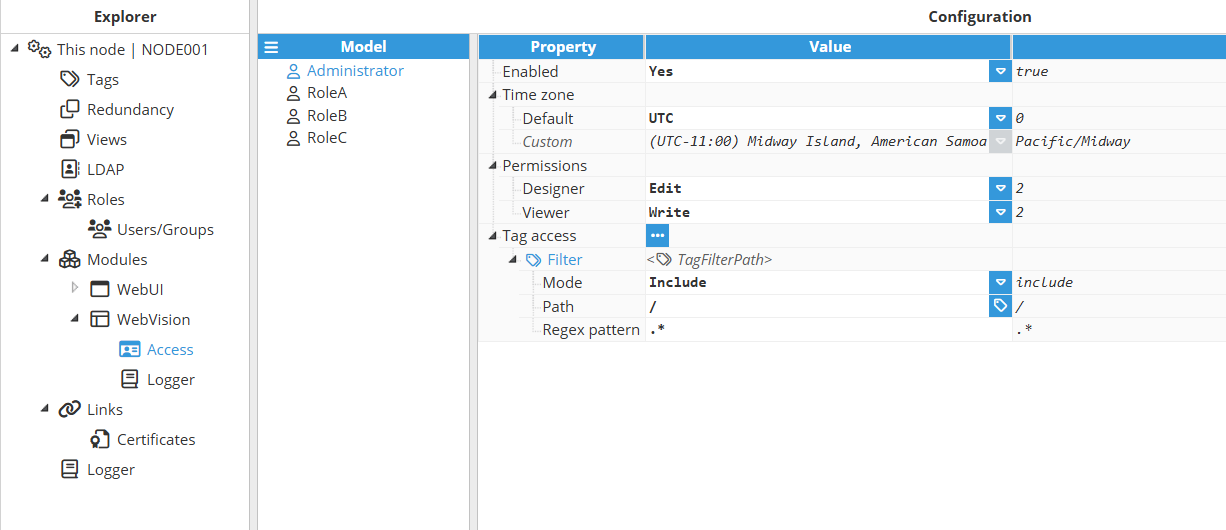
Configure the Access section in WebVision by adding one or more filters to specific parts of the Data Model. These filters will restrict access to designated areas of the application at the backend level.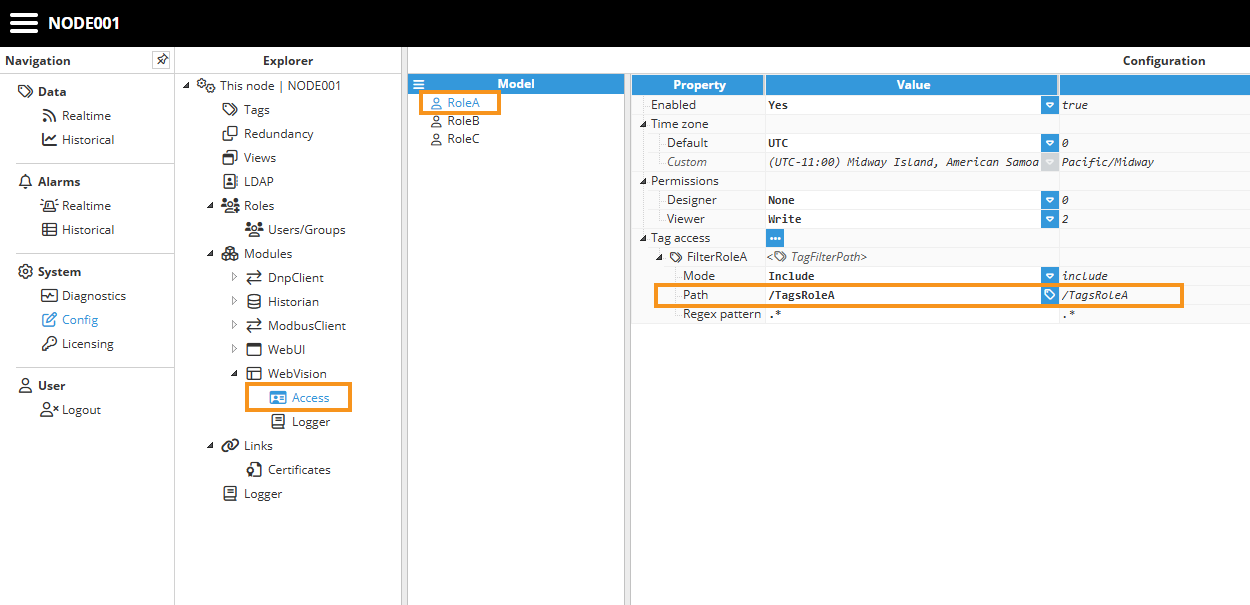
Frontend Restrictions
Limit access in the WebVision user interface by using the ui("user.roles") expression. This function returns the logged-in user's role, enabling dynamic control over which sections of the interface are displayed based on the user's assigned role.
To customize the user visualization based on their role, start by creating a Region in the StartUp window or any other relevant screen. Within the Region, configure the 'Shown Child' property to include an expression that evaluates the system variable ui("user.roles"). This expression allows you to compare the logged-in user’s role with the client-specific role and dynamically select the appropriate visualization. This approach ensures that each user sees the interface tailored to their assigned role.
// Define a mapping object for roles and their corresponding visualizations
const roleVisualizationMap = {
    "RoleA": "ScreenRoleA",
    "RoleB": "ScreenRoleB",
    "RoleC": "ScreenRoleC",
};
// Get the user's roles
const userRoles = ui("user.roles");
// Return the visualization for the first matching role, or a default visualization
return roleVisualizationMap[userRoles] || "DefaultVisualization";
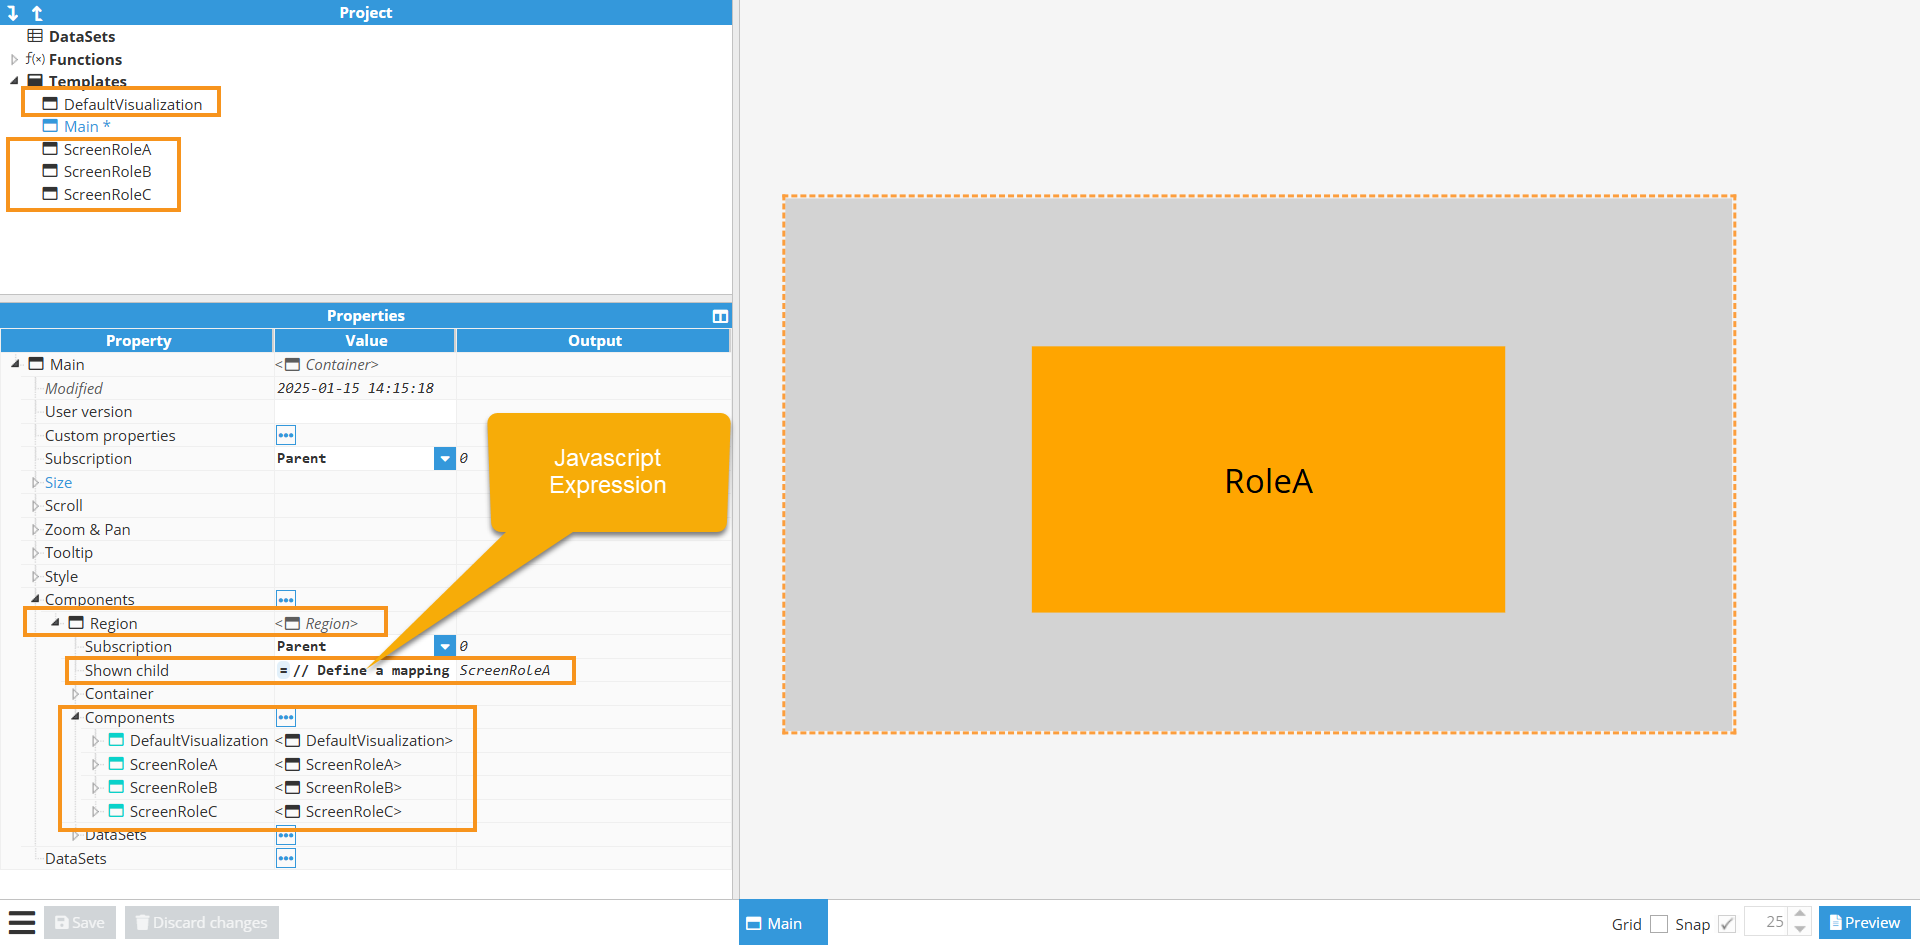
Another option is to directly assign the Region Shown Child property to the return value of ui("user.roles"), and then name the containers instantiated within the Region to match the roles defined in the system.