N3uron implements a Role-Based Access Control (RBAC) mechanism to manage user access and permissions across the platform.
Roles
Users can be created easily and assigned to one or more roles, where each role defines a specific set of permissions. There are no limitations on role combinations: a single user may hold multiple roles simultaneously, and any number of roles can be assigned to a user as required. This flexible authorization model enables precise permission management aligned with operational and security requirements.
The permissions for each role can be configured in the Access section of the following modules:
It is important to carefully define the different roles within a project and understand how they impact overall security. The level of access required should guide the creation of roles, as well as the assignment of users to those roles.
Proper role design ensures that users are granted only the permissions they require, thereby reducing security risks by adhering to the principle of least privilege.
You can create and configure a role in the WebUI by following the steps below:
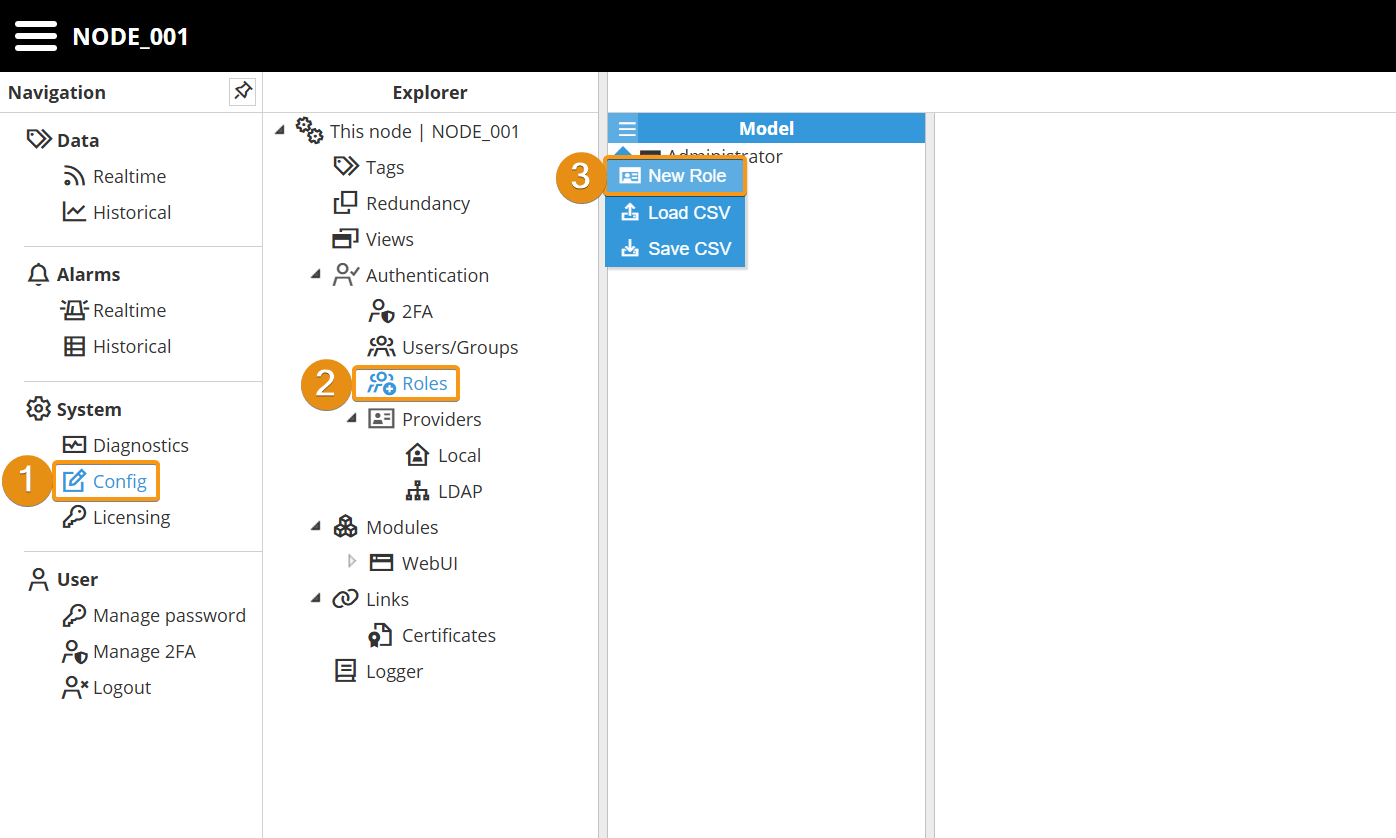
Step 1: Navigate to System → Config. In the Explorer panel, select This Node and then click Roles. Next, click the button on the left-hand side of the Model header and select New Role.
By default, the Administrator and User roles are included.
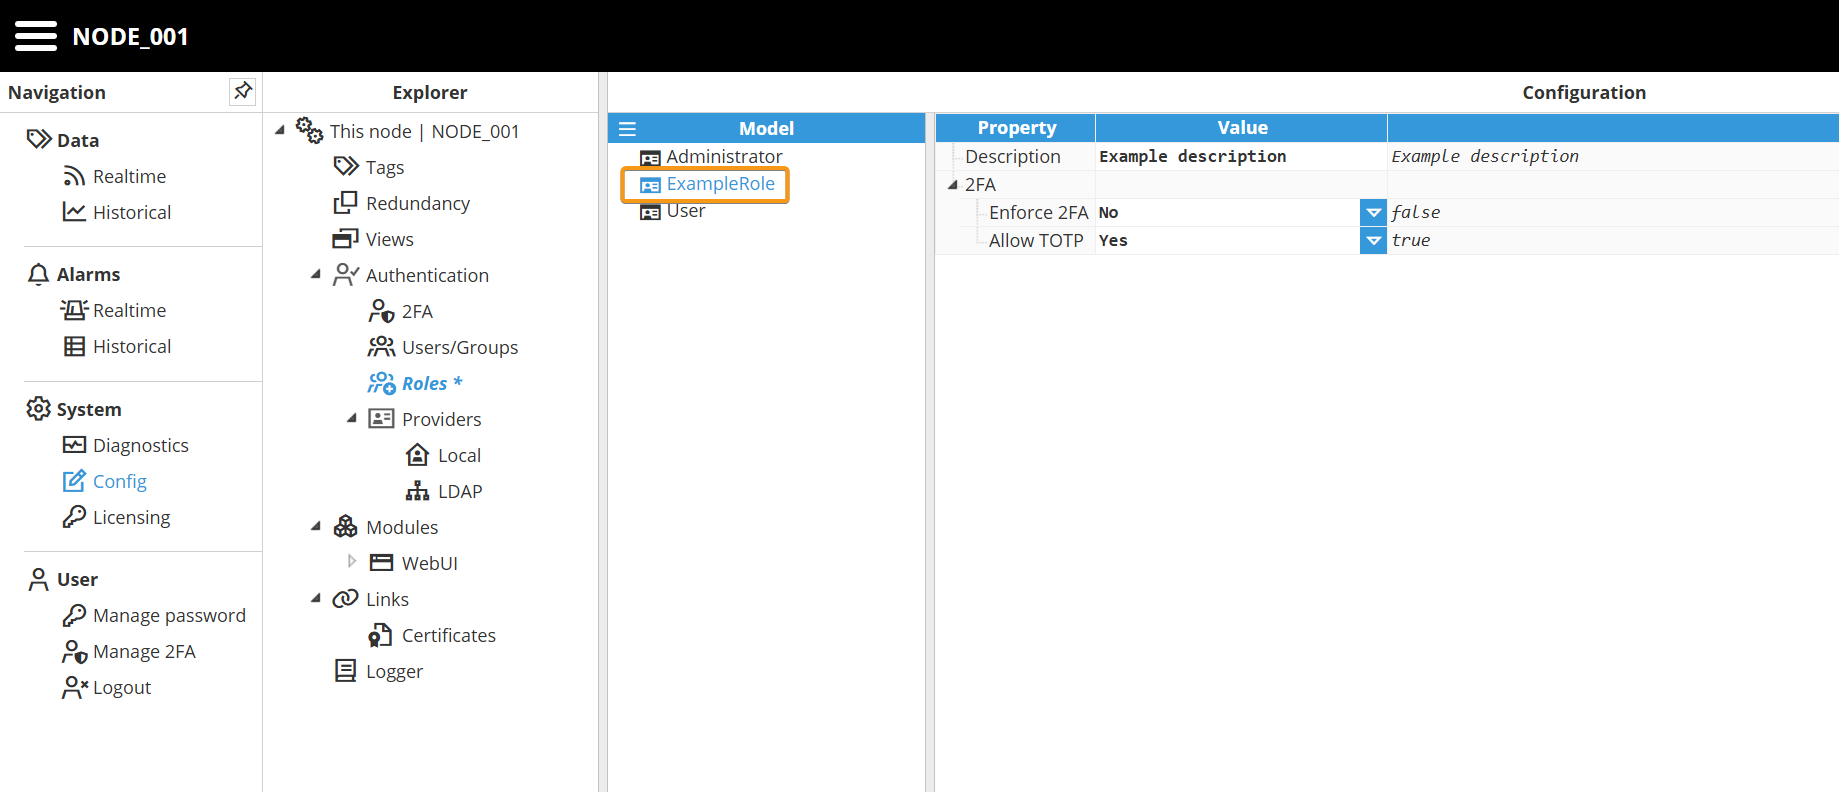
Step 2: Enter a name and optionally a description for the newly created role. At this point, the role is available to be assigned to users.
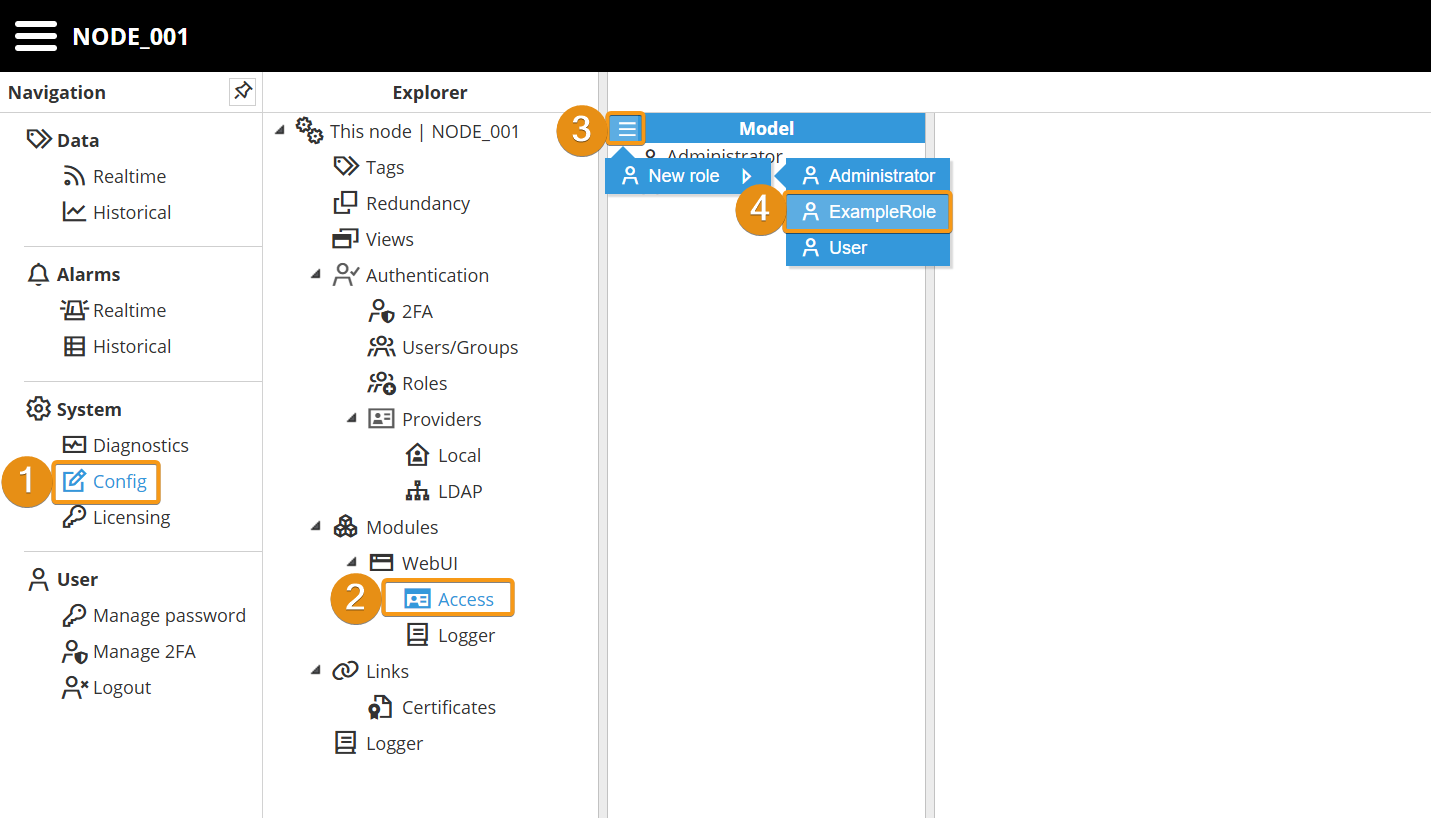
Step 3: Navigate to the Access section of the module for which you want to configure role-based access control. In this example, the configuration process will be demonstrated using the WebUI module.
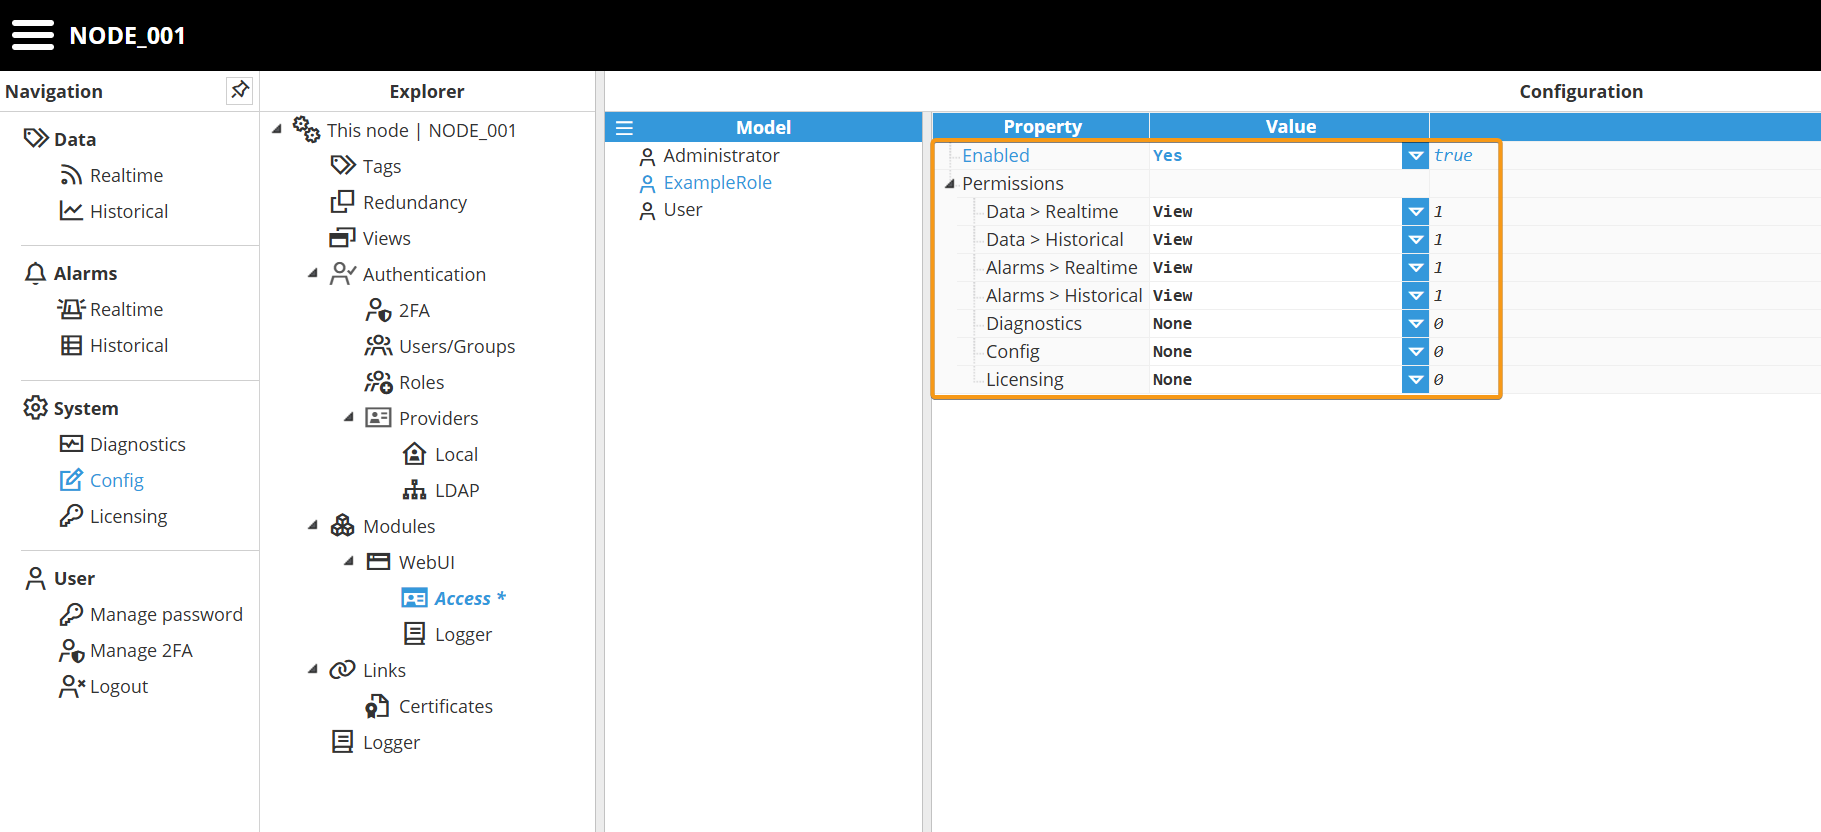
In the configuration example below, access is granted to Realtime and Historical data for both tags and alarms, while access to Diagnostics, Configuration, and Licensing is denied.
Step 4: Assign the role to the desired users in Config→Users/Groups.
Local Users
In this section, we will show you how to create and configure a Local user.
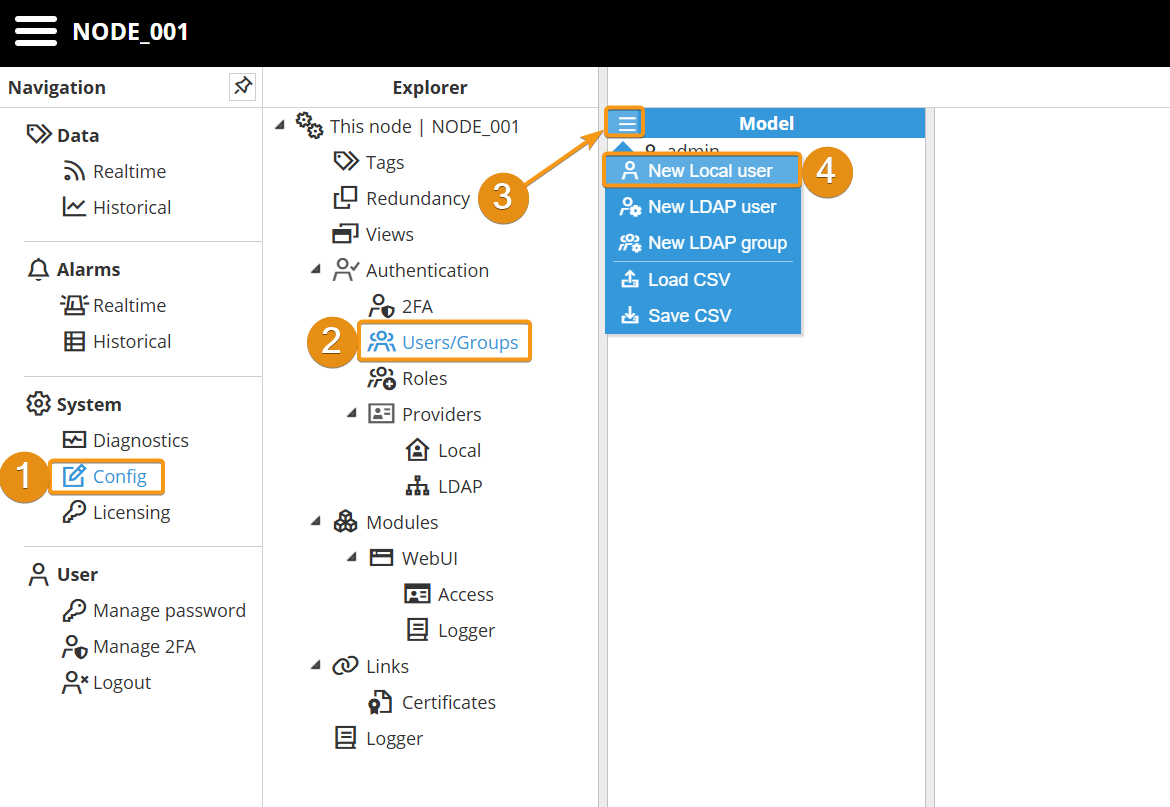
Step 1: Go to System→Config, click on Users/Groups. Then click on the button on the left-hand side of the Model header and select New Local User.
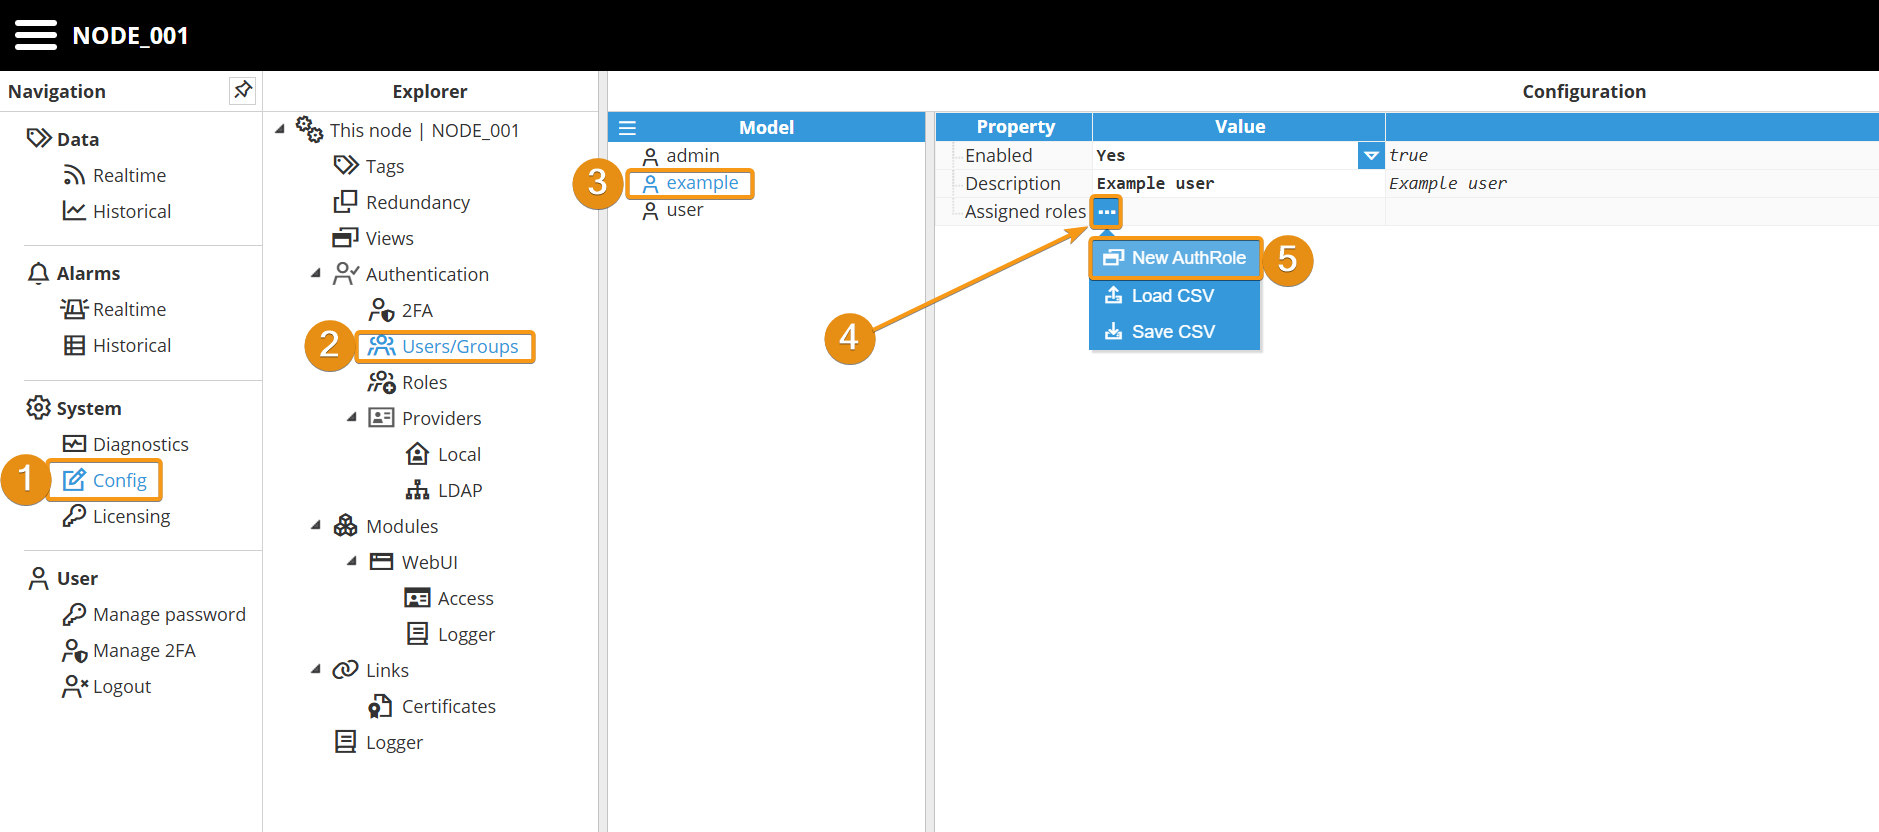
Step 2: Click on the user you have just created and in the Configuration panel, enable it, and provide a description.
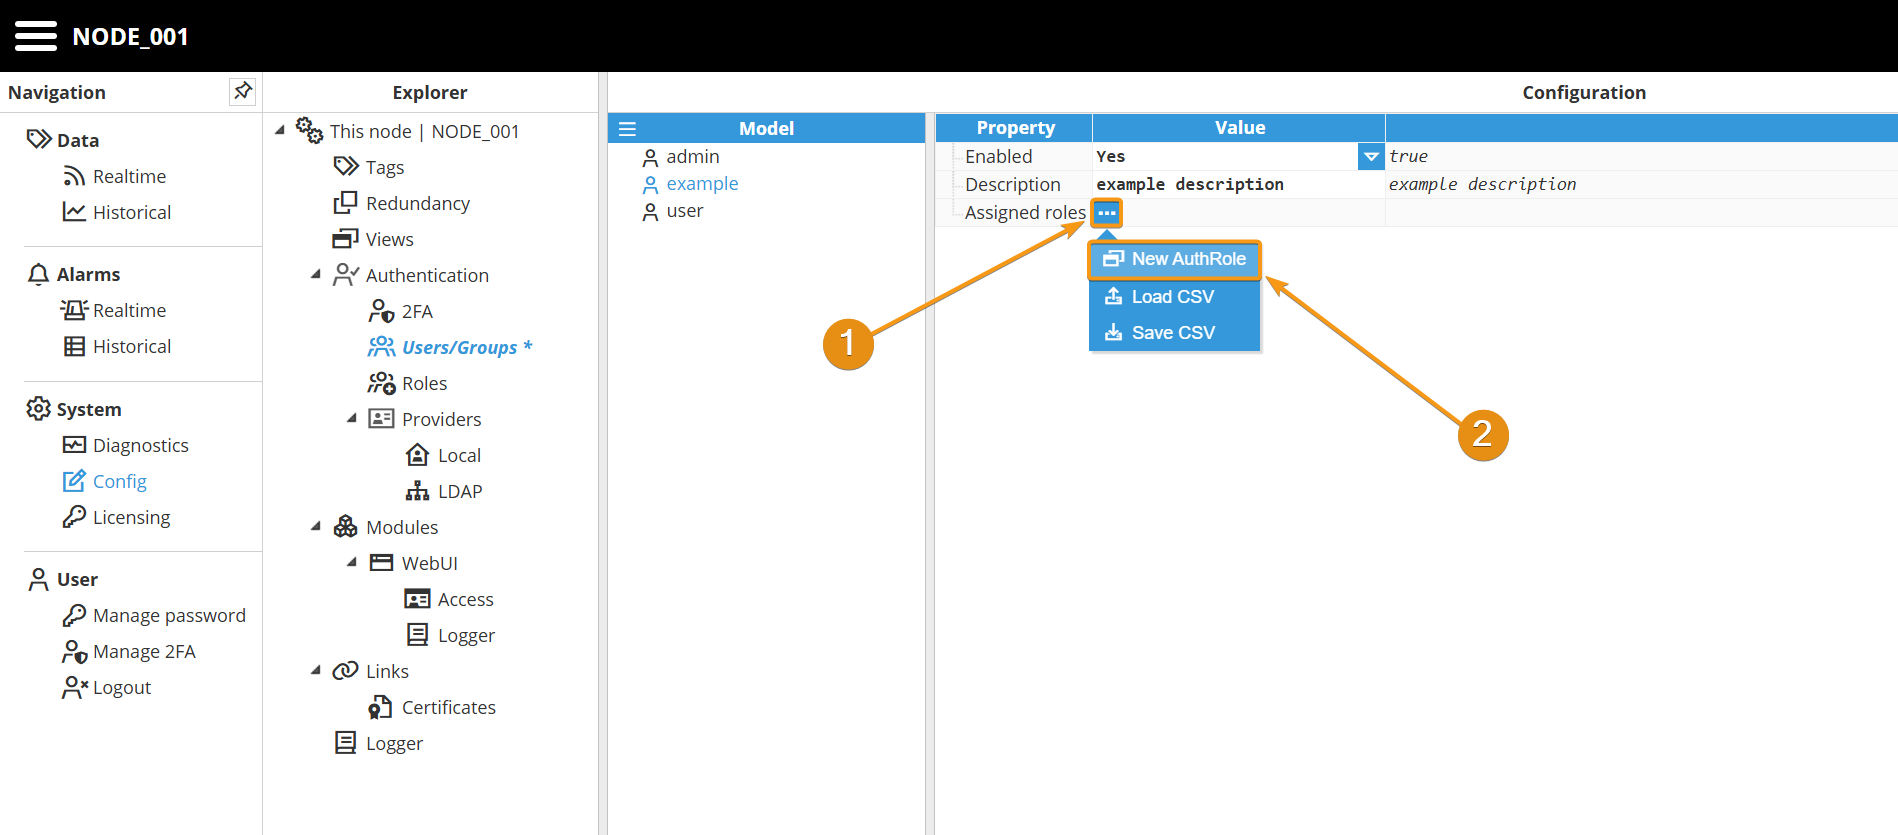
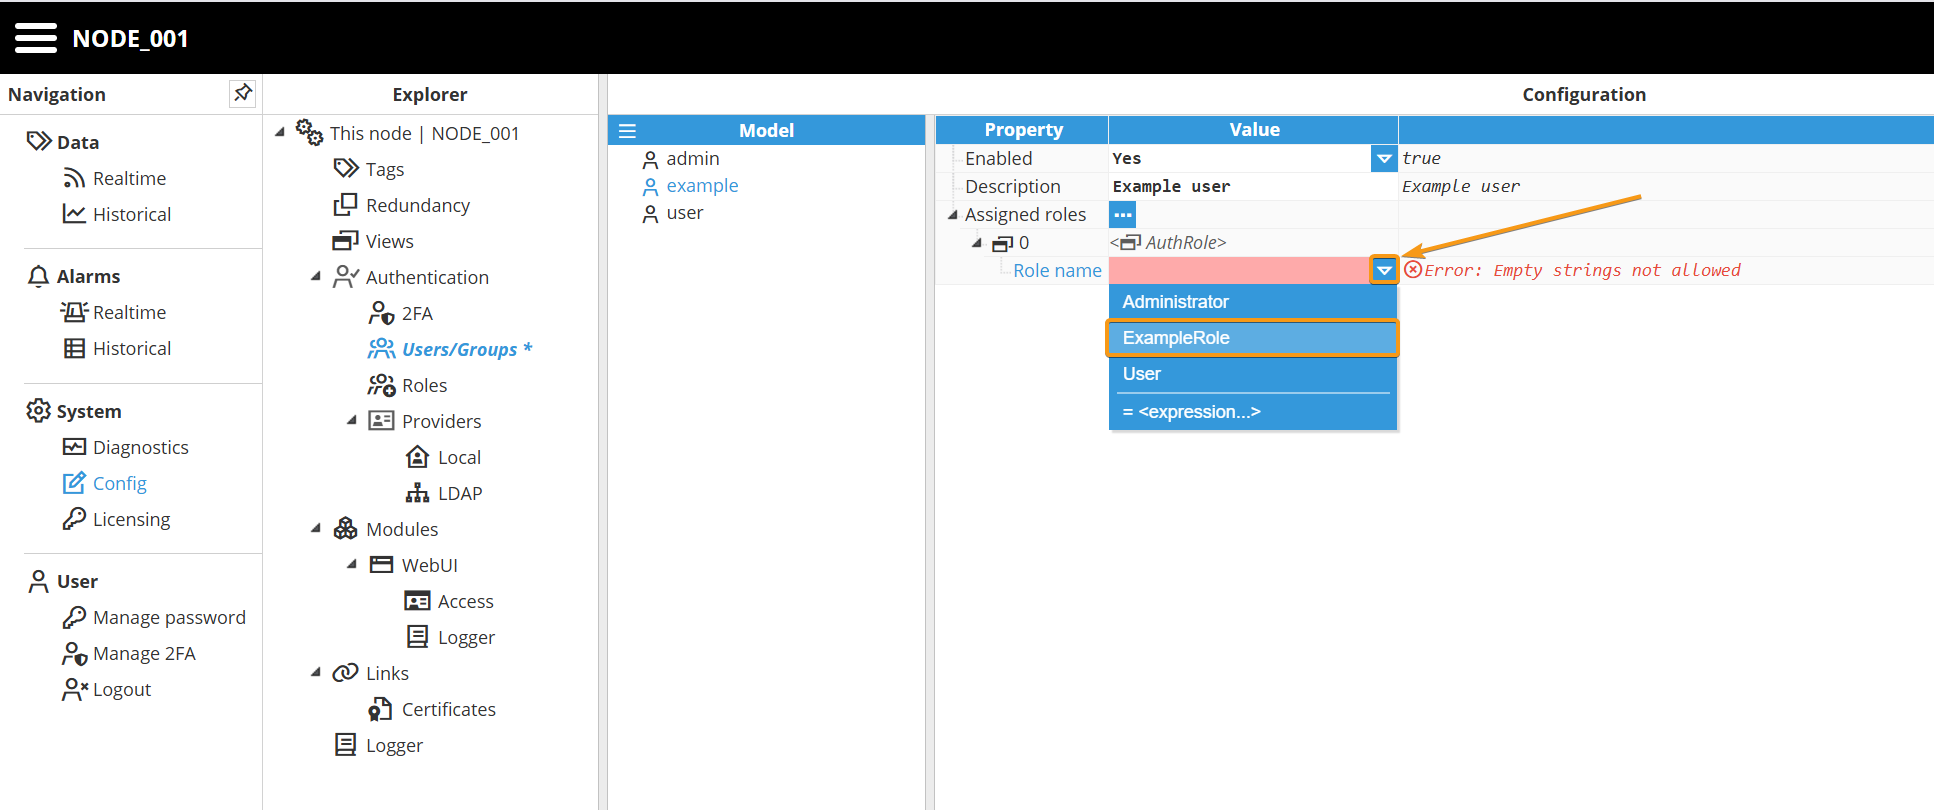
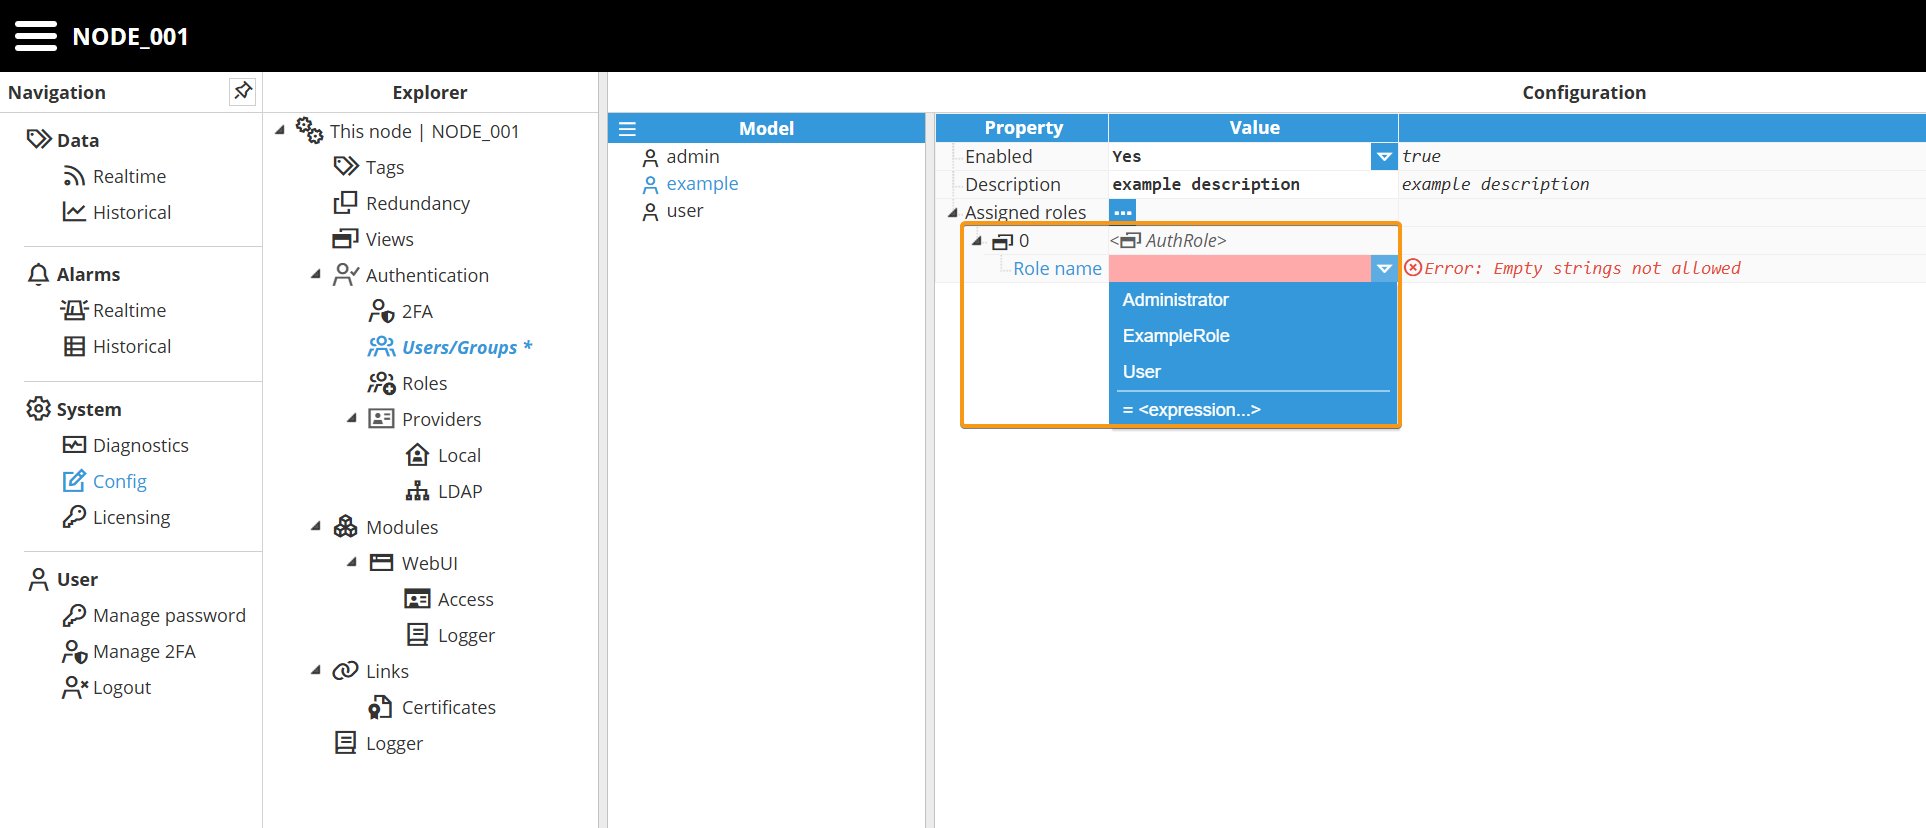
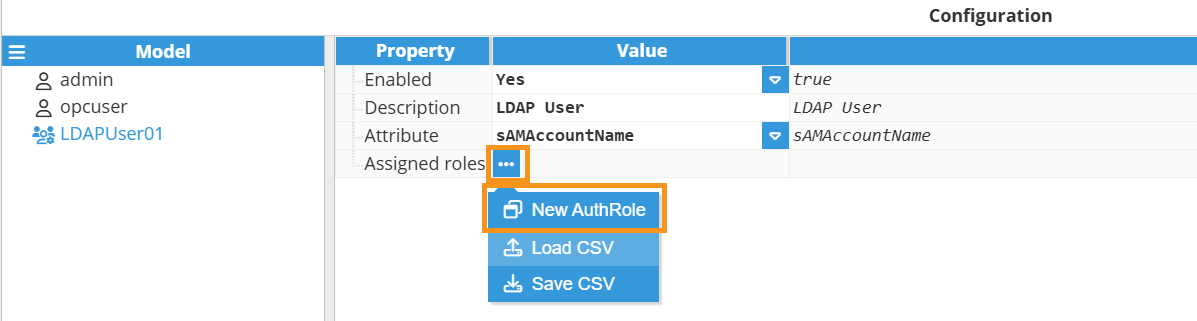
Step 3: Now, expand the Assigned roles menu by clicking on the ellipsis button and assign them a new role. Remember that a user can have as many roles as needed.
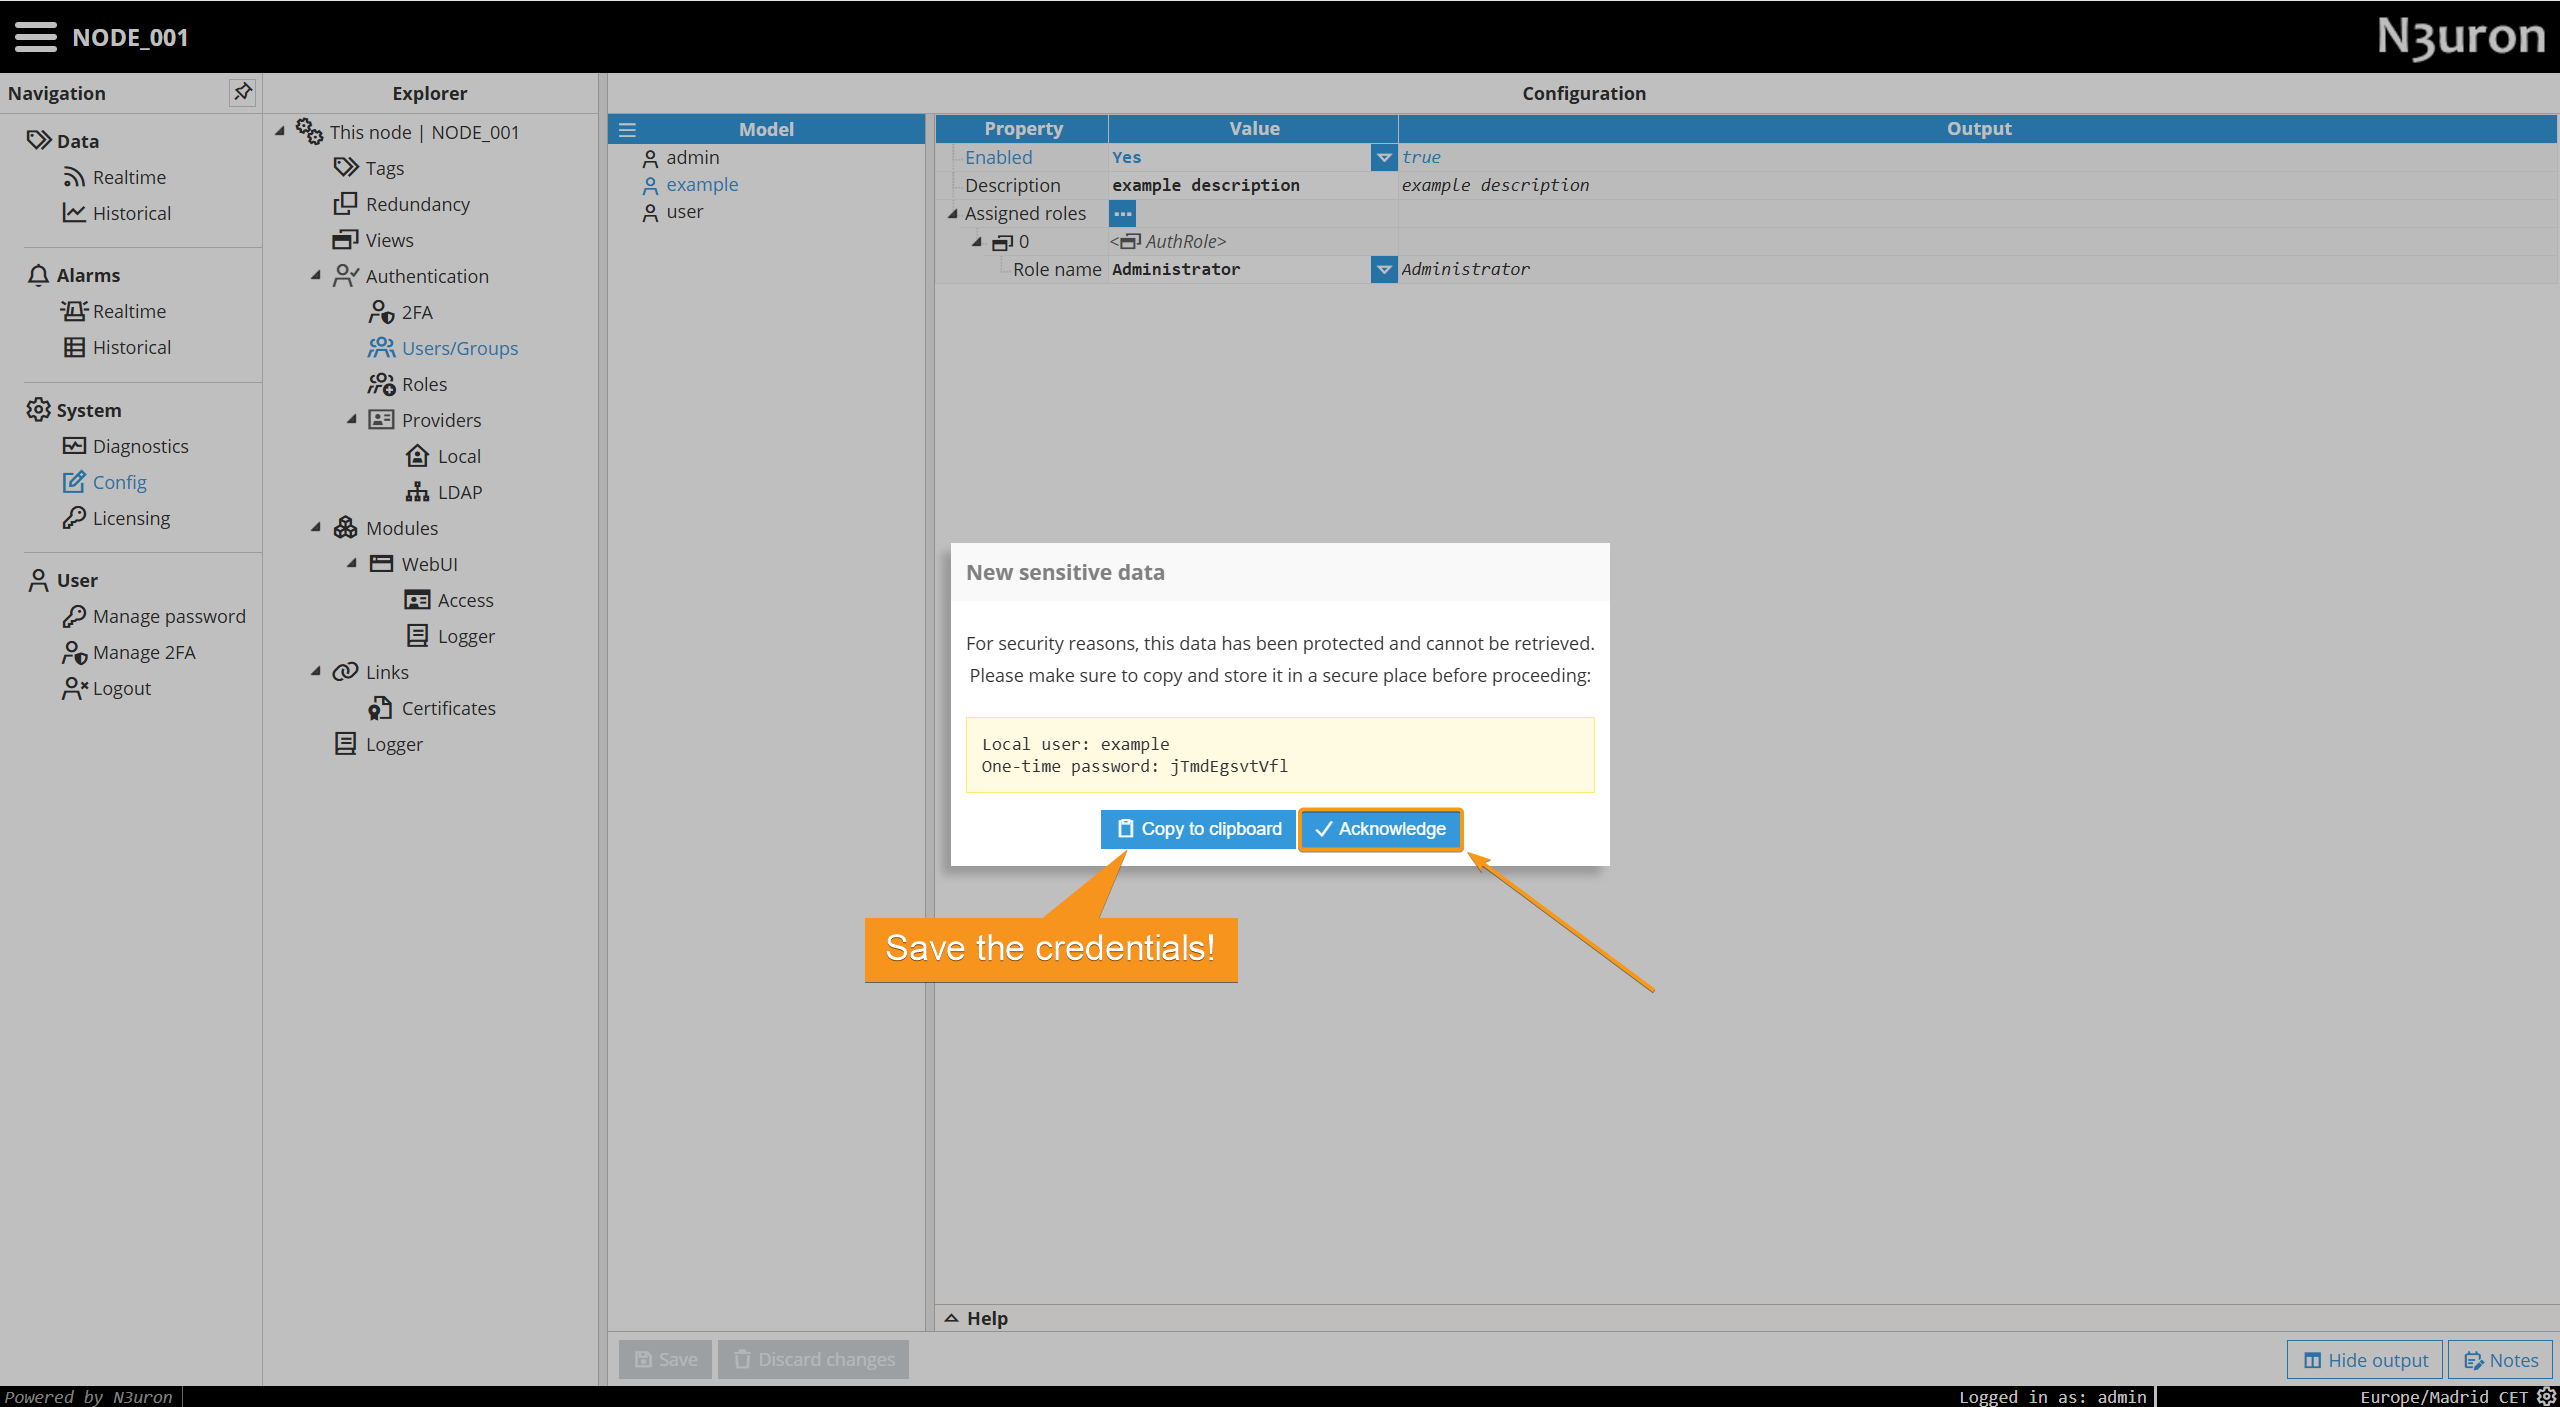
Step 4: Proceed to save the changes. You will then be prompted with the initial one-time password for the user. Then click on Acknowledge.
LDAP Users
N3uron supports LDAP (Lightweight Directory Access Protocol) to store users, roles, and related authentication data. In this model, Active Directory groups are mapped to N3uron roles and used to define user-to-role associations.
When the LDAP Provider is enabled, user and role administration is performed entirely within Active Directory and is not managed from within N3uron. As a result, adding new users or modifying existing ones requires changes to be made directly in Active Directory, typically by an Active Directory administrator.
In this section, we will show you how to create and configure an LDAP user.
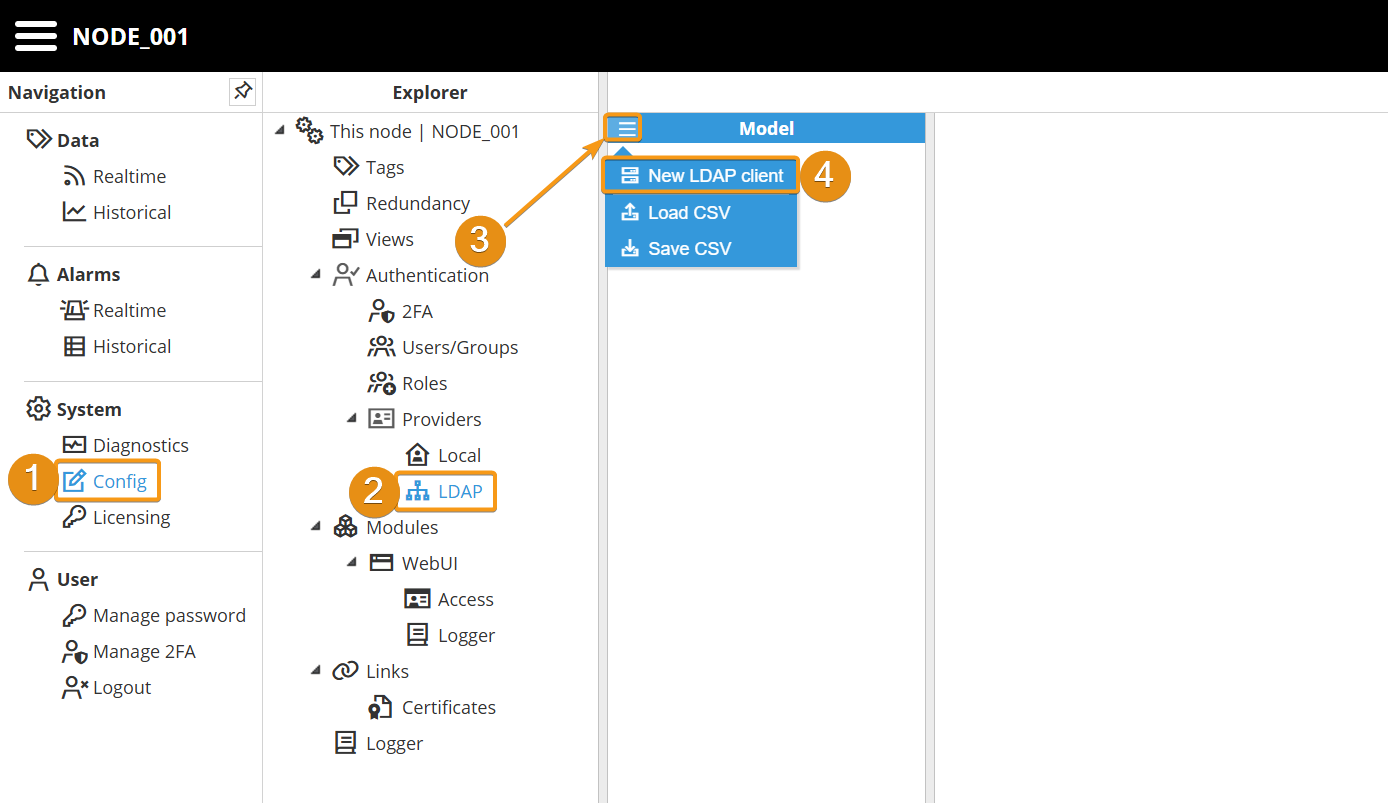
Step 1: Create a new LDAP client inside Authentication→Providers→LDAP.
Step 2: Configure the LDAP client by specifying the parameters required for your environment, such as the directory server details, authentication credentials, and connection settings.
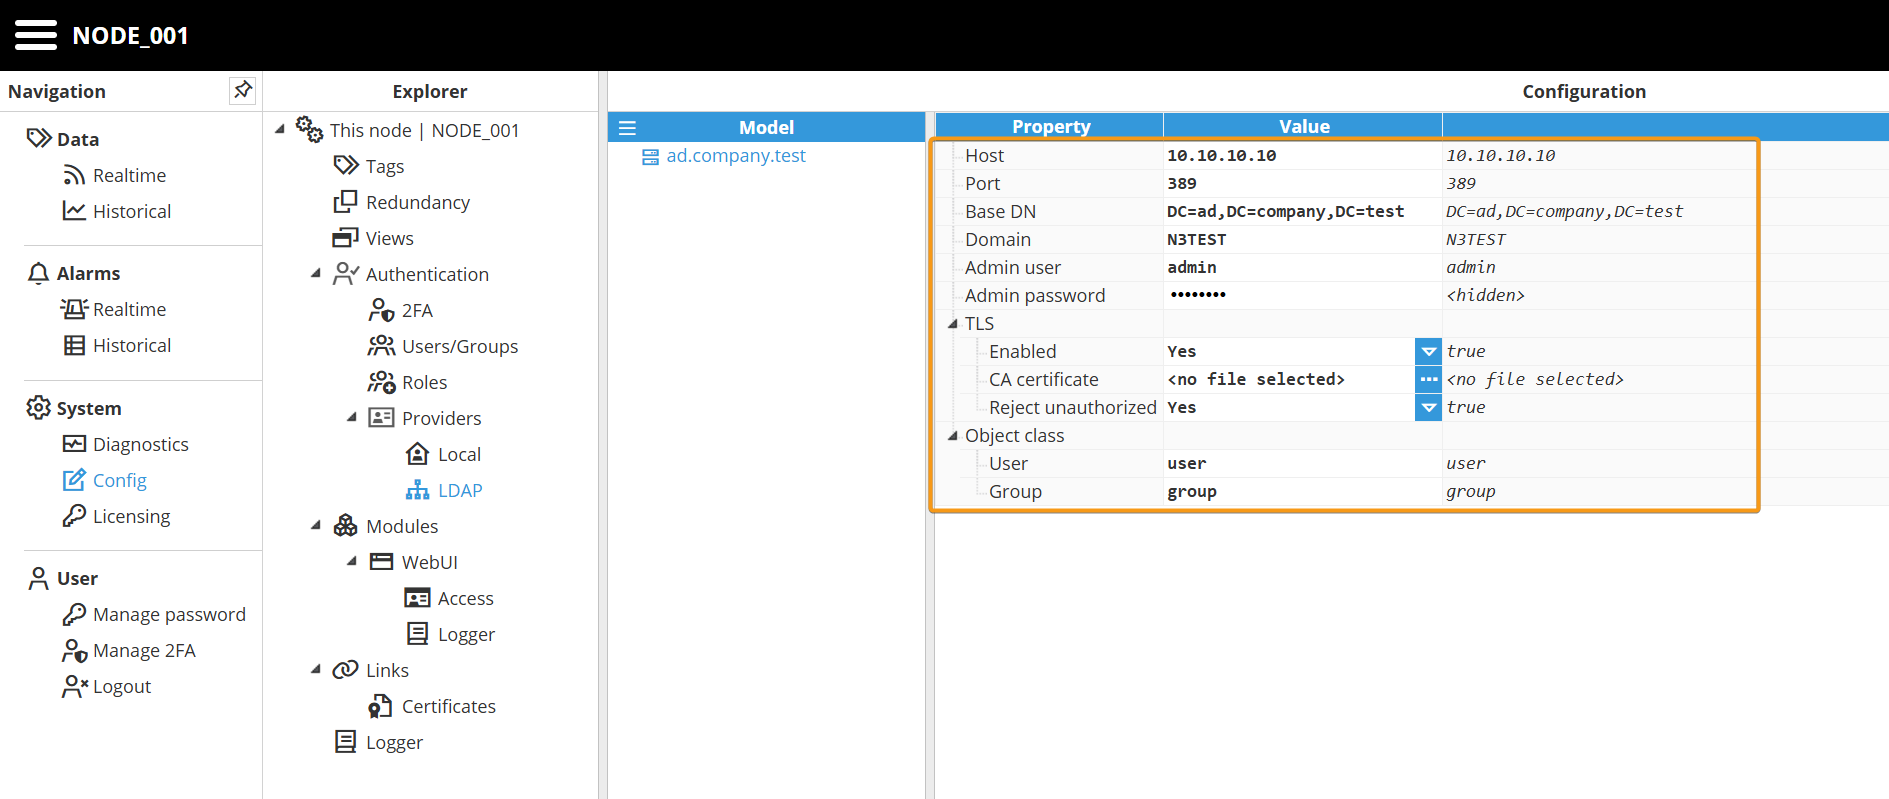
Parameters:
Host: LDAP host
Port: LDAP port. The default value is 389.
Base DN: Optional and usually not required. Base distinguished name.
Domain: Optional parameter. If not provided, users will need to use the Distinguished Name when they log in or alternatively enter either DOMAIN\LOGIN or LOGIN@DOMAIN.
Admin user: Optional. Only needed in case users don’t have permission to retrieve their own groups. If no admin user is provided, the login user credentials will be used instead.
Admin password: Optional. Only needed in case users don’t have permission to retrieve their own groups. If no admin user is provided, the login user credentials will be used instead.
TLS:
Enabled: Enables connection over TLS to the host.
CA: CA certificate.
rejectUnauthorized: Reject unknown certificates.
Object class:
User: When querying for users, filter to objects that match this class. The default value is user.
Group: When querying for groups, filter to objects that match this class. The default value is group.
Step 3: Follow the same steps as used to create a Local user, but this time select New LDAP user.
Warning
The username defined in N3uron is compared against the value of the selected Active Directory object attribute during user creation. An Active Directory user with an exactly matching name must exist; otherwise, authentication will fail.
Step 4: Configure the following parameters:
Enabled: A disabled user or group will not be taken into account when authentication is processed.
Attribute: The attribute on the user object for defining the username.
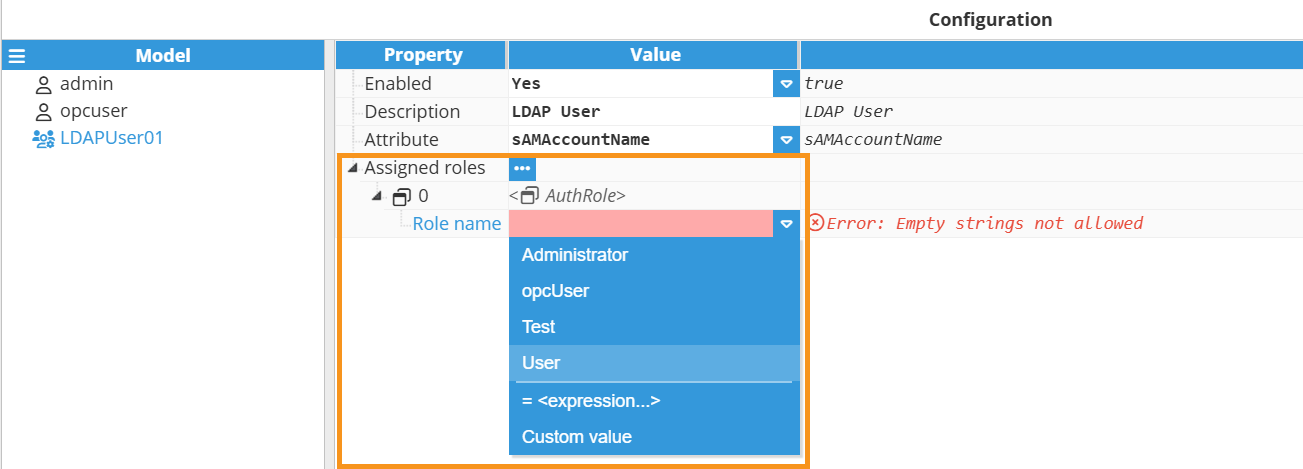
Step 5: Now, assign as many roles as required to the new user.
The configuration of an LDAP group is identical, except for the fact that it would apply to the group objects assigned to the user trying to authenticate rather than to the user object in your Active Directory.